ESP TOYOTA PROACE VERSO EV 2021 Owners Manual
[x] Cancel search | Manufacturer: TOYOTA, Model Year: 2021, Model line: PROACE VERSO EV, Model: TOYOTA PROACE VERSO EV 2021Pages: 360, PDF Size: 68.91 MB
Page 12 of 360
12
NOTIC E
For more information on the Indicators, please refer to the corresponding section.
Warning and indicator
lamps
Displayed as symbols, the warning and indicator lamps inform the driver of the occurrence of a malfunction (warning lamps) or of the operating status of a system (operation or deactivation indicator lamps). Certain lamps light up in two ways (fixed or flashing) and/or in several colours.
Associated warnings
The illumination of a lamp may be accompanied by an audible signal and/or a message displayed in a screen.Relating the type of alert to the operating status of the vehicle allows you to determine whether the situation is normal or whether a fault has
occurred: refer to the description of each lamp for further information.
When the ignition is switched on
Certain red or orange warning lamps come on for a few seconds when the ignition is switched on. These warning lamps should go off as soon as the engine is started.For more information on a system or a function, refer to the corresponding section.
Persistent warning lamp
If a red or orange warning lamp comes on, there may be fault which needs further investigation.
If a lamp remains lit
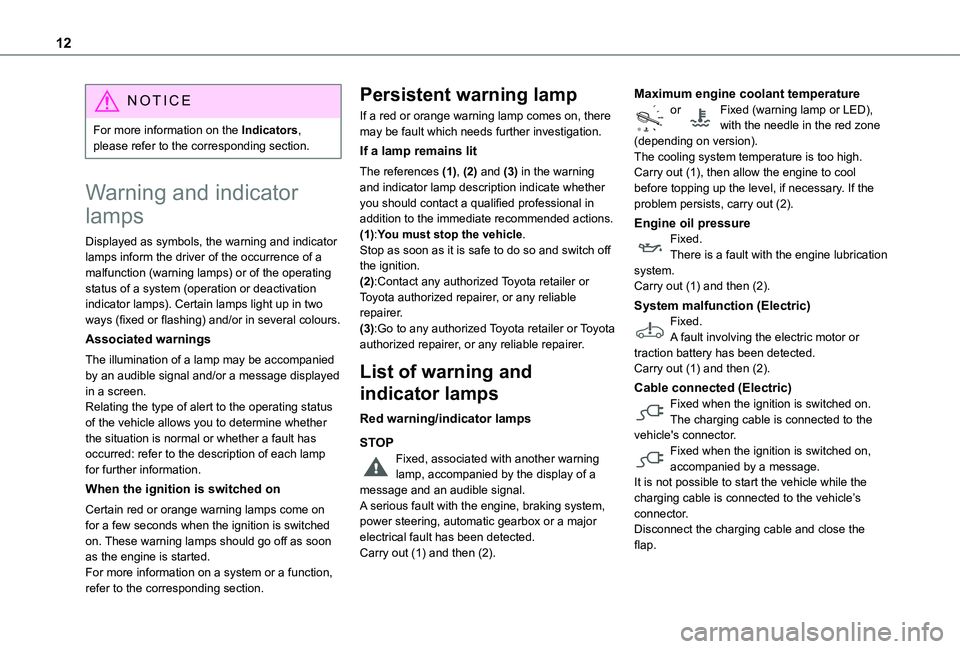
The references (1), (2) and (3) in the warning and indicator lamp description indicate whether you should contact a qualified professional in addition to the immediate recommended actions.(1):You must stop the vehicle.Stop as soon as it is safe to do so and switch off the ignition.(2):Contact any authorized Toyota retailer or Toyota authorized repairer, or any reliable repairer.(3):Go to any authorized Toyota retailer or Toyota authorized repairer, or any reliable repairer.
List of warning and
indicator lamps
Red warning/indicator lamps
STOP
Fixed, associated with another warning lamp, accompanied by the display of a message and an audible signal.A serious fault with the engine, braking system, power steering, automatic gearbox or a major electrical fault has been detected.Carry out (1) and then (2).
Maximum engine coolant temperatureor Fixed (warning lamp or LED), with the needle in the red zone (depending on version).The cooling system temperature is too high.Carry out (1), then allow the engine to cool before topping up the level, if necessary. If the problem persists, carry out (2).
Engine oil pressureFixed.There is a fault with the engine lubrication system.Carry out (1) and then (2).
System malfunction (Electric)Fixed.A fault involving the electric motor or traction battery has been detected.Carry out (1) and then (2).
Cable connected (Electric)Fixed when the ignition is switched on.The charging cable is connected to the vehicle's connector.
Fixed when the ignition is switched on, accompanied by a message.It is not possible to start the vehicle while the charging cable is connected to the vehicle’s connector.Disconnect the charging cable and close the flap.
Page 19 of 360
19
Instruments
1
Wait a few minutes before switching off the engine.
WARNI NG
After switching off the ignition, carefully open the bonnet and check the coolant level.
NOTIC E
For more information on Checking levels, refer to the corresponding section.
Checking
After driving for a few minutes, the temperature and pressure in the cooling system increase.To top up the level:► wait at least one hour for the engine to cool,► unscrew the cap by two turns to allow the pressure to drop,► when the pressure has dropped, remove the cap,► top up the level to the "MAX" mark.For more information on Checking levels, refer to the corresponding section.
WARNI NG
Be aware of the risk of scalding when topping up the coolant. Do not fill above the maximum level (indicated on the reservoir).
Engine oil level indicator
(Depending on version)On versions fitted with an electric oil gauge, the state of the engine oil level is displayed on the instrument panel for a few seconds when the ignition is switched on, at the same time as the servicing information.
NOTIC E
The level read will only be correct if the vehicle is on level ground and the engine has been off for more than 30 minutes.
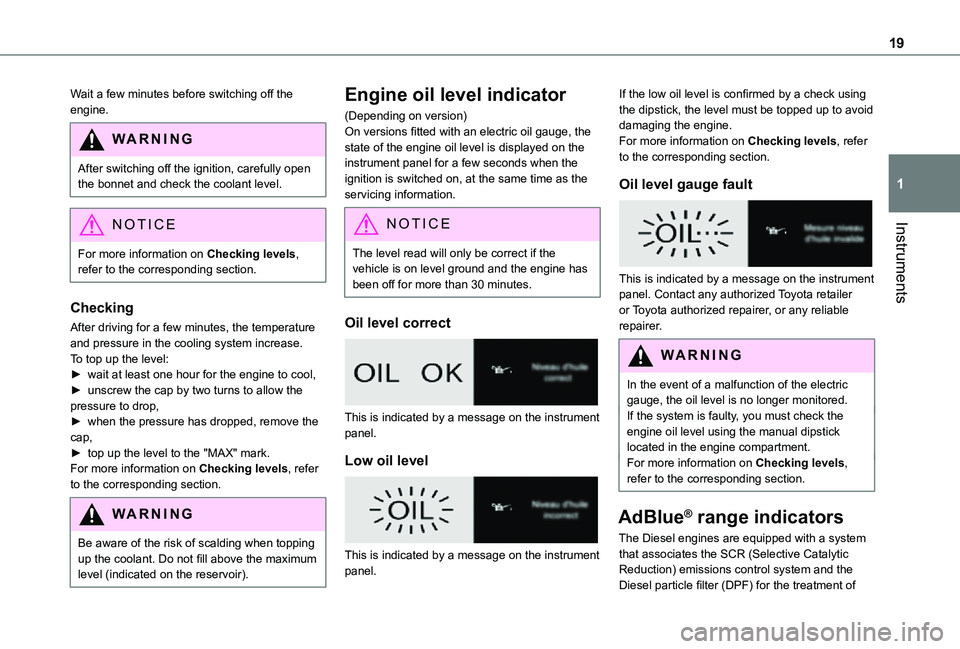
Oil level correct
This is indicated by a message on the instrument panel.
Low oil level
This is indicated by a message on the instrument panel.
If the low oil level is confirmed by a check using the dipstick, the level must be topped up to avoid damaging the engine.For more information on Checking levels, refer to the corresponding section.
Oil level gauge fault
This is indicated by a message on the instrument panel. Contact any authorized Toyota retailer or Toyota authorized repairer, or any reliable repairer.
WARNI NG
In the event of a malfunction of the electric gauge, the oil level is no longer monitored.If the system is faulty, you must check the engine oil level using the manual dipstick located in the engine compartment.For more information on Checking levels, refer to the corresponding section.
AdBlue® range indicators
The Diesel engines are equipped with a system
that associates the SCR (Selective Catalytic Reduction) emissions control system and the Diesel particle filter (DPF) for the treatment of
Page 20 of 360
20
exhaust gases. They cannot function without AdBlue®fluid.When the level of AdBlue® falls below the reserve level (between 2,400 and 0 km (1,500 miles and 0 miles)), a warning lamp lights up when the ignition is switched on and an estimate of the distance that can be travelled before engine starting is prevented is displayed in the instrument panel.
WARNI NG
The engine starting prevention system required by regulations is activated automatically once the AdBlue® tank is empty. It is then no longer possible to start the engine until the minimum level of AdBlue® has been topped up.
Manual display of the range
While the driving range is greater than 1,500 miles (2,400 km), it is not displayed automatically.
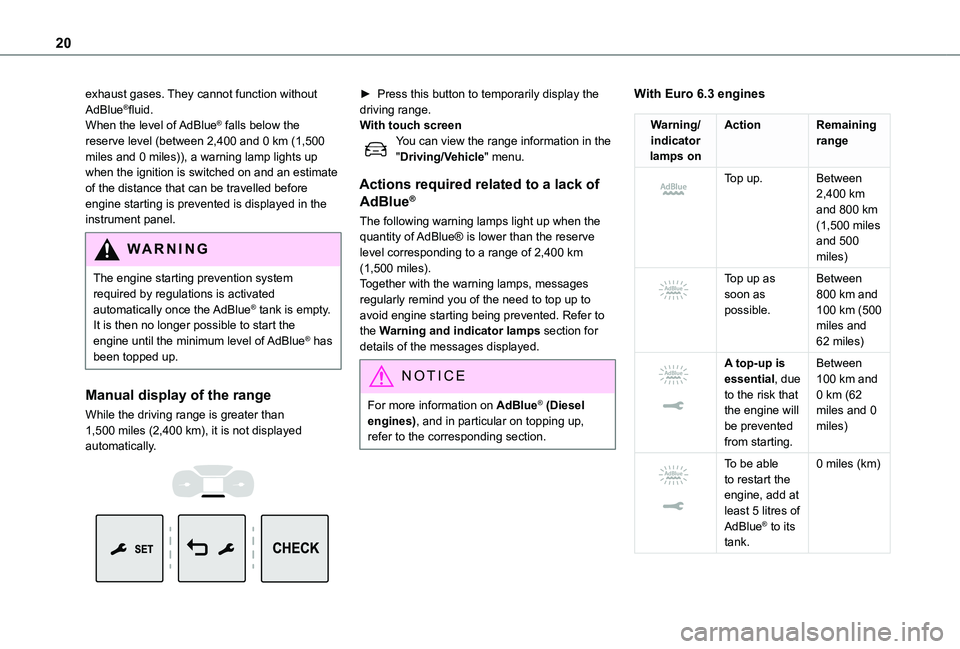
► Press this button to temporarily display the driving range. With touch screenYou can view the range information in the "Driving/Vehicle" menu.
Actions required related to a lack of
AdBlue®
The following warning lamps light up when the quantity of AdBlue® is lower than the reserve level corresponding to a range of 2,400 km (1,500 miles).Together with the warning lamps, messages regularly remind you of the need to top up to avoid engine starting being prevented. Refer to the Warning and indicator lamps section for details of the messages displayed.
NOTIC E
For more information on AdBlue® (Diesel engines), and in particular on topping up, refer to the corresponding section.
With Euro 6.3 engines
Warning/indicator lamps on
ActionRemaining range
Top up.Between 2,400 km and 800 km (1,500 miles and 500
miles)
Top up as soon as possible.
Between 800 km and 100 km (500 miles and 62 miles)
A top-up is essential, due to the risk that the engine will be prevented from starting.
Between 100 km and 0 km (62 miles and 0 miles)
To be able to restart the engine, add at least 5 litres of AdBlue® to its tank.
0 miles (km)
Page 26 of 360
26
Touch screen
This system gives access to the following elements:– Permanent display of the time and outside temperature (a blue warning lamp appears if there is a risk of ice).– Vehicle functions and equipment setting menus.– Audio system and telephone controls and display of related information.– Display of visual manoeuvring aid functions– Internet services and display of related information.– Navigation system controls and display of related information (depending on version).
WARNI NG
For safety reasons, always stop the vehicle before performing operations that require sustained attention.Some functions are not accessible while driving.
Recommendations
This screen is of the capacitive type.– Do not use pointed objects on the touch screen.– Do not touch the touch screen with wet hands.– Use a soft, clean cloth to clean the touch screen.
Principles
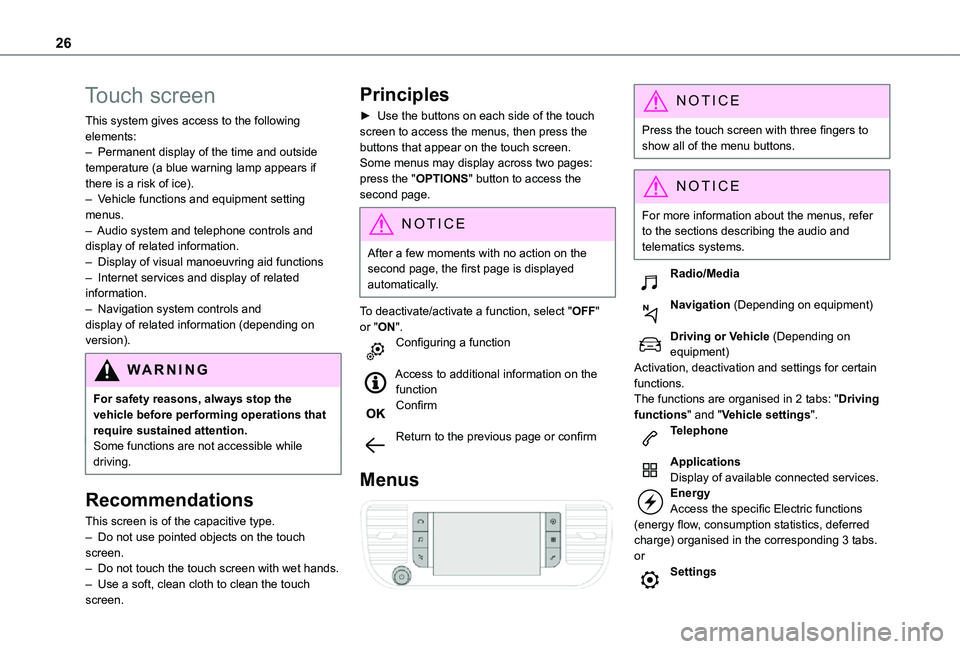
► Use the buttons on each side of the touch screen to access the menus, then press the buttons that appear on the touch screen.Some menus may display across two pages: press the "OPTIONS" button to access the second page.
NOTIC E
After a few moments with no action on the second page, the first page is displayed automatically.
To deactivate/activate a function, select "OFF" or "ON".Configuring a function
Access to additional information on the functionConfirm
Return to the previous page or confirm
Menus
NOTIC E
Press the touch screen with three fingers to show all of the menu buttons.
NOTIC E
For more information about the menus, refer to the sections describing the audio and
telematics systems.
Radio/Media
Navigation (Depending on equipment)
Driving or Vehicle (Depending on equipment)Activation, deactivation and settings for certain functions.The functions are organised in 2 tabs: "Driving functions" and "Vehicle settings".Telephone
ApplicationsDisplay of available connected services.EnergyAccess the specific Electric functions (energy flow, consumption statistics, deferred charge) organised in the corresponding 3 tabs.orSettings
Page 27 of 360
27
Instruments
1
Main settings for the audio system and touch screen.Audio system on/off.Volume adjustment/mute.
Upper bar
Certain information is displayed permanently in the upper bar of the touch screen:– Time and outside temperature (a blue warning lamp appears if there is a risk of ice).– Reminder of information from the Radio Media and Telephone menus and navigation instructions (depending on equipment).– Notifications.– Access to the Settings.
Energy menu
Depending on version, this is accessible either:– directly, by pressing the button near the touch screen.– via the Applications menu.
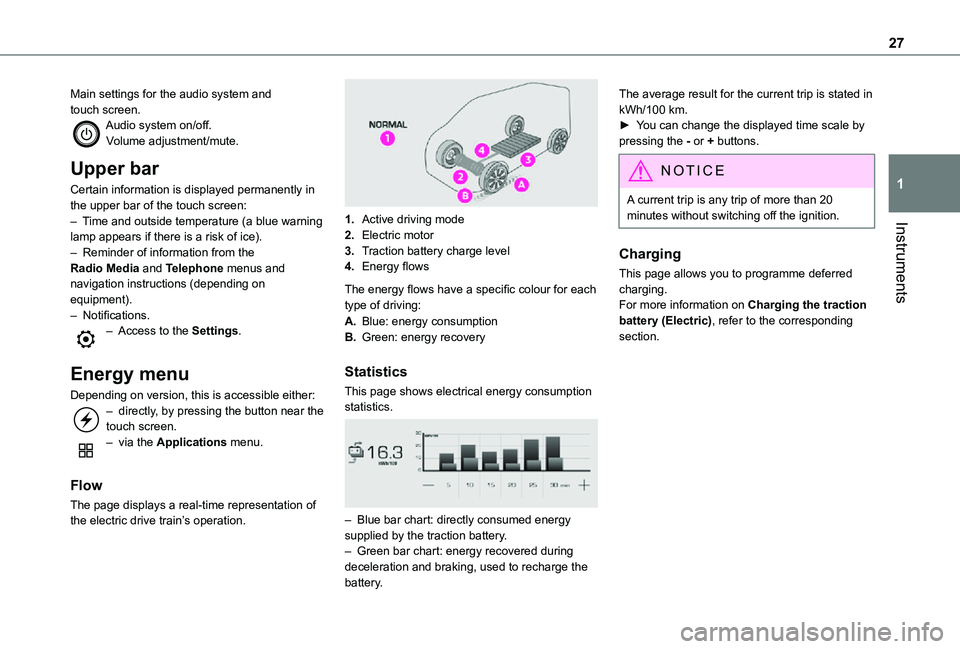
Flow
The page displays a real-time representation of the electric drive train’s operation.
1.Active driving mode
2.Electric motor
3.Traction battery charge level
4.Energy flows
The energy flows have a specific colour for each type of driving:
A.Blue: energy consumption
B.Green: energy recovery
Statistics
This page shows electrical energy consumption statistics.
– Blue bar chart: directly consumed energy supplied by the traction battery.– Green bar chart: energy recovered during deceleration and braking, used to recharge the battery.
The average result for the current trip is stated in kWh/100 km.► You can change the displayed time scale by pressing the - or + buttons.
NOTIC E
A current trip is any trip of more than 20 minutes without switching off the ignition.
Charging
This page allows you to programme deferred charging.For more information on Charging the traction battery (Electric), refer to the corresponding section.
Page 28 of 360
28
Remotely-operable
functions (Electric)
(Available soon)
In addition to all the functions of the MyToyota application that you can access from a smartphone, you can access the following functions:– Battery charge management (Deferred charging).
– Temperature pre-conditioning management.– Consultation of the state of charge and range of the vehicle.
Installation procedure
► Download the MyToyota app from the appropriate online store for your smartphone.► Create an account.► Enter the vehicle’s V.I.N. (code beginning with "VF" on the vehicle registration document).For more information on Identification markings, refer to the corresponding section.
NOTIC E
Network coverageIn order to be able to use the various remotely operable features, ensure that your vehicle is located in an area covered by the mobile network.A lack of network coverage may prevent communication with the vehicle (for example, if it is in an underground car park). In such cases, the application will display a message indicating that the connection with the vehicle could not be established.
Setting the date and time
Without Bluetooth® audio
system
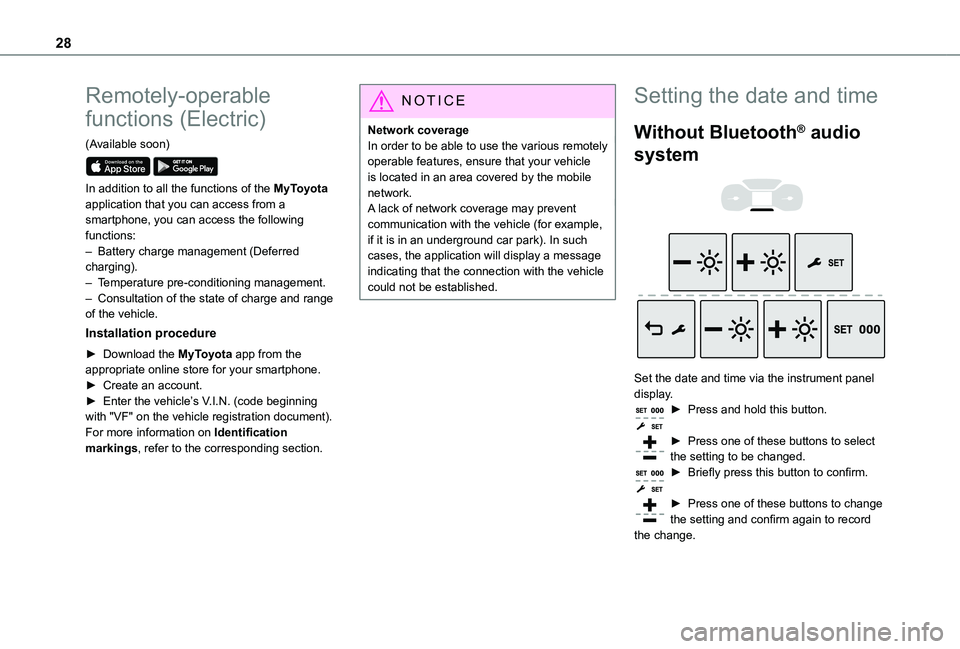
Set the date and time via the instrument panel display.► Press and hold this button.
► Press one of these buttons to select the setting to be changed.► Briefly press this button to confirm.
► Press one of these buttons to change the setting and confirm again to record the change.
Page 31 of 360
31
Access
2
– remote control battery discharged, vehicle battery discharged or disconnected, etc.– vehicle located in an area subject to strong electromagnetic interference.
► Keep this button 1 pulled across to remove the key 2 from the device.
NOTIC E
If the alarm is activated, the audible signal triggered on opening a door with the key (integral with the remote control) will stop when the ignition is switched on.
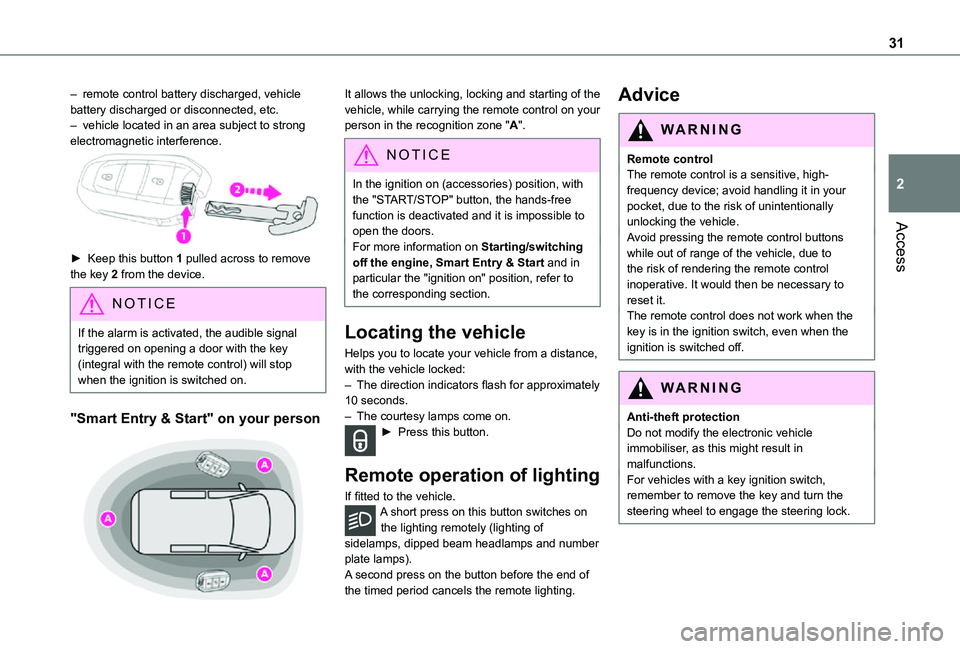
"Smart Entry & Start" on your person
It allows the unlocking, locking and starting of the vehicle, while carrying the remote control on your person in the recognition zone "A".
NOTIC E
In the ignition on (accessories) position, with the "START/STOP" button, the hands-free function is deactivated and it is impossible to open the doors.
For more information on Starting/switching off the engine, Smart Entry & Start and in particular the "ignition on" position, refer to the corresponding section.
Locating the vehicle
Helps you to locate your vehicle from a distance, with the vehicle locked:– The direction indicators flash for approximately 10 seconds.– The courtesy lamps come on.► Press this button.
Remote operation of lighting
If fitted to the vehicle.A short press on this button switches on the lighting remotely (lighting of sidelamps, dipped beam headlamps and number plate lamps).A second press on the button before the end of the timed period cancels the remote lighting.
Advice
WARNI NG
Remote controlThe remote control is a sensitive, high-frequency device; avoid handling it in your pocket, due to the risk of unintentionally unlocking the vehicle.Avoid pressing the remote control buttons
while out of range of the vehicle, due to the risk of rendering the remote control inoperative. It would then be necessary to reset it.The remote control does not work when the key is in the ignition switch, even when the ignition is switched off.
WARNI NG
Anti-theft protectionDo not modify the electronic vehicle immobiliser, as this might result in malfunctions.For vehicles with a key ignition switch, remember to remove the key and turn the steering wheel to engage the steering lock.
Page 32 of 360
32
WARNI NG
Locking the vehicleDriving with the doors locked could make it more difficult for the emergency services to enter the passenger compartment in an emergency.As a safety precaution, remove the key from the ignition or take the electronic key with you when leaving the vehicle, even for a short time.
NOTIC E
Purchasing a second-hand vehicleHave the key codes memorised by any authorized Toyota retailer or Toyota authorized repairer, or any reliable repairer, to ensure that the keys in your possession are the only ones able to start the vehicle.
WARNI NG
To preserve the battery charge in the electronic key and the vehicle's battery, the "hands-free" functions are set to hibernation mode after 21 days without use. To restore these functions, press one of the remote control buttons or start the engine with the electronic key in the reader.For more information on starting with the Smart Entry & Start system, refer to the corresponding section.
NOTIC E
Electrical interferenceThe electronic key may not operate if close to certain electronic devices such as telephones (switched on or on standby) or laptop computers, strong magnetic fields, etc.
WARNI NG
Accumulations (water, dust, grime, salt, etc.) on the inner surface of the door handle may affect detection.If cleaning the inner surface of the door handle using a cloth does not restore detection, contact any authorized Toyota retailer or Toyota authorized repairer, or any reliable repairer.A sudden splash of water (stream of water, high pressure jet washer, etc.) may be identified by the system as the desire to open the vehicle.
Unlocking/Complete or
selective unlocking
What is the purpose of total
or selective unlocking?
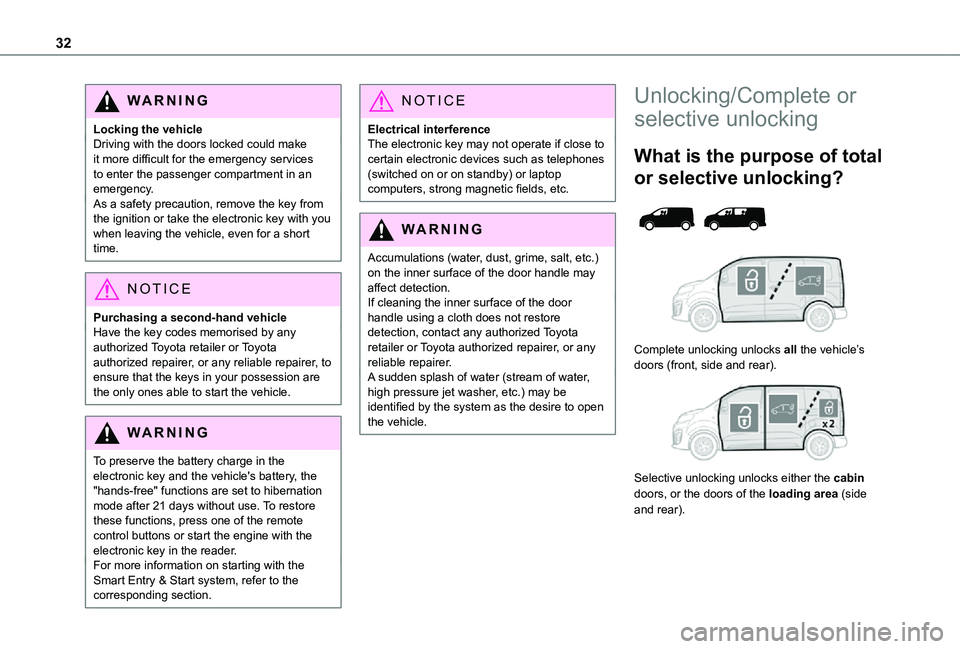
Complete unlocking unlocks all the vehicle’s doors (front, side and rear).
Selective unlocking unlocks either the cabin doors, or the doors of the loading area (side and rear).
Page 33 of 360
33
Access
2
NOTIC E
The separation of the cabin and loading area unlocking is a security measure.It is used to lock out access to the part of the vehicle in which you are not present.
Activation/Deactivation
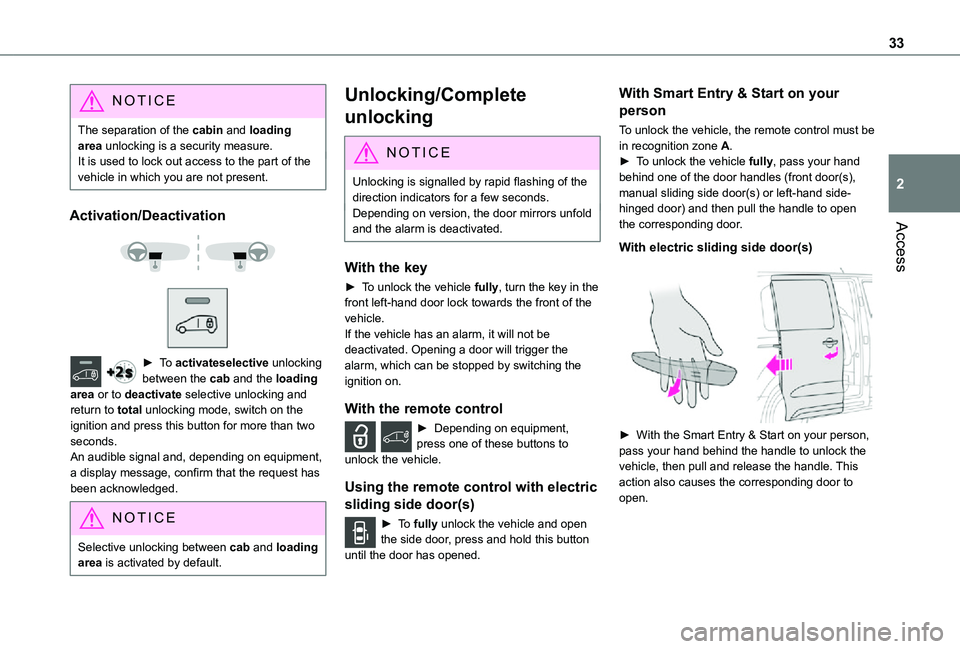
► To activateselective unlocking between the cab and the loading area or to deactivate selective unlocking and return to total unlocking mode, switch on the ignition and press this button for more than two seconds.An audible signal and, depending on equipment, a display message, confirm that the request has been acknowledged.
NOTIC E
Selective unlocking between cab and loading area is activated by default.
Unlocking/Complete
unlocking
NOTIC E
Unlocking is signalled by rapid flashing of the direction indicators for a few seconds.Depending on version, the door mirrors unfold and the alarm is deactivated.
With the key
► To unlock the vehicle fully, turn the key in the front left-hand door lock towards the front of the vehicle.If the vehicle has an alarm, it will not be deactivated. Opening a door will trigger the alarm, which can be stopped by switching the ignition on.
With the remote control
► Depending on equipment, press one of these buttons to
unlock the vehicle.
Using the remote control with electric
sliding side door(s)
► To fully unlock the vehicle and open the side door, press and hold this button until the door has opened.
With Smart Entry & Start on your
person
To unlock the vehicle, the remote control must be in recognition zone A.► To unlock the vehicle fully, pass your hand behind one of the door handles (front door(s), manual sliding side door(s) or left-hand side-hinged door) and then pull the handle to open the corresponding door.
With electric sliding side door(s)
► With the Smart Entry & Start on your person, pass your hand behind the handle to unlock the vehicle, then pull and release the handle. This action also causes the corresponding door to open.
Page 34 of 360
34
With tailgate
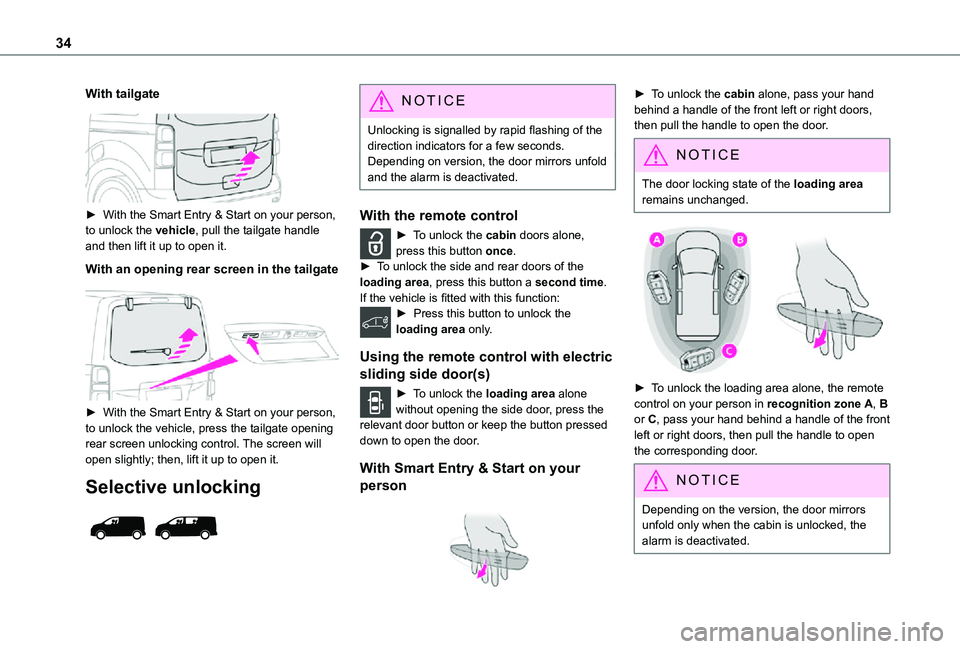
► With the Smart Entry & Start on your person, to unlock the vehicle, pull the tailgate handle and then lift it up to open it.
With an opening rear screen in the tailgate
► With the Smart Entry & Start on your person, to unlock the vehicle, press the tailgate opening rear screen unlocking control. The screen will open slightly; then, lift it up to open it.
Selective unlocking
NOTIC E
Unlocking is signalled by rapid flashing of the direction indicators for a few seconds.Depending on version, the door mirrors unfold and the alarm is deactivated.
With the remote control
► To unlock the cabin doors alone, press this button once.► To unlock the side and rear doors of the loading area, press this button a second time.If the vehicle is fitted with this function:► Press this button to unlock the loading area only.
Using the remote control with electric
sliding side door(s)
► To unlock the loading area alone without opening the side door, press the relevant door button or keep the button pressed down to open the door.
With Smart Entry & Start on your
person
► To unlock the cabin alone, pass your hand behind a handle of the front left or right doors, then pull the handle to open the door.
NOTIC E
The door locking state of the loading area remains unchanged.
► To unlock the loading area alone, the remote control on your person in recognition zone A, B or C, pass your hand behind a handle of the front left or right doors, then pull the handle to open the corresponding door.
NOTIC E
Depending on the version, the door mirrors unfold only when the cabin is unlocked, the alarm is deactivated.