warning light TOYOTA RAV4 PRIME 2022 Owner's Guide
[x] Cancel search | Manufacturer: TOYOTA, Model Year: 2022, Model line: RAV4 PRIME, Model: TOYOTA RAV4 PRIME 2022Pages: 624, PDF Size: 24.01 MB
Page 181 of 624
1813-1. Instrument cluster
3
Vehicle status information and indicators
Select to display warning mes-
sages and measures to be
taken if a malfunction is
detected. (P.518)
Displays suggestions to the
driver in the following situations.
To select a response to a dis-
played suggestion, use the
meter control switches.
■Suggestion to enable the
power back door (if
equipped)
If the power back door system is
disabled on the screen and
the power back door switch on the instrument panel is oper-
ated, a suggestion message will
be displayed asking if you wish
to enable the power back door
system. To enable the power
back door system, select “Yes”.
After enabling the power back door
system, press the power back door
switch again to op
en or close the
power back door.
■Suggestion to turn on the
headlights
If the headlight switch is in other
than or , and the vehicle
speed is 3 mph (5 km/h) or
higher for a certain amount of
time when the surroundings are
dark, a suggestion message will
be displayed.
■Suggestion to turn off the
headlights
If the headlights are left on for a
certain amount of time after the
power switch has been turned
off, a suggestion message will
be displayed.
When the headlight switch is in
the AUTO position: The mes-
sage asking if you wish to turn
the headlights off is displayed.
To turn the headlights off, select
“Yes”.
If the driver’s door is opened after
the power switch is turned off, this
suggestion message will not be dis-
played.
■Customization
The Convenience Services (Sug-
WARNING
■Cautions during setting up
the display
As the hybrid system needs to be
operating during setting up the
display, ensure that the vehicle is
parked in a place with adequate
ventilation. In a closed area such
as a garage, exhaust gases
including harmful carbon monox-
ide (CO) may collect and enter
the vehicle. This may lead to
death or a seri ous health hazard.
NOTICE
■During setting up the display
To prevent 12-vo lt battery dis-
charge, ensure that the hybrid
system is operating while setting
up the display features.
Warning message display
Convenience Services
(Suggestion function)
Page 189 of 624
1893-1. Instrument cluster
3
Vehicle status information and indicators
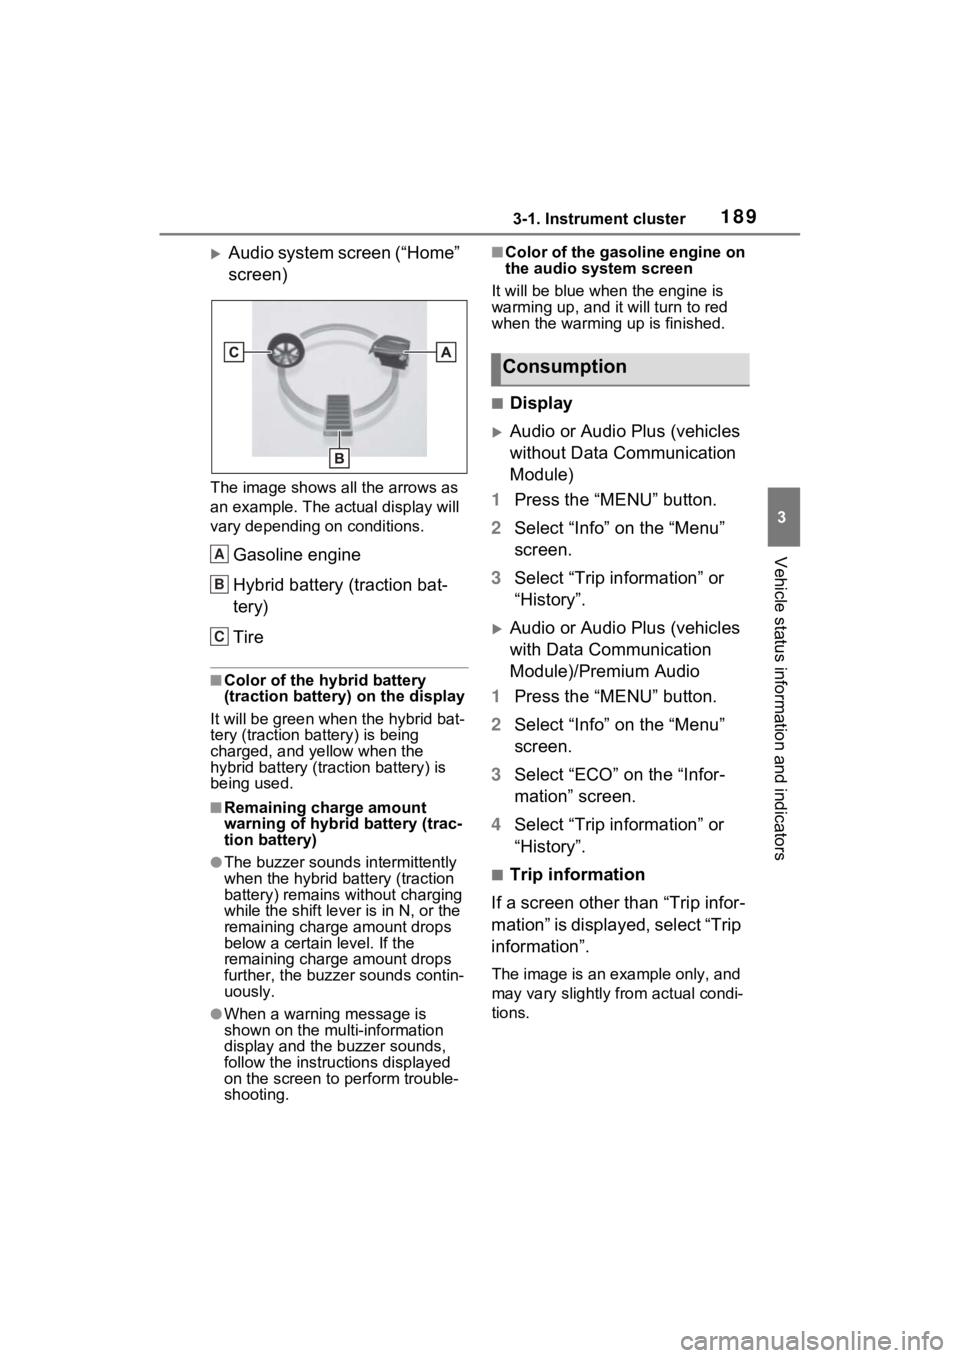
Audio system screen (“Home”
screen)
The image shows all the arrows as
an example. The actual display will
vary depending on conditions.
Gasoline engine
Hybrid battery (traction bat-
tery)
Tire
■Color of the hybrid battery
(traction battery) on the display
It will be green whe n the hybrid bat-
tery (traction battery) is being
charged, and yellow when the
hybrid battery (traction battery) is
being used.
■Remaining charge amount
warning of hybrid battery (trac-
tion battery)
●The buzzer sounds intermittently
when the hybrid battery (traction
battery) remains without charging
while the shift leve r is in N, or the
remaining charge amount drops
below a certain level. If the
remaining charge amount drops
further, the buzzer sounds contin-
uously.
●When a warning message is
shown on the multi-information
display and the buzzer sounds,
follow the instructions displayed
on the screen to p erform trouble-
shooting.
■Color of the gasoline engine on
the audio system screen
It will be blue when the engine is
warming up, and it will turn to red
when the warming up is finished.
■Display
Audio or Audio Plus (vehicles
without Data Communication
Module)
1 Press the “MENU” button.
2 Select “Info” on the “Menu”
screen.
3 Select “Trip information” or
“History”.
Audio or Audio Plus (vehicles
with Data Communication
Module)/Premium Audio
1 Press the “MENU” button.
2 Select “Info” on the “Menu”
screen.
3 Select “ECO” on the “Infor-
mation” screen.
4 Select “Trip information” or
“History”.
■Trip information
If a screen other than “Trip infor-
mation” is displayed, select “Trip
information”.
The image is an example only, and
may vary slightly from actual condi-
tions.
A
B
C
Consumption
Page 204 of 624
2044-2. Opening, closing and locking the doors
■Using the entry function
Carry the electronic key to
enable this function.
WARNING
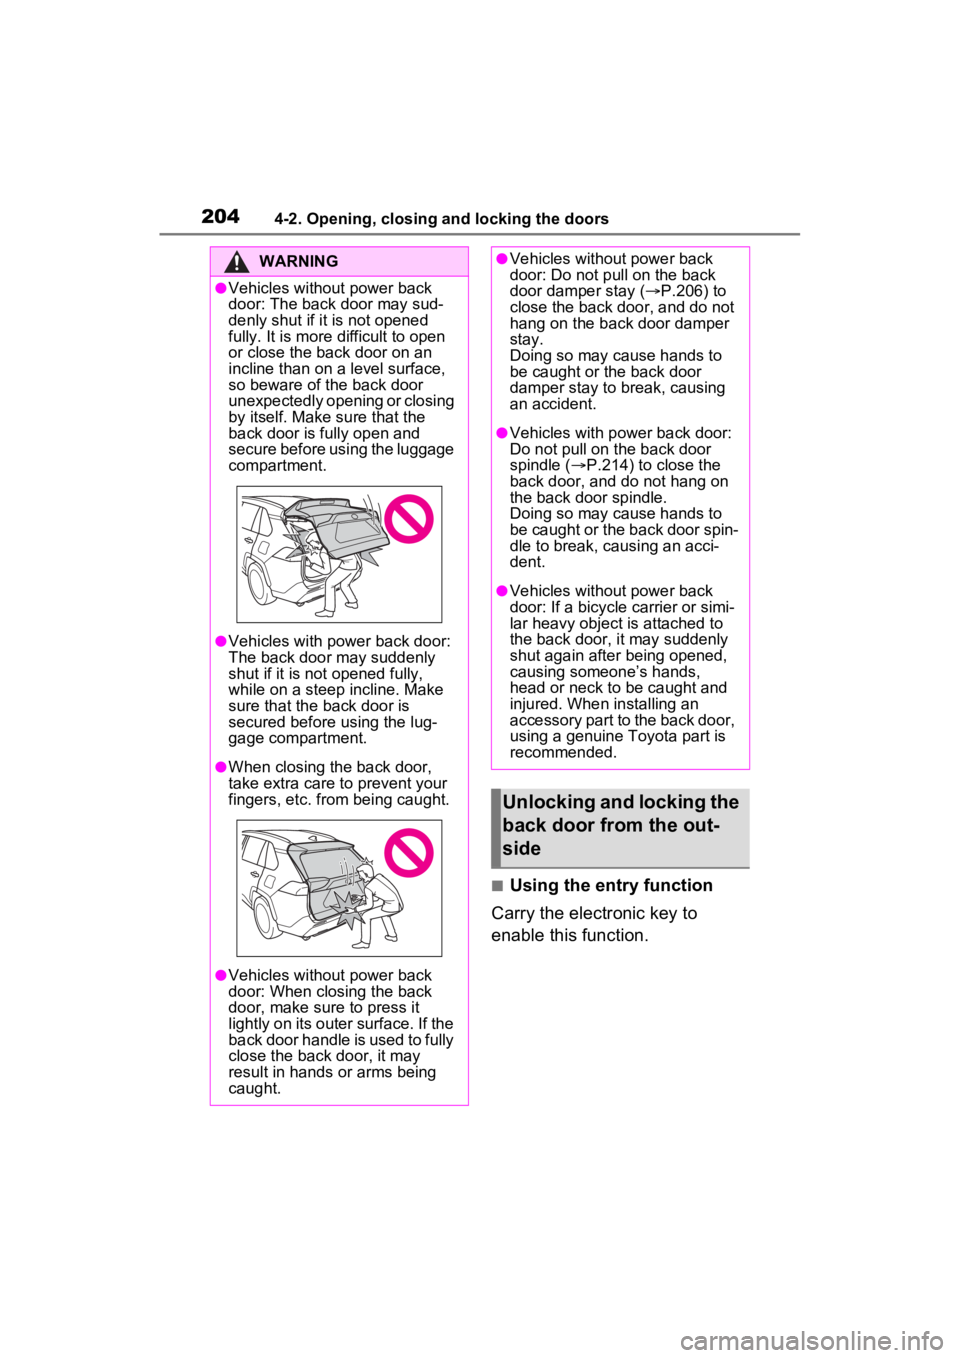
●Vehicles without power back
door: The back door may sud-
denly shut if it is not opened
fully. It is more difficult to open
or close the ba ck door on an
incline than on a level surface,
so beware of the back door
unexpectedly opening or closing
by itself. Make sure that the
back door is fully open and
secure before using the luggage
compartment.
●Vehicles with power back door:
The back door may suddenly
shut if it is not opened fully,
while on a steep incline. Make
sure that the back door is
secured before using the lug-
gage compartment.
●When closing the back door,
take extra care to prevent your
fingers, etc. from being caught.
●Vehicles without power back
door: When closing the back
door, make sure to press it
lightly on its outer surface. If the
back door handle is used to fully
close the back door, it may
result in hands or arms being
caught.
●Vehicles without power back
door: Do not pull on the back
door damper stay ( P.206) to
close the back door, and do not
hang on the back door damper
stay.
Doing so may cause hands to
be caught or the back door
damper stay to break, causing
an accident.
●Vehicles with power back door:
Do not pull on the back door
spindle ( P.214) to close the
back door, and do not hang on
the back door spindle.
Doing so may cause hands to
be caught or the back door spin-
dle to break, causing an acci-
dent.
●Vehicles without power back
door: If a bicycle carrier or simi-
lar heavy object is attached to
the back door, it may suddenly
shut again after being opened,
causing someone’s hands,
head or neck to be caught and
injured. When installing an
accessory part to the back door,
using a genuine Toyota part is
recommended.
Unlocking and locking the
back door from the out-
side
Page 212 of 624
2124-2. Opening, closing and locking the doors
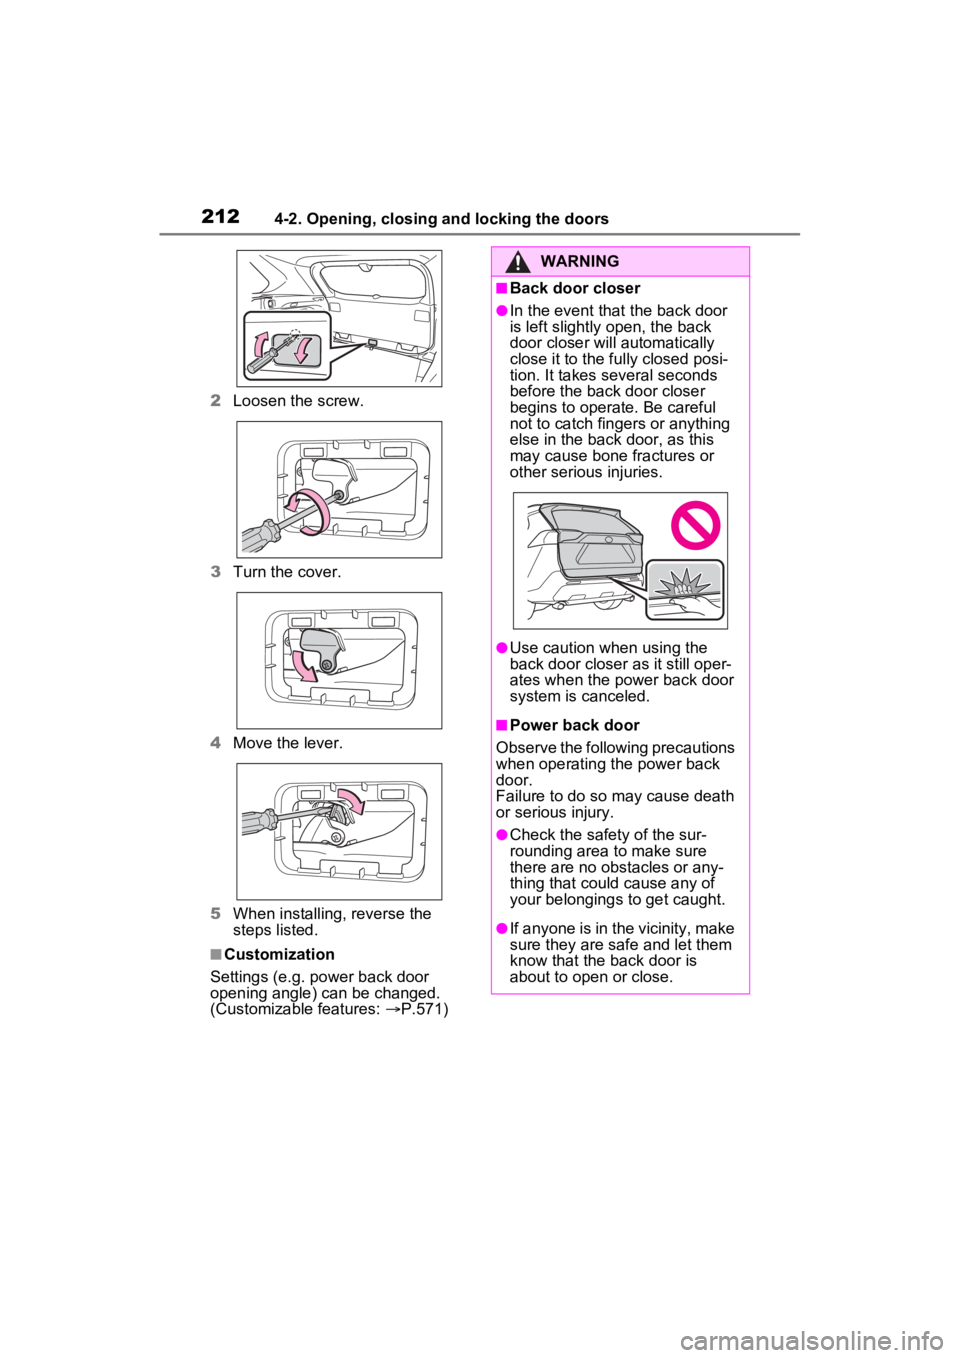
2Loosen the screw.
3 Turn the cover.
4 Move the lever.
5 When installing, reverse the
steps listed.
■Customization
Settings (e.g. power back door
opening angle) can be changed.
(Customizable features: P.571)
WARNING
■Back door closer
●In the event that the back door
is left slightly open, the back
door closer will automatically
close it to the fu lly closed posi-
tion. It takes several seconds
before the back door closer
begins to operate. Be careful
not to catch fingers or anything
else in the back door, as this
may cause bone fractures or
other serious injuries.
●Use caution when using the
back door closer as it still oper-
ates when the power back door
system is canceled.
■Power back door
Observe the following precautions
when operating the power back
door.
Failure to do so may cause death
or serious injury.
●Check the safety of the sur-
rounding area to make sure
there are no obs tacles or any-
thing that could cause any of
your belongings to get caught.
●If anyone is in the vicinity, make
sure they are safe and let them
know that the back door is
about to open or close.
Page 225 of 624
2254-3. Adjusting the seats
4
Before driving
*: If equipped
■Recording procedure
1 Check that the shift lever is in
P.
2 Turn the power switch to ON.
3 Adjust the driver’s seat to the
desired positions.
4 While pressing the “SET” but-
ton, or within 3 seconds after
the “SET” button is pressed,
press button “1” or “2” until
the buzzer sounds.
If the selected button has already
been preset, the previously
recorded positio n will be overwrit-
WARNING
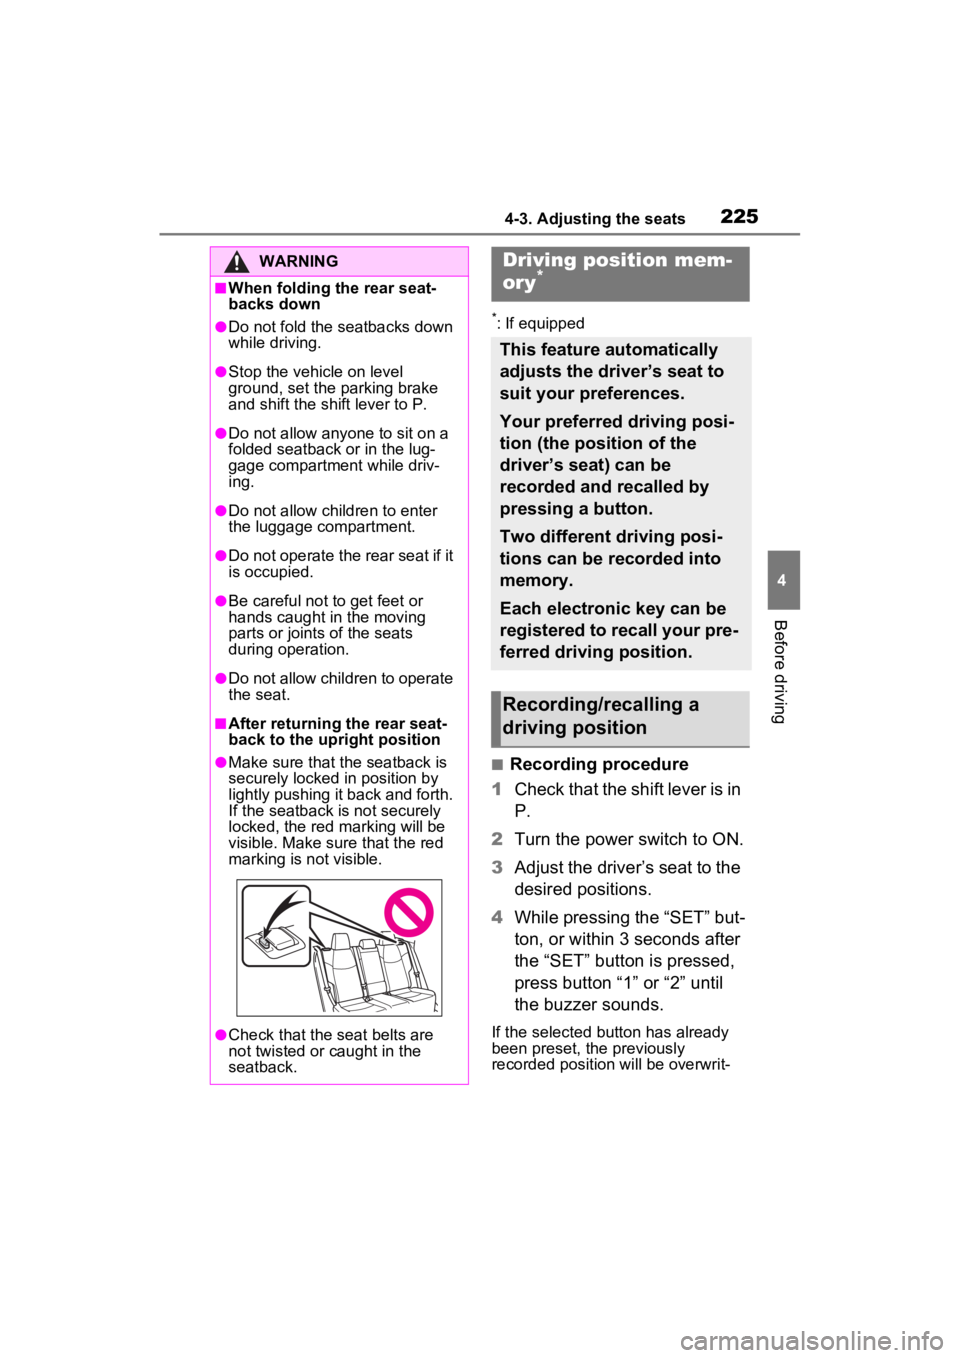
■When folding the rear seat-
backs down
●Do not fold the seatbacks down
while driving.
●Stop the vehicle on level
ground, set the parking brake
and shift the shift lever to P.
●Do not allow anyo ne to sit on a
folded seatback or in the lug-
gage compartment while driv-
ing.
●Do not allow child ren to enter
the luggage compartment.
●Do not operate the rear seat if it
is occupied.
●Be careful not to get feet or
hands caught in the moving
parts or joints of the seats
during operation.
●Do not allow children to operate
the seat.
■After returning the rear seat-
back to the upright position
●Make sure that the seatback is
securely locked in position by
lightly pushing it back and forth.
If the seatback is not securely
locked, the red marking will be
visible. Make sure that the red
marking is not visible.
●Check that the seat belts are
not twisted or caught in the
seatback.
Driving position mem-
ory*
This feature automatically
adjusts the driver’s seat to
suit your preferences.
Your preferred driving posi-
tion (the position of the
driver’s seat) can be
recorded and recalled by
pressing a button.
Two different driving posi-
tions can be recorded into
memory.
Each electronic key can be
registered to recall your pre-
ferred driving position.
Recording/recalling a
driving position
Page 226 of 624
2264-3. Adjusting the seats
ten.
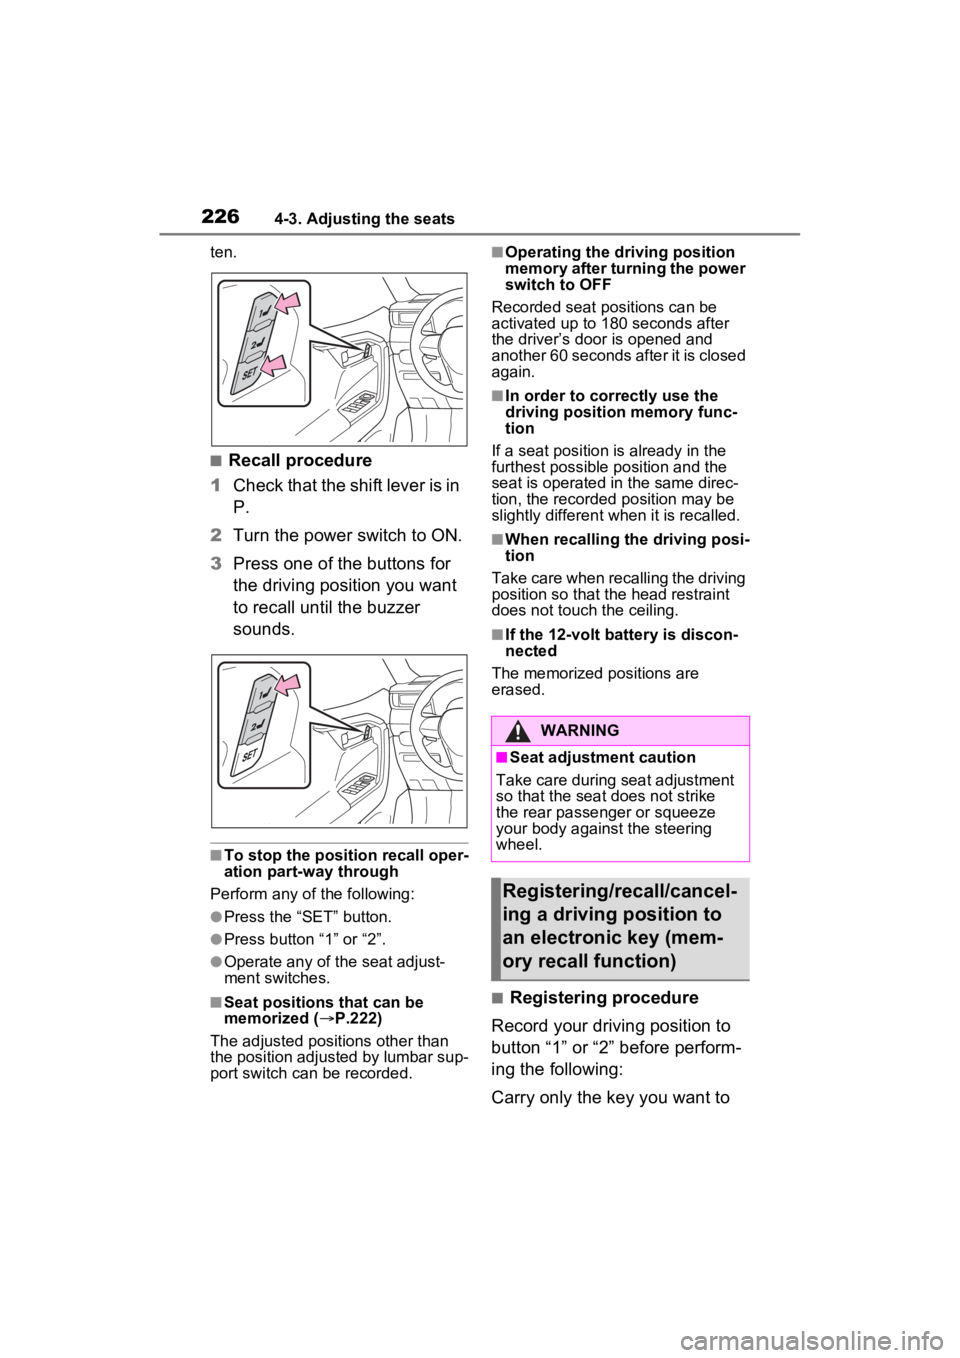
■Recall procedure
1 Check that the shift lever is in
P.
2 Turn the power switch to ON.
3 Press one of the buttons for
the driving position you want
to recall until the buzzer
sounds.
■To stop the position recall oper-
ation part-way through
Perform any of the following:
●Press the “SET” button.
●Press button “1” or “2”.
●Operate any of the seat adjust-
ment switches.
■Seat positions that can be
memorized ( P.222)
The adjusted positions other than
the position adjusted by lumbar sup-
port switch can be recorded.
■Operating the driving position
memory after turning the power
switch to OFF
Recorded seat positions can be
activated up to 180 seconds after
the driver’s door is opened and
another 60 seconds after it is closed
again.
■In order to correctly use the
driving position memory func-
tion
If a seat position is already in the
furthest possible position and the
seat is operated in the same direc-
tion, the recorded position may be
slightly different w hen it is recalled.
■When recalling the driving posi-
tion
Take care when recalling the driving
position so that the head restraint
does not touch the ceiling.
■If the 12-volt b attery is discon-
nected
The memorized positions are
erased.
■Registering procedure
Record your driving position to
button “1” or “2” before perform-
ing the following:
Carry only the key you want to
WARNING
■Seat adjustment caution
Take care during seat adjustment
so that the seat does not strike
the rear passenger or squeeze
your body against the steering
wheel.
Registering/recall/cancel-
ing a driving position to
an electronic key (mem-
ory recall function)
Page 231 of 624
2314-4. Adjusting the steering wheel and mirrors
4
Before driving
*: If equipped
The height of the rear view mir-
ror can be adjusted to suit your
driving posture.
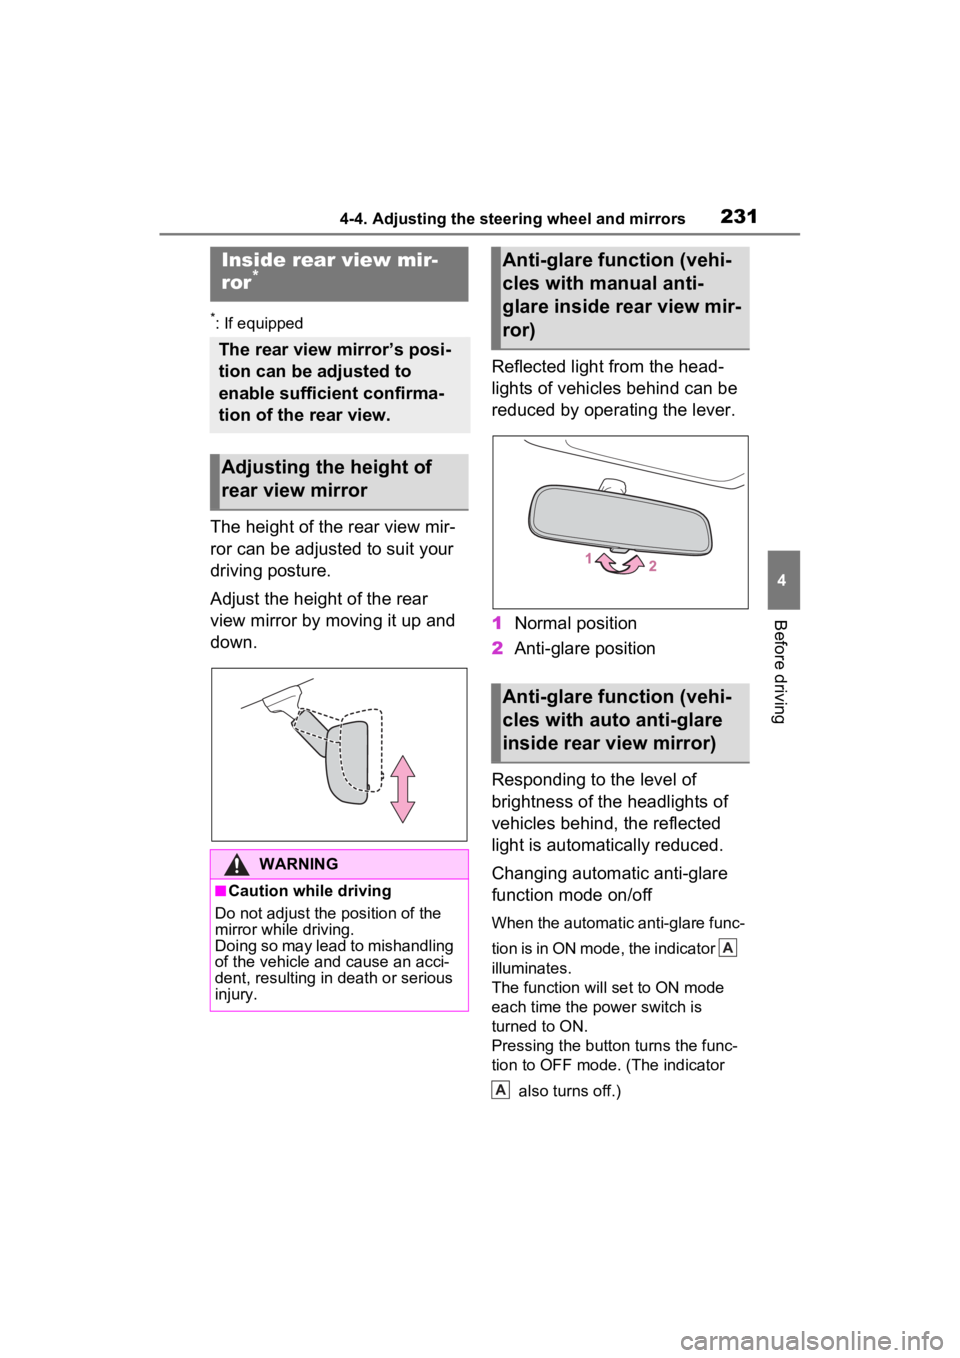
Adjust the height of the rear
view mirror by moving it up and
down.Reflected light from the head-
lights of vehicles behind can be
reduced by operating the lever.
1
Normal position
2 Anti-glare position
Responding to the level of
brightness of the headlights of
vehicles behind, the reflected
light is automatically reduced.
Changing automatic anti-glare
function mode on/off
When the automatic anti-glare func-
tion is in ON mode, the indicator
illuminates.
The function will set to ON mode
each time the power switch is
turned to ON.
Pressing the button turns the func-
tion to OFF mode. (The indicator also turns off.)
Inside rear view mir-
ror*
The rear view mirror’s posi-
tion can be adjusted to
enable sufficient confirma-
tion of the rear view.
Adjusting the height of
rear view mirror
WARNING
■Caution while driving
Do not adjust the position of the
mirror while driving.
Doing so may lead to mishandling
of the vehicle and cause an acci-
dent, resulting in death or serious
injury.
Anti-glare function (vehi-
cles with manual anti-
glare inside rear view mir-
ror)
Anti-glare function (vehi-
cles with auto anti-glare
inside rear view mirror)
A
A
Page 233 of 624
2334-4. Adjusting the steering wheel and mirrors
4
Before driving
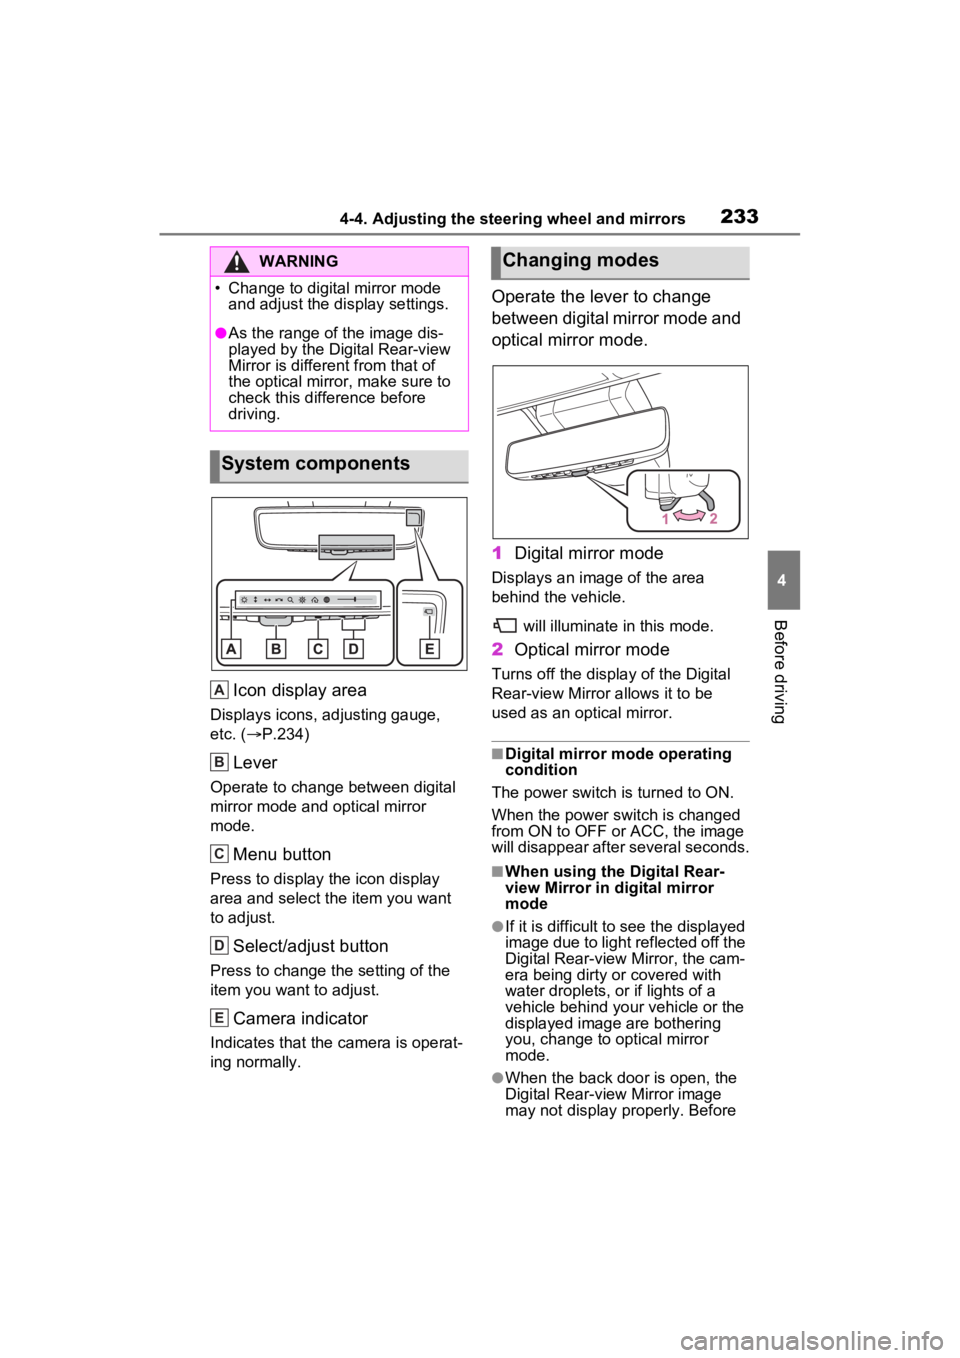
Icon display area
Displays icons, adjusting gauge,
etc. (P.234)
Lever
Operate to change between digital
mirror mode and optical mirror
mode.
Menu button
Press to display the icon display
area and select the item you want
to adjust.
Select/adjust button
Press to change the setting of the
item you want to adjust.
Camera indicator
Indicates that the camera is operat-
ing normally.
Operate the lever to change
between digital mirror mode and
optical mirror mode.
1 Digital mirror mode
Displays an ima ge of the area
behind the vehicle.
will illuminate in this mode.
2Optical mirror mode
Turns off the display of the Digital
Rear-view Mirror allows it to be
used as an optical mirror.
■Digital mirror mode operating
condition
The power switch is turned to ON.
When the power switch is changed
from ON to OFF or ACC, the image
will disappear after several seconds.
■When using the Digital Rear-
view Mirror in d igital mirror
mode
●If it is difficult to see the displayed
image due to light reflected off the
Digital Rear-view Mirror, the cam-
era being dirty or covered with
water droplets, or if lights of a
vehicle behind your vehicle or the
displayed image are bothering
you, change to optical mirror
mode.
●When the back door is open, the
Digital Rear-view Mirror image
may not display properly. Before
WARNING
�
Page 236 of 624
2364-4. Adjusting the steering wheel and mirrors
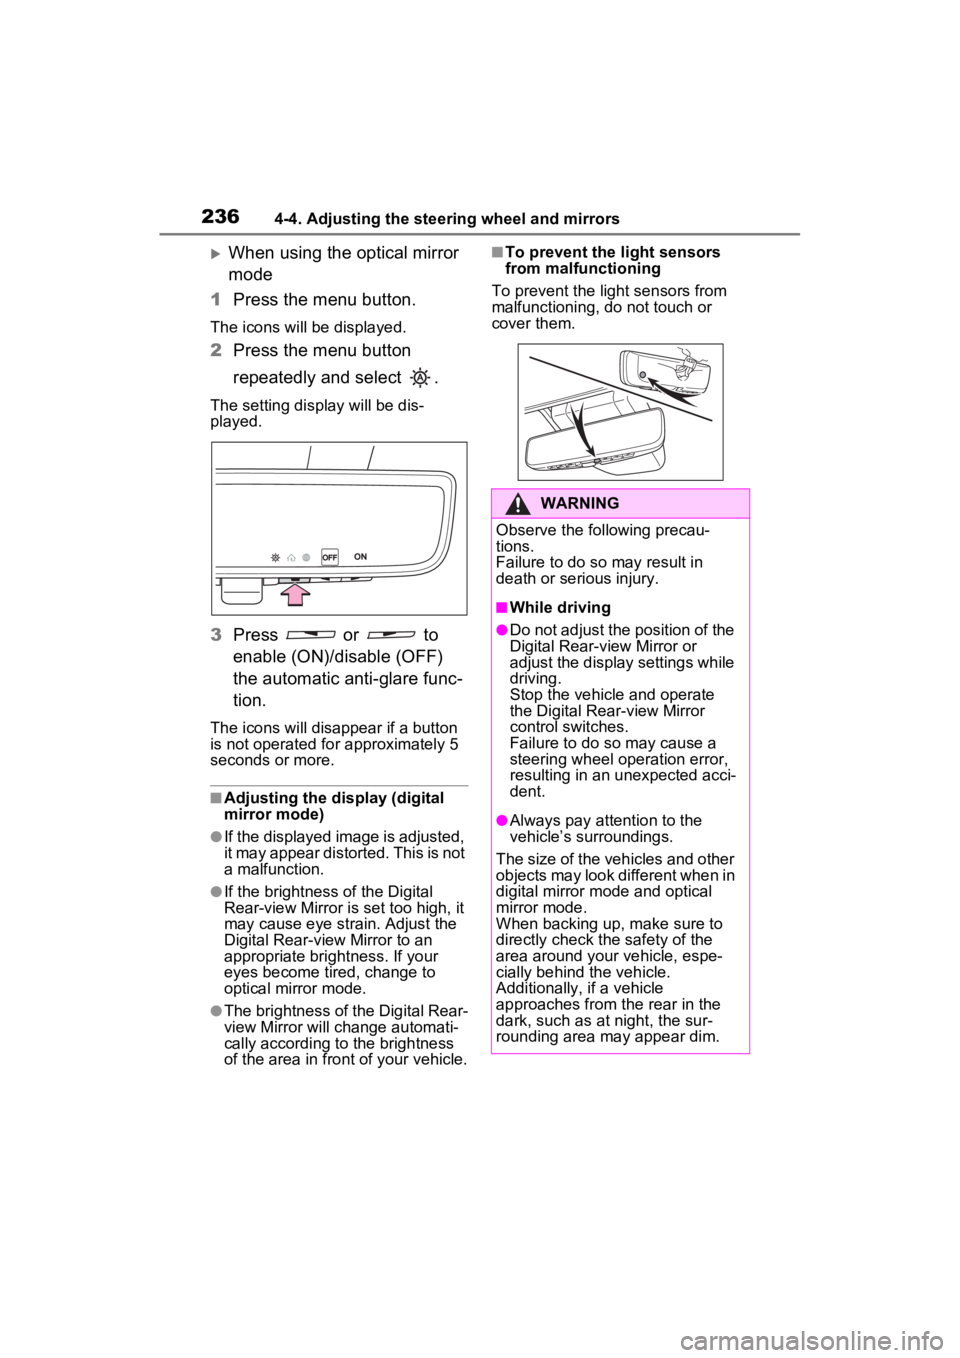
When using the optical mirror
mode
1 Press the menu button.
The icons will be displayed.
2Press the menu button
repeatedly and select .
The setting display will be dis-
played.
3Press or to
enable (ON)/disable (OFF)
the automatic anti-glare func-
tion.
The icons will disappear if a button
is not operated fo r approximately 5
seconds or more.
■Adjusting the display (digital
mirror mode)
●If the displayed image is adjusted,
it may appear distorted. This is not
a malfunction.
●If the brightness of the Digital
Rear-view Mirror is set too high, it
may cause eye strain. Adjust the
Digital Rear-view Mirror to an
appropriate brightness. If your
eyes become tired, change to
optical mirror mode.
●The brightness of the Digital Rear-
view Mirror will ch ange automati-
cally according to the brightness
of the area in front of your vehicle.
■To prevent the light sensors
from malfunctioning
To prevent the light sensors from
malfunctioning, do not touch or
cover them.
WARNING
Observe the following precau-
tions.
Failure to do so may result in
death or serious injury.
■While driving
●Do not adjust the position of the
Digital Rear-view Mirror or
adjust the display settings while
driving.
Stop the vehicle and operate
the Digital Rear-view Mirror
control switches.
Failure to do so may cause a
steering wheel operation error,
resulting in an unexpected acci-
dent.
●Always pay attention to the
vehicle’s surroundings.
The size of the vehicles and other
objects may look different when in
digital mirror mode and optical
mirror mode.
When backing up, make sure to
directly check the safety of the
area around your vehicle, espe-
cially behind the vehicle.
Additionally, if a vehicle
approaches from the rear in the
dark, such as at night, the sur-
rounding area may appear dim.
Page 237 of 624
2374-4. Adjusting the steering wheel and mirrors
4
Before driving
■Cleaning the mirror surface
If the mirror surface is dirty, the
image on the display may be dif-
ficult to see.
Clean the mirror surface gently
using a soft dry cloth.
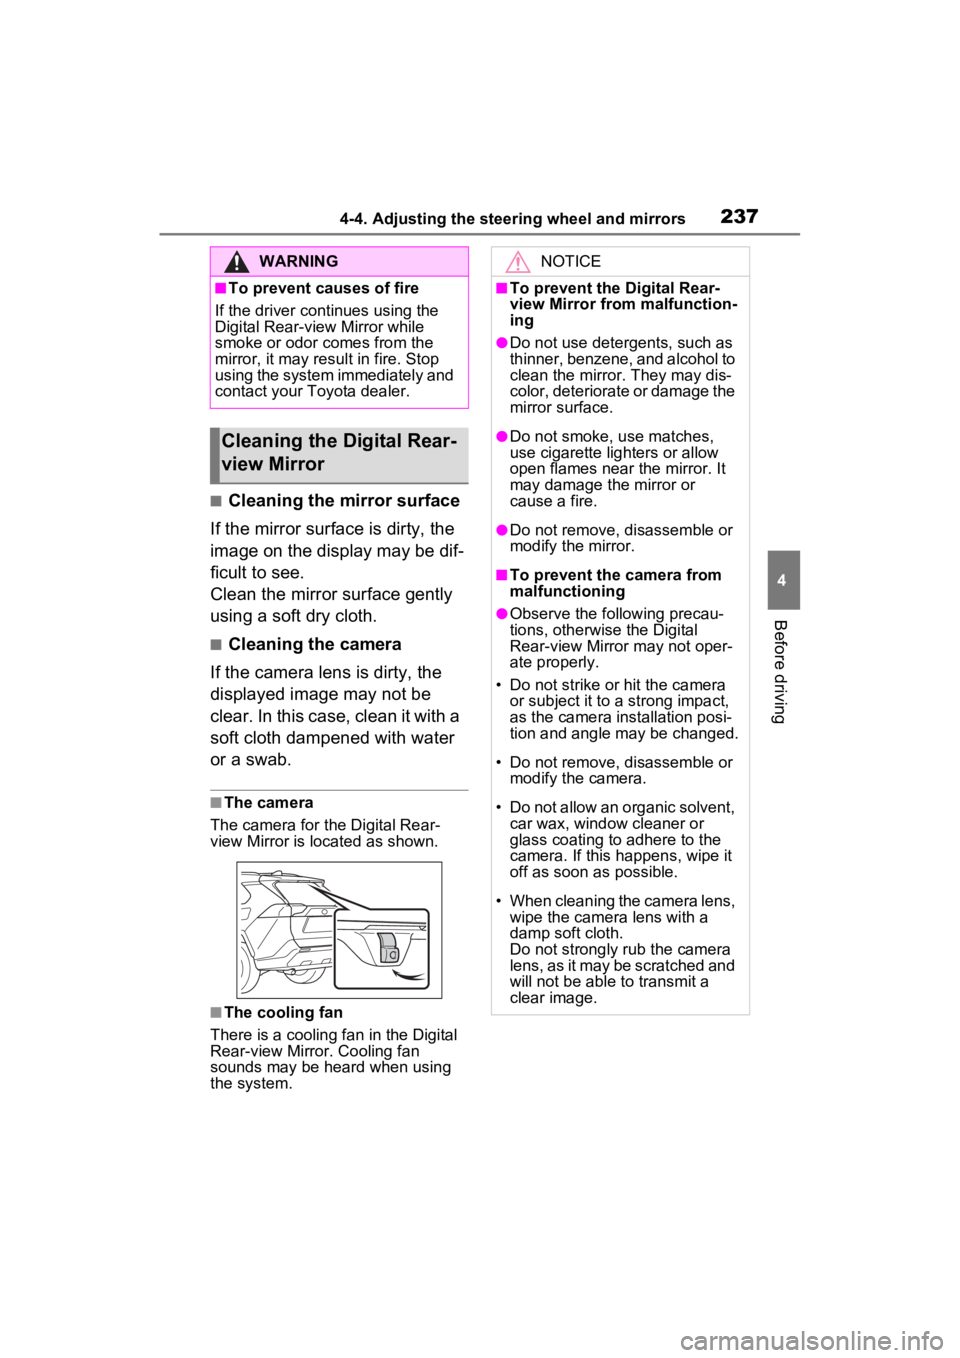
■Cleaning the camera
If the camera lens is dirty, the
displayed image may not be
clear. In this case, clean it with a
soft cloth dampened with water
or a swab.
■The camera
The camera for the Digital Rear-
view Mirror is located as shown.
■The cooling fan
There is a cooling fa n in the Digital
Rear-view Mirror. Cooling fan
sounds may be heard when using
the system.
WARNING
■To prevent causes of fire
If the driver continues using the
Digital Rear-view Mirror while
smoke or odor comes from the
mirror, it may res ult in fire. Stop
using the system immediately and
contact your Toyota dealer.
Cleaning the D igital Rear-
view Mirror
NOTICE
■To prevent the Digital Rear-
view Mirror from malfunction-
ing
●Do not use detergents, such as
thinner, benzene, and alcohol to
clean the mirror. They may dis-
color, deteriorate or damage the
mirror surface.
●Do not smoke, use matches,
use cigarette lighters or allow
open flames near the mirror. It
may damage the mirror or
cause a fire.
●Do not remove, d isassemble or
modify the mirror.
■To prevent the camera from
malfunctioning
●Observe the fo llowing precau-
tions, otherwise the Digital
Rear-view Mirror may not oper-
ate properly.
• Do not strike or hit the camera or subject it to a strong impact,
as the camera installation posi-
tion and angle may be changed.
• Do not remove, disassemble or modify the camera.
• Do not allow an organic solvent, car wax, window cleaner or
glass coating to adhere to the
camera. If this happens, wipe it
off as soon as possible.
• When cleaning the camera lens, wipe the camera lens with a
damp soft cloth.
Do not strongly rub the camera
lens, as it may be scratched and
will not be able to transmit a
clear image.