ESP TOYOTA SUPRA 2021 (in English) User Guide
[x] Cancel search | Manufacturer: TOYOTA, Model Year: 2021, Model line: SUPRA, Model: TOYOTA SUPRA 2021Pages: 364, PDF Size: 10.43 MB
Page 61 of 364
613-1. AT A GLANCE
Supra Owner’s Manual_U (from Mar. ’20
Prod.)
3
AT A GLANCE
sages.
Messages are additionally dis-
played in the status field.
Via Toyota Supra Command:
1 "My Vehicle"
2 "System settings"
3 "Notifications"
4 Select the desired message.
The respective menu is opened,
where the message is dis-
played.
All messages, except vehicle
messages, can be deleted from
the list. Vehicle messages are
displayed as long as they are
relevant.
Via Toyota Supra Command:
1 "Notifications"
2 Select the desired message.
3 Press button.
4 "Delete this notification" or
"Delete all notifications"
The following settings can be
adjusted:
• Select the applications, from which messages will be per-
mitted.
• Sort the messages according to date or priority.
Via Toyota Supra Command:
1 "My Vehicle"
2 "System settings"
3 "Notifications"
4 Select the desired setting.
Retrieving messages
Deleting messages
Adjusting
Page 62 of 364
623-1. AT A GLANCE
Supra Owner’s Manual_U (from Mar. ’20
Prod.)
This chapter describes all stan-
dard, country-specific and
optional features offered with
the series. It also describes fea-
tures that are not necessarily
available in your vehicle, for
instance, due to the selected
options or country versions. This
also applies to safety-related
functions and systems. When
using these functions and sys-
tems, the applicable laws and
regulations must be observed.
The vehicle offers different func-
tions, whose use requires a data
transfer to Toyota or a service
provider. The data transfer can
be deactivated for some func-
tions.
With data transfer deactivated,
the respective function cannot
be used.
Only make these settings while
stationary.Follow the instructions on the
Control Display.
Via Toyota Supra Command:
1
"My Vehicle"
2 "System settings"
3 "Data privacy"
4 Select the desired setting.
Depending on the usage, the
vehicle stores personal data,
such as stored radio stations.
This personal data can be per-
manently deleted using Toyota
Supra Command.
Depending on the equipment
package, the following data can
be deleted:
• Driver profile settings.
• Stored radio stations.
• Stored programmable mem- ory buttons.
• Travel and Onboard Com- puter information.
• Music hard disc.
• Navigation, for instance stored destinations.
• Phone book.
• Online data, for instance Favorites, cookies.
Personal settings
Vehicle features and
options
Data protection
Data transfer
Concept
General information
Activating/deactivating
Deleting personal data in
the vehicle
Concept
General information
Page 69 of 364
693-1. AT A GLANCE
Supra Owner’s Manual_U (from Mar. ’20
Prod.)
3
AT A GLANCE
Via Toyota Supra Command:
1 "My Vehicle"
2 "System settings"
3 "Mobile devices"
4 "Connect new device"
5 Select functions:
• "Telephone"
• "Bluetooth® audio"
• "Apps"
• "Apple CarPlay"
• "Screen Mirroring"
The Bluetooth name of the vehicle
is displayed on the Control Display.
6 On the mobile device, search
for Bluetooth devices in the
vicinity.
The Bluetooth name of the vehicle
appears on the mobile device dis-
play.
Select the Bluetooth name of the
vehicle.
7Depending on the mobile
device, a control number is
displayed or the control num-
ber must be entered.
• Compare the control number displayed on the Control Dis-
play with the control number
on the display of the device.
Confirm the control number on the
device and on the Control Display.
• Enter and confirm the same control number on the device
and via Toyota Supra Com-
mand.
The device is con nected and dis-
played in the device list, refer to
page 73.
All requirements are met and all
required steps were completed
in the specified order. Despite
that, the mobile device does not
function as expected.
In this case, the following expla-
nations can help:
Why could the mobile phone not
be paired or connected?
• There are too many Bluetooth
devices connected to the
mobile phone or vehicle.
In the vehicle, delete Bluetooth
connections with other devices.
Delete all known Bluetooth connec-
tions from the de vice list on the
mobile phone and start a new
device search.
• The mobile phone is in
power-save mode or has only
a limited remaining battery
life.
Charge mobile phone.
Why does the mobile phone no
longer react?
• The applications on the mobile phone do not function
anymore.
Switch the mobile phone off and on
again.
• Too high or too low ambient temperature for mobile phone
operation.
Pairing the mobile device
with the vehicle
Frequently asked ques-
tions
Page 72 of 364
723-1. AT A GLANCE
Supra Owner’s Manual_U (from Mar. ’20
Prod.)
• Corresponding mobile wire-less contract.
• Bluetooth, Wi-Fi, and Siri voice operation are activated
on the iPhone.
• Booking the Toyota Supra Connect service: Apple Car-
Play preparation.
Via Toyota Supra Command:
1 "My Vehicle"
2 "System settings"
3 "Mobile devices"
4 "Settings"
5 Select the following settings:
• "Bluetooth®"
• "Apple CarPlay"
Pair the iPhone with the vehicle
via Bluetooth, refer to page 68.
Select CarPlay as the function:
"Apple CarPlay"
The iPhone is connected to the
vehicle and displayed in the
device list, refer to page 73.
For more information, refer to
the NAVIGATION SYSTEM
OWNER'S MANUAL. All requirements are met and all
required steps were completed
in the specified order. Despite
that, the mobile device does not
function as expected.
In this case, the following expla-
nations can help:
The iPhone has already been
paired with Apple CarPlay.
When a new connection is
established, CarPlay can no lon-
ger be selected.
• Delete the iPhone concerned
from the device list.
• On the iPhone, delete the vehicle concerned from the
list of stored vehicles under
Bluetooth and under Wi-Fi.
• Pair the iPhone as a new device.
If the steps listed have been car-
ried out and the required func-
tion is still not available: contact
the Toyota dealer.
Screen Mirroring enables mirror-
ing (outputting) of the smart-
phone display on the Control
Display.
Switching on Bluetooth
and CarPlay
Pairing iPhone with Car-
Play
OperationFrequently asked ques-
tions
Screen Mirroring
General information
Page 94 of 364
944-1. CONTROLS
Supra Owner’s Manual_U (from Mar. ’20
Prod.)
tem if you find yourself in a dan-
gerous situation.
To switch off the alarm: press
any button.
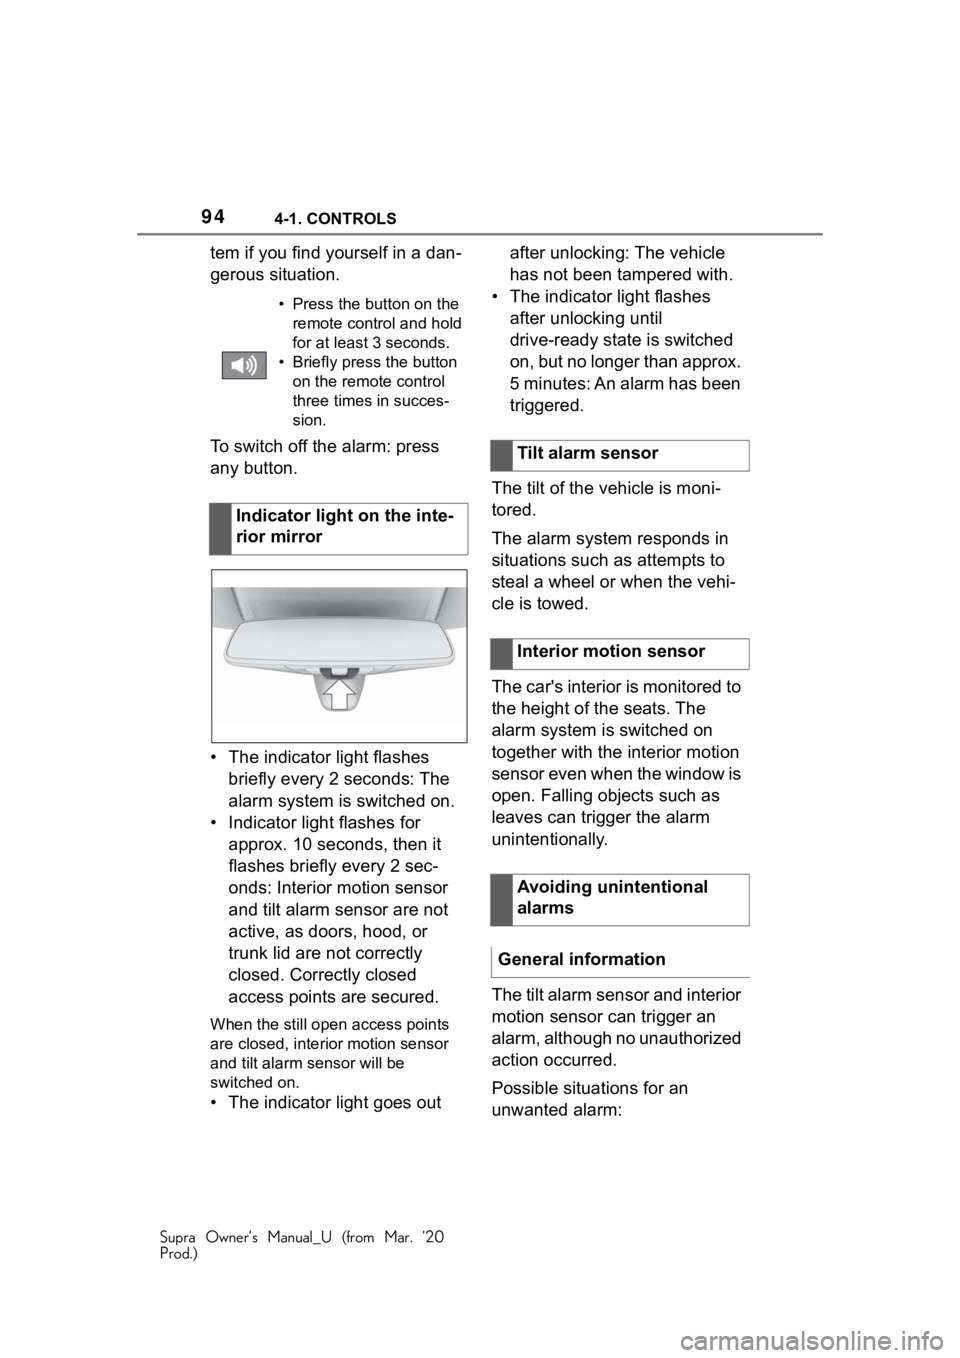
• The indicator light flashes briefly every 2 seconds: The
alarm system is switched on.
• Indicator light flashes for approx. 10 seconds, then it
flashes briefly every 2 sec-
onds: Interior motion sensor
and tilt alarm sensor are not
active, as doors, hood, or
trunk lid are not correctly
closed. Correctly closed
access points are secured.
When the still open access points
are closed, interior motion sensor
and tilt alarm sensor will be
switched on.
• The indicator light goes out after unlocking: The vehicle
has not been tampered with.
• The indicator light flashes after unlocking until
drive-ready state is switched
on, but no longer than approx.
5 minutes: An alarm has been
triggered.
The tilt of the vehicle is moni-
tored.
The alarm system responds in
situations such as attempts to
steal a wheel or when the vehi-
cle is towed.
The car's interior is monitored to
the height of the seats. The
alarm system is switched on
together with the interior motion
sensor even when the window is
open. Falling objects such as
leaves can trigger the alarm
unintentionally.
The tilt alarm sensor and interior
motion sensor can trigger an
alarm, although no unauthorized
action occurred.
Possible situations for an
unwanted alarm:
• Press the button on the remote control and hold
for at least 3 seconds.
• Briefly press the button on the remote control
three times in succes-
sion.
Indicator light on the inte-
rior mirror
Tilt alarm sensor
Interior motion sensor
Avoiding unintentional
alarms
General information
Page 112 of 364
1124-1. CONTROLS
Supra Owner’s Manual_U (from Mar. ’20
Prod.)
Before using a child restraint
system on the front passenger
seat, ensure that the front, knee,
and side airbags on the front
passenger side are deacti-
vated. For automatic deactiva-
tion of frontseat passenger
airbags, refer to page 174.
The right place for chil-
dren
Safety information
WA R N I N G
Unattended children or animals in
the vehicle can cause the vehicle
to move and endanger them-
selves and traffic, for instance due
to the following actions:
●Pressing the Start/Stop button.
●Releasing the parking brake.
●Opening and closing the doors
or windows.
●Engaging selector lever position
N.
●Using vehicle equipment.
There is a risk of accidents or inju-
ries. Do not leave children or ani-
mals unattended in the vehicle.
Take the remote control with you
when exiting and lock the vehicle.
WA R N I N G
A heated vehicle may result in
death to persons, especially chil-
dren and animals. There is a risk
of injuries or danger to life. Do not
leave persons, especially chil-
dren and animals unattended in
the vehicle.
WA R N I N G
Exposure to intense sunlight can
cause child restraint systems and
their components to become very
hot. Persons may sustain burn
injuries when touching the hot
components. There is a risk of
injury. Do not e xpose the child
restraint system to direct sunlight
or cover where necessary. If nec-
essary, let the child restraint sys-
tem cool down before transporting
a child. Do not leave children
unattended in the vehicle.
Children on the front pas-
senger seat
General information
Safety information
WA R N I N G
Active front-sea t passenger air-
bags can injure a c hild in a child
restraint system when the airbags
are activated. Ther e is a risk of
injury. Make sure that the
front-seat passenger airbags are
deactivated and that the PAS-
SENGER AIRBAG OFF indicator
light lights up.
Page 115 of 364
1154-1. CONTROLS
Supra Owner’s Manual_U (from Mar. ’20
Prod.)
4
CONTROLS
1 Unbuckle the safety belt
buckle.
2 Remove the child restraint
system.
3 Allow the belt strap to be
pulled in completely.
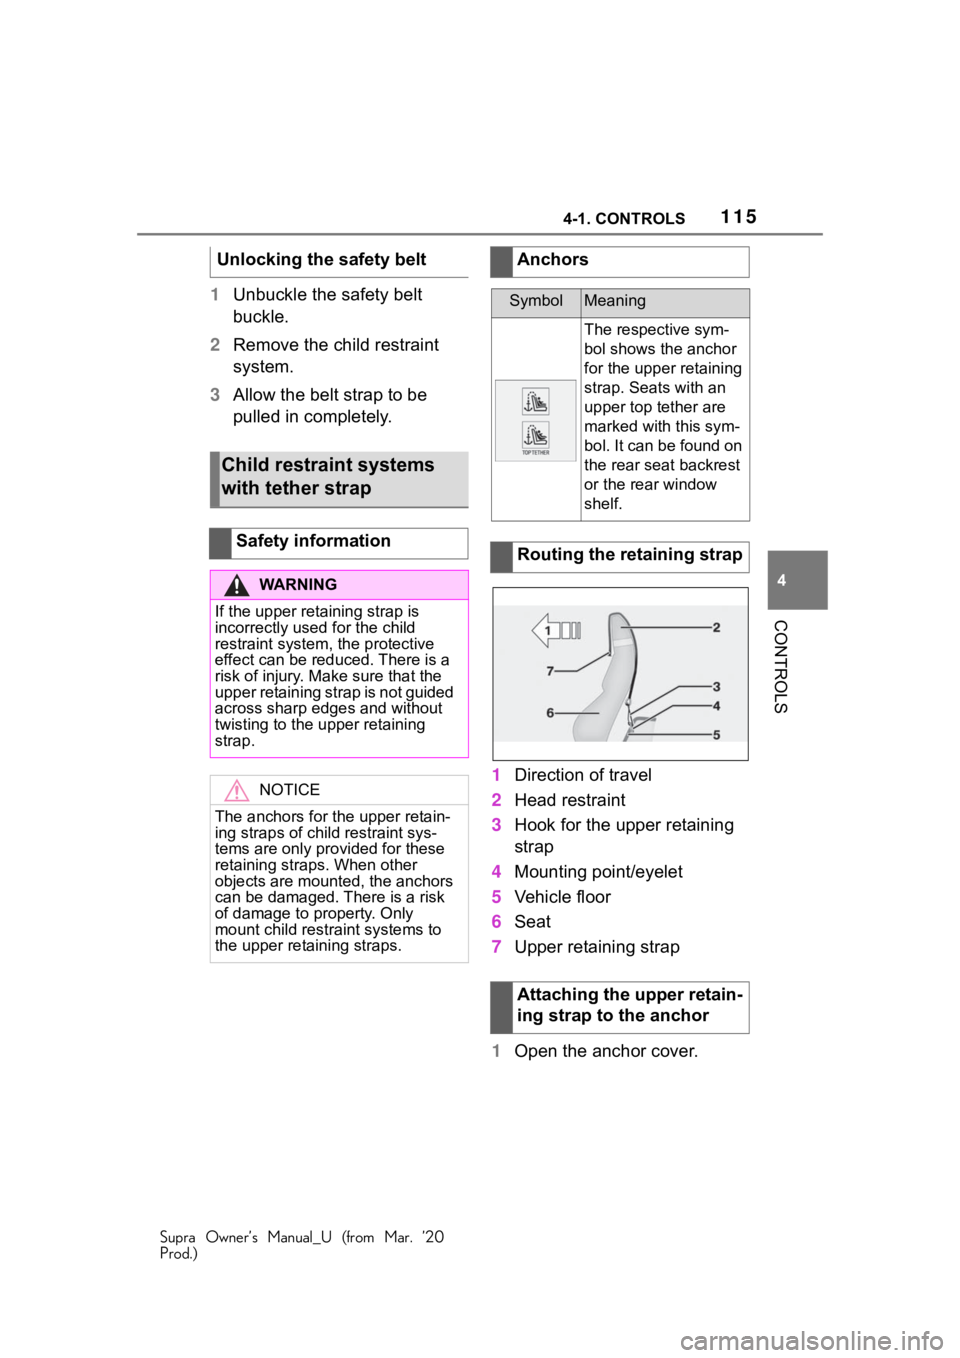
1Direction of travel
2 Head restraint
3 Hook for the upper retaining
strap
4 Mounting point/eyelet
5 Vehicle floor
6 Seat
7 Upper retaining strap
1 Open the anchor cover.
Unlocking the safety belt
Child restraint systems
with tether strap
Safety information
WA R N I N G
If the upper retaining strap is
incorrectly used for the child
restraint system,
the protective
effect can be reduced. There is a
risk of injury. Make sure that the
upper retaining strap is not guided
across sharp edges and without
twisting to the upper retaining
strap.
NOTICE
The anchors for the upper retain-
ing straps of child restraint sys-
tems are only provided for these
retaining straps. When other
objects are mounted, the anchors
can be damaged. There is a risk
of damage to property. Only
mount child restraint systems to
the upper retaining straps.
Anchors
SymbolMeaning
The respective sym-
bol shows the anchor
for the upper retaining
strap. Seats with an
upper top tether are
marked with this sym-
bol. It can be found on
the rear seat backrest
or the rear window
shelf.
Routing the retaining strap
Attaching the upper retain-
ing strap to the anchor
Page 131 of 364
1314-1. CONTROLS
Supra Owner’s Manual_U (from Mar. ’20
Prod.)
4
CONTROLS
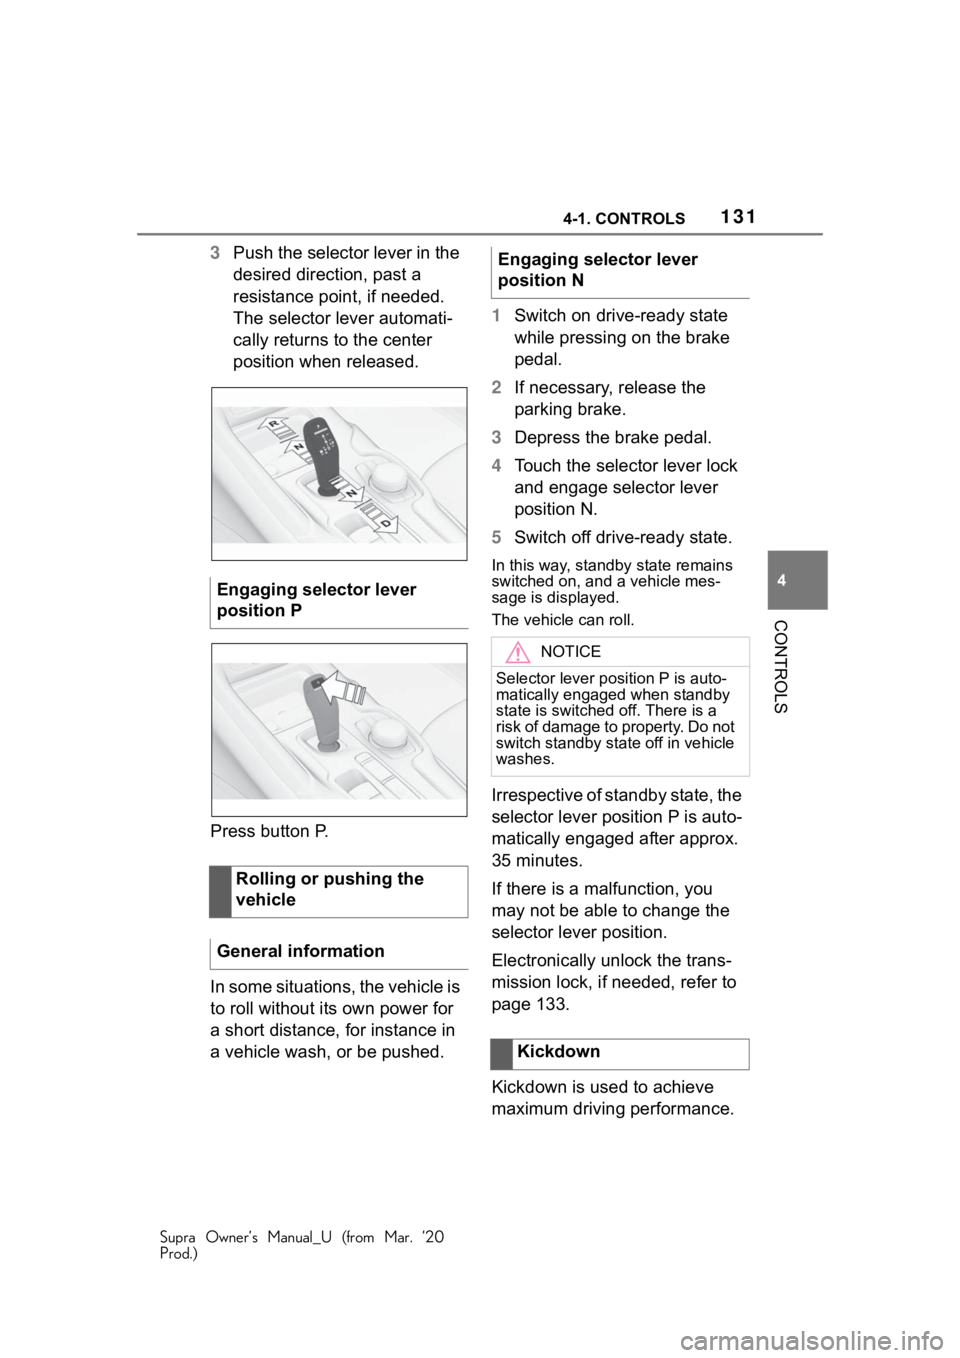
3 Push the selector lever in the
desired direction, past a
resistance point, if needed.
The selector lever automati-
cally returns to the center
position when released.
Press button P.
In some situations, the vehicle is
to roll without its own power for
a short distance, for instance in
a vehicle wash, or be pushed. 1
Switch on drive-ready state
while pressing on the brake
pedal.
2 If necessary, release the
parking brake.
3 Depress the brake pedal.
4 Touch the selector lever lock
and engage selector lever
position N.
5 Switch off drive-ready state.
In this way, standby state remains
switched on, and a vehicle mes-
sage is displayed.
The vehicle can roll.
Irrespective of standby state, the
selector lever position P is auto-
matically engaged after approx.
35 minutes.
If there is a malfunction, you
may not be able to change the
selector lever position.
Electronically unlock the trans-
mission lock, if needed, refer to
page 133.
Kickdown is used to achieve
maximum driving performance.
Engaging selector lever
position P
Rolling or pushing the
vehicle
General information
Engaging selector lever
position N
NOTICE
Selector lever position P is auto-
matically engaged when standby
state is switched off. There is a
risk of damage to property. Do not
switch standby state off in vehicle
washes.
Kickdown
Page 149 of 364
1494-1. CONTROLS
Supra Owner’s Manual_U (from Mar. ’20
Prod.)
4
CONTROLS
If necessary, the corresponding
menu will open on the Control
Display.
Items displayed may differ
depending on the specifications
of the vehicle.
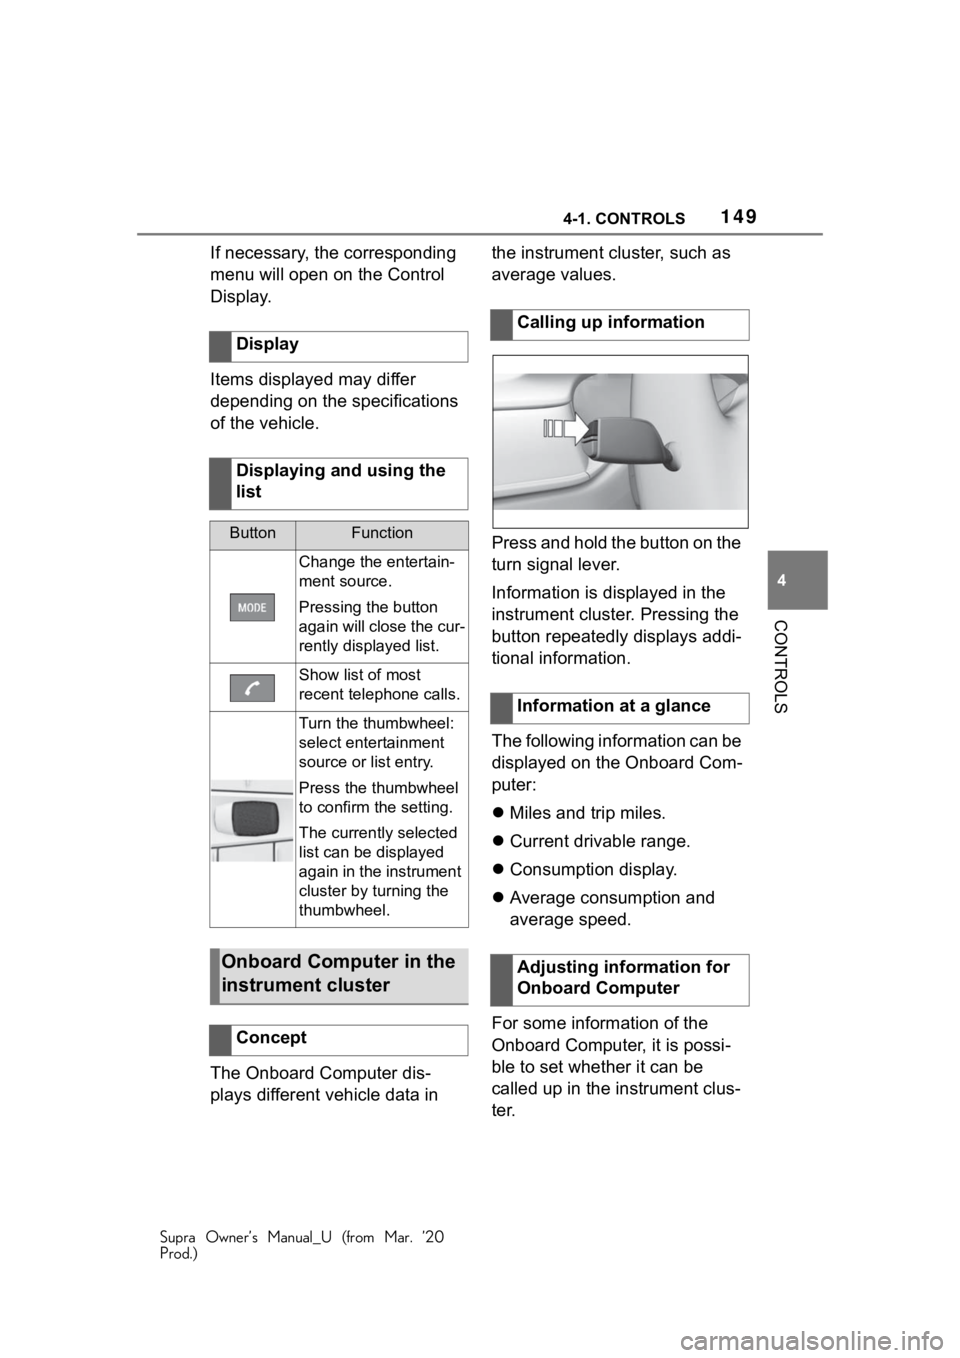
The Onboard Computer dis-
plays different vehicle data in the instrument cluster, such as
average values.
Press and hold the button on the
turn signal lever.
Information is displayed in the
instrument cluster. Pressing the
button repeatedly displays addi-
tional information.
The following information can be
displayed on the Onboard Com-
puter:
Miles and trip miles.
Current drivable range.
Consumption display.
Average consumption and
average speed.
For some information of the
Onboard Computer, it is possi-
ble to set whether it can be
called up in the instrument clus-
ter.
Display
Displaying and using the
list
ButtonFunction
Change the entertain-
ment source.
Pressing the button
again will close the cur-
rently displayed list.
Show list of most
recent telephone calls.
Turn the thumbwheel:
select entertainment
source or list entry.
Press the thumbwheel
to confirm the setting.
The currently selected
list can be displayed
again in the instrument
cluster by turning the
thumbwheel.
Onboard Computer in the
instrument cluster
Concept
Calling up information
Information at a glance
Adjusting information for
Onboard Computer
Page 160 of 364
1604-1. CONTROLS
Supra Owner’s Manual_U (from Mar. ’20
Prod.)
The Automatic high-beam
detects other traffic participants
early on and automatically
switches the high beams on or
off depending on the traffic situ-
ation.
The Automatic high-beam
ensures that the high beams are
switched on, whenever the traf-
fic situation allows. In the low
speed range, the high beams
are not switched on by the sys-
tem.
The system responds to light
from oncoming traffic and traffic
driving ahead of you, and to
ambient lighting, for instance in
towns and cities.
The high beams can be
switched on and off manually at
any time.
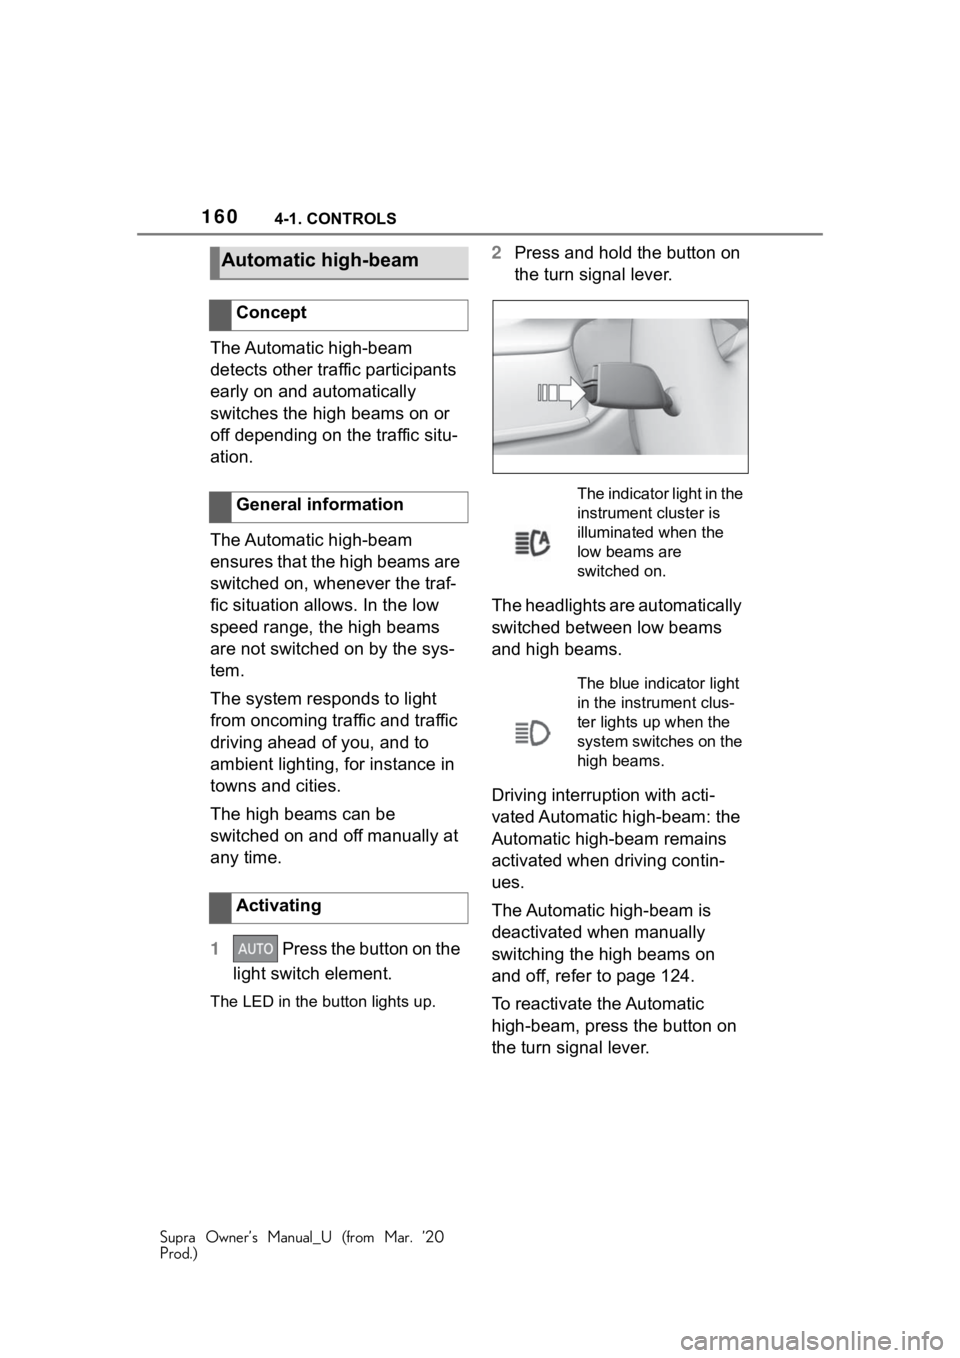
1 Press the button on the
light switch element.
The LED in the button lights up.
2 Press and hold the button on
the turn signal lever.
The headlights are automatically
switched between low beams
and high beams.
Driving interruption with acti-
vated Automatic high-beam: the
Automatic high-beam remains
activated when driving contin-
ues.
The Automatic high-beam is
deactivated when manually
switching the high beams on
and off, refer to page 124.
To reactivate the Automatic
high-beam, press the button on
the turn signal lever.Automatic high-beam
Concept
General information
Activating
The indicator light in the
instrument cluster is
illuminated when the
low beams are
switched on.
The blue indicator light
in the instrument clus-
ter lights up when the
system switches on the
high beams.