sensor TOYOTA TUNDRA 2015 2.G Owners Manual
[x] Cancel search | Manufacturer: TOYOTA, Model Year: 2015, Model line: TUNDRA, Model: TOYOTA TUNDRA 2015 2.GPages: 576, PDF Size: 9.71 MB
Page 36 of 576

361-1. For safe use
CAUTION
■When children are in the vehicle
Do not allow children to play with the seat belt. If the seat belt becomes
twisted around a child’s neck, it may lead to choking or other serious injuries
that could result in death.
If this occurs and the buckle cannot be unfastened, scissors should be used
to cut the belt.
■ Seat belt pretensioners
● Do not place anything, such as a cushion, on the front passenger’s seat.
Doing so will disperse the passenger’s weight, which prevents the sensor
from detecting the passenger’s weight properly. As a result, the seat belt
pretensioner for the front passenger’s seat may not activate in the event of
a collision.
● If the pretensioner has activated, the SRS warning light will come on. In
that case, the seat belt cannot be used again and must be replaced at
your Toyota dealer.
■ Adjustable shoulder anchor (D ouble Cab and CrewMax models)
Always make sure the shoulder belt is positioned across the center of your
shoulder. The belt should be kept away from your neck, but not falling off
your shoulder. Failure to do so could reduce the amount of protection in an
accident and cause death or serious injuries in the event of a sudden stop,
sudden swerve or an accident. ( P. 33)
■ Seat belt damage and wear
● Do not damage the seat belts by allowing the belt, plate, or buckle to be
jammed in the door.
● Inspect the seat belt system periodically. Check for cuts, fraying, and loose
parts. Do not use a damaged seat belt until it is replaced. Damaged seat
belts cannot protect an occupant from death or serious injury.
● Ensure that the belt and plate are locked and the belt is not twisted.
If the seat belt does not function correctly, immediately contact your Toyota
dealer.
● Replace the seat assembly, including the belts, if your vehicle has been
involved in a serious accident, even if there is no obvious damage.
● Do not attempt to install, remove, modify, disassemble or dispose of the
seat belts. Have any necessary repairs carried out by your Toyota dealer.
Inappropriate handling of the pretensioner may prevent it from operating
properly, resulting in death or serious injury.
Page 41 of 576

411-1. For safe use
1
For safety and security
Your vehicle is equipped with ADVANCED AIRBAGS designed based
on the US motor vehicle safety standards (FMVSS208). The airbag
sensor assembly (ECU) controls airbag deployment based on infor-
mation obtained from the sensors et c. shown in the system compo-
nents diagram above. This informat ion includes crash severity and
occupant information. As the airbags deploy, a chemical reaction in
the inflators quickly fills the airbag s with non-toxic gas to help restrain
the motion of the occupants.
Front bench type seat: The SRS airbags are designed to protect the
driver and right front passenger, and they are not designed to protect
an occupant in the front center seating position. Seat belt pretensioners
Knee airbags
“AIR BAG ON” and “AIR BAG
OFF” indicator lights
Front passenger airbag
Curtain shield airbags
Side airbags (front seats)
Front passenger occupant
classification system (ECU
and sensors)
SRS warning light
Driver airbag
Driver’s seat position sensor
Side impact sensors (rear)
(Double Cab and CrewMax
models)
Side impact sensors (front
door) (Double Cab and Crew-
Max models)
Side impact sensors (front)
(Regular Cab models)
Driver’s seat belt buckle
switch
Front passenger’s seat belt
buckle switch
Front impact sensors
Airbag sensor assembly
1
2
3
4
5
6
7
8
9
10
11
12
13
14
15
16
17
Page 45 of 576

451-1. For safe use
1
For safety and security
CAUTION
■SRS airbag precautions
● Do not use seat accessories which cover the parts where the SRS side
airbags inflate as they may interfere with inflation of the airbags. Such
accessories may prevent the side airbags from activating correctly, disable
the system or cause the side airbags to inflate accidentally, resulting in
death or serious injury.
● Do not strike or apply significant levels of force to the area of the SRS air-
bag components.
Doing so can cause the SRS airbags to malfunction.
● Do not touch any of the component parts immediately after the SRS air-
bags have deployed (inflated) as they may be hot.
● If breathing becomes difficult after the SRS airbags have deployed, open a
door or window to allow fresh air in, or leave the vehicle if it is safe to do
so. Wash off any residue as soon as possible to prevent skin irritation.
● If the areas where the SRS airbags are stored, such as the steering wheel
pad and front and rear pillar garnishes, are damaged or cracked, have
them replaced by your Toyota dealer.
● Do not place anything, such as a cushion, on the front passenger’s seat.
Doing so will disperse the passenger’s weight, which prevents the sensor
from detecting the passenger’s weight properly. As a result, the SRS front
airbags for the front passenger may not deploy in the event of a collision.
■ Modification and disposal of SRS airbag system components
Do not dispose of your vehicle or per form any of the following modifications
without consulting your Toyota dealer. The SRS airbags may malfunction or
deploy (inflate) accidentally, causing death or serious injury.
● Installation, removal, disassembly and repair of the SRS airbags
● Repairs, modifications, removal or replacement of the steering wheel,
instrument panel, dashboard, seats or seat upholstery, front, side and rear
pillars or roof side rails
● Repairs or modifications of the front fender, front bumper, or side of the
occupant compartment
● Installation of a grille guard (bull bars, kangaroo bar, etc.), snow plows,
winches or roof luggage carrier
● Modifications to the vehicle’s suspension system
● Installation of electronic devices such as mobile two-way radios and CD
players
● Modifications to your vehicle for a person with a physical disability
Page 80 of 576
801-2. Theft deterrent system
Alar m
The alarm uses light and sound to give an alert when an intrusion is
detected.
The alarm is triggered in the following situations when the alarm is
set:
●A locked door is unlocked or opene d in any way other than using a
key or wireless remote control. (The doors will lock again automati-
cally.)
● The hood is opened.
● Vehicles with the glass breakage sensor: The side windows are
tapped or broken.
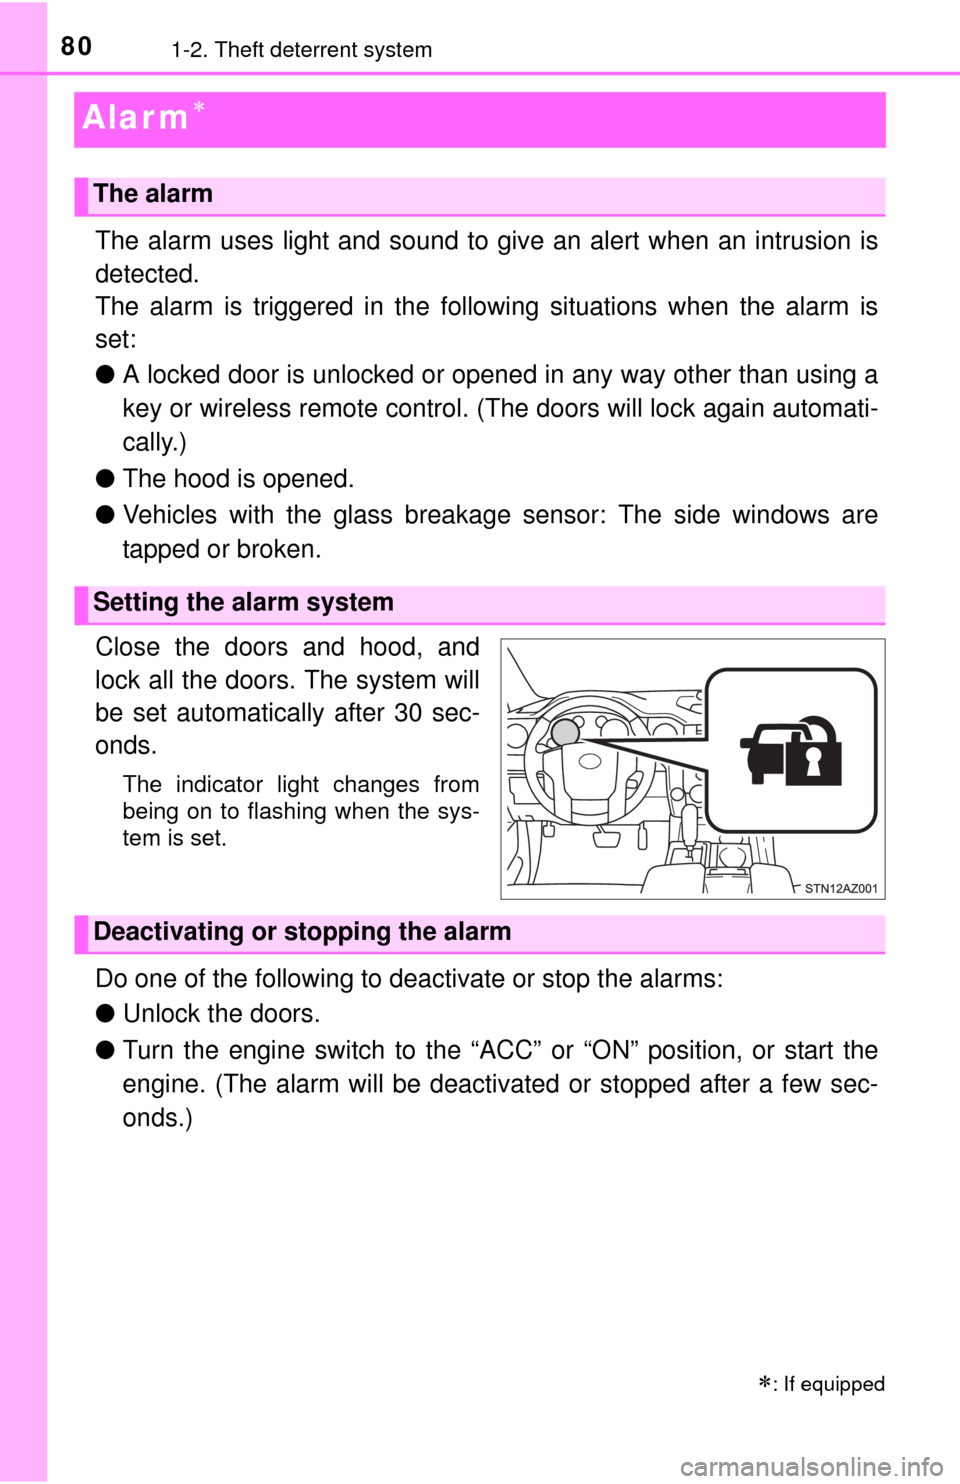
Close the doors and hood, and
lock all the doors. The system will
be set automatically after 30 sec-
onds.
The indicator light changes from
being on to flashing when the sys-
tem is set.
Do one of the following to d eactivate or stop the alarms:
● Unlock the doors.
● Turn the engine switch to the “ACC” or “ON” position, or start the
engine. (The alarm will be deactivated or stopped after a few sec-
onds.)
: If equipped
The alarm
Setting the alarm system
Deactivating or stopping the alarm
Page 128 of 576
1283-4. Adjusting the steering wheel and mirrors
Auto anti-glare inside rear view mirror
Responding to the level of brightness of the headlights of vehicles
behind, the reflected light is automatically reduced.
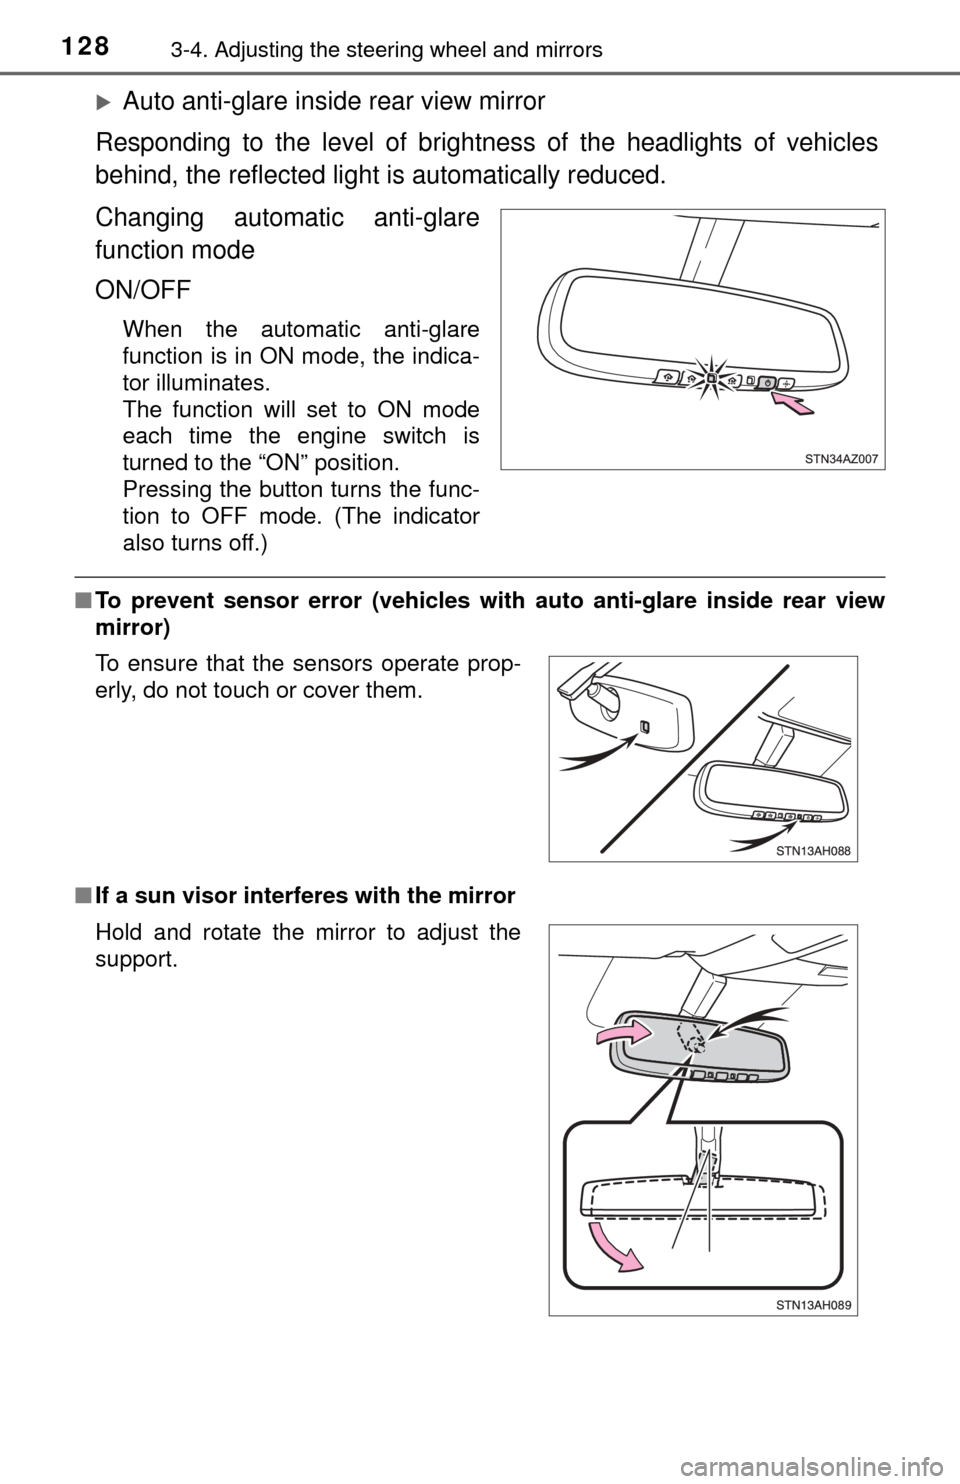
Changing automatic anti-glare
function mode
ON/OFF
When the automatic anti-glare
function is in ON mode, the indica-
tor illuminates.
The function will set to ON mode
each time the engine switch is
turned to the “ON” position.
Pressing the button turns the func-
tion to OFF mode. (The indicator
also turns off.)
■ To prevent sensor error (vehicles with auto anti-glare inside rear view
mirror)
■ If a sun visor interferes with the mirror
To ensure that the sensors operate prop-
erly, do not touch or cover them.
Hold and rotate the mirror to adjust the
support.
Page 190 of 576
1904-3. Operating the lights and wipers
■Daytime running light system (if equipped)
●To make your vehicle more visible to other drivers, the daytime running
lights turn on automatically whenever the engine is started and the parking
brake is released. Daytime running lights are not designed for use at night.
● Compared to turning on the headlights, the daytime running light system
offers greater durability and consumes less electricity, so it can help improve
fuel economy.
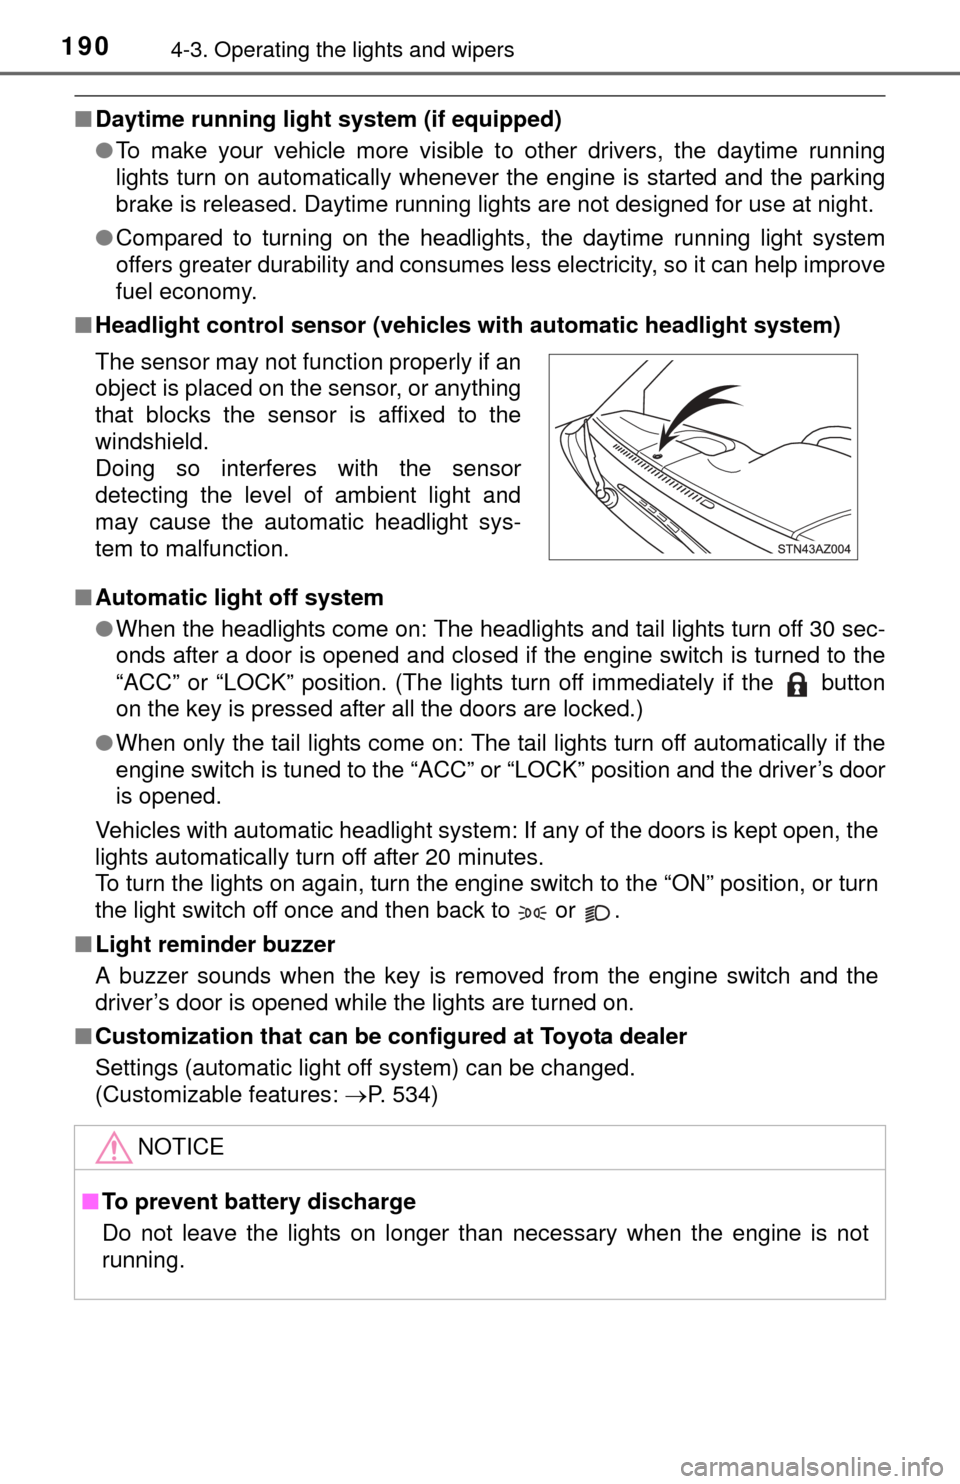
■ Headlight control sensor (vehicl es with automatic headlight system)
■ Automatic light off system
●When the headlights come on: The headlights and tail lights turn off 30 sec-
onds after a door is opened and closed if the engine switch is turned to the
“ACC” or “LOCK” position. (The lights turn off immediately if the button
on the key is pressed after all the doors are locked.)
● When only the tail lights come on: The tail lights turn off automatically if the
engine switch is tuned to the “ACC” or “LOCK” position and the driver’s door
is opened.
Vehicles with automatic headlight system: If any of the doors is kept open, the
lights automatically turn off after 20 minutes.
To turn the lights on again, turn the engine switch to the “ON” position, or turn
the light switch off once and then back to or .
■ Light reminder buzzer
A buzzer sounds when the key is removed from the engine switch and the
driver’s door is opened while the lights are turned on.
■ Customization that can be co nfigured at Toyota dealer
Settings (automatic light off system) can be changed.
(Customizable features: P. 534)
The sensor may not function properly if an
object is placed on the sensor, or anything
that blocks the sensor is affixed to the
windshield.
Doing so interferes with the sensor
detecting the level of ambient light and
may cause the automatic headlight sys-
tem to malfunction.
NOTICE
■
To prevent battery discharge
Do not leave the lights on longer than necessary when the engine is not
running.
Page 202 of 576
2024-5. Using the driving support systems
Intuitive parking assist
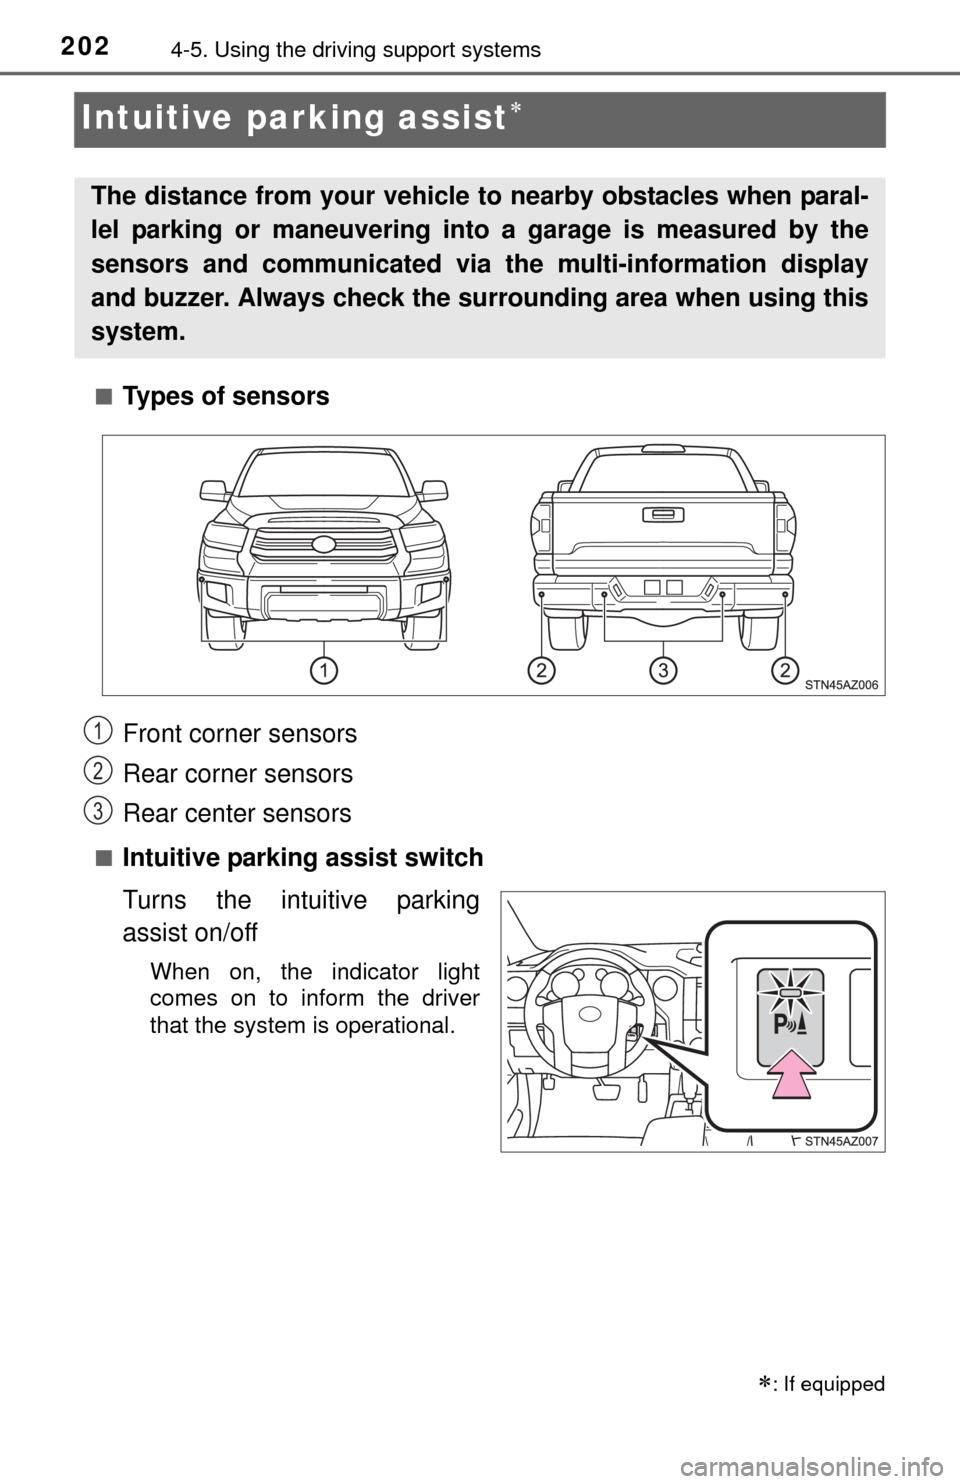
■Types of sensors
■Intuitive parking assist switch
Turns the intuitive parking
assist on/off
When on, the indicator light
comes on to inform the driver
that the system is operational.
: If equipped
The distance from your vehicle to nearby obstacles when paral-
lel parking or maneuvering into a garage is measured by the
sensors and communicated via the multi-information display
and buzzer. Always check the su rrounding area when using this
system.
Front corner sensors
Rear corner sensors
Rear center sensors1
2
3
Page 203 of 576
2034-5. Using the driving support systems
4
Driving
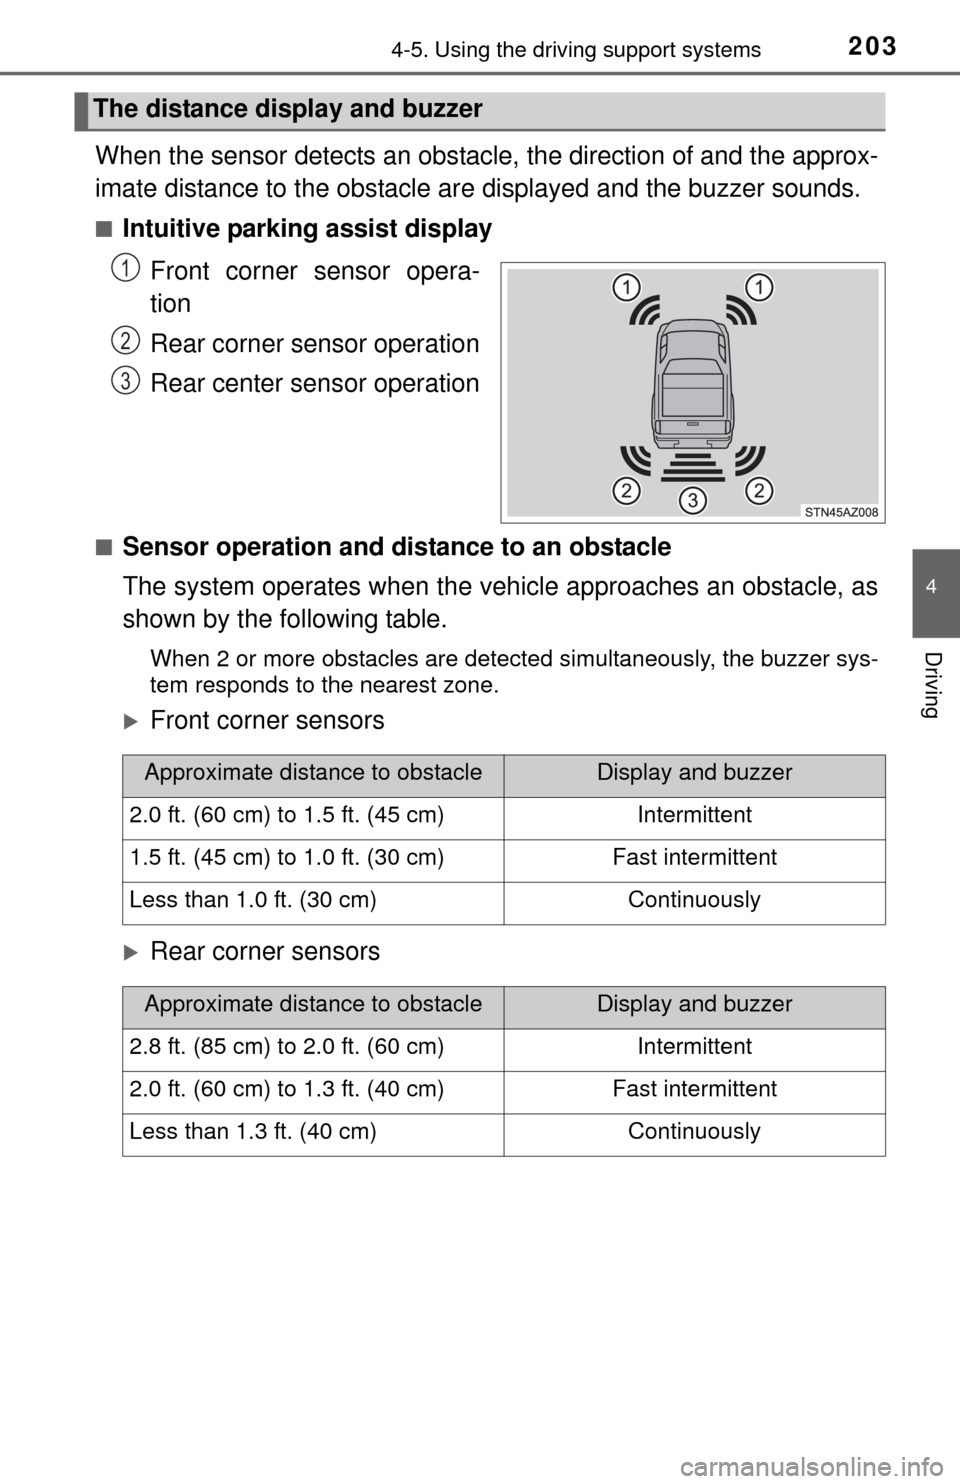
When the sensor detects an obstacle, the direction of and the approx-
imate distance to the obstacle ar e displayed and the buzzer sounds.
■Intuitive parking assist display
Front corner sensor opera-
tion
Rear corner sensor operation
Rear center sensor operation
■Sensor operation and distance to an obstacle
The system operates when the vehicle approaches an obstacle, as
shown by the following table.
When 2 or more obstacles are detected simultaneously, the buzzer sys-
tem responds to the nearest zone.
Front corner sensors
Rear corner sensors
The distance display and buzzer
1
2
3
Approximate distance to obstacleDisplay and buzzer
2.0 ft. (60 cm) to 1.5 ft. (45 cm)Intermittent
1.5 ft. (45 cm) to 1.0 ft. (30 cm)Fast intermittent
Less than 1.0 ft. (30 cm)Continuously
Approximate distance to obstacleDisplay and buzzer
2.8 ft. (85 cm) to 2.0 ft. (60 cm)Intermittent
2.0 ft. (60 cm) to 1.3 ft. (40 cm)Fast intermittent
Less than 1.3 ft. (40 cm)Continuously
Page 204 of 576
2044-5. Using the driving support systems
Rear center sensor
■When multiple obstacles are de tected in front and behind the
vehicle at the same time
The buzzer will change in the following manner.
● If an obstacle has been detected within 1.5 ft. (45 cm) of the front
or 2.8 ft. (85 cm) in rear of the vehicle (a continuous buzzer is
sounding), and a new obstacle is de tected at the other end of the
vehicle, the buzzer will sound 7 times then 1 continuous buzzer.
● If an obstacle has been detected within 1.5 ft. (45 cm) of the front
or 2.8 ft. (85 cm) in rear of the vehicle (a continuous buzzer is
sounding), and a new obstacle is detected in the same way at the
other end of t he vehicle, the buzzer will sound 3 times then 1
continuous buzzer.
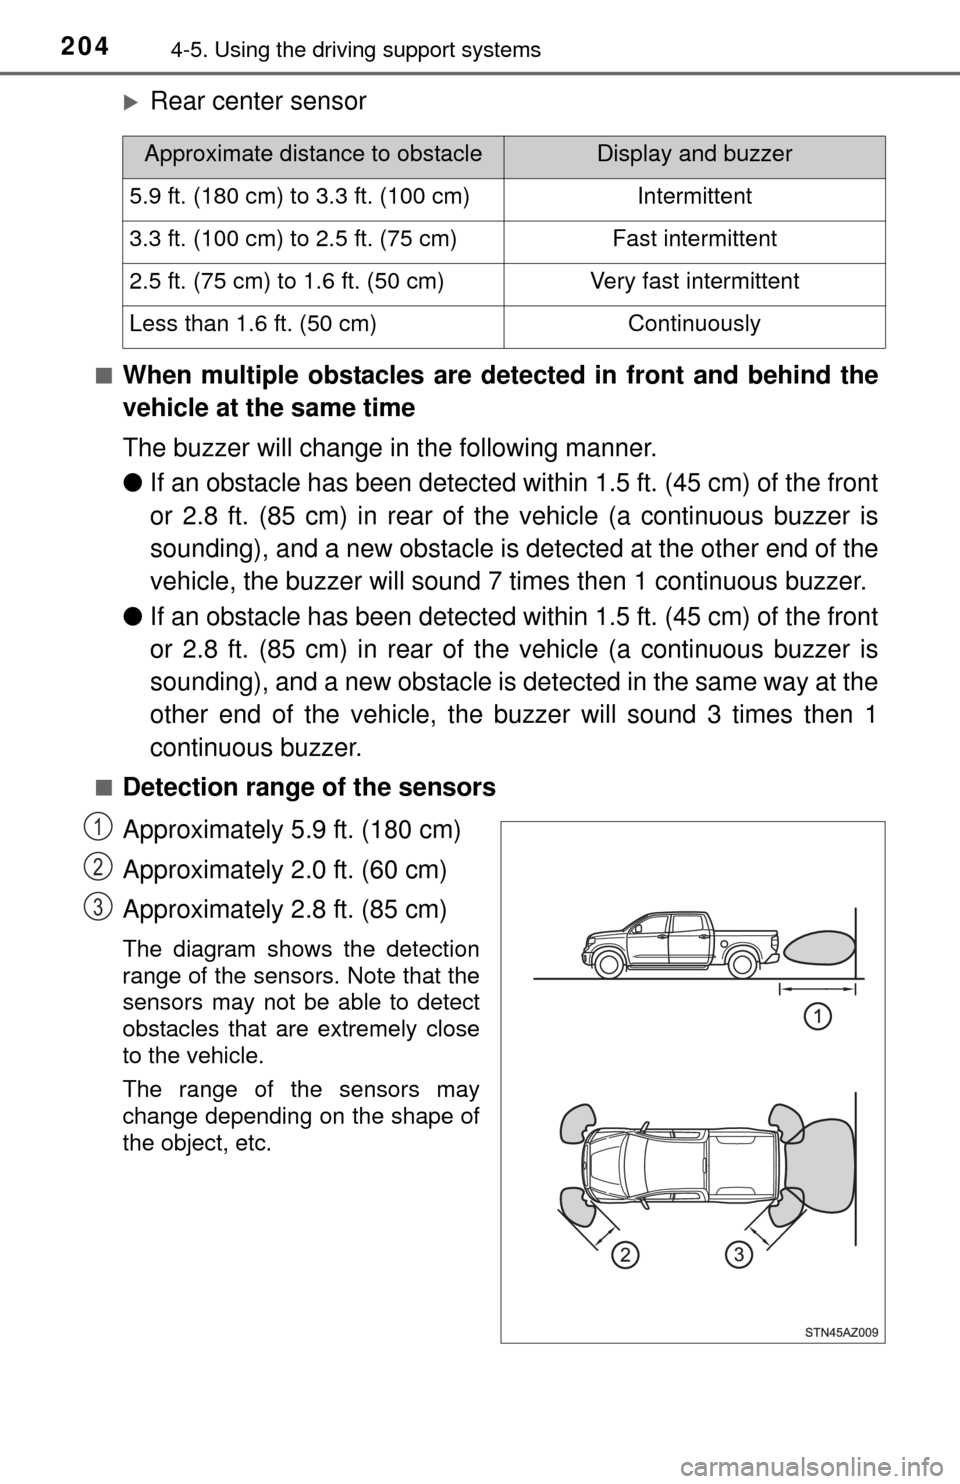
■Detection range of the sensors
Approximately 5.9 ft. (180 cm)
Approximately 2.0 ft. (60 cm)
Approximately 2.8 ft. (85 cm)
The diagram shows the detection
range of the sensors. Note that the
sensors may not be able to detect
obstacles that are extremely close
to the vehicle.
The range of the sensors may
change depending on the shape of
the object, etc.
Approximate distance to obstacleDisplay and buzzer
5.9 ft. (180 cm) to 3.3 ft. (100 cm)Intermittent
3.3 ft. (100 cm) to 2.5 ft. (75 cm)Fast intermittent
2.5 ft. (75 cm) to 1.6 ft. (50 cm)Very fast intermittent
Less than 1.6 ft. (50 cm)Continuously
1
2
3
Page 205 of 576

2054-5. Using the driving support systems
4
Driving
■The intuitive parking assist can be operated when
●Front corner sensors:
• The engine switch is in the “ON” position.
• The shift lever is in R.
• The shift lever is not in P or R and vehicle speed is less than about 6 mph
(10 km/h).
● Rear corner and rear center sensors:
• The engine switch is in the “ON” position.
• The shift lever is in R.
■ Sensor detection information
●The sensor’s detection areas are limited to the areas around the vehicle’s
front corner and rear bumpers.
● Certain vehicle conditions and the surrounding environment may affect the
ability of the sensor to correctly detect obstacles. Particular instances where
this may occur are listed below.
• There is dirt, snow or ice on the sensor. (Wiping the sensors will resolve
this problem.)
• The sensor is frozen. (Thawing the area will resolve this problem.)
• The sensor is covered in any way.
• The vehicle is leaning considerably to one side.
• On an extremely bumpy road, on an incline, on gravel, or on grass.
• The vicinity of the vehicle is noisy due to vehicle horns, motorcycle
engines, air brakes of large vehicles, or other loud noises producing ultra-
sonic waves.
• There is another vehicle equipped with parking assist sensors in the
vicinity.
• The sensor is coated with a sheet of spray or heavy rain.
• The vehicle is equipped with a fender pole or radio antenna.
• The bumper or sensor receives a strong impact.
• The vehicle is approaching a tall or curved curb.
• In harsh sunlight or intense cold weather.
• The area directly under the bumpers is not detected.
• If obstacles draw too close to the sensor.
• A non-genuine Toyota suspension (lowered suspension, etc.) is installed.
• People may not be detected if they are wearing certain types of clothing.
In addition to the examples above, there are instances in which, because of
their shape, signs and other objects may be judged by the sensor to be closer
than they are.