Wheel lock VAUXHALL CORSA F 2019 Owner's Guide
[x] Cancel search | Manufacturer: VAUXHALL, Model Year: 2019, Model line: CORSA F, Model: VAUXHALL CORSA F 2019Pages: 229, PDF Size: 6.72 MB
Page 131 of 229

Driving and operating129Brakes
The brake system comprises two
independent brake circuits.
If a brake circuit fails, the vehicle can
still be braked using the other brake
circuit. However, braking effect is
achieved only when the brake pedal
is depressed firmly. Considerably
more force is needed for this. The
braking distance is extended. Seek the assistance of a workshop before
continuing the journey.
When the engine is not running, the
support of the brake servo unit
disappears once the brake pedal has
been depressed once or twice.
Braking effect is not reduced, but
braking requires significantly greater
force. It is especially important to bear this in mind when being towed.
Control indicator R 3 77.
Antilock brake system
Antilock brake system (ABS)
prevents the wheels from locking.ABS starts to regulate brake pressure as soon as a wheel shows a tendency to lock. The vehicle remains
steerable, even during hard braking.
ABS control is made apparent
through a pulse in the brake pedal
and the noise of the regulation
process.
For optimum braking, keep the brake
pedal fully depressed throughout the
braking process, despite the fact that
the pedal is pulsating. Do not reduce
the pressure on the pedal.
After starting-off the system performs
a self-test which may be audible.
Control indicator u 3 78.
Adaptive brake light
During full braking, all three brake
lights flash for the duration of ABS
control.Fault9 Warning
If there is a fault in the ABS, the
wheels may be liable to lock due
to braking that is heavier than
normal. The advantages of ABS are no longer available. During
hard braking, the vehicle can no longer be steered and may
swerve.
Have the cause of the fault remedied
by a workshop.
Page 135 of 229

Driving and operating133system is necessary. This can occur
e.g. when turning the steering wheel
for one rotation with ignition switched
off. In this case, switch on ignition and
turn steering wheel once from lock to
lock.
If control indicators c and b do not
extinguish after calibration, seek the
assistance of a workshop.Driver assistance
systems9 Warning
Driver assistance systems are
developed to support the driver
and not to replace the driver's
attention.
The driver accepts full
responsibility when driving the
vehicle.
When using driver assistance
systems, always take care
regarding the current traffic
situation.
Cruise control
The cruise control can store and
maintain speeds of approx. 20 mph to maximum vehicle speed. Deviations
from the stored speeds may occur
when driving uphill or downhill.
For safety reasons, the cruise control cannot be activated until the brake
pedal has been operated once.
Activating in first gear is not possible.
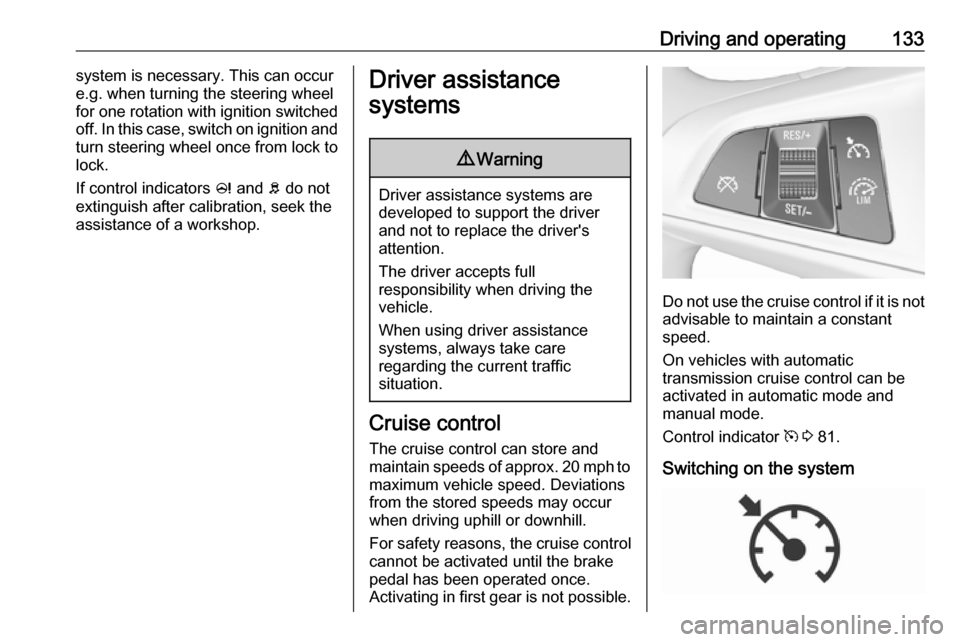
Do not use the cruise control if it is not advisable to maintain a constant
speed.
On vehicles with automatic
transmission cruise control can be
activated in automatic mode and
manual mode.
Control indicator m 3 81.
Switching on the system
Page 140 of 229

138Driving and operatingGeneral information9Warning
Forward collision alert is just a
warning system and does not
apply the brakes. When
approaching a vehicle ahead too
rapidly, it may not provide you
enough time to avoid a collision.
The driver accepts full
responsibility for the appropriate
following distance based on traffic, weather and visibility conditions.
The complete attention of the
driver is always required while
driving. The driver must always be
ready to take action and apply the
brakes.
System limitations
The system is designed to warn of vehicles only, but may react also to
other objects.
In the following cases, forward
collision alert may not detect a vehicle ahead or sensor performance is
limited:
● on winding roads
● when weather limits visibility, e.g.
fog, rain, or snow
● when the sensor is blocked by snow, ice, slush, mud, dirt,
windscreen damage or affected
by foreign items, e.g. stickers
Following distance indication
The following distance indication
displays the distance to a preceding
moving vehicle. The front camera in
the windscreen is used to detect the
distance of a vehicle directly ahead in
the vehicle's path. It is active at
speeds above 25 mph.
When a preceding vehicle is detected
ahead, the distance is indicated in
seconds, displayed on a page in the
Driver Information Centre 3 81 . Press
MENU on the stalk to select ? and
turn the adjuster wheel to choose following distance indication page.
The minimum indicated distance is 0.5 seconds.
If there is no vehicle ahead or the
vehicle ahead is out of range, two
dashes will be displayed: -.- sec.
Page 185 of 229

Vehicle care183Tyres age, even if they are not used.
We recommend tyre replacement
every six years.
Changing tyre and wheel
size
If tyres of a different size than thosefitted at the factory are used, it may be
necessary to reprogramme the
nominal tyre pressure and to make
other vehicle modifications.
After converting to a different tyre
size, have the label with tyre
pressures replaced.
Tyre pressure monitoring system
3 178.Caution
When converting to wheels with
14 inch diameter, the ground
clearance will be reduced. This
must be considered when passing
over obstacles.
9 Warning
The use of unsuitable tyres or
wheels may lead to accidents and will invalidate the vehicle
operating permit.
Wheel covers
Wheel covers and tyres that are
factory approved for the respective
vehicle and comply with all of the
relevant wheel and tyre combination
requirements must be used.
If the wheel covers and tyres used are
not factory approved, the tyres must
not have a rim protection ridge.
Wheel covers must not impair brake
cooling.
9 Warning
Use of unsuitable tyres or wheel
covers could lead to sudden
pressure loss and thereby
accidents.
Steel wheels: When using locking
wheel nuts don't attach wheel covers.
Tyre chains
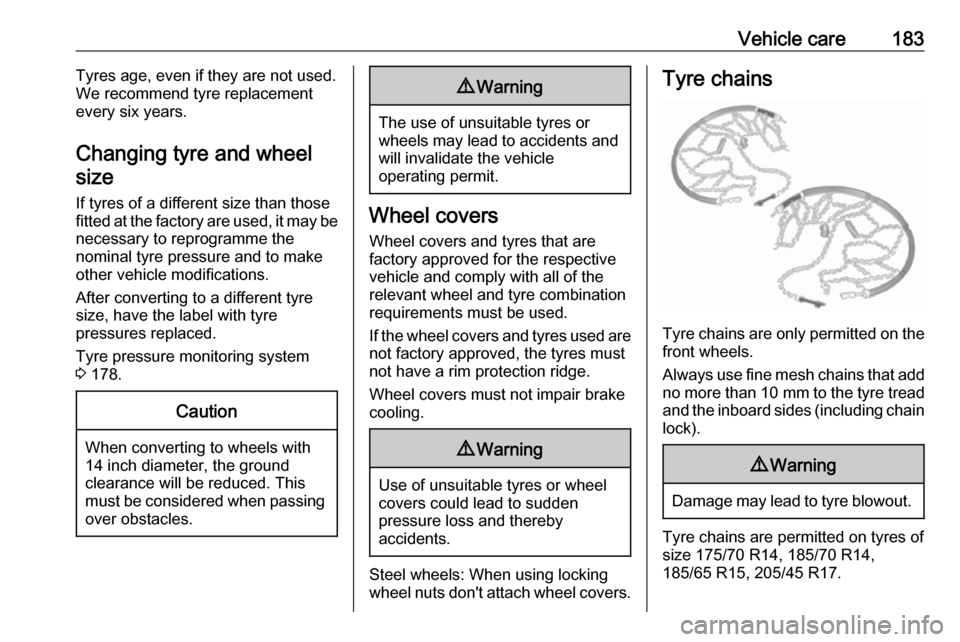
Tyre chains are only permitted on the
front wheels.
Always use fine mesh chains that add no more than 10 mm to the tyre tread
and the inboard sides (including chain lock).
9 Warning
Damage may lead to tyre blowout.
Tyre chains are permitted on tyres of
size 175/70 R14, 185/70 R14,
185/65 R15, 205/45 R17.
Page 193 of 229

Vehicle care191●If the ground on which the vehicle
is standing is soft, a solid board
(max. 1 cm thick) should be
placed under the jack.
● Take heavy objects out of the vehicle before jacking up.
● No people or animals may be in the vehicle when it is jacked-up.
● Never crawl under a jacked-up vehicle.
● Do not start the vehicle when it is
raised on the jack.
● Before screwing in the wheel bolts, clean them and lightly coat
the taper of each wheel bolt with
commercially available grease.9 Warning
Do not grease the thread of the
wheel bolt.
1. Steel wheels:
Pull off the wheel cover.
Alloy wheels with bolt caps Disengage wheel bolt caps with a
screwdriver and remove. To
protect the wheel, place a soft
cloth between the screwdriver
and the alloy wheel.
2. Install the wheel wrench ensuring that it locates securely and loosen
each wheel bolt by half a turn.
The wheels might be protected by
locking wheel bolts. To loosen
these specific bolts, first attach
the adapter for the locking wheel
bolts onto the head of the bolt
before installing the wheel
wrench. The adapter is located in
the glovebox.
3. Ensure the jack is correctly positioned under the relevant
vehicle jacking point.
On versions with sill panels or
retrofitted sill panels, no jack may
be used. The vehicle may be
damaged.
Page 194 of 229

192Vehicle care
4. Set the jack to the necessaryheight. Position it directly below
the jacking point in a manner that
prevents it from slipping.
Attach jack handle and with the
jack correctly aligned rotate handle until wheel is clear of theground.
5. Unscrew the wheel bolts.
6. Change the wheel.
7. Screw on the wheel bolts.
8. Lower vehicle.
9. Install the wheel wrench ensuring that it is securely located and
tighten each bolt in a crosswise
sequence. Tightening torque is
110 Nm.
10. Align the valve hole in the wheel cover of the steel wheel with the
tyre valve before installing.
Install wheel bolt caps or centre
cap on alloy wheel.
11. Install vehicle jacking point cover.
12. Stow and secure the replaced wheel and the vehicle tools
3 175.
Stow the adapter for the locking
wheel bolts 3 53.
13. Check the tyre pressure of the installed tyre and the wheel bolt
torque as soon as possible.Spare wheel with directional tyre
If possible, fit directional tyres such
that they roll in the direction of travel.
The rolling direction is indicated by a
symbol (e.g. an arrow) on the
sidewall.
The following applies to tyres fitted
opposing the rolling direction:
● Driveability may be affected. Have the defective tyre renewed
or repaired as soon as possible
and fit it instead of the spare
wheel.
● Drive particularly carefully on wet
and snow-covered road
surfaces.
Page 197 of 229

Vehicle care195
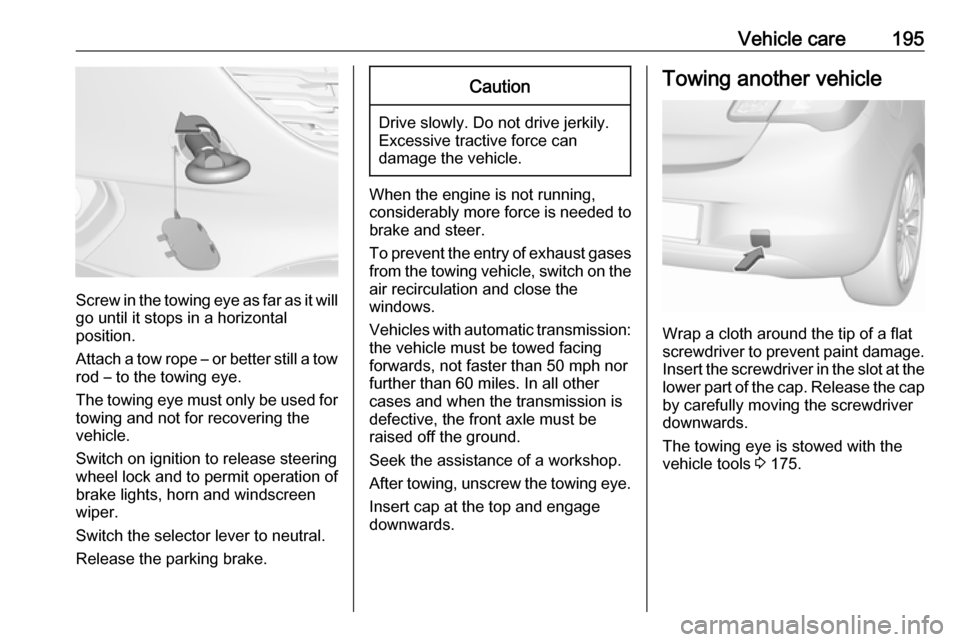
Screw in the towing eye as far as it will
go until it stops in a horizontal
position.
Attach a tow rope – or better still a tow
rod – to the towing eye.
The towing eye must only be used for towing and not for recovering the
vehicle.
Switch on ignition to release steering
wheel lock and to permit operation of
brake lights, horn and windscreen
wiper.
Switch the selector lever to neutral.
Release the parking brake.
Caution
Drive slowly. Do not drive jerkily.
Excessive tractive force can
damage the vehicle.
When the engine is not running,
considerably more force is needed to
brake and steer.
To prevent the entry of exhaust gases from the towing vehicle, switch on the
air recirculation and close the
windows.
Vehicles with automatic transmission: the vehicle must be towed facing
forwards, not faster than 50 mph nor
further than 60 miles. In all other
cases and when the transmission is
defective, the front axle must be
raised off the ground.
Seek the assistance of a workshop. After towing, unscrew the towing eye.
Insert cap at the top and engage
downwards.
Towing another vehicle
Wrap a cloth around the tip of a flat
screwdriver to prevent paint damage. Insert the screwdriver in the slot at the
lower part of the cap. Release the cap by carefully moving the screwdriver
downwards.
The towing eye is stowed with the
vehicle tools 3 175.
Page 224 of 229

222IndexAAccessories and vehicle modifications .......................... 154
Adjustable air vents ...................115
Airbag and belt tensioners ...........76
Airbag deactivation ................45, 77
Airbag label................................... 40 Airbag system .............................. 40
Air conditioning regular operation ................................ 116
Air conditioning system .............. 109
Air intake .................................... 116
Air vents...................................... 115
Antilock brake system ................ 129
Antilock brake system (ABS) .......78
Anti-theft alarm system ................25
Anti-theft locking system .............. 25
Appearance care ........................196
Ashtrays ....................................... 68
Automatic anti-dazzle ..................28
Automatic light control .................99
Automatic locking ........................23
Automatic transmission .............125
Autostop ............................... 80, 120
B Battery discharge protection ......106
Battery voltage ............................. 90
Belts.............................................. 37
Bonnet ....................................... 156Brake and clutch fluid.................201
Brake and clutch system .............77
Brake assist ............................... 130
Brake fluid .................................. 160
Brakes ............................... 129, 160
Breakdown.................................. 194
Bulb replacement ....................... 162
C Capacities .................................. 210
Catalytic converter .....................124
Central locking system ................21
Centre high-mounted brake light 169
Changing tyre and wheel size ...183
Charging system .......................... 77
Child locks ................................... 23
Child restraint installation locations ................................... 50
Child restraints.............................. 46
Child restraint systems ................46
Cigarette lighter ........................... 68
City mode ................................... 132
Climate control ............................. 15
Climate control systems .............108
Clock ............................................ 66
Code ............................................. 87
Control indicators.......................... 73
Control of the vehicle .................117
Controls ........................................ 62
Convex shape .............................. 27
Page 227 of 229

225Roof load...................................... 59
Roof rack ..................................... 59
S Safety belts ................................... 37
Seat adjustment ....................... 7, 34
Seat belt ........................................ 8
Seat belt reminder .......................76
Seat belts ..................................... 37
Seat folding .................................. 35
Seat heating ................................. 36
Seat position ................................ 33
Selector lever ............................. 125
Service ....................................... 116
Service display ............................ 72
Service information ....................200
Service vehicle soon .................... 77
Side airbag system ......................44
Sidelights ...................................... 98
Side turn lights ........................... 169
Software acknowledgement .......216
Spare wheel ............................... 190
Speed limiter......................... 81, 135
Speedometer ............................... 69
Starting and operating ................118
Starting off ................................... 16
Starting the engine ....................119
Steering wheel adjustment ......9, 62
Steering wheel controls ...............62
Stop-start system........................ 120Storage ......................................... 53
Storage compartments .................53
Sun visors .................................... 31
Symbols ......................................... 4
T
Tachometer ................................. 70
Tail lights ................................... 167
Three-point seat belt .................... 38
Tools .......................................... 175
Towing ........................................ 194
Towing another vehicle .............195
Towing the vehicle .....................194
Traction Control system ............. 131
Traffic sign assistant .............81, 144
Transmission ............................... 16
Transmission display .................125
Tread depth ............................... 182
Trip odometer .............................. 69
Turn lights ............................ 75, 102
Tyre chains ................................ 183
Tyre designations ......................177
Tyre pressure ............................ 177
Tyre pressure monitoring system ............................... 79, 178
Tyre pressures ........................... 212
Tyre repair kit ............................. 184
U Underseat storage .......................55
Upholstery .................................. 198Uplevel display............................. 81
Using this manual ..........................3
V Vehicle battery ........................... 160
Vehicle checks............................ 156
Vehicle data ................................ 205
Vehicle data recording and privacy ..................................... 218
Vehicle detected ahead ................81
Vehicle dimensions .................... 210
Vehicle Identification Number ....203
Vehicle jack ................................ 175
Vehicle messages .......................87
Vehicle personalisation ...............90
Vehicle security ............................ 25
Vehicle specific data ......................3
Vehicle storage ........................... 155
Vehicle tools ............................... 175
Vehicle unlocking ........................... 6 Ventilation ................................... 108
W
Warning chimes ........................... 89
Warning lights ............................... 69
Warning triangle .......................... 58
Washer and wiper systems .........14
Washer fluid ............................... 159
Wheel changing .........................189
Wheel covers ............................. 183
Wheels and tyres .......................176