warning light VAUXHALL CROSSLAND X 2018.5 User Guide
[x] Cancel search | Manufacturer: VAUXHALL, Model Year: 2018.5, Model line: CROSSLAND X, Model: VAUXHALL CROSSLAND X 2018.5Pages: 259, PDF Size: 7.9 MB
Page 91 of 259

Instruments and controls89Illuminates when the engine is
running
Stop, switch off engine. Vehicle
battery is not charging. Engine
cooling may be interrupted. The
brake servo unit may cease to be
effective. Seek the assistance of a
workshop.
Malfunction indicator light
Z illuminates or flashes yellow.
Illuminates when the ignition is
switched on and extinguishes shortly
after the engine starts.
Illuminates when the engine is
running
Fault in the emission control system.
The permitted emission limits may be
exceeded.
Seek the assistance of a workshop
immediately.Flashes when the engine is
running
The engine management system has a fault that could lead to catalytic
converter damage. Ease up on the
accelerator until the flashing stops.
Seek the assistance of a workshop
immediately.
Service vehicle soon
H illuminates yellow.
Illuminates briefly when the ignition is
switched on.
May illuminate together with other
control indicators and a
corresponding message in the Driver
Information Centre.
Seek the assistance of a workshop
immediately.
Stop engine
Y illuminates red.
Illuminates briefly when the ignition is switched on.Illuminates together with other control
indicators, accompanied by a warning chime and a corresponding message
in the Driver Information Centre.
Stop engine immediately and seek
the assistance of a workshop.
System check
J illuminates yellow or red.
Illuminates yellow A minor engine fault has been
detected.
Illuminates red A major engine fault has been
detected.
Stop engine as soon as possible and
seek the assistance of a workshop.
Brake and clutch system
R illuminates red.
The brake and clutch fluid level is too low, when manual parking brake is
not applied 3 190.
Page 94 of 259

92Instruments and controlsIlluminates when the engine is
runningCaution
Engine lubrication may be
interrupted. This may result in
damage to the engine and / or
locking of the drive wheels.
1. Depress clutch.
2. Select neutral gear.
3. Move out of the flow of traffic as quickly as possible without
impeding other vehicles.
4. Switch off ignition.
9 Warning
When the engine is off,
considerably more force is needed
to brake and steer.
During an Autostop, the brake
servo unit will still be operational.
Do not remove key until vehicle is stationary, otherwise the steeringwheel lock could engage
unexpectedly.
Check oil level before seeking
assistance of a workshop 3 188.
Low fuel
o illuminates yellow.
Level in fuel tank is too low.
Refuelling 3 177.
Bleeding the diesel fuel system
3 191.
Autostop
D illuminates or flashes green.
Illuminates green
Engine is in an Autostop.
Flashes green
Autostop is temporarily unavailable,
or Autostop mode is invoked
automatically.
Stop-start system 3 135.
Exterior light
8 illuminates green.
The exterior lights are on 3 108.High beam
C illuminates blue.
Illuminated when high beam is on or
during headlight flash 3 109.
High beam assist
f illuminates green.
The high beam assist is activated,
see Adaptive forward lighting 3 110.
Low beam 9 illuminates green.
Illuminated when low beam is on.
Fog light
> illuminates green.
The front fog lights are on 3 112.
Rear fog light ø illuminates yellow.
The rear fog light is on 3 113.
Rain sensor < illuminates green.
Page 100 of 259
98Instruments and controlsHead-up display views:● vehicle speed
● speed limits by the traffic sign assistant
● set speed of speed limiter
● set speed of cruise control
● navigation information.
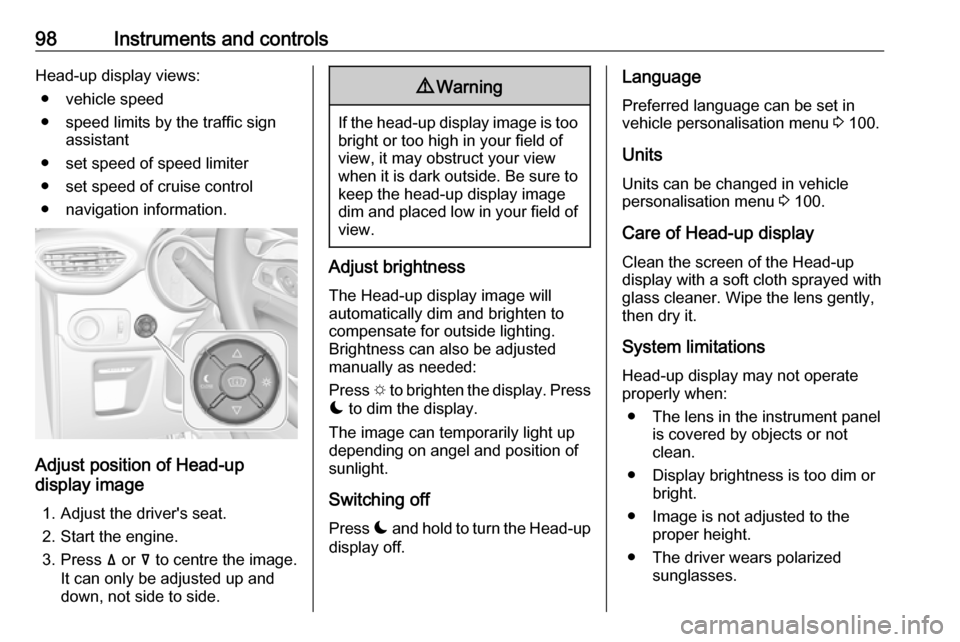
Adjust position of Head-up
display image
1. Adjust the driver's seat.
2. Start the engine.
3. Press ä or å to centre the image.
It can only be adjusted up and
down, not side to side.
9 Warning
If the head-up display image is too
bright or too high in your field of
view, it may obstruct your view
when it is dark outside. Be sure to keep the head-up display imagedim and placed low in your field of
view.
Adjust brightness
The Head-up display image will
automatically dim and brighten to
compensate for outside lighting.
Brightness can also be adjusted
manually as needed:
Press e to brighten the display. Press
æ to dim the display.
The image can temporarily light up
depending on angel and position of
sunlight.
Switching off
Press æ and hold to turn the Head-up
display off.
Language
Preferred language can be set in
vehicle personalisation menu 3 100.
Units
Units can be changed in vehicle
personalisation menu 3 100.
Care of Head-up display
Clean the screen of the Head-up
display with a soft cloth sprayed with
glass cleaner. Wipe the lens gently, then dry it.
System limitations Head-up display may not operate
properly when:
● The lens in the instrument panel is covered by objects or not
clean.
● Display brightness is too dim or bright.
● Image is not adjusted to the proper height.
● The driver wears polarized sunglasses.
Page 102 of 259
100Instruments and controls● If a warning message appears inthe Driver Information Centre.
● If the electronic key is not in the passenger compartment.
● If the parking assist detects an object.
● If an unintended lane change occurs.
● If the diesel particle filter has reached the maximum filling
level.
When the vehicle is parked and /
or the driver's door is opened
● With exterior lights on.
During an Autostop ● If the driver's door is opened.● If any condition for an autostart is
not fulfilled.
Battery voltage When the vehicle battery voltage isrunning low, a warning message will
appear in the Driver Information
Centre.When the vehicle is being driven, the
load reduction function temporarily
deactivates certain functions, such as
the air conditioning, the heated rear
screen, heated steering wheel, etc.
The deactivated functions are
reactivated automatically as soon as
conditions permit.Vehicle personalisation
The vehicle's behaviour can be
personalised by changing the settings in the Info Display.
Depending on vehicle equipment and
country-specific regulations some of the functions described below may
not be available.
Some functions are only displayed or
active when the engine is running.
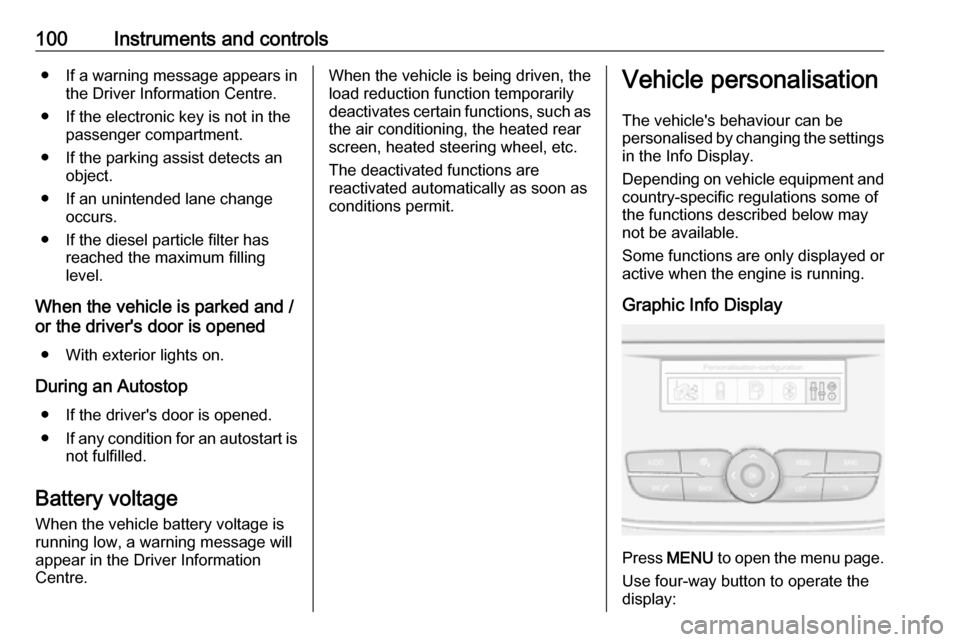
Graphic Info Display
Press MENU to open the menu page.
Use four-way button to operate the
display:
Page 105 of 259

Instruments and controls103Change language by touching the
respective entry.
Confirm with G.
Touch r repeatedly to exit the menu.
Vehicle settings
Press Í.
Select Vehicle settings .
In the corresponding submenus the
following settings can be changed:
● Headlights
Welcome lighting : Activates or
deactivates the function and
adjusts its duration.
Guide-me-home lighting :
Activates or deactivates the
function and adjusts its duration.
● Comfort
Mood lighting : Adjusts the
brightness of the ambient
lighting.
Rear wiper in reverse : Activates
or deactivates automatic
switching on of the rear window
wiper when reverse gear is
engaged.
● Vehicle access
Door unlock: boot only : Activates
or deactivates unlocking only the
tailgate when pressing T on the
remote control.
Door unlock: driver only :
Changes the configuration to unlock only the driver's door and
fuel filler flap or all doors, load
compartment and fuel filler flap
when pressing O on the remote
control.
● Safety
Driver attention warning :
Activates or deactivates the
driver drowsiness system.Driving functions
Press Í.
Select Driving functions .
In the corresponding submenus the
following settings can be changed:
● Park Assist : Activates advanced
park assist, a parking maneuver can be selected.
● Blind Spot Sensors : Activates or
deactivates side blind spot alert.
● Panoramic view system :
Activation/deactivation of the
function.
Page 110 of 259
108LightingLightingExterior lighting.......................... 108
Light switch .............................. 108
Automatic light control .............109
High beam ............................... 109
Headlight flash ......................... 109
Headlight range adjustment ....110
Daytime running lights .............110
Adaptive forward lighting .........110
Hazard warning flashers ..........111
Turn lights ................................ 112
Front fog lights ......................... 112
Rear fog light ........................... 113
Parking lights ........................... 113
Reversing lights .......................113
Misted light covers ...................113
Interior lighting ........................... 114
Instrument panel illumination control ..................................... 114
Interior lights ............................ 114
Reading lights .......................... 114
Sunvisor lights ......................... 115
Lighting features ........................115
Centre console lighting ............115
Entry lighting ............................ 115Exit lighting.............................. 115
Battery discharge protection ....116Exterior lighting
Light switch
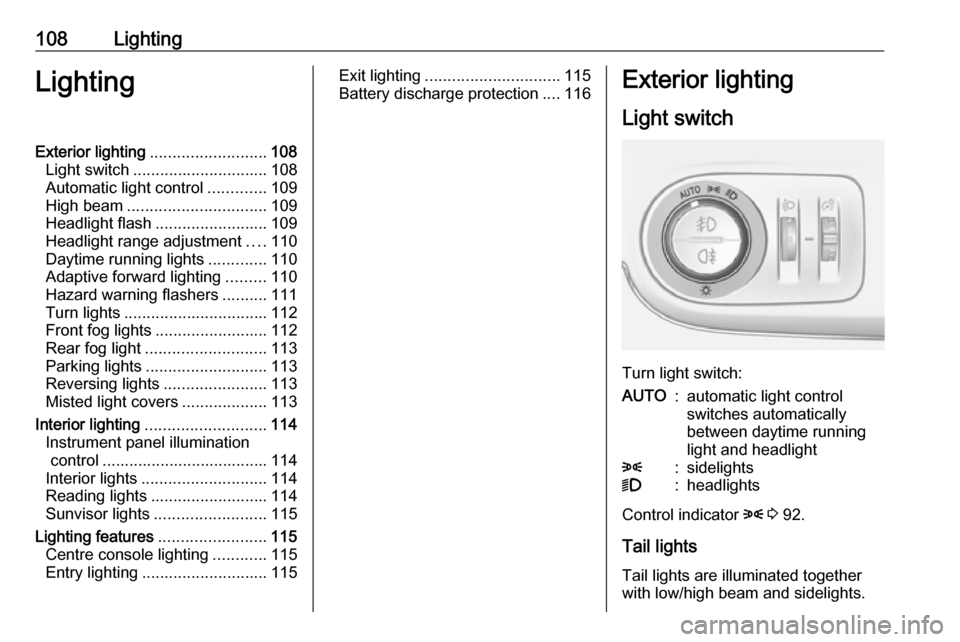
Turn light switch:
AUTO:automatic light control
switches automatically
between daytime running
light and headlight8:sidelights9:headlights
Control indicator 8 3 92.
Tail lights Tail lights are illuminated together
with low/high beam and sidelights.
Page 113 of 259

Lighting111It switches automatically back to low
beam when:
● The camera or a sensor in the windscreen detects the lights of
oncoming or preceding vehicles.
● The vehicle speed drops below 9 mph.
● It is foggy or snowy.
● Driving in urban areas.
If there are no restrictions detected, the system switches back to high
beam.
ActivationActivate this function pressing a
button on the turn and lane change
lever. The LED of the button
illuminates if the high beam assist is activated. The high beam is switched on automatically at a speed above
15 mph.
The green control indicator f
illuminates continuously when the
assist is activated, the blue one 7
illuminates when high beam is on.
Control indicator f 3 92.
Deactivation
Deactivate this function pressing a
button on the turn and lane change
lever.
If a headlight flash is activated when
the high beam assist is activated and
low beam is on, the high beam assist will be deactivated. The system
changes to high beam.
If a headlight flash is activated when
the high beam assist is activated and
high beam is on, the high beam assist will be deactivated. The system
changes to low beam.
To reactivate the high beam assist,
flash the headlights again.Automatic headlight levelling
To prevent oncoming traffic from
being dazzled, headlight levelling is
automatically adjusted based on the
load in the vehicle.
Fault in Adaptive forward lighting- LED system
When the system detects a failure in
the Adaptive forward lighting-LED
headlight system, a warning is
displayed in the Driver Information
Centre.
Hazard warning flashers
Operated by pressing ¨.
Page 114 of 259
112LightingHazard warning flashers are switched
on automatically in the following
situations:
● Braking in an emergency (depending on the force of
deceleration).
● In the event of an accident.
They are switched off the first time
you accelerate or if you press ¨.
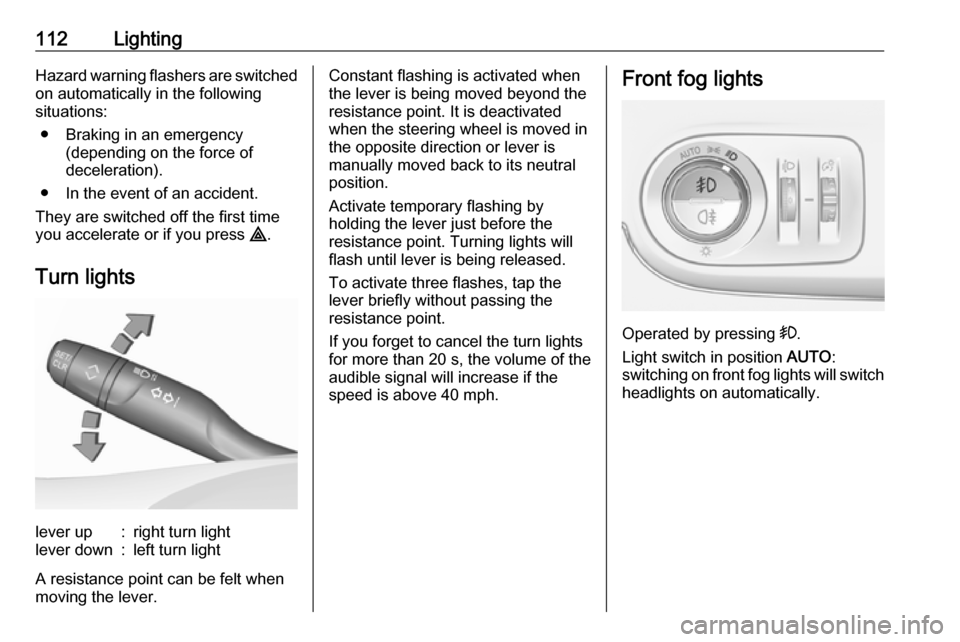
Turn lightslever up:right turn lightlever down:left turn light
A resistance point can be felt when
moving the lever.
Constant flashing is activated when
the lever is being moved beyond the
resistance point. It is deactivated
when the steering wheel is moved in
the opposite direction or lever is
manually moved back to its neutral
position.
Activate temporary flashing by
holding the lever just before the
resistance point. Turning lights will
flash until lever is being released.
To activate three flashes, tap the
lever briefly without passing the
resistance point.
If you forget to cancel the turn lights
for more than 20 s, the volume of the
audible signal will increase if the
speed is above 40 mph.Front fog lights
Operated by pressing >.
Light switch in position AUTO:
switching on front fog lights will switch headlights on automatically.
Page 149 of 259
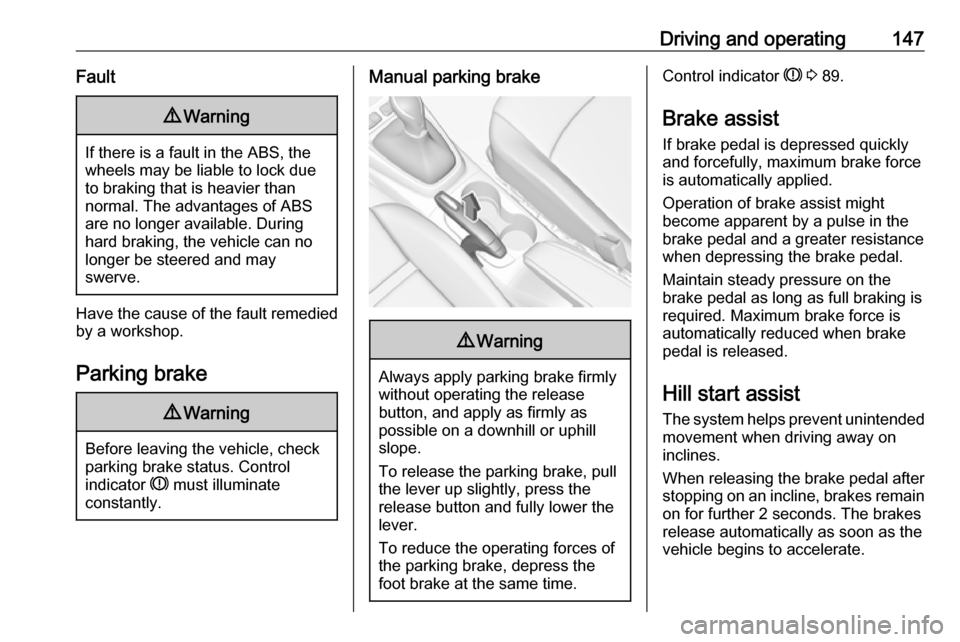
Driving and operating147Fault9Warning
If there is a fault in the ABS, the
wheels may be liable to lock due
to braking that is heavier than
normal. The advantages of ABS are no longer available. During
hard braking, the vehicle can no longer be steered and may
swerve.
Have the cause of the fault remedied
by a workshop.
Parking brake
9 Warning
Before leaving the vehicle, check
parking brake status. Control
indicator R must illuminate
constantly.
Manual parking brake9 Warning
Always apply parking brake firmly
without operating the release
button, and apply as firmly as
possible on a downhill or uphill
slope.
To release the parking brake, pull
the lever up slightly, press the
release button and fully lower the
lever.
To reduce the operating forces of
the parking brake, depress the
foot brake at the same time.
Control indicator R 3 89.
Brake assist
If brake pedal is depressed quickly
and forcefully, maximum brake force
is automatically applied.
Operation of brake assist might
become apparent by a pulse in the
brake pedal and a greater resistance when depressing the brake pedal.
Maintain steady pressure on the
brake pedal as long as full braking is
required. Maximum brake force is
automatically reduced when brake
pedal is released.
Hill start assist The system helps prevent unintendedmovement when driving away on
inclines.
When releasing the brake pedal after
stopping on an incline, brakes remain on for further 2 seconds. The brakes
release automatically as soon as the
vehicle begins to accelerate.
Page 157 of 259

Driving and operating155Alerting the driverThe driver is warned by following
alerts:
● Symbol , illuminates and a
warning message is displayed in the Driver Information Centre
when the distance to the vehicle
ahead gets to small.
● Symbol , illuminates, a warning
message is displayed in the
Driver Information Centre and a
warning chime sounds, when a
collision is imminent and
immediate driver's action is
required.9 Warning
Forward collision alert is just a
warning system and does not
apply the brakes. When
approaching a vehicle ahead too
rapidly, it may not provide you
enough time to avoid a collision.
The driver accepts full
responsibility for the appropriate
following distance based on traffic, weather and visibility conditions.
The complete attention of the
driver is always required while
driving. The driver must always be
ready to take action and apply the
brakes.Caution
The colour lighting of this control
indicator does not correspond to
local traffic laws on following
distance. The driver bears full
responsibility for maintaining safe
following distance according to
applicable traffic rules, weather
and road conditions etc. at all
times.
Selecting the alert sensitivity
The alert sensitivity has to be set to
close, normal or distant in the vehicle personalisation menu 3 100.
The chosen setting will remain until it
is changed. The alert timing will vary
based on vehicle speed. The faster
the vehicle speed, the farther away
the alert will occur. Consider traffic
and weather conditions when
selecting the alert timing.
Deactivation The system can only be deactivated
by deactivating the active emergency
braking in the vehicle personalisation
3 100.
System limitations
Forward collision alert is designed to
warn on vehicles only, but may react
also to other objects.
In the following cases, forward
collision alert may not detect a vehicle ahead or sensor performance is
limited:
● driving on winding or hilly roads
● driving during nighttime
● weather limits visibility, such as fog, rain, or snow