torque VOLKSWAGEN PASSAT 1995 B3, B4 / 3.G Service User Guide
[x] Cancel search | Manufacturer: VOLKSWAGEN, Model Year: 1995, Model line: PASSAT, Model: VOLKSWAGEN PASSAT 1995 B3, B4 / 3.GPages: 369, PDF Size: 12.33 MB
Page 134 of 369
Downloaded from www.Manualslib.com manuals search engine 42-38
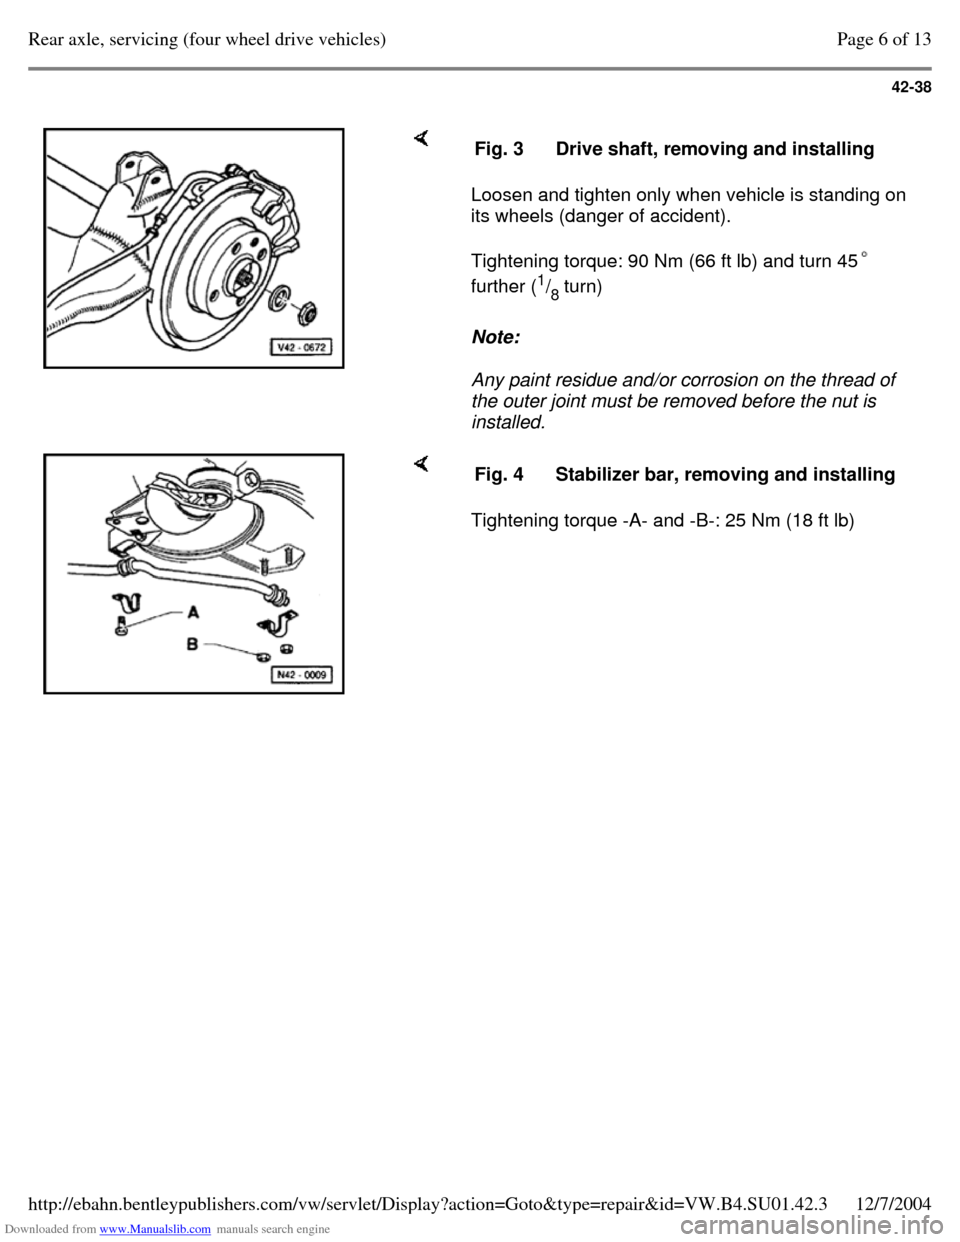
Loosen and tighten only when vehicle is standing on
its wheels (danger of accident).
Tightening torque: 90 Nm (66 ft lb) and turn 45
further (1
/
8 turn)
Note:
Any paint residue and/or corrosion on the thread of
the outer joint must be removed before the nut is
installed. Fig. 3 Drive shaft, removing and installing Tightening torque -A- and -B-: 25 Nm (18 ft lb) Fig. 4 Stabilizer bar, removing and installing Page 6 of 13Rear axle, servicing (four wheel drive vehicles)12/7/2004http://ebahn.bentleypublishers.com/vw/servlet/Display?action=Goto&type=repair&id=VW.B4.SU01.42.3
Page 138 of 369
Downloaded from www.Manualslib.com manuals search engine 42-42
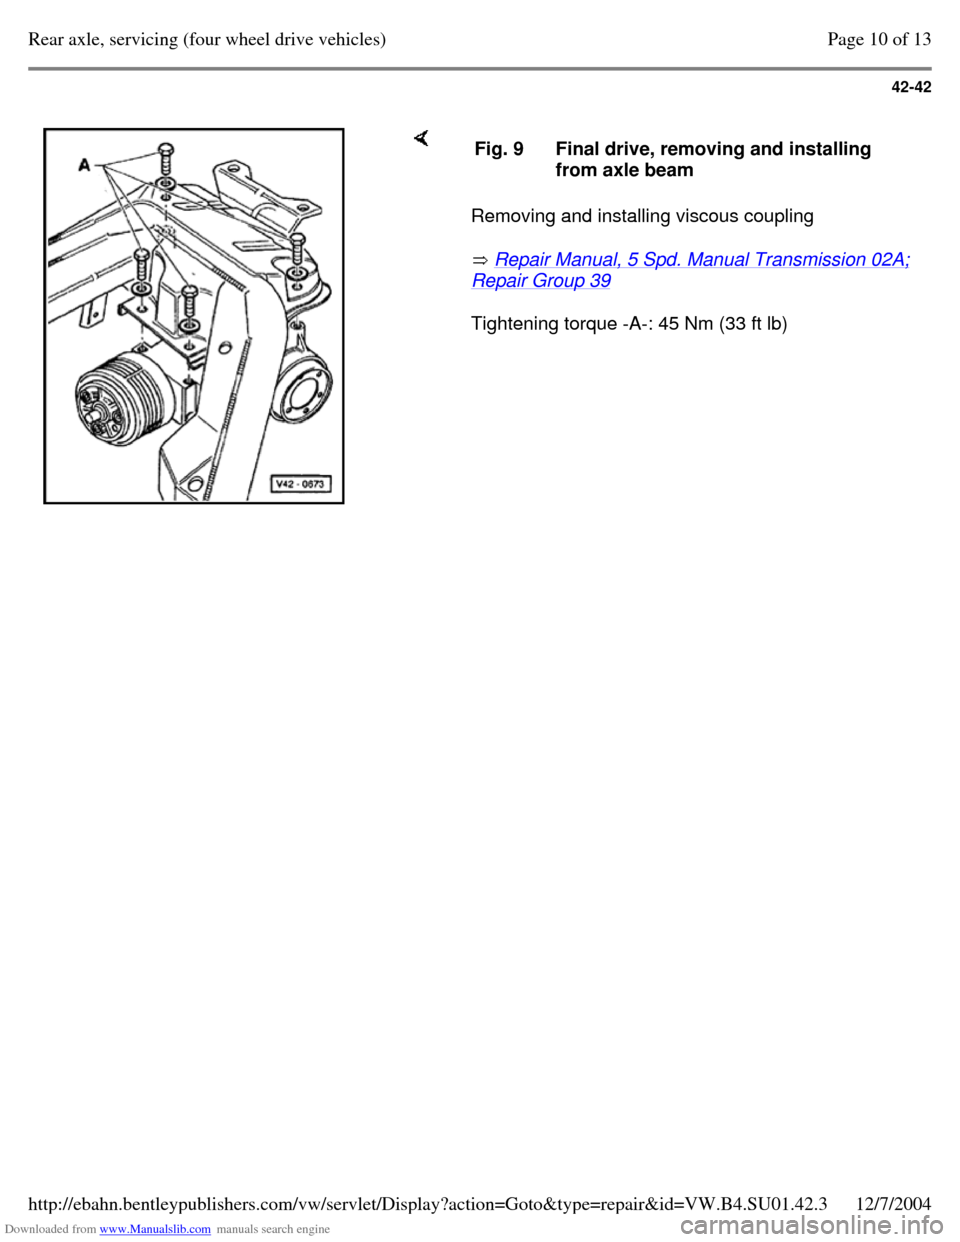
Removing and installing viscous coupling
Repair Manual, 5 Spd. Manual Transmission 02A; Repair Group 39
Tightening torque -A-: 45 Nm (33 ft lb) Fig. 9 Final drive, removing and installing
from axle beam Page 10 of 13Rear axle, servicing (four wheel drive vehicles)12/7/2004http://ebahn.bentleypublishers.com/vw/servlet/Display?action=Goto&type=repair&id=VW.B4.SU01.42.3
Page 140 of 369
Downloaded from www.Manualslib.com manuals search engine 42-44
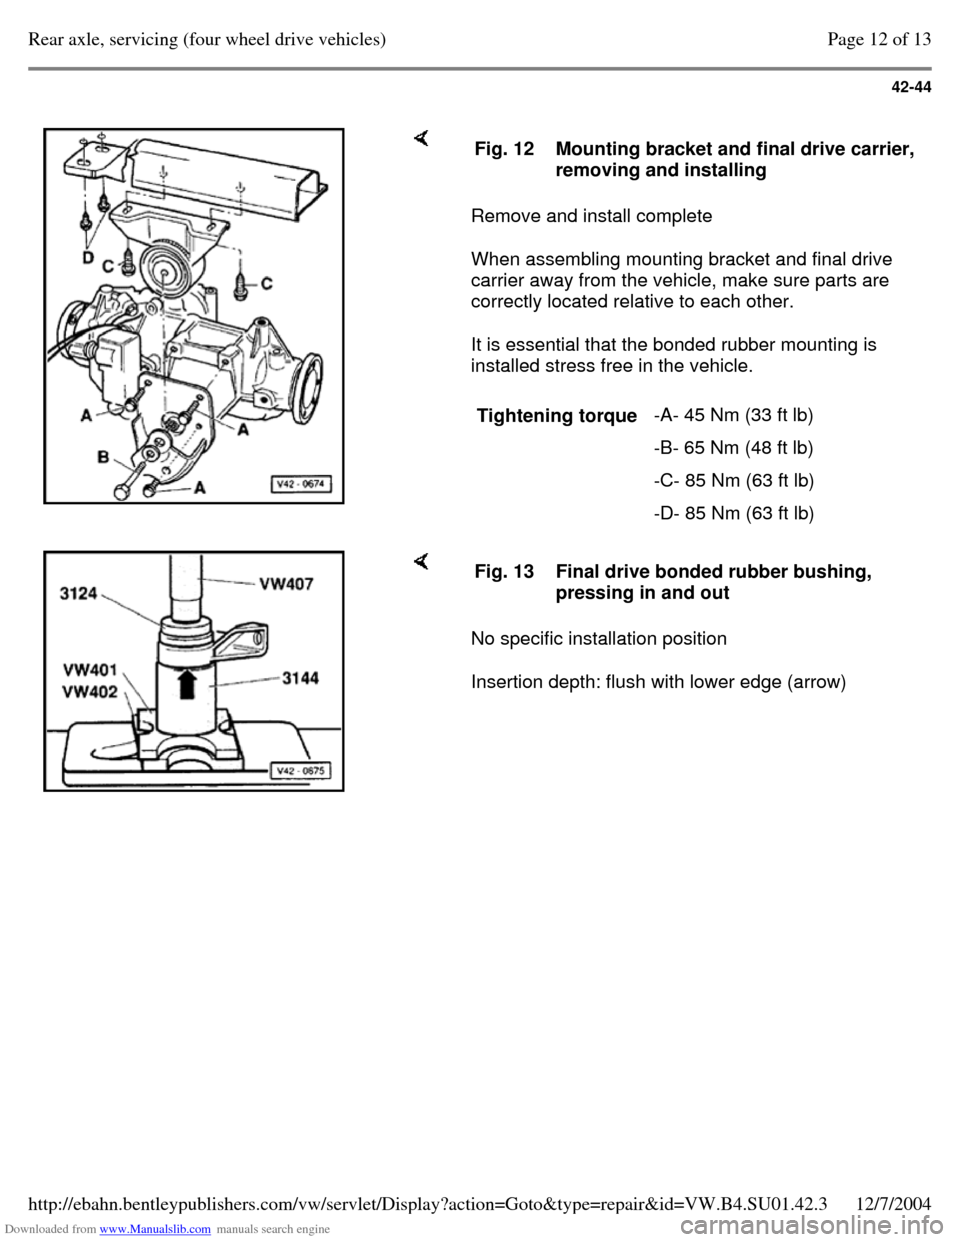
Remove and install complete
When assembling mounting bracket and final drive
carrier away from the vehicle, make sure parts are
correctly located relative to each other.
It is essential that the bonded rubber mounting is
installed stress free in the vehicle. Fig. 12 Mounting bracket and final drive carrier, removing and installing
Tightening torque -A- 45 Nm (33 ft lb)
-B- 65 Nm (48 ft lb)
-C- 85 Nm (63 ft lb)
-D- 85 Nm (63 ft lb) No specific installation position
Insertion depth: flush with lower edge (arrow) Fig. 13 Final drive bonded rubber bushing,
pressing in and out Page 12 of 13Rear axle, servicing (four wheel drive vehicles)12/7/2004http://ebahn.bentleypublishers.com/vw/servlet/Display?action=Goto&type=repair&id=VW.B4.SU01.42.3
Page 141 of 369
Downloaded from www.Manualslib.com manuals search engine 42-45
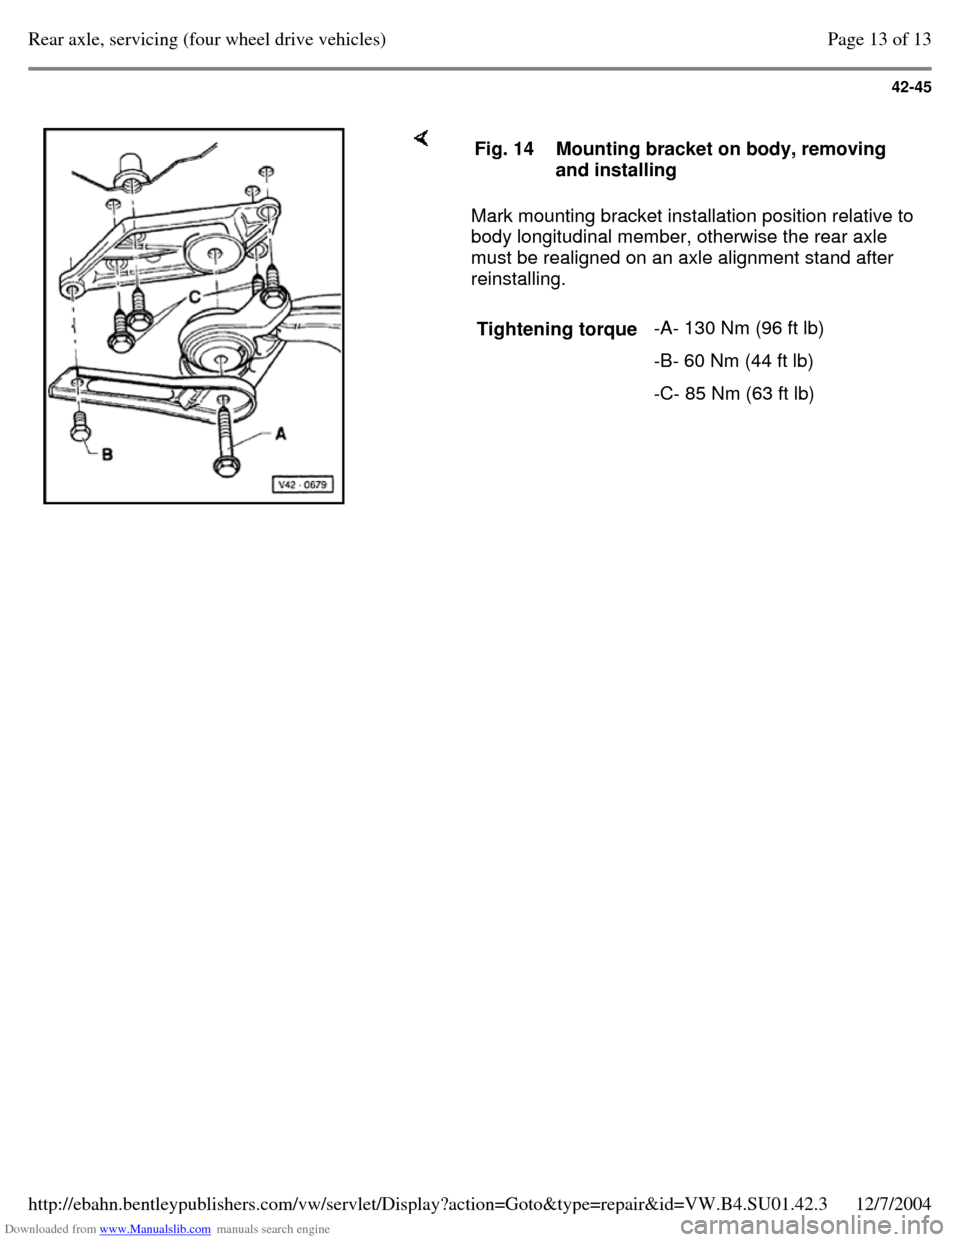
Mark mounting bracket installation position relative to
body longitudinal member, otherwise the rear axle
must be realigned on an axle alignment stand after
reinstalling. Fig. 14 Mounting bracket on body, removing
and installing
Tightening torque -A- 130 Nm (96 ft lb)
-B- 60 Nm (44 ft lb)
-C- 85 Nm (63 ft lb) Page 13 of 13Rear axle, servicing (four wheel drive vehicles)12/7/2004http://ebahn.bentleypublishers.com/vw/servlet/Display?action=Goto&type=repair&id=VW.B4.SU01.42.3
Page 148 of 369

Downloaded from www.Manualslib.com manuals search engine 42-52
- Cut new thread in the cap nut, M 12 x 1.5.
- Use new bolts, Part No. N 010 137.1 and
washer, Part No. N 011 531.7 to secure the rear
axle.
Tightening torque: 65 Nm (48 ft lb)
Note:
The procedure described here must only be
performed on one cap nut on each side of the
vehicle. Page 7 of 7Rear drive shafts, servicing12/7/2004http://ebahn.bentleypublishers.com/vw/servlet/Display?action=Goto&type=repair&id=VW.B4.SU01.42.4
Page 162 of 369
Downloaded from www.Manualslib.com manuals search engine 42-66
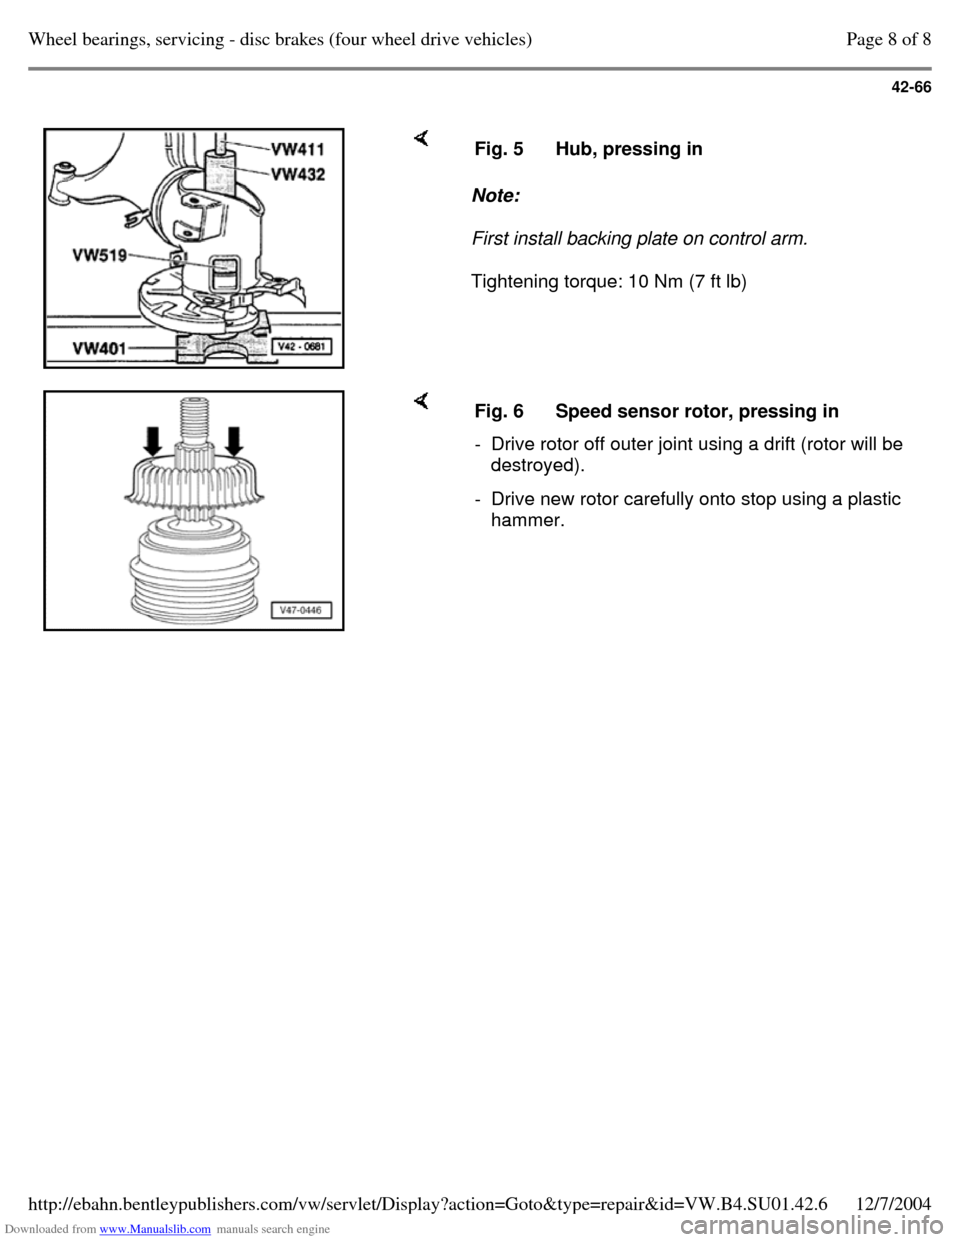
Note:
First install backing plate on control arm.
Tightening torque: 10 Nm (7 ft lb) Fig. 5 Hub, pressing in Fig. 6 Speed sensor rotor, pressing in - Drive rotor off outer joint using a drift (rotor will be
destroyed).
- Drive new rotor carefully onto stop using a plastic
hammer. Page 8 of 8Wheel bearings, servicing - disc brakes (four wheel drive vehicles)12/7/2004http://ebahn.bentleypublishers.com/vw/servlet/Display?action=Goto&type=repair&id=VW.B4.SU01.42.6
Page 184 of 369
Downloaded from www.Manualslib.com manuals search engine 45-15
Installing
Note:
Remove the sealing plugs from a new ABS
hydraulic unit one at a time, and only when the
corresponding brake line is to be connected.
If the plugs are removed too soon, brake fluid
can escape and it can no longer be certain that
the unit is sufficiently filled or adequately bled.
- Mount ABS control module to hydraulic unit
using new bolts.
Tightening torque: 4 Nm (35 in lb)
- Reconnect ABS hydraulic pump connector. The remainder of the installation procedure is the
reverse of removal, with the following additions:
- Bleed brake system Page 47-29 . Page 7 of 9ABS, ABS/EDL hydraulic unit, vacuum brake booster and brake master cylinder (Teves 20 GI), servicing12/7/2004http://ebahn.bentleypublishers.com/vw/servlet/Display?action=Goto&type=repair&id=VW.B4.SU01.45.3
Page 185 of 369
Downloaded from www.Manualslib.com manuals search engine 45-16
Note:
For vehicles equipped with ABS/EDL, on which
the brake fluid reservoir has been completely
empty (e.g. leaks in brake system), it is
necessary to initiate the "Basic Setting" function
of the On Board Diagnostic (OBD) program:
Repair Manual, Brake System On Board Diagnostic (OBD), Repair Group 01 Otherwise the standard brake bleeding
procedures apply.
- Code ABS control module: Repair Manual, Brake System On Board Diagnostic (OBD), Repair Group 01
Tightening torques
ABS control unit to ABS
hydraulic unit 4 Nm (35 in.
lb)
ABS hydraulic unit to bracket
(Torx T25 socket-head bolts) 8 Nm (71 in.
lb)
Brake master cylinder to
vacuum booster 25
Nm (18 ft
lb)
Heat shield to brake master
cylinder 8 Nm (71 in.
lb)
Brake lines to ABS hydraulic
unit
M10 x 1 15
Nm (11 ft
lb)
M12 x 1 15
Nm (11 ft
lb) Page 8 of 9ABS, ABS/EDL hydraulic unit, vacuum brake booster and brake master cylinder (Teves 20 GI), servicing12/7/2004http://ebahn.bentleypublishers.com/vw/servlet/Display?action=Goto&type=repair&id=VW.B4.SU01.45.3
Page 197 of 369
Downloaded from www.Manualslib.com manuals search engine 46-1
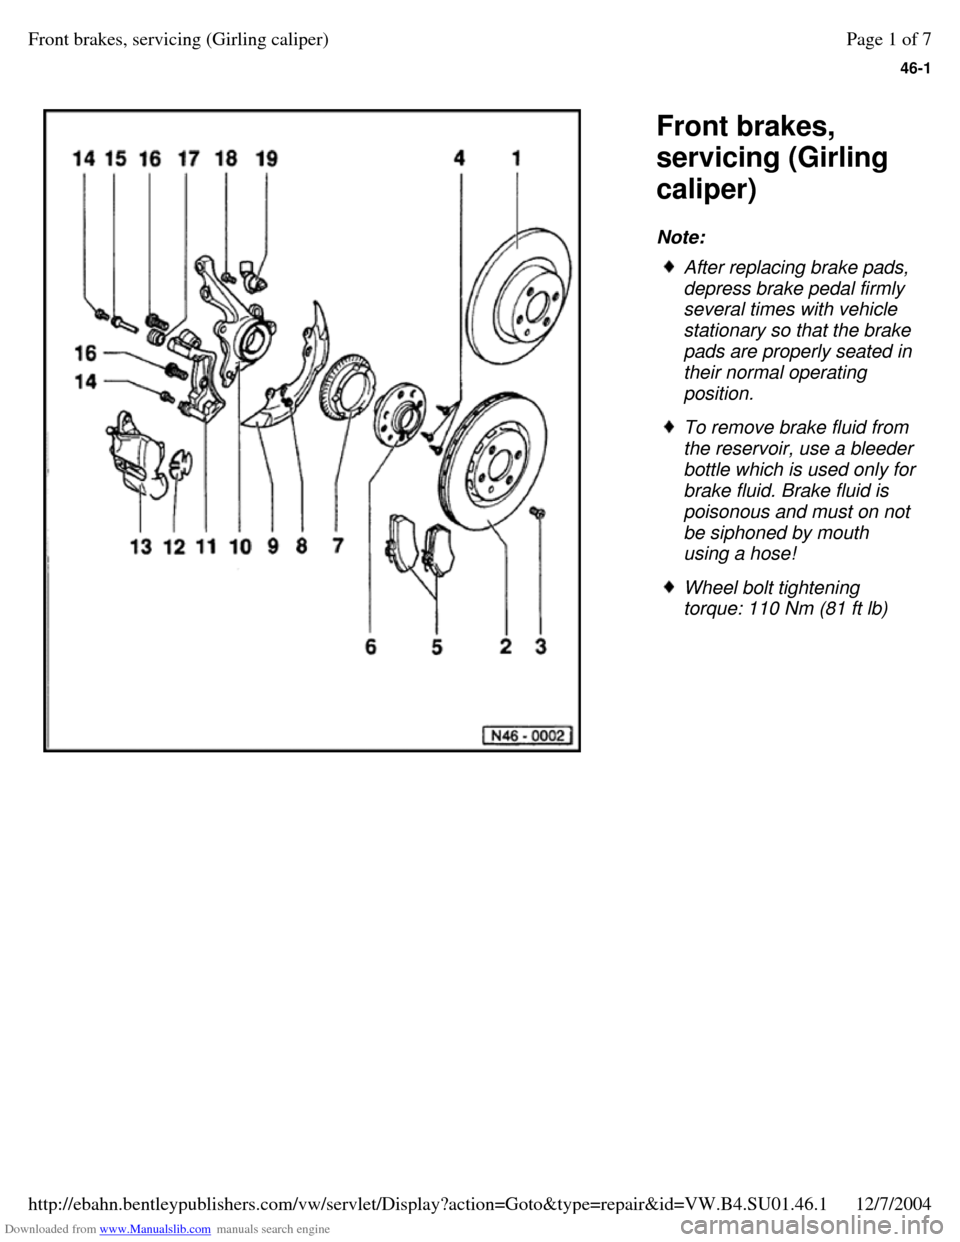
Front brakes,
servicing (Girling
caliper)
Note: After replacing brake pads,
depress brake pedal firmly
several times with vehicle
stationary so that the brake
pads are properly seated in
their normal operating
position. To remove brake fluid from
the reservoir, use a bleeder
bottle which is used only for
brake fluid. Brake fluid is
poisonous and must on not
be siphoned by mouth
using a hose! Wheel bolt tightening
torque: 110 Nm (81 ft lb) Page 1 of 7Front brakes, servicing (Girling caliper)12/7/2004http://ebahn.bentleypublishers.com/vw/servlet/Display?action=Goto&type=repair&id=VW.B4.SU01.46.1
Page 277 of 369
Downloaded from www.Manualslib.com manuals search engine 48-7
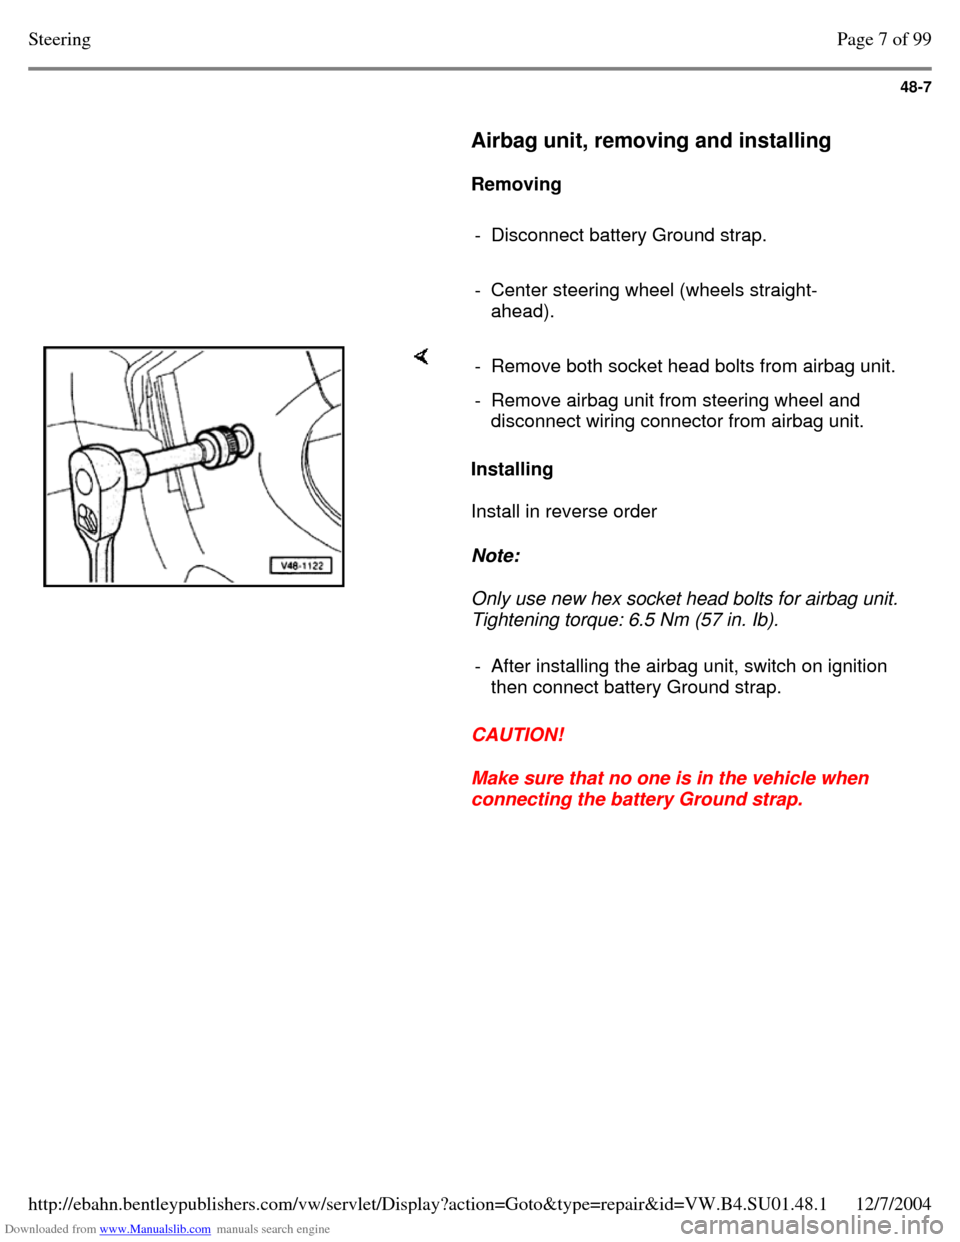
Airbag unit, removing and installing
Removing
- Disconnect battery Ground strap.
- Center steering wheel (wheels straight-
ahead). Installing
Install in reverse order
Note:
Only use new hex socket head bolts for airbag unit.
Tightening torque: 6.5 Nm (57 in. Ib).
CAUTION!
Make sure that no one is in the vehicle when
connecting the battery Ground strap. - Remove both socket head bolts from airbag unit. - Remove airbag unit from steering wheel and
disconnect wiring connector from airbag unit.
- After installing the airbag unit, switch on ignition
then connect battery Ground strap. Page 7 of 99Steering12/7/2004http://ebahn.bentleypublishers.com/vw/servlet/Display?action=Goto&type=repair&id=VW.B4.SU01.48.1