brake light VOLVO S40 2002 Owners Manual
[x] Cancel search | Manufacturer: VOLVO, Model Year: 2002, Model line: S40, Model: VOLVO S40 2002Pages: 88, PDF Size: 2.34 MB
Page 13 of 88
2 0 0 2
VOLVO
S40 & V40
Chapter 2 - Instruments, switches and controls
pg. 17 Instruments, switches and controls
Instruments, switches and controls
Instruments, switches, controls etc. are described on the following pages. Instruments
18
Indicator and warning lights21
Headlights, Parking lights, Instrument illumination, Fog lights24
Turn signals, home Safe lighting, Wipers/washers25
Ignition switch/steering wheel locks, Flashers, Heated rear window/mirrors26
Trip Computer27
Dynamic Stability Assistance30
Cruise control31
Heated seats, Parking brake32
Auxiliary socket, Cupholder33
Steering wheel adjustment34
Heating, Ventilation and Air Conditioning35
Electrcaly operated windows38
pg. 18 Instruments, switches and controls
ProCarManuals.com
Page 16 of 88

2 Clock
3 Tachometer
Reads thousands of engine rpm. The needle should never be in the solid red range.
4 Trip odometer reset button
Press the button to reset the trip odometer. The ignition must be switched on.
5 Odometer
6 Speedometer
7 Trip odometer
Used for measuring shorter distances. The last digit indicates 1/10 mile/kilometer.
8 Fuel gauge
Fuel tank capacity: 16 US gallons (60 liters).
When the warning light comes on there is approximately 1.9 US gal. (7 liters) of fuel remaining. See "Refueling"
for additional information. When refueling the fuel gauge needle will not register until the volume of gasoline in
the tank exceeds 3.2 US gal. (12 liters).
9 Trip Computer/Ambient temperature
NOTE: See page 27- 29
for information on the trip computer.
10 Temperature gauge (engine coolant)
Do not drive the car with the pointer in the red range. The pointer should be approximately midway on the
gauge face when driving. If the pointer approaches the red range repeatedly, check coolant level. See page 117
.
pg. 21 Indicator and warning lights
1 Turn signal, left
2 Turn signal, right
3 Fuel level low
4 Front fog lights on
5 Rear fog lights on
6 Rear fog lamp on
7 Cruise control
8 High beams on
9 ABS (anti-lock brakes) malfunction
10 Door open
11 Parking brake applied
12 Low oil pressure
ProCarManuals.com
Page 17 of 88

13 Hazard warning light on
14 Fault in SRS system
15 Brake circuit not working (brake fluid level too low) and EBD
16 Battery charge failure
17 DSA (option)
18 Automatic transmission: position W, 4 or 3 or L
19 Check engine light
20 Immobilizer on
21 Service Reminder Indicator
22 Low washer fluid level
23 Turn indicator trailer (certain models)
Starting check
After a few seconds, all lights except 9 and 20 will go out. Once the engine starts, 9 and 20 will also go out.
* Indicates failure of a brake light, not failure of the braking system (see item 15).
pg. 22 Warning lights
The warning lights described on pages 22 and 23 should never stay on when driving
When the ignition key is turned on and before the engine starts, all of the warning lights should go on to test the
function of the bulbs. Should a light not go off after the engine has started, the system indicated should be
inspected. However, the parking brake reminder light will not go off until the parking brake has been fully
released.
Supplemental Restraint System (SRS)
If the light comes on (or stays on after the vehicle has started), the SRS diagnostic system has detected a fault.
Drive to an authorized Volvo retailer for an inspection of the system. See the SRS section for more information.
Oil pressure warning light
If the light comes on while driving, stop the car and then stop the engine immediately and check the engine oil
level . See page 114.
If the light stays on after restart, have the car towed to the nearest authorized Volvo
retailer. After hard driving, the light may come on occasionally when the engine is idling. This is normal,
provided it goes off when the engine speed is increased.
Parking brake reminder light
This light will be on when the parking brake (hand brake) is applied. The parking brake lever is situated
between the front seats.
Canadian models are equipped with this warning light:
WARNING!
If the fluid level is below the lowest MIN mark in the brake fluid reservoir: DO NOT DRIVE. Tow the car to a
Volvo retailer and have the brake system checked and any leakage repaired.
Brake failure warning light
If the light comes on while driving or braking, stop immediately, open the hood and check the brake fluid level
ProCarManuals.com
Page 18 of 88

in the reservoir. See page 116 for reservoir position.
If the control lamp still stays on, the EBD (Electronic Brakeforce Distribution) is not working.
Drive to your Volvo dealer. See ABS control lamp and also page 73.
Canadian models are equipped with this warning light:
Bulb failure warning light
The light will come on if one of the brake light bulbs are defective when the brake pedal is pressed.
Check the fuse and bulb. See sections "Replacing bulbs" and "fuses".
pg. 23 Warning lights, Daytime Running Lights
DSA (option)
Dynamic Stability Assistance
This is a system which helps keep the drivewheels from spinning. The light flashes if the road surface is slippery,
the wheels are spinning and the system is working.
The control light comes on if a fault occurs in the DSA system. It also comes on if the system is switched off via
the switch.
For more information see page 30.
Service Reminder Light
This light will come on according to preset service intervals or after 750 hours of driving or after 12 months,
whichever occurs first. It is a reminder to the driver that the service interval has been exceeded. The light will
stay on for 2 minutes after start until reset by the servicing retailer.
Anti-lock Brake system (ABS)
If the warning lamp lights up there is a malfunction of the ABS system (the standard braking system will
however function). The vehicle should be driven to a Volvo retailer for inspection.
See page 73
for additional information.
Malfunction Indicator Lamp
On-Board Diagnostics II (OBDII): As you drive, a computer called "OBDII" monitors your car's engine,
transmission, electrical and emission systems. The CHECK ENGINE light will light up if the computer senses a
condition that potentially may need correcting. When this happens, please have your car checked by a Volvo
retailer as soon as possible.
A CHECK ENGINE light may have many causes. Sometimes, you may not notice a change in your car's
behavior. Even so, an uncorrected condition could hurt fuel economy, emission cleanliness, and driveability.
Extended driving without correcting the cause could even damage other components in your car.
ProCarManuals.com
Page 33 of 88
pg. 64 Driving economy
Economical driving conserves natural resources
Better driving economy may be obtained by thinking ahead, avoiding rapid starts and stops and adjusting the speed of
your vehicle to immediate traffic conditions. Observe the following rules:
· Bring the engine to normal operating temperature as soon as possible by driving with a light foot on the accelerator
pedal for the first few minutes of operation. A cold engine uses more fuel and is subject to increased wear.
· Whenever possible, avoid using the car for short trips. Short trips do not allow the engine to reach normal operating
temperature.
· Drive carefully and avoid rapid acceleration and hard braking.
· Do not exceed posted speed limits.
· Avoid carrying unnecessary items (extra load) in the car.
· Maintain correct tire pressure. Check tire pressure regularly (check when tires are cold).
· Remove snow tires when threat of snow or ice has ended.
· Note that roof racks, ski racks, etc., increase air resistance and thereby fuel consumption.
· Avoid using automatic transmission kickdown feature unless necessary.
· Avoid using the air conditioning when it is not required. When engaged, the air conditioner's compressor places an
additional load on the engine. However, please note that fuel consumption is lower with the air conditioning on than it
is when driving with the air conditioning switched off and the windows down.
· Utilizing the fuel consumption modes in the Trip Computer can help you "learn" how to drive more economically.
Other factors which decrease gas mileage are:
· Worn or dirty spark plugs
· Incorrect spark plug gap
· Dirty air cleaner
· Dirty engine oil and clogged oil filter
· Dragging brakes
· Incorrect front end alignment
Some of the above mentioned items and others are checked at the standard Maintenance Service intervals.
NOTE : The automatic transmission's ( D)rive position should be used as often as possible to help improve fuel
economy.
WARNING!
It is recommended that tires of the same make and dimensions be used on all four wheels (including the use of
snow tires). Do not use bias ply tires as this will adversely alter vehicle handling characteristics. Maintain correct tire
pressure.
Do not drive with trunk lid open! A warning light in the instrument panel will indicate that the trunk is open.
Poisonous exhaust gases may enter via the open trunk lid. If the trunk lid/tailgate must be kept open for any reason,
proceed as follows:
· Close the windows.
· Set the ventilation system control to air flow to floor, windshield and side windows and blower control to its
highest setting.
pg. 65 Starting the engine
ProCarManuals.com
Page 34 of 88

Starting and stopping
1. Fasten the seat belt.WARNING!
Before starting, check that the seat, steering wheel and mirrors are adjusted properly. Make sure the brake pedal can
be depressed completely. Move the seat closer if necessary. Refer to section "front seats".
2. Make sure the gear selector is in the Park position.
3. Without touching the accelerator pedal, turn the ignition key to the starting position. Allow the starter to operate
for up to 5 seconds. Release the key as soon as the engine starts. If the engine fails to start, repeat step 3.
For cold starts at altitudes above 6000 ft (1800 meters), depress the accelerator pedal halfway and turn the key to the
starting position. Release the pedal slowly when the engine starts. Depress the brake pedal and release the parking
brake.
4. To release the gear selector from the (P)ark position, the ignition key must be in position II and the brake pedal
must be depressed.
NOTE: Your car is equipped with a KEYLOCK system. When the engine is switched off, the gear selector must be in
the ( P)ark position before the starting key can be removed from the ignition switch.
5. Select the desired gear. The gear engages after a slight delay which is especially noticeable when selecting R.
CAUTION :
The engine should be idling; never accelerate until after you feel the gear engage! Too rapid acceleration immediately
after selecting a gear will cause harsh engagement and premature transmission wear.
NOTE : Selecting P or N when idling at a standstill for prolonged periods of time will help prevent overheating of
transmission oil.
Ignition sleep mode
If the key is turned to "drive" position (see See page 26
) for several minutes without the engine running, the car's
starting system will power down to "sleep" mode. To start the car, momentarily turn the key back to the "locked"
position. Then start the car as you would normally do.
WARNING!
Always place the gear selector in Park and apply the parking brake before leaving the vehicle. Never leave the car
unattended with the engine running.
Always open the garage doors fully before starting the engine inside a garage to ensure adequate ventilation. The
exhaust gases contain carbon monoxide, which is invisible and odorless but very poisonous.
CAUTION:
Never race the engine immediately after starting. Oil flow may not reach some lubricating points fast enough to
prevent engine damage.
Do not race the engine just prior to switching off!
ProCarManuals.com
Page 36 of 88

Downshifting protection
There is a built in protection in the transmission which prevents over revving in the engine when you select one of the
low gear positions.
Shift lock
In order to move the gear selector from P position to the other gear positions the key must be in driving position
(position II)and the brake pedal must be depressed. See page 99
how to move the gear selector manually in case of flat
battery.
pg. 67 Automatic transmission
W - Winter/Wet Weather
Use the W button to turn the Winter/Wet Weather function on or off. The Winter/Wet Weather function limits
downshifting during acceleration, helping to reduce wheel spin. Because downshifting is limited in W mode,
performance may seem sluggish and fuel economy may be reduced. W mode is recommended for acceleration from a
standstill on rain-slicked roads.
Automatic transmission -shift gate positions
The gear selector can be moved freely between N and D. Selections of other positions are obtained by depressing the
selector knob prior to moving the selector. Slightly depressing the selector knob allows selection of positions R, N, D,
4, 3 and L. Fully depressing the selector knob allows selection of position P. This is also necessary when initially
bringing the selector out of position P. Fully depressing the selector knob permits shifting freely between all positions.
Kick-down
Automatic shift to a lower gear (kick-down) is achieved by depressing the accelerator pedal fully and briskly. An
upshift will be achieved when approaching the top speed for a particular gear or by releasing the accelerator pedal
slightly. Kick -down can be used for maximum acceleration or when passing at highway speeds. Avoid using the kick-
down function during the break-in period (first 1,200 miles of vehicle operation).
ProCarManuals.com
Page 45 of 88
The screwdriver is combined with the socket wrench. The tools can be alternated by pulling the shaft out of the handle
and reinserting the opposite end of the shaft into the handle.
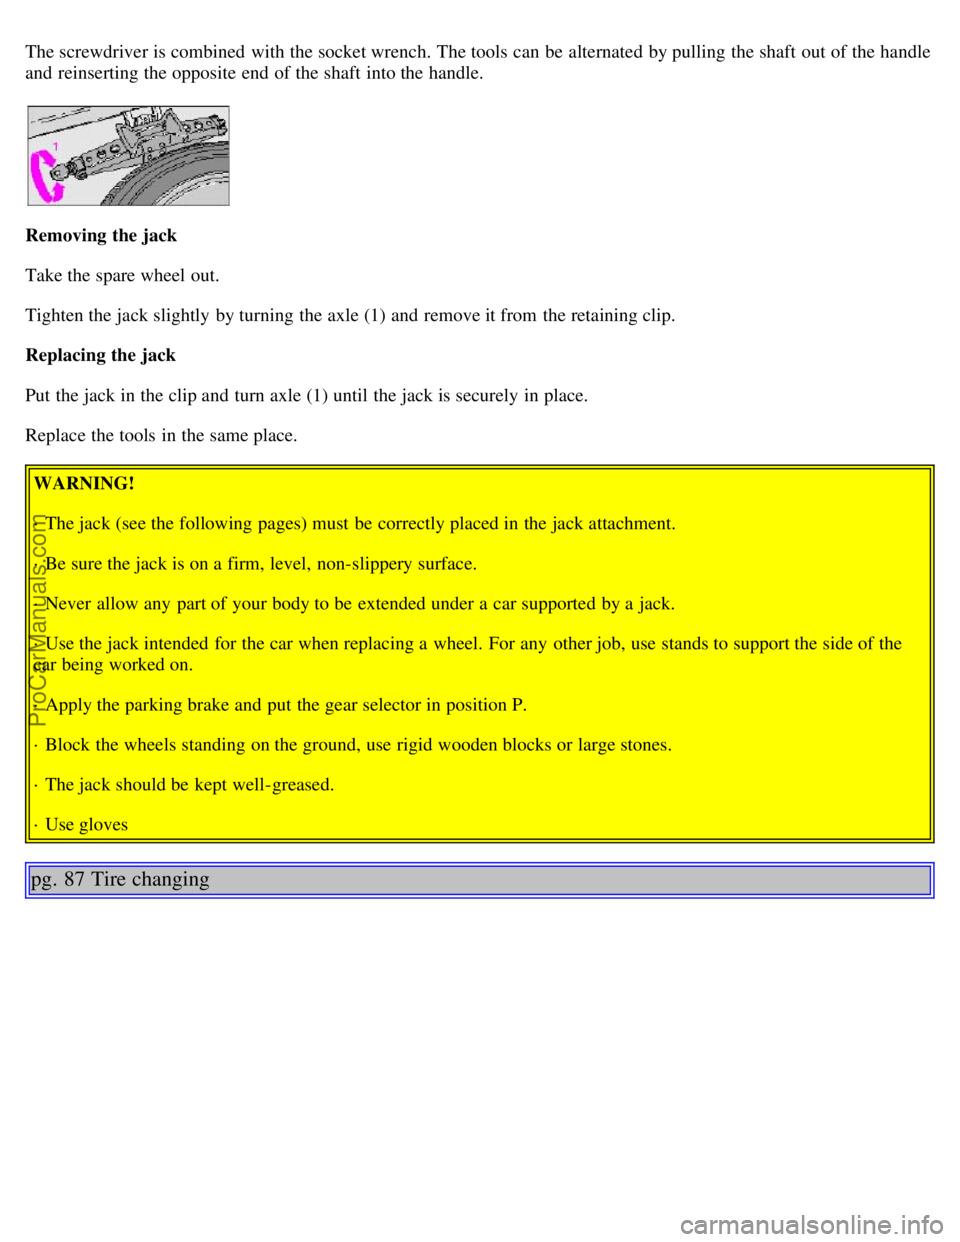
Removing the jack
Take the spare wheel out.
Tighten the jack slightly by turning the axle (1) and remove it from the retaining clip.
Replacing the jack
Put the jack in the clip and turn axle (1) until the jack is securely in place.
Replace the tools in the same place.WARNING!
· The jack (see the following pages) must be correctly placed in the jack attachment.
· Be sure the jack is on a firm, level, non-slippery surface.
· Never allow any part of your body to be extended under a car supported by a jack.
· Use the jack intended for the car when replacing a wheel. For any other job, use stands to support the side of the
car being worked on.
· Apply the parking brake and put the gear selector in position P.
· Block the wheels standing on the ground, use rigid wooden blocks or large stones.
· The jack should be kept well-greased.
· Use gloves
pg. 87 Tire changing
ProCarManuals.com
Page 51 of 88
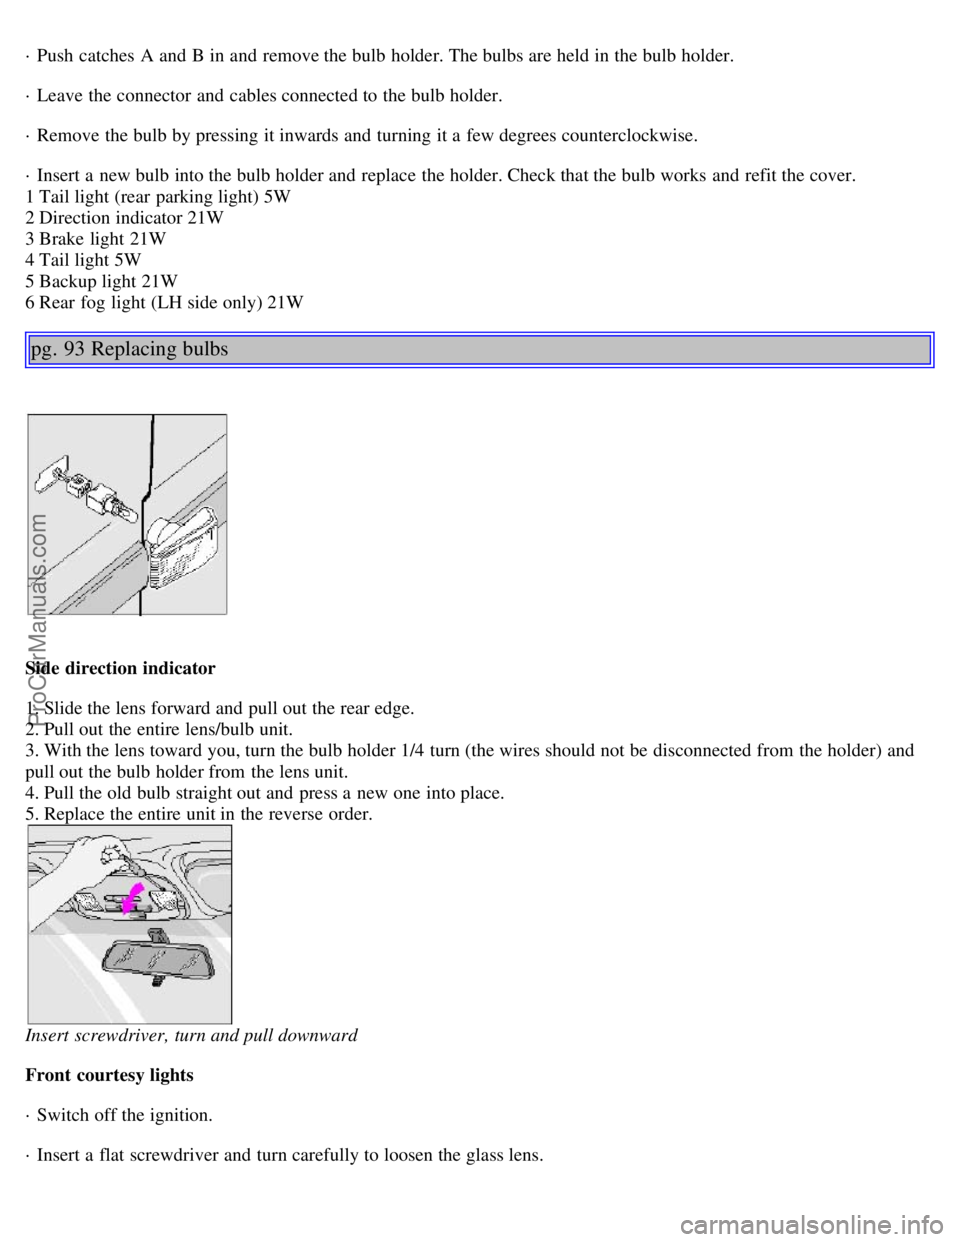
· Push catches A and B in and remove the bulb holder. The bulbs are held in the bulb holder.
· Leave the connector and cables connected to the bulb holder.
· Remove the bulb by pressing it inwards and turning it a few degrees counterclockwise.
· Insert a new bulb into the bulb holder and replace the holder. Check that the bulb works and refit the cover.
1 Tail light (rear parking light) 5W
2 Direction indicator 21W
3 Brake light 21W
4 Tail light 5W
5 Backup light 21W
6 Rear fog light (LH side only) 21W
pg. 93 Replacing bulbs
Side direction indicator
1. Slide the lens forward and pull out the rear edge.
2. Pull out the entire lens/bulb unit.
3. With the lens toward you, turn the bulb holder 1/4 turn (the wires should not be disconnected from the holder) and
pull out the bulb holder from the lens unit.
4. Pull the old bulb straight out and press a new one into place.
5. Replace the entire unit in the reverse order.
Insert screwdriver, turn and pull downward
Front courtesy lights
· Switch off the ignition.
· Insert a flat screwdriver and turn carefully to loosen the glass lens.
ProCarManuals.com
Page 61 of 88
Fuel filter
The fuel filter should be replaced at 105,000 miles (168,000 km). The filter is replaced as a complete unit. Replace
more frequently if contaminated fuel is introduced into the tank, or if there is reason to suspect that this has occurred.
Fuel system, including filler cap, tank and lines and connections
The ability of the fuel system to contain hydrocarbons depends upon a leak-free system. Inspect fuel lines every
30,000 miles (48,000 km).Check for proper sealing of the fuel filler cap which contains "O" ring seals.
NOTE: If the fuel filler cap is not closed tightly or if the engine is running when the car is refueled, the Check Engine
light ("Malfunction indicator") may indicate a fault. However, your vehicle's performance will not be affected. Use
only Volvo original or approved fuel filler caps.
Timing belt
For proper functioning of the vehicle and its emission control systems, the timing belt and belt tensioner must be
replaced every 105,000 miles (168,000 km). Engine damage will occur if the belt fails.
PCV system
(on turbocharged models)
The nipple in the intake manifold and the filter at the end of the PCV hose in the air cleaner should be inspected and
cleaned at 105,000 miles (168,000 km) and thereafter, again at 150,000 mile (240,000 km) intervals.
Spark plugs
The spark plugs should be replaced every 45,000 miles (72,000 km) under normal driving conditions. City driving or
fast highway driving may necessitate replacement sooner.
Under normal driving conditions, spark plugs require no maintenance between replacement intervals. When installing
new plugs, be sure to use the right type and to tighten them correctly. When changing the plugs, clean the terminals
and rubber seals. Also check that the suppressor connectors are in good condition. Cracked or damaged connectors
should be replaced.
pg. 111 Engine compartment
Engine compartment S40/V40
1 Power brakes
2 Brake fluid reservoir
3 Fusebox
4 Air cleaner
5 Battery
7 Radiator
8 Oil filter
10 Engine oil dipstick
11 Generator
12 Windshield/headlight washer fluid reservoir
13 Power steering pump
14 Power steering fluid reservoir
15 Engine oil filler cap
ProCarManuals.com