spark plug YAMAHA KODIAK 400 2003 Owners Manual
[x] Cancel search | Manufacturer: YAMAHA, Model Year: 2003, Model line: KODIAK 400, Model: YAMAHA KODIAK 400 2003Pages: 418, PDF Size: 17.15 MB
Page 17 of 418

Tire wear limit......................................5-33
OPERATION ...........................................6-1
Starting a cold engine ...........................6-3
Starting a warm engine .........................6-9
Warming up...........................................6-9
Drive select lever operation and
reverse driving ..................................6-11
Engine break-in ...................................6-17
Parking ................................................6-19
Parking on a slope ..............................6-21
Accessories and loading .....................6-23
RIDING YOUR ATV..................................7-1
Getting to know your ATV .....................7-3
Ride with care and good judgement .....7-5
Be careful where you ride ...................7-27
Turning your ATV ................................7-39
Climbing uphill.....................................7-45
Riding downhill ....................................7-55
Crossing a slope .................................7-59
Crossing through shallow water ..........7-63
Riding over rough terrain ....................7-69
Sliding and skidding ............................7-71
What to do if ........................................7-75
What to do...........................................7-75
67
PERIODIC MAINTENANCE AND
ADJUSTMENT ........................................ 8-1
Owner’s manual and tool kit ................. 8-3
Periodic maintenance/lubrication.......... 8-7
Panel removal and installation............ 8-15
Engine oil ............................................ 8-29
Final gear oil ....................................... 8-39
Cooling system ................................... 8-45
Changing the coolant.......................... 8-49
Spark plug inspection ......................... 8-57
Air filter element cleaning ................... 8-63
V-belt cooling duct check hose ........... 8-71
Carburetor adjustment ........................ 8-73
Idle speed adjustment ........................ 8-75
Valve clearance adjustment ............... 8-77
Throttle lever adjustment .................... 8-79
Front brake pad check ........................ 8-81
Rear brake shoe inspection ................ 8-81
Brake fluid level check ........................ 8-83
Brake fluid replacement ...................... 8-87
Front brake lever free play.................. 8-89
Rear brake pedal and lever
adjustment ........................................ 8-91
8
U5VH60.book Page 2 Wednesday, August 7, 2002 12:00 PM
Page 54 of 418

3-1
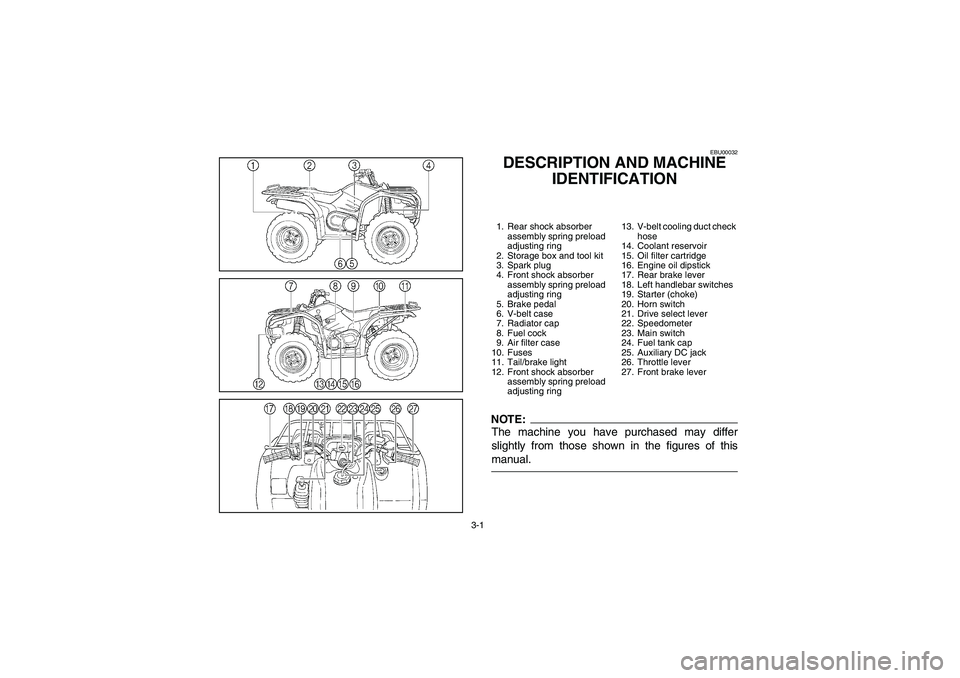
EBU00032
DESCRIPTION AND MACHINE
IDENTIFICATION1. Rear shock absorber
assembly spring preload
adjusting ring
2. Storage box and tool kit
3. Spark plug
4. Front shock absorber
assembly spring preload
adjusting ring
5. Brake pedal
6. V-belt case
7. Radiator cap
8. Fuel cock
9. Air filter case
10. Fuses
11. Tail/brake light
12. Front shock absorber
assembly spring preload
adjusting ring13. V-belt cooling duct check
hose
14. Coolant reservoir
15. Oil filter cartridge
16. Engine oil dipstick
17. Rear brake lever
18. Left handlebar switches
19. Starter (choke)
20. Horn switch
21. Drive select lever
22. Speedometer
23. Main switch
24. Fuel tank cap
25. Auxiliary DC jack
26. Throttle lever
27. Front brake leverNOTE:The machine you have purchased may differ
slightly from those shown in the figures of this
manual.
U5VH60.book Page 1 Wednesday, August 7, 2002 12:00 PM
Page 262 of 418

8-7
EBU00262
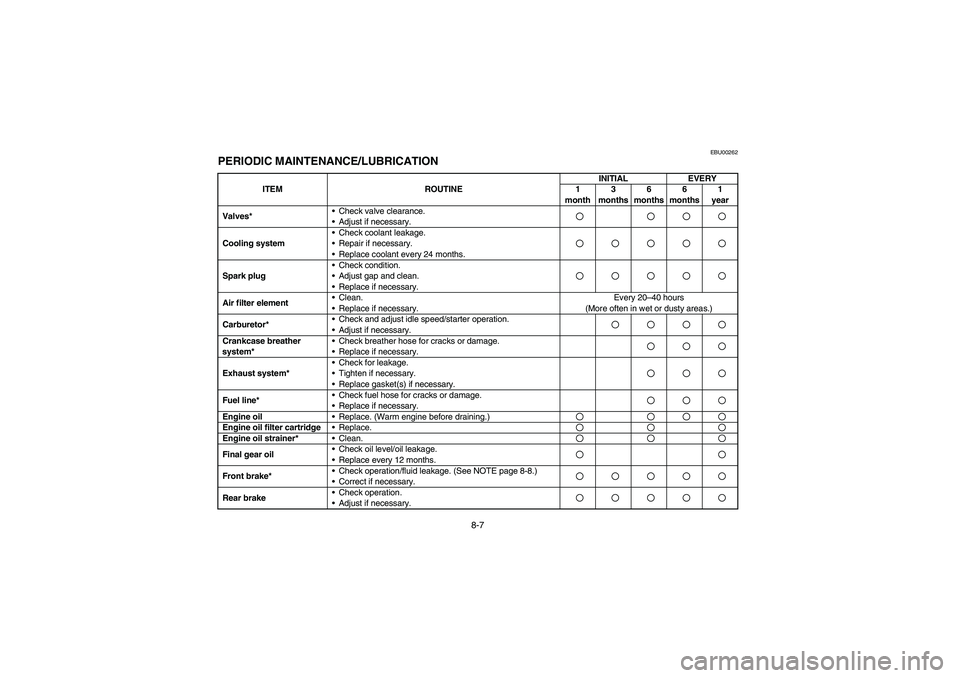
PERIODIC MAINTENANCE/LUBRICATION
ITEM ROUTINEINITIAL EVERY
1
month3
months6
months6
months1
year
Valves*•Check valve clearance.
•Adjust if necessary.
Cooling system•Check coolant leakage.
•Repair if necessary.
•Replace coolant every 24 months.Spark plug•Check condition.
•Adjust gap and clean.
•Replace if necessary.Air filter element•Clean.
•Replace if necessary.Every 20–40 hours
(More often in wet or dusty areas.)
Carburetor*•Check and adjust idle speed/starter operation.
•Adjust if necessary.Crankcase breather
system*•Check breather hose for cracks or damage.
•Replace if necessary.Exhaust system*•Check for leakage.
•Tighten if necessary.
•Replace gasket(s) if necessary.Fuel line*•Check fuel hose for cracks or damage.
•Replace if necessary.Engine oil
•Replace. (Warm engine before draining.)Engine oil filter cartridge
•Replace.Engine oil strainer*
•Clean.Final gear oil•Check oil level/oil leakage.
•Replace every 12 months.Front brake*•Check operation/fluid leakage. (See NOTE page 8-8.)
•Correct if necessary.Rear brake•Check operation.
•Adjust if necessary.U5VH60.book Page 7 Wednesday, August 7, 2002 12:00 PM
Page 312 of 418

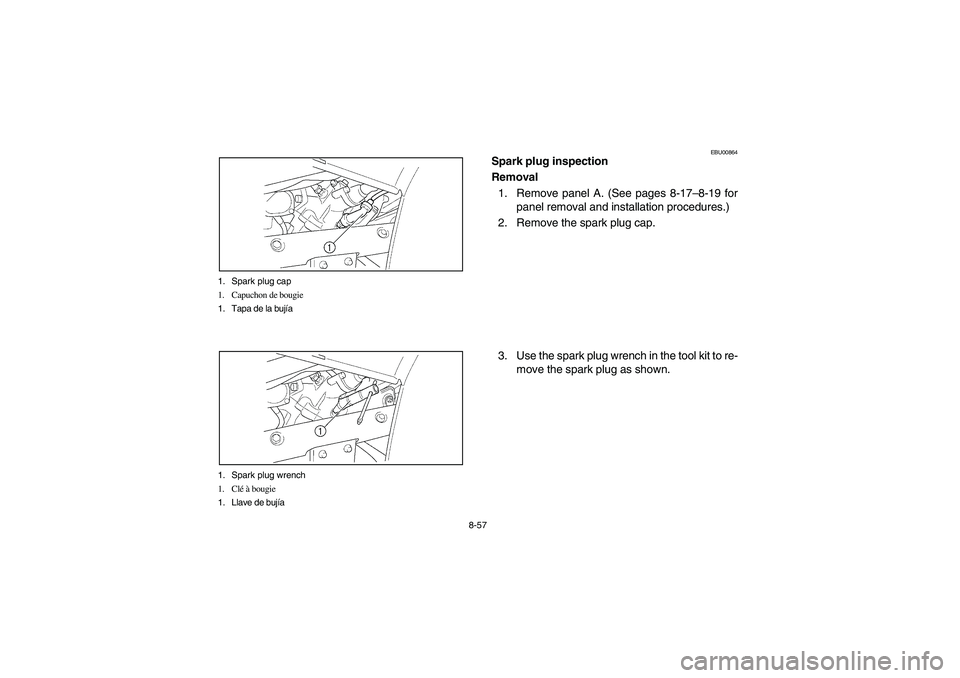
8-57 1. Spark plug cap
1. Capuchon de bougie
1. Tapa de la bujía
1. Spark plug wrench
1. Clé à bougie
1. Llave de bujía
EBU00864
Spark plug inspection
Removal
1. Remove panel A. (See pages 8-17–8-19 for
panel removal and installation procedures.)
2. Remove the spark plug cap.
3. Use the spark plug wrench in the tool kit to re-
move the spark plug as shown.
U5VH60.book Page 57 Wednesday, August 7, 2002 12:00 PM
Page 314 of 418

8-59
Inspection
The spark plug is an important engine component
and is easy to inspect. The condition of the spark
plug can indicate the condition of the engine.
The ideal color on the white insulator around the
center electrode is a medium-to-light tan color for a
ATV that is being ridden normally.
Do not attempt to diagnose such problems your-
self.
Instead, take the ATV to a Yamaha dealer. You
should periodically remove and inspect the spark
plug because heat and deposits will cause the
spark plug to slowly break down and erode. If elec-
trode erosion becomes excessive, or if carbon and
other deposits are excessive, you should replace
the spark plug with the specified plug.
Specified spark plug:
DR8EA (NGK)
U5VH60.book Page 59 Wednesday, August 7, 2002 12:00 PM
Page 316 of 418

8-61 a. Spark plug gap
a.Écartement des électrodes
a. Huelgo de la bujía
Installation
1. Measure the electrode gap with a wire thick-
ness gauge and, if necessary, adjust the gap
to specification.
2. Clean the gasket surface. Wipe off any grime
from the threads.
3. Install the spark plug and tighten it to the
specified torque.NOTE:_ If a torque wrench is not available when you are in-
stalling a spark plug, a good estimate of the correct
torque is 1/4 to 1/2 turn past finger tight. Have the
spark plug tightened to the specified torque as
soon as possible. _4. Install the spark plug cap.
5. Install the panel. Spark plug gap:
0.6–0.7 mm
Tightening torque:
Spark plug:
17.5 Nm (1.75 m·kgf)
U5VH60.book Page 61 Wednesday, August 7, 2002 12:00 PM
Page 330 of 418

8-75 1. Throttle stop screw
1. Vis d’arrêt de l’accélérateur
1. Tornillo de tope del acelerador
EBU01258
Idle speed adjustmentNOTE:_ A diagnostic tachometer must be used for this pro-
cedure. _1. Start the engine and warm it up for a few min-
utes at approximately 1,000 to 2,000 r/min.
Occasionally rev the engine to 4,000 to
5,000 r/min. The engine is warm when it
quickly responds to the throttle.
2. Remove panel D. (See pages 8-17–8-19 for
removal and installation procedures.)
3. Connect the tachometer to the spark plug
lead, and then set the idle to the specified
idling speed by adjusting the throttle stop
screw. Turn the screw in direction
a to in-
crease the engine speed, and in direction
b
to decrease the engine speed.
4. Install the panel.Specified idle speed:
1,450–1,550 r/min
U5VH60.book Page 75 Wednesday, August 7, 2002 12:00 PM
Page 380 of 418

8-125
EBU00724Troubleshooting chart
Starting problems or poor engine performance1. Fuel
Check if there is fuel
in the fuel tank.There is fuel.Turn the fuel cock
lever to “OFF”.No fuel.Fuel cock is
clogged.
Clean the
fuel cock. Some fuel.Turn the fuel cock
lever to “RES”.Restart the engine.
No fuel.Supply fuel.
2. Compression
Use the electric
starter to see if
there is compression.There is compression.
Compression normal.
No compression.Ask a Yamaha dealer to
inspect.
3. Ignition
Remove the
spark plug and
check electrodes.WetWipe clean with dry cloth.
DryAttach spark plug cap and
ground to chassis.Use the
electric starter.Spark is good.Ignition system is
normal.
Spark is weak.
Adjust the spark plug gap
or replace the spark plug. No spark.
Ask a Yamaha dealer to
inspect. 4. Battery
Use the electric starter.Engine turns over
quickly.Battery is good.
Engine turns over
slowly.Check the connections.Check the
fuel flow.
Turn the fuel cock
lever to “ON”.
Remove the fuel hose
from the fuel cock.
U5VH60.book Page 125 Wednesday, August 7, 2002 12:00 PM
Page 386 of 418

9-1
EBU00420
CLEANING AND STORAGE
A. CLEANING
Frequent, thorough cleaning of your machine will
not only enhance its appearance but will improve
its general performance and extend the useful life
of many components.
1. Before cleaning the machine:
a. Block off the end of the exhaust pipe to pre-
vent water entry. A plastic bag and strong
rubber band may be used.
b. Make sure the spark plug and all filler caps
are properly installed.
2. If the engine case is excessively greasy, ap-
ply degreaser with a paint brush. Do not ap-
ply degreaser to the wheel axles.
3. Rinse the dirt and degreaser off with a garden
hose. Use only enough pressure to do the
job.
U5VH60.book Page 1 Wednesday, August 7, 2002 12:00 PM
Page 392 of 418

9-7
EBU00427
B. STORAGE
Long term storage (60 days or more) of your ma-
chine will require some preventive procedures to
guard against deterioration. After thoroughly
cleaning the machine, prepare for storage as fol-
lows:
1. Fill the fuel tank with fresh fuel and add fuel
stabilizer (if available).NOTE:Use of fuel stabilizer eliminates the need to drain
the fuel system. Consult a Yamaha dealer if the
fuel system is to be drained instead.2. Remove the spark plug, pour about one ta-
blespoon of SAE 10W30 or 20W40 motor oil
in the spark plug hole and reinstall the spark
plug. Ground the spark plug wire and turn the
engine over several times to coat the cylinder
wall with oil.
3. Lubricate all control cables.
4. Block up the frame to raise all wheels off the
ground.
U5VH60.book Page 7 Wednesday, August 7, 2002 12:00 PM