check engine YAMAHA TMAX 2020 Owners Manual
[x] Cancel search | Manufacturer: YAMAHA, Model Year: 2020, Model line: TMAX, Model: YAMAHA TMAX 2020Pages: 126, PDF Size: 21.59 MB
Page 8 of 126

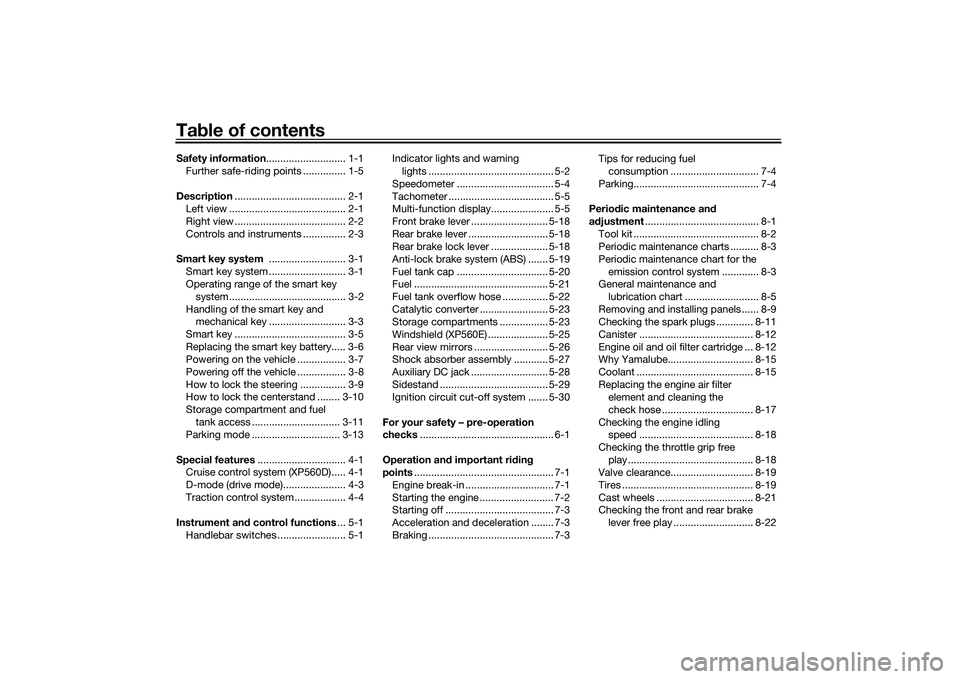
Table of contentsSafety information ............................ 1-1
Further safe-riding points ............... 1-5
Description ....................................... 2-1
Left view ......................................... 2-1
Right view ....................................... 2-2
Controls and instruments ............... 2-3
Smart key system ........................... 3-1
Smart key system ........................... 3-1
Operating range of the smart key system......................................... 3-2
Handling of the smart key and mechanical key ........................... 3-3
Smart key ....................................... 3-5
Replacing the smart key battery..... 3-6
Powering on the vehicle ................. 3-7
Powering off the vehicle ................. 3-8
How to lock the steering ................ 3-9
How to lock the centerstand ........ 3-10
Storage compartment and fuel tank access ............................... 3-11
Parking mode ............................... 3-13
Special features ............................... 4-1
Cruise control system (XP560D)..... 4-1
D-mode (drive mode)...................... 4-3
Traction control system .................. 4-4
Instrument an d control functions ... 5-1
Handlebar switches ........................ 5-1 Indicator lights and warning
lights ............................................ 5-2
Speedometer .................................. 5-4
Tachometer ..................................... 5-5
Multi-function display...................... 5-5
Front brake lever ........................... 5-18
Rear brake lever ............................ 5-18
Rear brake lock lever .................... 5-18
Anti-lock brake system (ABS) ....... 5-19
Fuel tank cap ................................ 5-20
Fuel ............................................... 5-21
Fuel tank overflow hose ................ 5-22
Catalytic converter ........................ 5-23
Storage compartments ................. 5-23
Windshield (XP560E) ..................... 5-25
Rear view mirrors .......................... 5-26
Shock absorber assembly ............ 5-27
Auxiliary DC jack ........................... 5-28
Sidestand ...................................... 5-29
Ignition circuit cut-off system ....... 5-30
For your safety – pre-operation
checks ............................................... 6-1
Operation an d important ri din g
points ................................................. 7-1
Engine break-in ............................... 7-1
Starting the engine .......................... 7-2
Starting off ...................................... 7-3
Acceleration and deceleration ........ 7-3
Braking ............................................ 7-3 Tips for reducing fuel
consumption ............................... 7-4
Parking............................................ 7-4
Perio dic maintenance an d
a d justment ........................................ 8-1
Tool kit ............................................ 8-2
Periodic maintenance charts .......... 8-3
Periodic maintenance chart for the emission control system ............. 8-3
General maintenance and
lubrication chart .......................... 8-5
Removing and installing panels ...... 8-9
Checking the spark plugs ............. 8-11
Canister ........................................ 8-12
Engine oil and oil filter cartridge ... 8-12
Why Yamalube.............................. 8-15
Coolant ......................................... 8-15
Replacing the engine air filter element and cleaning the
check hose ................................ 8-17
Checking the engine idling speed ........................................ 8-18
Checking the throttle grip free play ............................................ 8-18
Valve clearance............................. 8-19
Tires .............................................. 8-19
Cast wheels .................................. 8-21
Checking the front and rear brake
lever free play ............................ 8-22UB3TE0E0.book Page 1 Tuesday, September 17, 2019 9:35 AM
Page 12 of 126

Safety information
1-3
1Avoi
d Car bon Monoxi de Poisonin g
All engine exhaust contains carbon
monoxide, a deadly gas. Breathing
carbon monoxide can cause head-
aches, dizziness, drowsiness, nausea,
confusion, and eventually death.
Carbon Monoxide is a colorless, odor-
less, tasteless gas which may be pres-
ent even if you do not see or smell any
engine exhaust. Deadly levels of car-
bon monoxide can collect rapidly and
you can quickly be overcome and un-
able to save yourself. Also, deadly lev-
els of carbon monoxide can linger for
hours or days in enclosed or poorly
ventilated areas. If you experience any
symptoms of carbon monoxide poi-
soning, leave the area immediately, get
fresh air, and SEEK MEDICAL TREAT-
MENT. Do not run engine indoors. Even if
you try to ventilate engine exhaust
with fans or open windows and
doors, carbon monoxide can rap-
idly reach dangerous levels.
Do not run engine in poorly venti-
lated or partially enclosed areas
such as barns, garages, or car-
ports.
Do not run engine outdoors where
engine exhaust can be drawn into
a building through openings such
as windows and doors.
Loa din g
Adding accessories or cargo to your
scooter can adversely affect stability
and handling if the weight distribution
of the scooter is changed. To avoid the
possibility of an accident, use extreme
caution when adding cargo or acces-
sories to your scooter. Use extra care
when riding a scooter that has added
cargo or accessories. Here, along with
the information about accessories be-
low, are some general guidelines to fol-
low if loading cargo to your scooter:
The total weight of the operator, pas-
senger, accessories and cargo must
not exceed the maximum load limit.
Operation of an overloa ded vehicle
coul d cause an acci dent. When loading within this weight limit,
keep the following in mind:
Cargo and accessory weight
should be kept as low and close to
the scooter as possible. Securely
pack your heaviest items as close
to the center of the vehicle as pos-
sible and make sure to distribute
the weight as evenly as possible
on both sides of the scooter to
minimize imbalance or instability.
Shifting weights can create a sud-
den imbalance. Make sure that
accessories and cargo are se-
curely attached to the scooter be-
fore riding. Check accessory
mounts and cargo restraints fre-
quently.
• Properly adjust the suspension for your load (suspension-ad-
justable models only), and
check the condition and pres-
sure of your tires.
• Never attach any large or heavy items to the handlebar, front
fork, or front fender. Such items
can create unstable handling or
a slow steering response.
Maximum loa d:
195 kg (430 lb) (XP560D)
197 kg (434 lb) (XP560E)
UB3TE0E0.book Page 3 Tuesday, September 17, 2019 9:35 AM
Page 16 of 126

Description
2-1
2
EAU10411
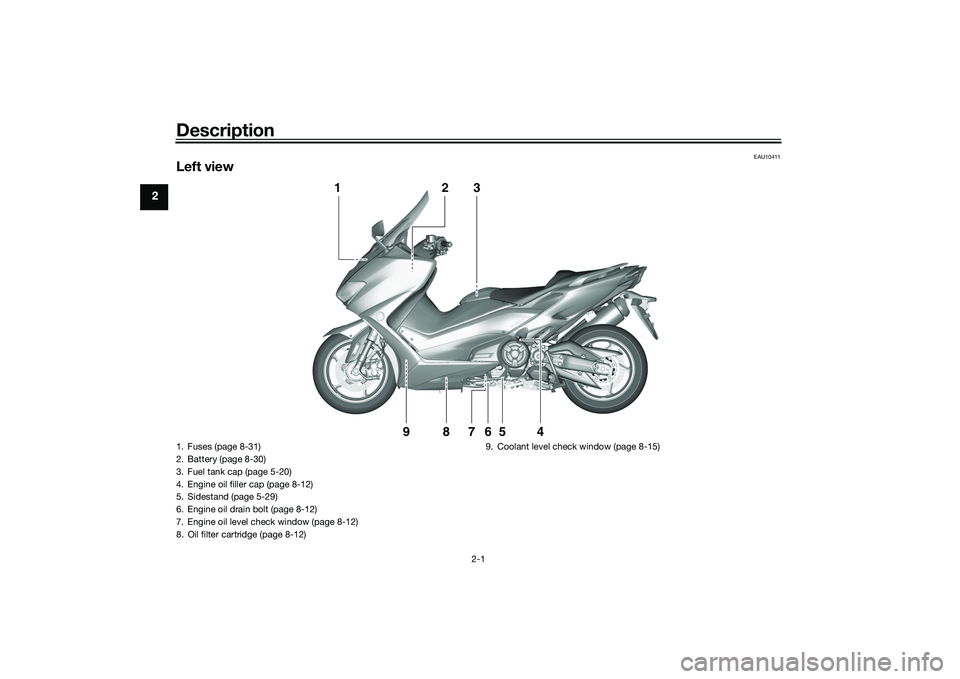
Left view
1
2
3
4
5
6
9
8
7
1. Fuses (page 8-31)
2. Battery (page 8-30)
3. Fuel tank cap (page 5-20)
4. Engine oil filler cap (page 8-12)
5. Sidestand (page 5-29)
6. Engine oil drain bolt (page 8-12)
7. Engine oil level check window (page 8-12)
8. Oil filter cartridge (page 8-12)9. Coolant level check window (page 8-15)UB3TE0E0.book Page 1 Tuesday, September 17, 2019 9:35 AM
Page 26 of 126

Smart key system
3-8
3
If the steering continues to be
locked and will not release, the
smart key system indicator light
will flash slowly. Move the handle-
bar gently to the left and right to
help release the steering lock and
then press the “ON/ ” switch
again.
The smart key system indicator
light will flash if the centerstand
lock cannot automatically release
itself. Gently rock the vehicle for-
ward or backward and then press
the “ON/ ” switch one more
time.
If the centerstand continues to be
locked and will not release, the
smart key system indicator light
will flash slowly. Rock the vehicle
forward and backward to help re-
lease the centerstand lock and
then press the “ON/ ” switch
again.
NOTICE
ECA15826
If the steerin g lock or centerstan d
lock will not release an d the smart
key system in dicator li ght is flash-
in g, have a Yamaha d ealer check the
smart key system.3. The power of the vehicle is turned on when all locks have been re-
leased. The multi-function display
will come on.
4. The engine can now be started. (See page 7-2.)TIPSee page 8-38 for information about
emergency mode and how to turn the
vehicle power on without the smart
key.
EAU78033
Powerin g off the vehicleTo turn the vehicle power off and stop
the engine if it is running, press the
“OFF/LOCK” switch.
Upon authentification of the smart key,
the beeper will sound once to confirm
that the vehicle power has been suc-
cessfully turned off and the storage
compartment and fuel tank cap lid
locks will be released.TIP The rider must turn off the power
of the vehicle manually.
The power of the vehicle will not
turn off automatically even if the
smart key is moved out of operat-
ing range of the smart key system.1. “OFF/LOCK” switch
1
UB3TE0E0.book Page 8 Tuesday, September 17, 2019 9:35 AM
Page 39 of 126

Instrument and control functions
5-3
5
EAU88690
Hi gh beam in dicator li ght “ ”
This indicator light comes on when the
high beam of the headlight is switched
on.
EAU77550
Cruise control in dicator li ghts
See page 4-1 for an explanation of
these indicator lights.
EAU88710
Malfunction ind icator light
(MIL) “ ”
This light comes on or flashes if a prob-
lem is detected in the engine or other
vehicle control system. If this occurs,
have a Yamaha dealer check the on-
board diagnostic system. The electri-
cal circuit of the warning light can be
checked by vehicle power on. The light
should come on for a few seconds,
and then go off. If the light does not
come on initially when the vehicle pow-
er on, or if the light remains on, have a
Yamaha dealer check the vehicle.
NOTICE
ECA26820
If the MIL starts flashin g, re duce en-
g ine spee d to prevent exhaust sys-
tem damag e.TIPThe engine is sensitively controlled for
the on-board diagnostic system to de-
tect deterioration and malfunction of
the emission control system. Due to
this specification, the MIL may come
on or flash for vehicle modifications,
lack of maintenance, or excessive or
improper use of the motorcycle. To
prevent this, observe these precau-
tions.
Do not attempt to modify the soft-
ware of the engine control unit.
Do not add any electrical acces-
sories that interfere with engine
control.
Do not use aftermarket accesso-
ries or parts such as suspension,
spark plugs, injectors, exhaust
system, etc.
Do not change drivetrain specifi-
cations (chain, sprockets, wheels,
tires, etc.).
Do not remove or alter the O2 sen-
sor, air induction system, or ex-
haust parts (catalysts or EXUP,
etc.).
Maintain proper V-belt and drive
belt (if equipped).
Maintain correct tire pressure.
Do not operate the vehicle in an
extreme manner. For example, re-
peated or excessive opening and
closing of the throttle, racing,
burnouts, wheelies, etc.
EAU77075
ABS warnin g lig ht “ ”
This warning light comes on when a
problem is detected with the ABS. (See
page 5-19.)
When the vehicle power is turned on,
this light will come on and then go off
after reaching a traveling speed of 10
km/h (6 mi/h). If the warning light: does not come on when the vehi-
cle power is turned on
does not go off after traveling at a
speed of 10 km/h (6 mi/h) or high-
er
comes on or flashes while riding
UB3TE0E0.book Page 3 Tuesday, September 17, 2019 9:35 AM
Page 40 of 126

Instrument and control functions
5-4
5 the anti-lock brake system may not
work correctly. Have a Yamaha dealer
check the vehicle as soon as possible.
WARNING
EWA16043
If the ABS warnin
g lig ht does not
turn off after reachin g 10 km/h (6
mi/h), or if the warnin g li ght comes
on while ri din g:
Use extra caution to avoi d pos-
si ble wheel lock d uring emer-
g ency brakin g.
Have a Yamaha dealer check
the vehicle as soon as possi ble.TIPThe ABS warning light may come on
when revving the engine with the
scooter on its centerstand, but this
does not indicate a malfunction.
EAU88700
Traction control system in dicator
li g ht “ ”
This indicator light will flash when trac-
tion control has engaged.
If the traction control system is turned
off, this indicator light will come on.
TIPWhen the vehicle is turned on, the light
should come on for a few seconds and
then go off. If the light does not come
on, or if the light remains on, have a
Yamaha dealer check the vehicle.
EAU78083
Smart key system in dicator
li g ht “ ”
This indicator light will flash when com-
munication between the vehicle and
smart key takes place and when cer-
tain smart key system operations are
carried out.
The indicator light may also flash when
there is an error in the smart key sys-
tem.TIPWhen the vehicle is turned on, the light
should come on for a few seconds and
then go off. If the light does not come
on, or if the light remains on, have a
Yamaha dealer check the vehicle.
EAU77131
Speed ometerThe speedometer shows the vehicle’s
traveling speed.
When the vehicle power is turned on,
the speedometer needle will sweep
across the speed range and return to
zero in order to test the electrical cir-
cuit.1. Speedometer
1 1
1
UB3TE0E0.book Page 4 Tuesday, September 17, 2019 9:35 AM
Page 42 of 126

Instrument and control functions
5-6
5 Fuel meter
The fuel meter indicates the amount of
fuel in the fuel tank. The display seg-
ments of the fuel meter disappear from
“F” (full) towards “E” (empty) as the fuel
level decreases. When the last seg-
ment starts flashing, refuel as soon as
possible.
TIPIf a problem is detected in the fuel me-
ter electrical circuit, the fuel meter will
flash repeatedly. Have a Yamaha deal-
er check the vehicle.
Coolant temperature meter
The coolant temperature varies with
changes in the weather and engine
load. If the top segment starts flashing,
the information display automatically
changes to “C-TEMP” and “Hi” flash-
es. Stop the vehicle and let the engine
cool. (See page 8-37.)TIPThe information display cannot be
changed while the engine is overheat-
ing.NOTICE
ECA10022
Do not continue to operate the en-
g
ine if it is overheatin g.
Eco in dicator
This indicator comes on when the vehi-
cle is being operated in an environ-
mentally friendly, fuel-efficient manner.
The indicator goes off when the vehicle
is stopped.TIPConsider the following tips to reduce
fuel consumption: Avoid high engine speeds during
acceleration.
Travel at a constant speed.
1. Fuel meter
1
1. Coolant temperature meter
1
1. Eco indicator “ECO”
1
UB3TE0E0.book Page 6 Tuesday, September 17, 2019 9:35 AM
Page 65 of 126

Instrument and control functions
5-29
5
2. Turn the vehicle power off.
3. Remove the auxiliary DC jack cap.
4. Turn the accessory off.
5. Insert the accessory plug into the
auxiliary DC jack.
6. Turn the vehicle power on and start the engine.
7. Turn the accessory on.
TIPWhen finished with your ride, be sure
to turn off the accessory, disconnect it,
and then install the auxiliary DC jack
cap.
WARNING
EWA14361
To prevent electrical shock or short-
circuitin g, make sure that the cap is
installe d when the auxiliary DC jack
is not bein g use d.
EAU15306
Si destan dThe sidestand is located on the left
side of the frame. Raise the sidestand
or lower it with your foot while holding
the vehicle upright.TIPThe built-in sidestand switch is part of
the ignition circuit cut-off system,
which cuts the ignition in certain situa-
tions. (See the following section for an
explanation of the ignition circuit cut-
off system.)
WARNING
EWA10242
The vehicle must not b e ridden with
the si destan d d own, or if the si de-
stan d cannot b e properly move d up
(or does not stay up), otherwise the
si destan d coul d contact the groun d
an d d istract the operator, resultin g
in a possib le loss of control.
Yamaha’s ig nition circuit cut-off
system has been desi gne d to assist
the operator in fulfillin g the respon-
si bility of raisin g the si destan d b e-
fore startin g off. Therefore, check this system re
gularly an d have a
Yamaha dealer repair it if it does not
function properly.
UB3TE0E0.book Page 29 Tuesday, September 17, 2019 9:35 AM
Page 66 of 126

Instrument and control functions
5-30
5
EAU63612
Ig nition circuit cut-off systemThe ignition circuit cut-off system
(comprising the sidestand switch and
brake light switches) has the following
functions.
It prevents starting when the side-
stand is up, but neither brake is
applied.
It prevents starting when either
brake is applied, but the sidestand
is still down.
It cuts the running engine when
the sidestand is moved down.
Periodically check the operation of the
ignition circuit cut-off system accord-
ing to the following procedure.UB3TE0E0.book Page 30 Tuesday, September 17, 2019 9:35 AM
Page 67 of 126

Instrument and control functions
5-31
5
With the engine turned off:
1. Move the sidestand down.
2. Make sure that the engine stop switch is turned on.
3. Turn the vehicle power on.
4. Keep the front or re ar brake applied.
5. Push the “ON/ ” switch.
Does the engine start?
With the engine still off:
6. Move the sidestand up.
7. Keep the front or re ar brake applied.
8. Push the “ON/ ” switch.
Does the engine start?
With the engine still running:
9. Move the sidest and down.
Does the engine stall?
The system is OK. The scooter can be ridden. The sidestand switch ma
y not be working correctly.
The scooter should not be ridden until
checked by a Y amaha dealer.
The sidestand switch ma y not be working correctly.
The scooter should not be ridden until
checked by a Y amaha dealer.
YES NO YES NO NO YES
The brake switch ma y not be working correctly.
The scooter should not be ridden until
checked by a Y amaha dealer.The vehicle must be placed on the center-
stand during this inspection. If a malfunction is noted, have a Yamaha
dealer check the system before riding.
WARNING
UB3TE0E0.book Page 31 Tuesday, September 17, 2019 9:35 AM