horn YAMAHA XT660Z 2015 Owners Manual
[x] Cancel search | Manufacturer: YAMAHA, Model Year: 2015, Model line: XT660Z, Model: YAMAHA XT660Z 2015Pages: 98, PDF Size: 8.44 MB
Page 26 of 98

INSTRUMENT AND CONTROL FUNCTIONS
3-9
3key and both standard keys to a
Yamaha dealer and have the stan-
dard keys re-registered.
EAU1234H
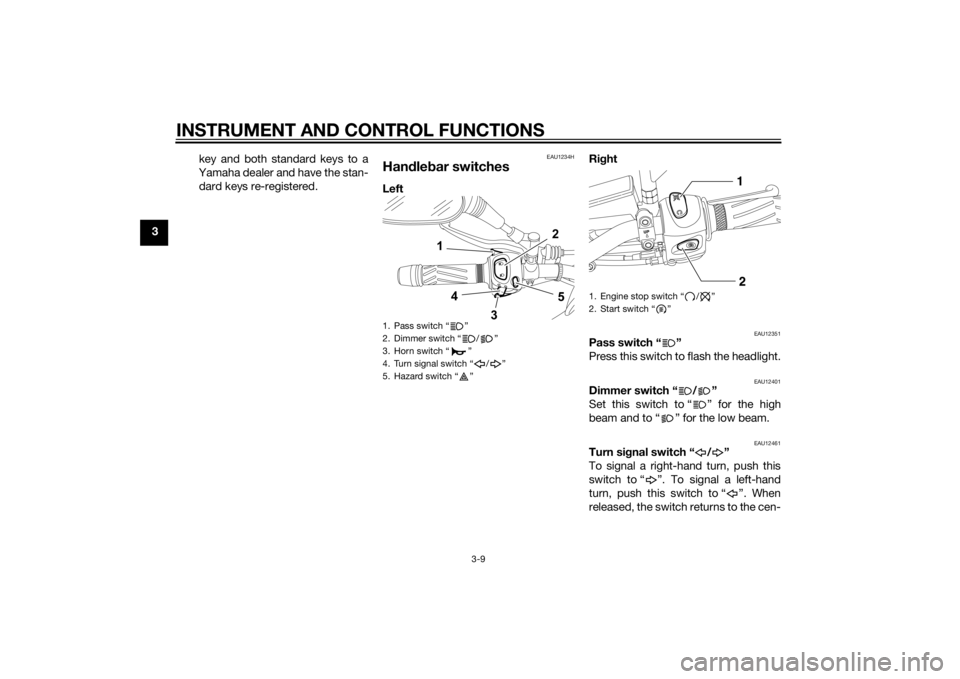
Handlebar switchesLeftRight
EAU12351
Pass switch “ ”
Press this switch to flash the headlight.
EAU12401
Dimmer switch “ / ”
Set this switch to “ ” for the high
beam and to “ ” for the low beam.
EAU12461
Turn signal switch “ / ”
To signal a right-hand turn, push this
switch to “ ”. To signal a left-hand
turn, push this switch to “ ”. When
released, the switch returns to the cen-
1. Pass switch “ ”
2. Dimmer switch “ / ”
3. Horn switch “ ”
4. Turn signal switch “ / ”
5. Hazard switch “ ”
1. Engine stop switch “ / ”
2. Start switch “ ”
U2BDE1E0.book Page 9 Tuesday, December 16, 2014 5:38 PM
Page 27 of 98

INSTRUMENT AND CONTROL FUNCTIONS
3-10
3 ter position. To cancel the turn signal
lights, push the switch in after it has re-
turned to the center position.
EAU12501
Horn switch “ ”
Press this switch to sound the horn.
EAU12661
Engine stop switch “ / ”
Set this switch to “ ” before starting
the engine. Set this switch to “ ” to
stop the engine in case of an emergen-
cy, such as when the vehicle overturns
or when the throttle cable is stuck.
EAU12713
Start switch “ ”
Push this switch to crank the engine
with the starter. See page 5-1 for start-
ing instructions prior to starting the en-
gine.
EAU44712
The engine trouble warning light and
ABS warning light (ABS model only)
may come on when the key is turned to
“ON” and the start switch is pushed,
but this does not indicate a malfunc-
tion.
EAU12735
Hazard switch “ ”
With the key in the “ON” or “ ” posi-
tion, use this switch to turn on the haz-
ard lights (simultaneous flashing of all
turn signal lights).
The hazard lights are used in case of an
emergency or to warn other drivers
when your vehicle is stopped where it
might be a traffic hazard.NOTICE
ECA10062
Do not use the hazard lights for an
extended length of time with the en-
gine not running, otherwise the bat-
tery may discharge.
EAU12821
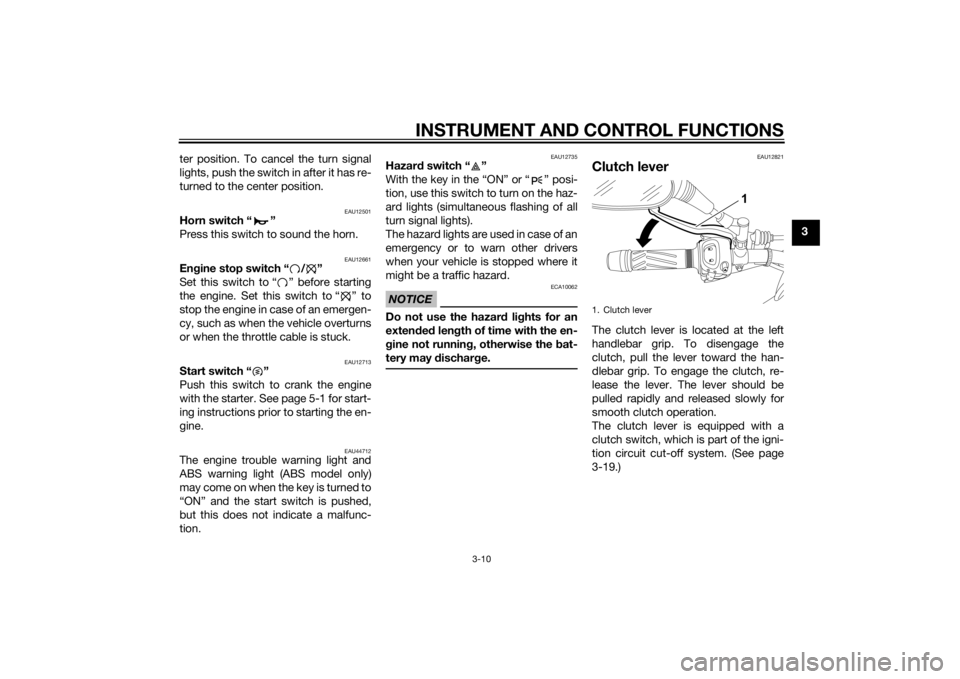
Clutch leverThe clutch lever is located at the left
handlebar grip. To disengage the
clutch, pull the lever toward the han-
dlebar grip. To engage the clutch, re-
lease the lever. The lever should be
pulled rapidly and released slowly for
smooth clutch operation.
The clutch lever is equipped with a
clutch switch, which is part of the igni-
tion circuit cut-off system. (See page
3-19.)1. Clutch lever
U2BDE1E0.book Page 10 Tuesday, December 16, 2014 5:38 PM
Page 95 of 98

10-1
10
INDEX
AABS (for ABS models) .......................... 3-12
ABS warning light (for ABS models) ....... 3-5
Air filter element and check hose,
replacing and cleaning ....................... 6-14
Auxiliary light bulb, replacing ............... 6-34BBattery .................................................. 6-29
Brake and clutch levers, checking and
lubricating........................................... 6-26
Brake fluid, changing............................ 6-23
Brake fluid level, checking.................... 6-21
Brake lever............................................ 3-11
Brake pedal .......................................... 3-11
Brake pedal, checking and
lubricating........................................... 6-26CCables, checking and lubricating ......... 6-25
Care ........................................................ 7-1
Catalytic converter ............................... 3-15
Clutch lever........................................... 3-10
Clutch lever free play, adjusting ........... 6-20
Coolant ................................................. 6-13
Coolant temperature warning light ......... 3-4DDimmer switch........................................ 3-9
Drive chain, cleaning and lubricating ... 6-24
Drive chain slack .................................. 6-23EEngine break-in ...................................... 5-3
Engine idling speed .............................. 6-16
Engine oil and oil filter element............. 6-10
Engine stop switch ............................... 3-10
Engine trouble warning light ................... 3-5
FFront and rear brake pads, checking ... 6-21
Front fork, adjusting ............................. 3-16
Front fork, checking ............................. 6-28
Fuel ...................................................... 3-13
Fuel consumption, tips for reducing ...... 5-3
Fuel tank breather/overflow hose ........ 3-15
Fuel tank cap........................................ 3-13
Fuses, replacing ................................... 6-31HHandlebar switches ............................... 3-9
Hazard switch ...................................... 3-10
Headlight bulb, replacing ..................... 6-32
High beam indicator light ....................... 3-4
Horn switch .......................................... 3-10IIdentification numbers ........................... 9-1
Ignition circuit cut-off system .............. 3-19
Immobilizer system ................................ 3-1
Immobilizer system indicator light ......... 3-5
Indicator lights and warning lights ......... 3-4LLicense plate light bulb, replacing ....... 6-35MMain switch/steering lock ...................... 3-2
Maintenance and lubrication, periodic... 6-4
Maintenance, emission control
system ................................................. 6-3
Matte color, caution ............................... 7-1
Model label............................................. 9-1
Multi-function display............................. 3-6NNeutral indicator light ............................. 3-4
PPanels, removing and installing .............. 6-8
Parking.................................................... 5-4
Part locations.......................................... 2-1
Pass switch............................................. 3-9RRear suspension, lubricating ................ 6-27SSafety information................................... 1-1
Seat....................................................... 3-16
Shifting.................................................... 5-2
Shift pedal............................................. 3-11
Shock absorber assembly, adjusting ... 3-18
Sidestand.............................................. 3-19
Sidestand, checking and lubricating .... 6-27
Spark plug, checking .............................. 6-9
Specifications ......................................... 8-1
Starting the engine ................................. 5-1
Start switch ........................................... 3-10
Steering, checking ................................ 6-28
Storage ................................................... 7-3
Supporting the motorcycle ................... 6-35
Swingarm pivots, lubricating ................ 6-27TTail/brake light ...................................... 6-34
Throttle grip and cable, checking and
lubricating ........................................... 6-25
Throttle grip free play, checking ........... 6-16
Tires ...................................................... 6-17
Tool kit .................................................... 6-2
Troubleshooting .................................... 6-39
Troubleshooting charts ......................... 6-40
Turn signal indicator light ....................... 3-4
Turn signal light bulb, replacing............ 6-34
U2BDE1E0.book Page 1 Tuesday, December 16, 2014 5:38 PM