YAMAHA YXZ1000R SS 2019 Owners Manual
YXZ1000R SS 2019
YAMAHA
YAMAHA
https://www.carmanualsonline.info/img/51/53887/w960_53887-0.png
YAMAHA YXZ1000R SS 2019 Owners Manual
Trending: ad blue, reset, brake light, battery capacity, steering wheel, transmission, cooling
Page 141 of 218
8-10
8
The service items contained herein should not be considered exhaustive, therefore:
• have your YXZ1000R checked and serviced by your Yamaha dealer at regular intervals.
• replace any damaged or visibly worn part immediately. UB5H7AE0.book Page 10 Wednesday, July 4, 2018 1:37 PM
Page 142 of 218
8-11
8
EBU35080HoodTo remove
Remove the bolts, and then pull the hood off
as shown.
To install
Place the hood in the original position, and
then install the bolts.
EBU36932PanelsThe panels shown need to be removed to
perform some of the maintenance jobs de-
scribed in this chapter. Refer to this section
each time a panel needs to be removed and
installed.
1. Hood
2. Bolt
2
1
2
UB5H7AE0.book Page 11 Wednesday, July 4, 2018 1:37 PM
Page 143 of 218
8-12
8
Panel A
To remove the panel1. Unhook the projections as shown.
2. Disconnect the interior light couplers (forLE models), and then remove the panel.
1. Panel A
2. Panel B
1. Panel C
2. Panel D
1
2
1
2
1. Panel A
2. Projection
1
2
2
UB5H7AE0.book Page 12 Wednesday, July 4, 2018 1:37 PM
Page 144 of 218
8-13
8
For interior-light-equipped models
To install the panel1. Connect the interior light couplers. (ForLE models)
2. Place the panel in the original position. Panel B
To remove the panel
1. Remove the hood. (See page 8-11.)
2. Remove panel A.
3. Remove the top cover by removing the
quick fastener screw and the bolts.
1. Interior light coupler
1
1
UB5H7AE0.book Page 13 Wednesday, July 4, 2018 1:37 PM
Page 145 of 218
8-14
8
4. Remove the passenger seat cushion.(See page 4-26.)
5. Remove the passenger seat by removing the bolts. 6. Remove the quick fastener screws and
the bolts, and then pull the panel off as
shown.1. Top cover
2. Bolt
3. Quick fastener screw
2
3
1
1. Passenger seat
2. Bolt
3. Seat belt
1
3
2
2
UB5H7AE0.book Page 14 Wednesday, July 4, 2018 1:37 PM
Page 146 of 218
8-15
8
To install the panel1. Place the panel in the original position,and then install the bolts and the quick
fastener screws. 2. Install the passenger seat by installing the
bolts, and then tighten them to the spec-
ified torque.
TIPMake sure that the seat frame is properly
secured.
1. Panel B
2. Quick fastener screw
3. Bolt
1
2
2
3
2
3
3
1. Panel BTightening torque:
Passenger seat bolt:32 N·m (3.2 kgf·m, 24 lb·ft)
1
UB5H7AE0.book Page 15 Wednesday, July 4, 2018 1:37 PM
Page 147 of 218
8-16
8
Place the passenger seat belt in the original
position. 3. Install the passenger seat cushion.
4. Install the top cover by installing the bolts
and quick fastener screw.
5. Install panel A and the hood.
Panels C and D
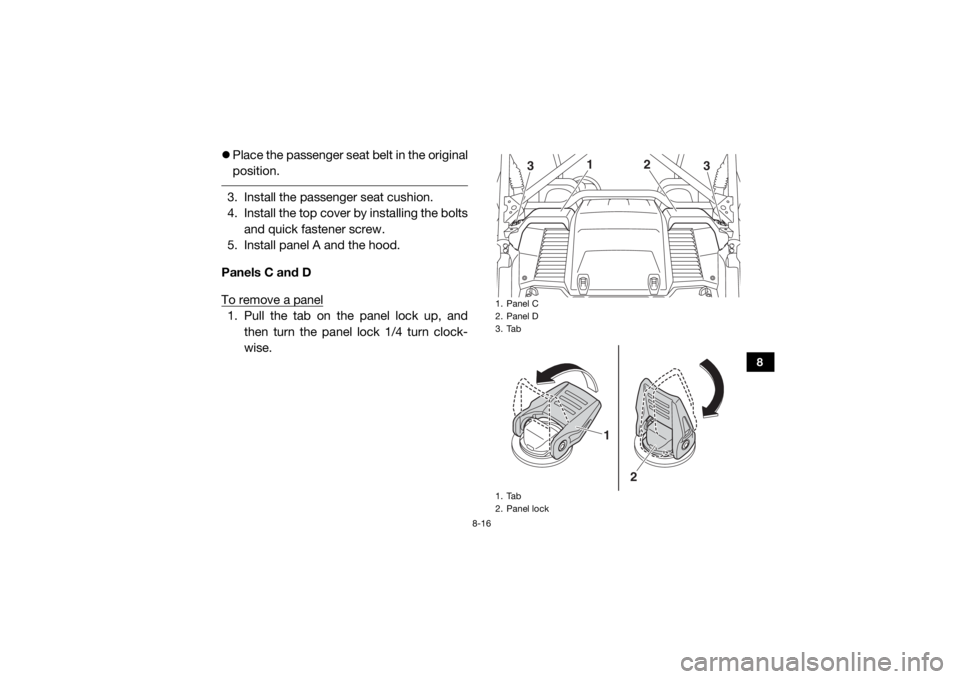
To remove a panel1. Pull the tab on the panel lock up, and then turn the panel lock 1/4 turn clock-
wise.
1. Panel C
2. Panel D
3. Tab
1. Tab
2. Panel lock
1
3
2
3
1
2
UB5H7AE0.book Page 16 Wednesday, July 4, 2018 1:37 PM
Page 148 of 218
8-17
8
2. Remove the panel as shown.To install a panel
1. Place the panel in the original position.
1. Panel C
1. Panel D
1
1
1. Panel C
1. Panel D
1
1
UB5H7AE0.book Page 17 Wednesday, July 4, 2018 1:37 PM
Page 149 of 218

8-18
8
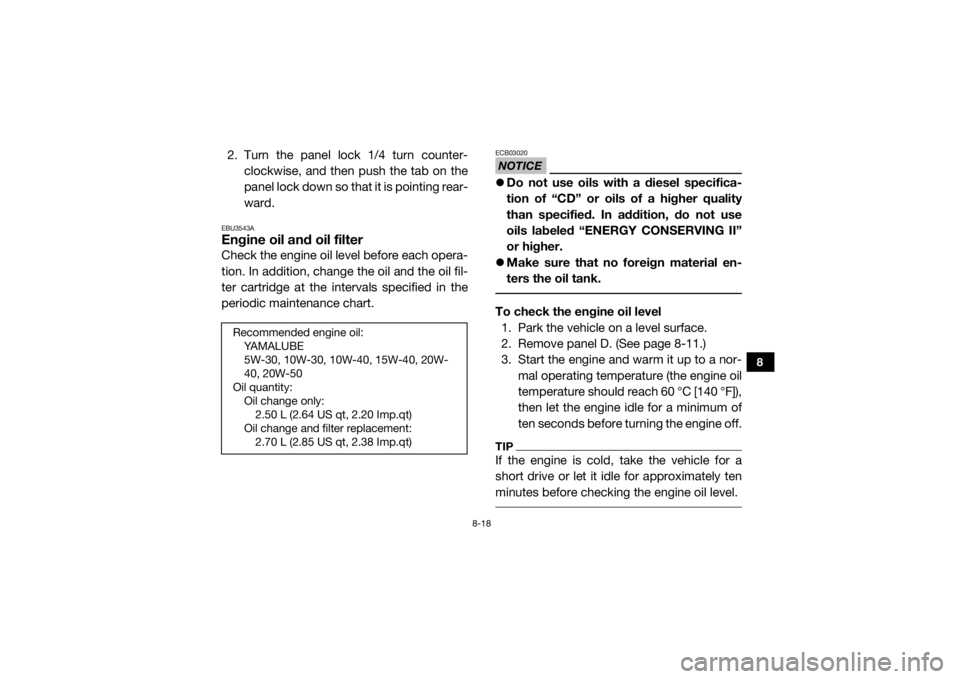
2. Turn the panel lock 1/4 turn counter-clockwise, and then push the tab on the
p a n e l l o c k d o w n s o t h a t i t i s p o i n t i n g r e a r -
ward.EBU3543AEngine oil and oil filterCheck the engine oil level before each opera-
tion. In addition, change the oil and the oil fil-
ter cartridge at the intervals specified in the
periodic maintenance chart.
NOTICEECB03020 Do not use oils with a diesel specifica-
tion of “CD” or oils of a higher quality
than specified. In addition, do not use
oils labeled “ENERGY CONSERVING II”
or higher.
Make sure that no foreign material en-
ters the oil tank. To check the engine oil level
1. Park the vehicle on a level surface.
2. Remove panel D. (See page 8-11.)
3. Start the engine and warm it up to a nor- mal operating temperature (the engine oil
temperature should reach 60 °C [140 °F]),
then let the engine idle for a minimum of
ten seconds before turning the engine off.TIPIf the engine is cold, take the vehicle for a
short drive or let it idle for approximately ten
minutes before checking the engine oil level.
Recommended engine oil:YA M A L U B E5W-30, 10W-30, 10W-40, 15W-40, 20W-
40, 20W-50
Oil quantity: Oil change only:2.50 L (2.64 US qt, 2.20 Imp.qt)
Oil change and filter replacement: 2.70 L (2.85 US qt, 2.38 Imp.qt)
UB5H7AE0.book Page 18 Wednesday, July 4, 2018 1:37 PM
Page 150 of 218
8-19
8
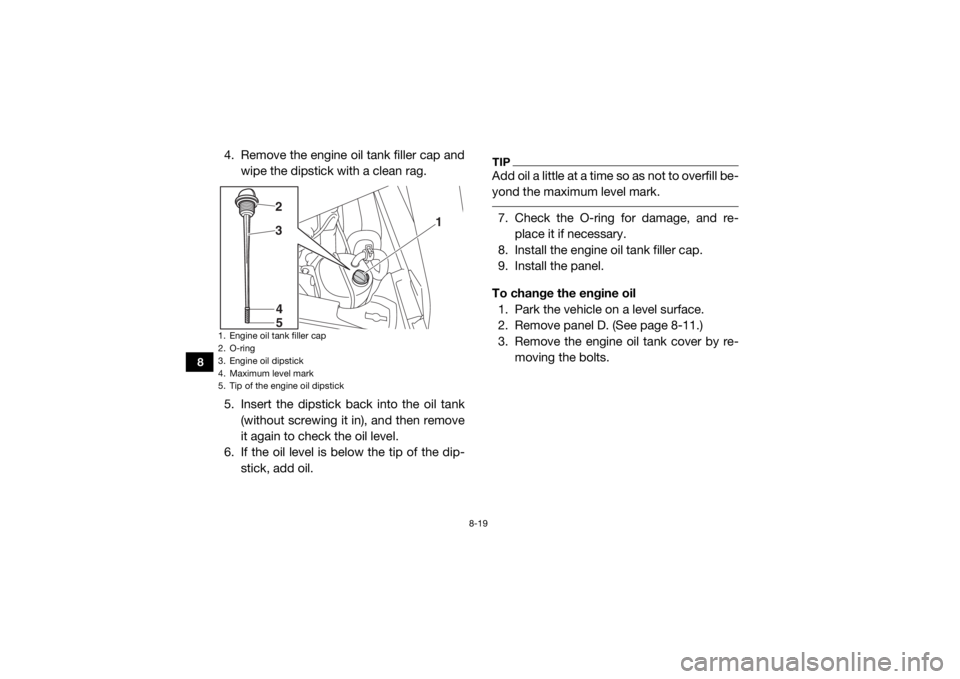
4. Remove the engine oil tank filler cap andwipe the dipstick with a clean rag.
5. Insert the dipstick back into the oil tank (without screwing it in), and then remove
it again to check the oil level.
6. If the oil level is below the tip of the dip- stick, add oil.
TIPAdd oil a little at a time so as not to overfill be-
yond the maximum level mark. 7. Check the O-ring for damage, and re-place it if necessary.
8. Install the engine oil tank filler cap.
9. Install the panel.
To change the engine oil 1. Park the vehicle on a level surface.
2. Remove panel D. (See page 8-11.)
3. Remove the engine oil tank cover by re- moving the bolts.
1. Engine oil tank filler cap
2. O-ring
3. Engine oil dipstick
4. Maximum level mark
5. Tip of the engine oil dipstick
45
32
1
UB5H7AE0.book Page 19 Wednesday, July 4, 2018 1:37 PM
Trending: warning light, spark plugs, stop start, engine overheat, brakes, boot, child lock


