dashboard Abarth 124 Spider 2016 Owner handbook (in English)
[x] Cancel search | Manufacturer: ABARTH, Model Year: 2016, Model line: 124 Spider, Model: Abarth 124 Spider 2016Pages: 224, PDF Size: 2.89 MB
Page 9 of 224
GETTING TO KNOW YOUR VEHICLE
In-depth knowledge of your new vehicle
starts here.
The handbook that you are reading
simply and directly explains how it is
made and how it works.
That’s why we advise you to read it
seated comfortably on board, so that
you can see immediately what is
described here for yourself.DASHBOARD................8
KEYS.....................9
IGNITION SWITCH............11
ADVANCED KEYLESS ENTRY
SYSTEM..................14
VEHICLE SECURITY ALARM.....14
DOORS...................16
SEATS....................19
HEAD RESTRAINTS...........21
STEERING WHEEL............21
MIRRORS..................22
EXTERIOR LIGHTS............24
WINDSCREEN WIPERS / WASHER .28
CLIMATE CONTROL SYSTEM.....30
POWER WINDOWS...........36
INTERNAL EQUIPMENT........37
BOOT LID..................38
BONNET..................40
CONVERTIBLE TOP (SOFT TOP) . . .42
7
Page 10 of 224
DASHBOARD
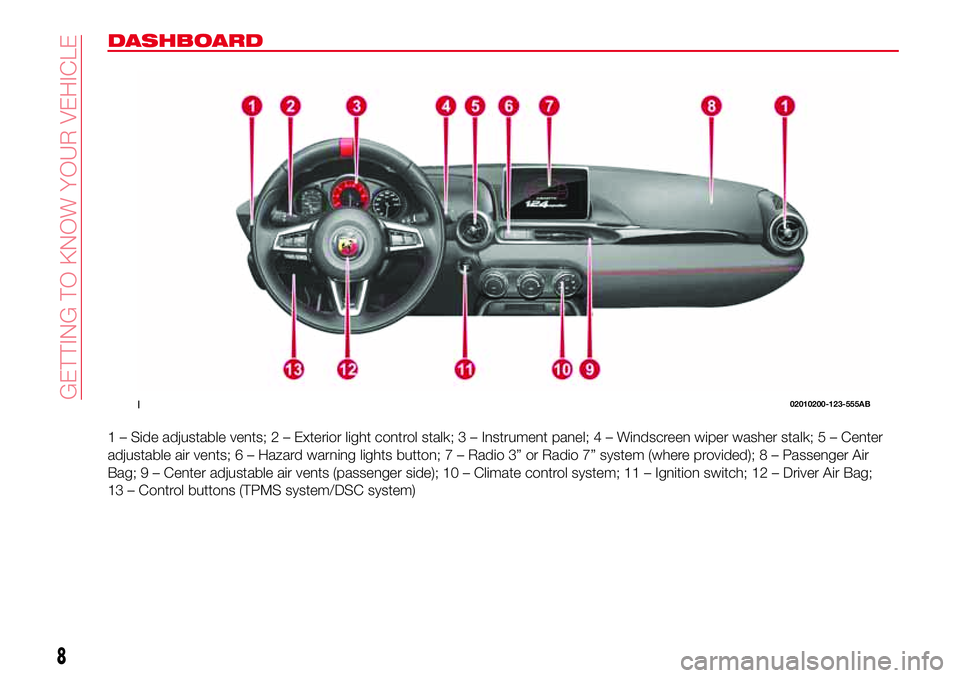
1 – Side adjustable vents; 2 – Exterior light control stalk; 3 – Instrument panel;4–Windscreen wiper washer stalk; 5 – Center
adjustable air vents; 6 – Hazard warning lights button; 7 – Radio 3” or Radio 7” system (where provided); 8 – Passenger Air
Bag; 9 – Center adjustable air vents (passenger side); 10 – Climate control system; 11 – Ignition switch; 12 – Driver Air Bag;
13 – Control buttons (TPMS system/DSC system)
102010200-123-555AB
8
GETTING TO KNOW YOUR VEHICLE
Page 26 of 224
EXTERIOR LIGHTS
HEADLIGHTS
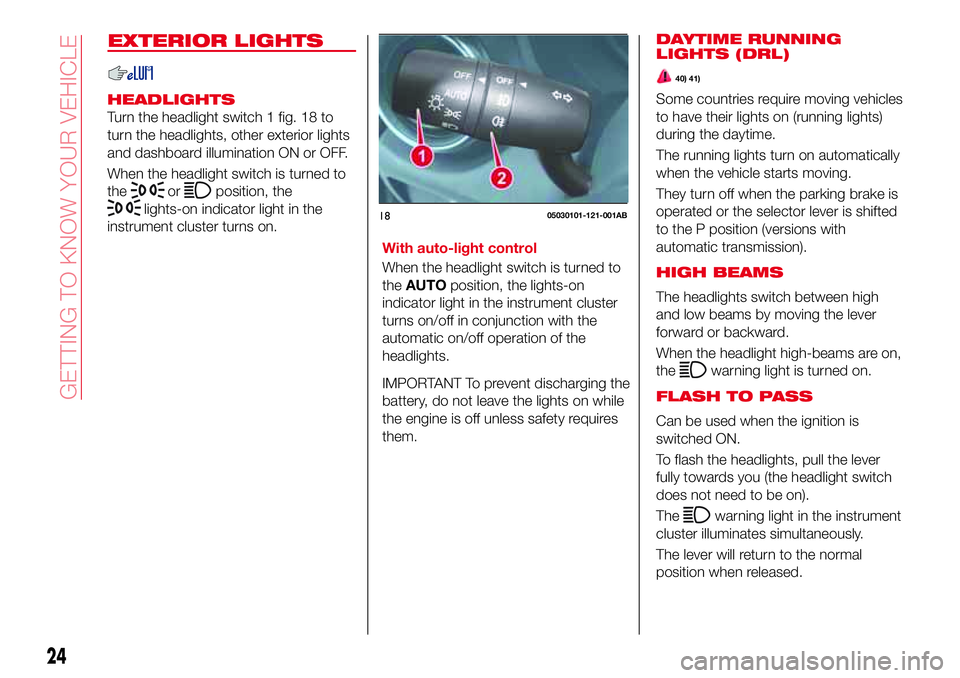
Turn the headlight switch 1 fig. 18 to
turn the headlights, other exterior lights
and dashboard illumination ON or OFF.
When the headlight switch is turned to
the
orposition, the
lights-on indicator light in the
instrument cluster turns on.
With auto-light control
When the headlight switch is turned to
theAUTOposition, the lights-on
indicator light in the instrument cluster
turns on/off in conjunction with the
automatic on/off operation of the
headlights.
IMPORTANT To prevent discharging the
battery, do not leave the lights on while
the engine is off unless safety requires
them.
1805030101-121-001AB
24
GETTING TO KNOW YOUR VEHICLE
DAYTIME RUNNING
LIGHTS (DRL)
40) 41)
Some countries require moving vehicles
to have their lights on (running lights)
during the daytime.
The running lights turn on automatically
when the vehicle starts moving.
They turn off when the parking brake is
operated or the selector lever is shifted
to the P position (versions with
automatic transmission).
HIGH BEAMS
The headlights switch between high
and low beams by moving the lever
forward or backward.
When the headlight high-beams are on,
the
warning light is turned on.
FLASH TO PASS
Can be used when the ignition is
switched ON.
To flash the headlights, pull the lever
fully towards you (the headlight switch
does not need to be on).
The
warning light in the instrument
cluster illuminates simultaneously.
The lever will return to the normal
position when released.
Page 27 of 224
AUTOMATIC LIGHTING(where provided)
Light sensor
When the headlight switch is in the
AUTOposition and the ignition is
switched ON, the light sensor senses
the surrounding lightness or darkness
and automatically turns the headlights,
other exterior lights and dashboard
illumination on or off.
IMPORTANT The light sensor also
works as a rain sensor for the
auto-wiper control. Keep hands and
scrapers clear of the windshield when
the wiper lever is in the AUTO position
and the ignition is switched ON as
fingers could be pinched or the wipers
and wiper blades damaged when the
wipers activate automatically. If you are
going to clean the windshield, be sure
the wipers are turned off completely
(this is particularly important when
clearing ice and snow) when it is
particularly tempting to leave the engine
running.COMING HOME LIGHT
SYSTEM
The coming me home light system
turns on the headlights (low beams)
when the lever is operated.
System activation
When the lever is pulled with the ignition
switched to ACC or OFF, the low beam
headlights turn on.
The headlights turn off after a certain
period of time has elapsed after the
doors are closed.
The time until the headlights turn off
after all of the doors are closed can be
changed. If no operations are done for
3 minutes after the lever is pulled, the
headlights turn off.
The headlights turn off if the lever is
pulled again while the headlights are on.
FRONT FOG LIGHTS
The front fog light can be used when
the ignition is switched to ON.
Activation
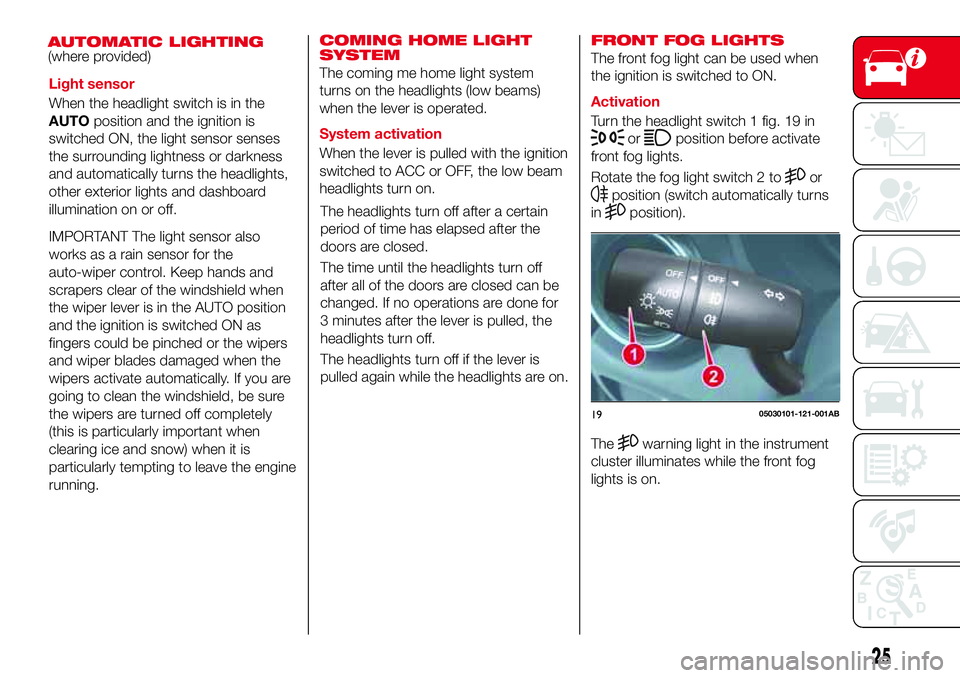
Turn the headlight switch 1 fig. 19 in
orposition before activate
front fog lights.
Rotate the fog light switch 2 to
or
position (switch automatically turns
in
position).
1905030101-121-001AB
25
Thewarning light in the instrument
cluster illuminates while the front fog
lights is on.
Page 28 of 224
Deactivation
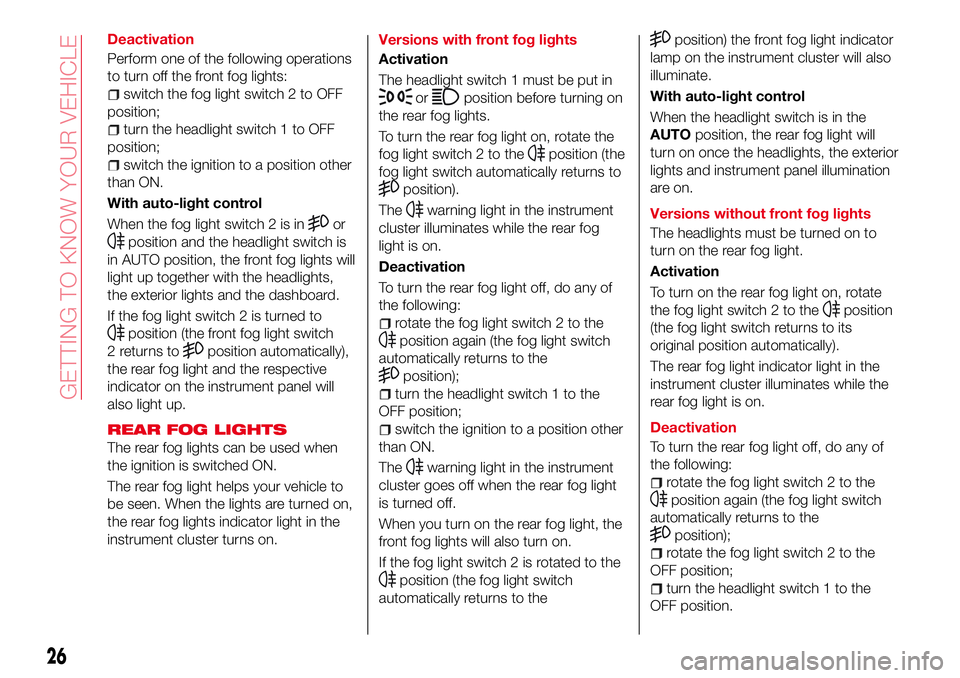
Perform one of the following operations
to turn off the front fog lights:
switch the fog light switch 2 to OFF
position;
turn the headlight switch 1 to OFF
position;
switch the ignition to a position other
than ON.
With auto-light control
When the fog light switch 2 is in
or
position and the headlight switch is
in AUTO position, the front fog lights will
light up together with the headlights,
the exterior lights and the dashboard.
If the fog light switch 2 is turned to
position (the front fog light switch
2 returns to
position automatically),
the rear fog light and the respective
indicator on the instrument panel will
also light up.
REAR FOG LIGHTS
The rear fog lights can be used when
the ignition is switched ON.
The rear fog light helps your vehicle to
be seen. When the lights are turned on,
the rear fog lights indicator light in the
instrument cluster turns on.Versions with front fog lights
Activation
The headlight switch 1 must be put in
orposition before turning on
the rear fog lights.
To turn the rear fog light on, rotate the
fog light switch 2 to the
position (the
fog light switch automatically returns to
position).
The
warning light in the instrument
cluster illuminates while the rear fog
light is on.
Deactivation
To turn the rear fog light off, do any of
the following:
rotate the fog light switch 2 to the
position again (the fog light switch
automatically returns to the
position);
turn the headlight switch 1 to the
OFF position;
switch the ignition to a position other
than ON.
The
warning light in the instrument
cluster goes off when the rear fog light
is turned off.
When you turn on the rear fog light, the
front fog lights will also turn on.
If the fog light switch 2 is rotated to the
position (the fog light switch
automatically returns to the
position) the front fog light indicator
lamp on the instrument cluster will also
illuminate.
With auto-light control
When the headlight switch is in the
AUTOposition, the rear fog light will
turn on once the headlights, the exterior
lights and instrument panel illumination
are on.
Versions without front fog lights
The headlights must be turned on to
turn on the rear fog light.
Activation
To turn on the rear fog light on, rotate
the fog light switch 2 to the
position
(the fog light switch returns to its
original position automatically).
The rear fog light indicator light in the
instrument cluster illuminates while the
rear fog light is on.
Deactivation
To turn the rear fog light off, do any of
the following:
rotate the fog light switch 2 to the
position again (the fog light switch
automatically returns to the
position);
rotate the fog light switch 2 to the
OFF position;
turn the headlight switch 1 to the
OFF position.
26
GETTING TO KNOW YOUR VEHICLE
Page 49 of 224

CONTROL PANEL AND INSTRUMENTS
1. Odometer/Trip meter and Trip computer button/Dashboard illumination - 2. Tachometer - 3. Speedometer - 4. Automatic
transmission info display - 5. Odometer/Trip computer info/Engine coolant temperature gauge/Fuel gauge/Outside
temperature/Speed limiter/Cruise Control/INFO switch display
4905020103-121-001AB
47
Page 50 of 224

Right hand drive versions
1. Odometer/Trip meter and Trip computer button/Dashboard illumination - 2. Tachometer - 3. Speedometer - 4. Automatic
transmission info display - 5. Odometer/Trip computer info/Engine coolant temperature gauge/Fuel gauge/Outside
temperature/Speed limiter/Cruise Control/INFO switch display
5005020107-121-001AB
48
KNOWING THE INSTRUMENT PANEL
Page 51 of 224
ODOMETER / TRIP METER
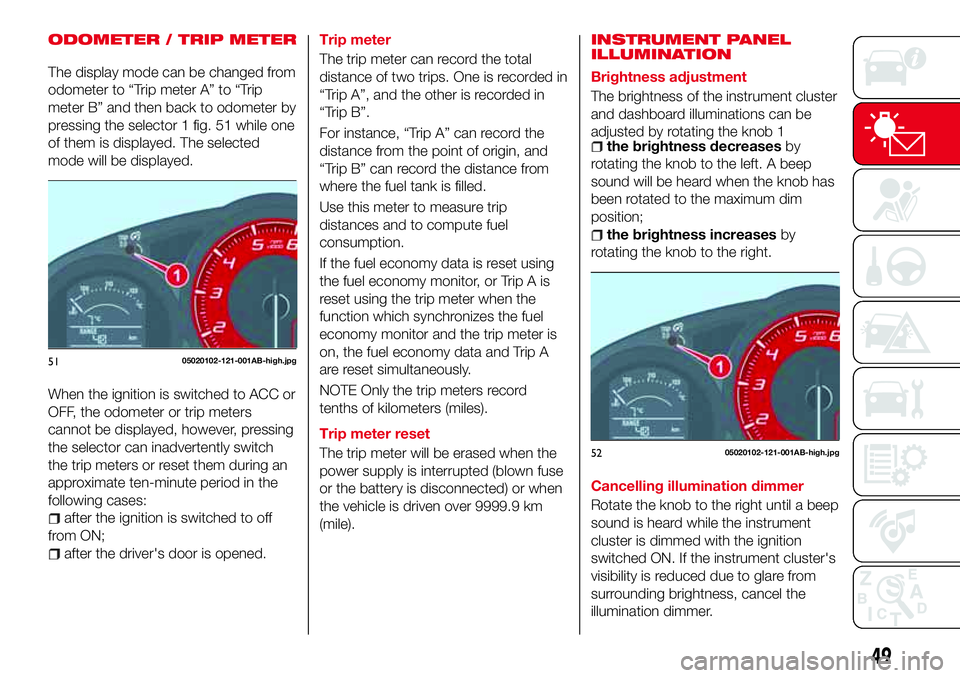
The display mode can be changed from
odometer to “Trip meter A” to “Trip
meter B” and then back to odometer by
pressing the selector 1 fig. 51 while one
of them is displayed. The selected
mode will be displayed.
When the ignition is switched to ACC or
OFF, the odometer or trip meters
cannot be displayed, however, pressing
the selector can inadvertently switch
the trip meters or reset them during an
approximate ten-minute period in the
following cases:
after the ignition is switched to off
from ON;
after the driver's door is opened.Trip meter
The trip meter can record the total
distance of two trips. One is recorded in
“Trip A”, and the other is recorded in
“Trip B”.
For instance, “Trip A” can record the
distance from the point of origin, and
“Trip B” can record the distance from
where the fuel tank is filled.
Use this meter to measure trip
distances and to compute fuel
consumption.
If the fuel economy data is reset using
the fuel economy monitor, or Trip A is
reset using the trip meter when the
function which synchronizes the fuel
economy monitor and the trip meter is
on, the fuel economy data and Trip A
are reset simultaneously.
NOTE Only the trip meters record
tenths of kilometers (miles).
Trip meter reset
The trip meter will be erased when the
power supply is interrupted (blown fuse
or the battery is disconnected) or when
the vehicle is driven over 9999.9 km
(mile).
INSTRUMENT PANEL
ILLUMINATION
Brightness adjustment
The brightness of the instrument cluster
and dashboard illuminations can be
adjusted by rotating the knob 1
the brightness decreasesby
rotating the knob to the left. A beep
sound will be heard when the knob has
been rotated to the maximum dim
position;
the brightness increasesby
rotating the knob to the right.
Cancelling illumination dimmer
Rotate the knob to the right until a beep
sound is heard while the instrument
cluster is dimmed with the ignition
switched ON. If the instrument cluster's
visibility is reduced due to glare from
surrounding brightness, cancel the
illumination dimmer.
5105020102-121-001AB-high.jpg
5205020102-121-001AB-high.jpg
49
Page 67 of 224

Warning light (red color) on dashboard trim
Warning light What it means
SEAT BELT WARNING LIGHT
The seat belt warning light turns on if the driver or passenger's seat is occupied and the seat
belt is not fastened with the ignition switched ON.
If the driver or passenger's seat belt is unfastened (only when the passenger seat is occupied)
and the vehicle is driven at a speed faster than about 20 km/h, the warning light flashes. After a
short time, the LED stops flashing, but remains illuminated.
If a seat belt remains unfastened, the LED flashes again for a given period of time.
If the driver or passenger's seat belt is unfastened after the LED turns on, and the vehicle speed
exceeds 20 km/h, the LED flashes again.
Passenger occupant classification system: to allow the passenger occupant classification
sensor to function properly, do not place and sit on an additional seat cushion on the
passenger's seat. The sensor may not function properly because the additional seat cushion
could cause sensor interference.
Warning light (amber color) on dashboard trim
Warning light What it means
PASSENGER AIR BAG DEACTIVATION INDICATOR LIGHT
The light turns on when the ignition is switched on for an operation check, and turns off a few
seconds later or when the engine is started. If the light does not turn on or remains turned on,
contact an Abarth Dealership.
65
Page 75 of 224

IMPORTANT Please note that the
TPMS is not a substitute for proper tire
maintenance, and it is the driver's
responsibility to maintain correct tire
pressure, even if under-inflation has not
reached the level to trigger illumination
of the TPMS low tire pressure telltale.
Your vehicle has also been equipped
with a TPMS malfunction indicator to
indicate when the system is not
operating properly.
IMPORTANT The TPMS malfunction
indicator is combined with the low tire
pressure telltale. When the system
detects a malfunction, the telltale will
flash for approximately one minute and
then remain continuously illuminated.
This sequence will continue upon
subsequent vehicle start-ups as long as
the malfunction exists. When the
malfunction indicator is illuminated, the
system may not be able to detect or
signal low tire pressure as intended.
TPMS malfunctions may occur for a
variety of reasons, including the
installation of replacement or alternate
tires or wheels on the vehicle that
prevent the TPMS from functioning
properly. Always check the TPMS
malfunction telltale after replacing one
or more tires or wheels on your vehicle
to ensure that the replacement oralternate tires and wheels allow the
TPMS to continue to function properly.
IMPORTANT To avoid false readings,
the system samples for a little while
before indicating a problem. As a result
it will not instantaneously register a
rapid tire deflation or blow out.
System error activation
When the TPMS warning light flashes,
there may be a system malfunction.
Contact an Abarth Dealership.
A system error activation may occur in
the following cases:
when there is equipment or a device
near the vehicle using the same radio
frequency as that of the tire pressure
sensors;
when a metallic device such as a
non-genuine navigation system is
equipped near the center of the
dashboard, which may block radio
signals from the tire pressure sensor to
the receiver unit;
when using the following devices in
the vehicle that may cause radio
interference with the receiver unit;
a digital device such as a personal
computer;
a current converter device such as a
DC-AC converter;
when excess snow or ice adheres to
the vehicle, especially around the
wheels;
when the tire pressure sensor
batteries are exhausted;
when using a wheel with no tire
pressure sensor installed;
when using tires with steel wire
reinforcement in the side walls;
when using tire chains.
Tires and wheels
IMPORTANT When inspecting or
adjusting the tire air pressures, do not
apply excessive force to the stem part
of the wheel unit. The stem part could
be damaged.
Changing tires and wheels
The following procedure allows the
TPMS to recognize a tire pressure
sensor's unique ID signal code
whenever tires or wheels are changed,
such as changing to and from winter
tires.
IMPORTANT Each tire pressure sensor
has a unique ID signal code. The signal
code must be registered with the TPMS
before it can work. The easiest way to
do it is to have an Abarth Dealership
change your tire and complete ID signal
code registration.
When having tires changed at an
Abarth Dealership: when an Abarth
Dealership changes your vehicle's tires,
they will complete the tire pressure
sensor ID signal code registration.
73