change time Abarth 124 Spider 2021 Owner handbook (in English)
[x] Cancel search | Manufacturer: ABARTH, Model Year: 2021, Model line: 124 Spider, Model: Abarth 124 Spider 2021Pages: 224, PDF Size: 3.9 MB
Page 120 of 224
MANUAL
TRANSMISSION
140) 141) 142)
25)
To engage the gears, press the clutch
pedal fully and put the gear lever into
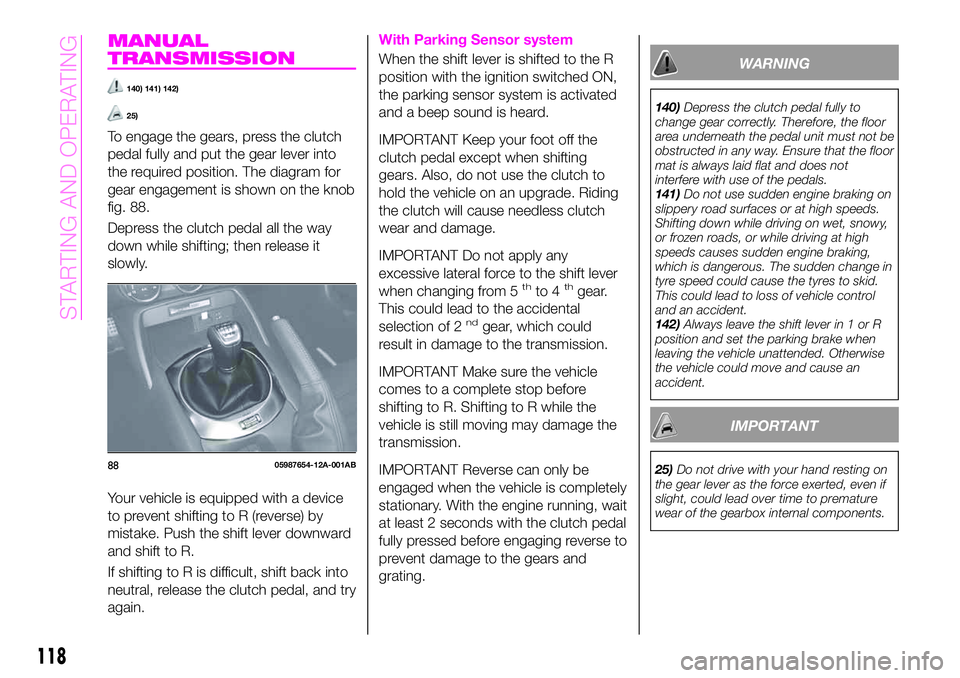
the required position. The diagram for
gear engagement is shown on the knob
fig. 88.
Depress the clutch pedal all the way
down while shifting; then release it
slowly.
Your vehicle is equipped with a device
to prevent shifting to R (reverse) by
mistake. Push the shift lever downward
and shift to R.
If shifting to R is difficult, shift back into
neutral, release the clutch pedal, and try
again.
With Parking Sensor system
When the shift lever is shifted to the R
position with the ignition switched ON,
the parking sensor system is activated
and a beep sound is heard.
IMPORTANT Keep your foot off the
clutch pedal except when shifting
gears. Also, do not use the clutch to
hold the vehicle on an upgrade. Riding
the clutch will cause needless clutch
wear and damage.
IMPORTANT Do not apply any
excessive lateral force to the shift lever
when changing from 5
thto 4thgear.
This could lead to the accidental
selection of 2
ndgear, which could
result in damage to the transmission.
IMPORTANT Make sure the vehicle
comes to a complete stop before
shifting to R. Shifting to R while the
vehicle is still moving may damage the
transmission.
IMPORTANT Reverse can only be
engaged when the vehicle is completely
stationary. With the engine running, wait
at least 2 seconds with the clutch pedal
fully pressed before engaging reverse to
prevent damage to the gears and
grating.
WARNING
140)Depress the clutch pedal fully to
change gear correctly. Therefore, the floor
area underneath the pedal unit must not be
obstructed in any way. Ensure that the floor
mat is always laid flat and does not
interfere with use of the pedals.
141)Do not use sudden engine braking on
slippery road surfaces or at high speeds.
Shifting down while driving on wet, snowy,
or frozen roads, or while driving at high
speeds causes sudden engine braking,
which is dangerous. The sudden change in
tyre speed could cause the tyres to skid.
This could lead to loss of vehicle control
and an accident.
142)Always leave the shift lever in 1 or R
position and set the parking brake when
leaving the vehicle unattended. Otherwise
the vehicle could move and cause an
accident.
IMPORTANT
25)Do not drive with your hand resting on
the gear lever as the force exerted, even if
slight, could lead over time to premature
wear of the gearbox internal components.8805987654-12A-001AB
118
STARTING AND OPERATING
Page 127 of 224
INCREASING SPEED
To increase speed using cruise
control switch
Press the RES/+ switch and hold it your
vehicle will accelerate. Release the
switch at the desired speed.
Press the RES/+ switch and release it
immediately to adjust the preset speed.
Multiple operations will increase the
preset speed according to the number
of times it is operated.
Increasing speed with a single
RES/+ switch operation
Meter display for vehicle speed
indicated in km/h: 1 km/h.
To increase speed using
accelerator pedal
Depress the accelerator pedal to
accelerate to the desired speed.
Press the SET/– switch and release it
immediately.
IMPORTANT Accelerate if you want to
speed up temporarily when the cruise
control is on. Greater speed will not
interfere with or change the set speed.
Take your foot off the accelerator to
return to the set speed.
DECREASING SPEED
Press the SET/– switch and hold it the
vehicle will gradually slow. Release the
switch at the desired speed.
Press the SET/– switch and release it
immediately to adjust the preset speed.
Multiple operations will decrease the
preset speed according to the number
of times it is operated.
Decreasing speed with a single
SET/– switch operation
Meter display for vehicle speed
indicated in km/h: 1 km/h.
INCREASING /
DECREASING SPEED
To increase speed
With cruise control switch: press the
RES/+ switch and hold it your vehicle
will accelerate. Release the switch at
the desired speed. Press the RES/+
switch and release it immediately to
adjust the preset speed. Multiple
operations will increase the preset
speed according to the number of
times it is operated.
Using accelerator pedal: depress the
accelerator pedal to accelerate to the
desired speed. Press the SET/– switch
and release it immediately.
IMPORTANT Accelerate if you want to
speed up temporarily when the cruise
control is on. Greater speed will not
interfere with or change the set speed.
Take your foot off the accelerator to
return to the set speed.
RESUME SPEED
If the cruise control system temporarily
cancelled (such as by applying the
brake pedal) and the system is still
activated, the most recent set speed
will automatically resume when the
RES/+ switch is pressed.
If vehicle speed is below 40 km/h
(25 mph), increase the vehicle speed up
to 40 km/h (25 mph) or more and press
the RES/+ switch.
TEMPORARILY
CANCELLING THE
SYSTEM
To temporarily cancel the system, use
one of these methods: slightly depress
the brake pedal/depress the clutch
pedal (versions with manual
transmission)/press the OFF/CANCEL
switch.
If the RES/+ switch is pressed when the
vehicle speed is 40 km/h or higher, the
system reverts to the previously set
speed.
125
Page 177 of 224
198)Do not remove either cooling system
cap when the engine and radiator are hot.
When the engine and radiator are hot,
scalding coolant and steam may shoot out
under pressure and cause serious injury.
199)The cooling system is pressurized. If
necessary, only replace the cap with
another original one or the operation of the
system may be adversely affected. Do not
remove the reservoir cap when the engine
is hot: risk of burns.
200)Do not travel with the windscreen
washer fluid reservoir empty: the washer
operation is essential for improving visibility.
Repeated operation of the system without
fluid could damage or cause rapid
deterioration of some system components.
201)Certain commercial additives for
windscreen washer fluids are inflammable.
The engine compartment contains hot
components which may set it on fire.
202)Brake fluid is poisonous and highly
corrosive. In the event of accidental
contact, immediately wash the affected
parts with water and mild soap. Then rinse
thoroughly. Call a doctor immediately if
swallowed.
203)Battery fluid is poisonous and
corrosive. Avoid contact with the skin and
eyes. Keep open flames away from the
battery and do not use objects that might
create sparks: risk of explosion and fire.
204)Using the battery with insufficient fluid
irreparably damages the battery and may
cause an explosion.
205)If the vehicle must remain unused for
a long time at a very low temperature,
remove the battery and take it to a warm
place, to avoid freezing.206)When performing any operation on
the battery or near it, always protect your
eyes with special goggles.
207)If the brake/clutch fluid level is low,
have the brakes inspected. A low
brake/clutch fluid level is dangerous. A low
level could indicate brake lining wear or a
brake system leak which could cause the
brakes to fail and lead to an accident.
208)Use only windscreen washer fluid or
plain water in the reservoir. Using radiator
antifreeze as washer fluid is dangerous. If
sprayed on the windscreen, it will dirty the
windscreen, affect your visibility, and could
result in an accident.
IMPORTANT
39)Be careful not to confuse the various
types of fluids while topping up: they are
not compatible with each other! Topping up
with an unsuitable fluid could severly
damage your vehicle.
40)The oil level should never exceed the
MAX mark.
41)Avoid allowing brake fluid, which is
extremely corrosive, to come into contact
with painted areas. Should it happen, wash
immediately with water.
IMPORTANT
4)Used engine oil and oil filters contain
substances which are harmful to the
environment. You are advised to contact an
Abarth Dealership to have the oil and filters
changed.
5)Used transmission fluid contains
substances that are harmful to the
environment. It is advisable to contact an
Abarth Dealership to have the fluid
changed.
6)Batteries contain substances which are
very dangerous for the environment. For
battery replacement, contact an Abarth
Dealership.
175
Page 198 of 224
TIPS, CONTROLS
AND GENERAL
INFORMATION
ROAD SAFETY
227) 228)
Learn how to use the various system
functions before setting off.
Read the instructions for the system
carefully before setting off.
RECEPTION CONDITIONS
Reception conditions change
constantly while driving.
Reception may be interfered with by the
presence of mountains, buildings or
bridges, especially when you are far
away from the broadcaster.
IMPORTANT The volume may be
increased when receiving traffic alerts
and news.
CARE AND
MAINTENANCE
51) 52)
Observe the following precautions to
ensure the system is fully operational:
the display lens should not come into
contact with pointed or rigid objects
which could damage its surface; use a
soft, dry anti-static cloth to clean and
do not press;
never use alcohol, petrols and
derivatives to clean the display lens;
prevent any liquid from entering the
system: this could damage it beyond
repair.
IMPORTANT
INFORMATION
Look at the screen only when it is
necessary and safe. If you need to look
at the screen for a long time, pull over
to a safe place so as not to be
distracted while driving.
Immediately stop using the system in
the event of a fault. Otherwise the
system might be damaged.
Contact a Dealership as soon as
possible to have the system repaired.
WARNING
227)Follow the safety rules below:
otherwise serious injuries may occur to the
occupants or the system may be
damaged.
228)If the volume is too loud this can be
dangerous. Adjust the volume so that you
can still hear background noises (e.g.
horns, ambulances, police vehicles, etc.).
IMPORTANT
51)Only clean the front panel and the
display lens with a soft, clean, dry,
anti-static cloth. Cleaning and polishing
products may damage the surface. Never
use alcohol, petrols and derivatives.
52)Do not use the display as a base for
supports with suction pads or adhesives for
external navigators or smartphones or
similar devices.
196
MULTIMEDIA
Page 201 of 224
REG (Regional Programme) (*);
ALC (Automatic volume adjustment);
BASS (Low pitch sound);
TREB (Treble sound);
FADE (Front/back volume balance);
BAL (Left/right volume balance);
BEEP (Audio operation sound);
BT SETUP (**);
12Hr < > 24Hr (12 Hr/24 Hr time
adjustment).
(*) With Radio Data System (RDS)
(where provided).
(**) Depending on the model, this
function may not be available.
CLOCK
Setting the time
The clock can be set at any time when
the ignition is switched to ACC or ON.
To adjust the time, press the clock
buttonFM/AMfor about 2 seconds
until a beep is heard. The clock's
current time will flash.
Time adjustment
To adjust the time, press the
hour/minute set button
/
while the clock's current time is
flashing.
The hours advance while the hour set
button
is pressed. The minutes
advance while the minute
set
button is pressed.Press the clock buttonFM/AMagain
to start the clock.
OPERATING THE RADIO
Radio ON: press a band selector
button FM/AM to turn the radio on.
Band selection: press the band
selector buttonFM/AMto switch the
bands as follows: FM1–FM2–AM
(without Radio Data System RDS) /
MW/LW (with Radio Data System RDS).
Manual tuning: select the station by
pressing the tuning button
/
lightly.
Seek tuning: press tuning button
/. The search stops when a
station is found.
Scan tuning: press and hold the scan
buttonMEDIAto automatically sample
strong stations. Scanning stops at each
station for about 5 seconds. To hold a
station, press and hold the scan button
MEDIA again during this interval.
Preset channel tuning
The 6 preset channels can be used to
store 6 AM (without Radio Data System
RDS), MW/LW (with Radio Data System
RDS) and 12 FM stations.
To set a channel first select AM
(without Radio Data System RDS),
MW/LW (with Radio Data System RDS),
FM1, or FM2. Tune to the desired
station.
Press a channel preset button for
about 2 seconds until a beep is heard.
The preset channel number or station
frequency will be displayed. The station
is now held in the memory.
Repeat this operation for the other
stations and bands you want to store.
To tune one in the memory, select AM
(without Radio Data System RDS),
MW/LW (with Radio Data System RDS),
FM1, or FM2 and then press its channel
preset button. The station frequency or
the channel number will be displayed.
AUX / USB / iPod MODE
Auxiliary jack / USB port
Audio can be heard from the vehicle's
speakers by connecting a commercially
available portable audio unit to the
auxiliary jack. A commercially-available,
non-impedance (3.5 Ø) stereo mini plug
lead is required. In addition, audio can
be played from the vehicle audio device
by connecting a USB device or an iPod
to the USB port.
How to use AUX mode
Switch the ignition to ACC or ON, press
the power/volume dial to turn the audio
system on and press theMEDIA
button of the audio unit to change to
the AUX mode.
199
Page 202 of 224
How to use USB mode
This unit does not support a USB
3.0 device. In addition, other devices
may not be supported depending on
the model or OS version.
Playback
Switch the ignition to ACC or ON, press
the power/volume dial to turn the audio
system on and press theMEDIA
button to switch to the USB mode and
start playback.
Track search
Press the track up buttononce to
skip forward to the beginning of the
next track.
Press the track down button
within a few seconds after
playback begins to track down to the
beginning of the previous track.
Press the track down button
after
a few seconds have elapsed to start
playback from the beginning of the
current track.
How to use iPod mode
An iPod may not be compatible
depending on the model or OS version.
In this case, an error message is
displayed.
NOTE The iPod functions on the iPod
cannot be operated while it is
connected to the unit because the unit
controls the iPod functions.
Track search
Press the track up buttononce to
skip forward to the beginning of the
next track.
Press the track down button
within a few seconds (depends
on iPod software version) after playback
begins to track down to the beginning
of the previous track.
Press the track down button
after
a few seconds (depends on iPod
software version) have elapsed to start
playback from the beginning of the
current track.
Category search: press the category
down button5to select the previous
category and press the category up
button6to select the next category.
The types of categories include Playlist,
Artist, Album, Song, Podcast, Genre,
Composer, and Audio book.
List search: press the list down button
to select the previous list and press
the list up button
to select the next
list. When the selected category is
Song or Audio book, there is no list.
Bluetooth® HANDS FREE
Device pairing
To useBluetooth®
audio and
Hands-Free, the device equipped with
Bluetooth®
has to be paired to the
unit using the following procedure. A
maximum of seven devices including
Bluetooth®
audio devices and
hands-free mobile phones can be
paired.
NOTE The
Bluetooth®
system may
not operate for 1 or 2 minutes after the
ignition is switched to ACC or ON.
However, this does not indicate a
problem. If the
Bluetooth®
system
does not connect automatically after
1 or 2 minutes have elapsed, make
sure that the
Bluetooth®
setting on
the device is normal and attempt to
reconnect the
Bluetooth®
device from
the vehicle side.
Pairing code setting
The 4-digit pairing code setting for
registration of your cell phone (pairing)
can be set beforehand. The initial
setting value is “0000”.
Proceed as follows:
1: press the pick-up button or talk
button with a short press;
2Say: [Beep] “Setup”
3Prompt: “Select one of the
following: Pairing options, confirmation
prompts, language, passcode, select
phone or select music player.”
4Say: [Beep] “Pairing options”
5Prompt: “Select one of the
following: Pair, Edit, Delete, List, or Set
Pairing Code.”
6Say: [Beep] “Set pairing code”
7Prompt: “Your current pairing code
is XXXX. Do you want to change it to a
200
MULTIMEDIA
Page 205 of 224
displays the Entertainment
screen.
NAVdisplays the Navigation screen
(only navigation-equipped
vehicles). If the SD card for the
navigation system is not inserted,
the compass indicating the
direction in which the vehicle is
moving is displayed.
displays the Favourites screen.
Long-press to store particular
items in “Favourites” (radio,
phonebook and destination of
the navigation system can be
programmed).
returns to previous screen.
Volume dial operation
Press theVOLdial to switch the audio
MUTE on and off.
Turn the volume dial to adjust the
volume. The volume increases by
turning the dial clockwise, and
decreases by turning it anticlockwise.
Selection of icons on screen
Tilt or turn the commander knob and
move the cursor to the desired icon.
Press the commander knob and select
the icon.
NOTE Long-press operation of the
commander knob is also possible for
some functions.
Touch panel operation
Touch & Tap: touch or tap on the item
indicated on the screen. The operation
is launched and the next item is
displayed.
Slide: touch the setting item displaying
a slider bar. Touch the slider with your
finger and move to the desired level.
Swipe: touch the screen with your
finger and move up or down. Items
which were not displayed can be
displayed.
IMPORTANT Do not press the screen
strongly or press it with a sharp-pointed
object. Otherwise, the screen could be
damaged.
NOTE For safety reasons, touch panel
operation is disabled while the vehicle is
moving.
AUDIO SOUND
ADJUSTMENT
Select theicon on the home screen
to display the Settings screen.
Select theSoundto select the item you
would like to change:
Bass(Low pitch sound): + Side low
pitch enhancement/– Side: low pitch
reduction;
Treble(Treble sound): + Side: treble
enhancement/– Side: treble reduction;
Fade(Front/rear volume balance):
Front (front speaker volumeenhancement)/Rear (rear speaker
volume enhancement);
Balance(Left/right volume balance):
Left (left speaker volume
enhancement)/Right (right speaker
volume enhancement);
ALC(Automatic volume adjustment)
(standard audio): Off-Adjustment at
seven levels;
Bose®
AudioPilot(Automatic
volume adjustment) (Bose®
Sound
System, where provided): On/Off;
Beep(Audio operation sound):
On/Off.
HOME SCREEN
Icons visualized on home screen are:
Applications: information such
as average fuel economy,
maintenance, and warnings can
be verified. Depending on the
grade and specification, the
screen display may differ.
Entertainment: operates audio
such as the radio. The audio
source most recently used is
displayed. An audio source
which cannot be used at that
time is skipped and the previous
audio source is displayed. To
change the audio source, select
the icon displayed at the bottom
of the screen.
203
Page 206 of 224
Communication:Bluetooth®
related functions are available.
Navigation: Navigation screen
(where provided) is displayed. If
the SD card for the navigation
system is not inserted, the
compass indicating the direction
in which the vehicle is moving is
displayed. The compass may
not indicate the correct bearing
when the vehicle is stopped or
travelling at a slow speed.
Settings: overall setting menu
(such as display, sound,
Bluetooth®
and Language).
Depending on the grade and
specification, the screen display
may differ.
OPERATING THE RADIO
Select the iconon the home screen
to display the “Entertainment” screen.
When selecting the desired radio, the
following icons are indicated in the
lower part of the display:
displays the “Entertainment”
menu. Use to switch to a
different audio source;
displays the list of receivable RDS
radio stations (FM only) (with
Radio Data System RDS);
displays the station list (AM only)
(not displayed when listening to
FM radio on vehicles with Radio
Data System RDS). Select
“Update Station List”to
display the frequencies of up to
ten radio stations on the auto
memory preset list Select the
desired frequency.
displays the Favourites list.
Long-press to store radio station
currently being aired.
you can search for receivable
radio stations. Scanning stops at
each station for about five
seconds. Select again to
continue receiving the radio
station.
you can change the radio
frequency manually. Rotate the
commander knob, slide the
screen, or touch the radio
frequency. Press
orto
change the radio frequency one
step at a time. When
oris
long-pressed, the radio frequency
changes continually. It stops when
you remove your hand from the
icon or the commander knob.
switches the TA mode on and off
(with Radio Data System RDS).
/Automatic radio station
selection. When
long-pressed, the radio
frequency changes
continually. It stops when
you remove your hand from
the icon or the commander
knob.
Displays the FM settings screen
(FM only) (with Radio Data System
RDS). On/Off of Alternative
frequency and Region lock can be
set.
Displays sound settings to adjust
audio quality level.
NOTE When theoricon is
selected while FM is selected, each
programme is selected.
Digital Audio Broadcasting (DAB)
Radio
(where provided)
Select the icon
on the home screen
to display the “Entertainment” screen.
SelectDABthe following icons are
displayed at the bottom of the screen:
Displays the “Entertainment”
menu. Use to switch to a
different audio source.
204
MULTIMEDIA
Page 207 of 224
Displays the station list (ensemble
and station). Select “Update List”
to update the station list. Select
“Select Ensemble” to select the
ensemble you want to display.
Displays the favorites list. Press
and hold to store the currently
tuned station to the favorites list.
Searches your desired station
from the station list. Tunes to
each station in the station list for
10 seconds. Select again when
your desired station is tuned. If
the station list is not available, it
switches to the station list update
screen. Perform the station list
updating.
Switches the TA mode on and
off.
/Returns to the
previous/goes to the next
station. Touch and hold to
return to the top station in
the previous/next ensemble.
Displays the DAB radio setting
screen.
Displays sound settings to adjust
audio quality level.
SETTINGS
NOTE Depending on the grade and
specification, the screen display may
differ.
Select the
icon on the home screen
to display the Settings screen. Switch
the tab and select the setting item you
want to change.
You can customize settings in the setup
display as follows:
“Display”: refer to “Volume/Display/
Sound controls” paragraph in Radio 7”
supplement;
“Sound”: refer to “Volume/Display/
Sound controls” paragraph in Radio 7”
supplement;
“Clock”: “Adjust Time”, “GPS Sync”,
“Time Format”, “Time Zone Select”,
“Daylight Savings Time”;
“Vehicle”: rain sensing Wiper/Door
Lock/Other;
“Devices”: selectBluetooth®
or
“Network Management”;
“System”: “Tool Tips”, “Language”,
“Temperature”, “Distance”, “Music
Database Update”, “Factory Reset”,
“About (agreements and disclaimers)”,
“About (version Information)”
AUX / USB / iPod MODE
Audio can be heard from the vehicle's
speakers by connecting a commercially
available portable audio unit to the
auxiliary jack. A commercially-available,non-impedance (3.5 Ø) stereo mini plug
lead is required.
In addition, audio can be played from
the vehicle audio device by connecting
a USB device or an iPod to the USB
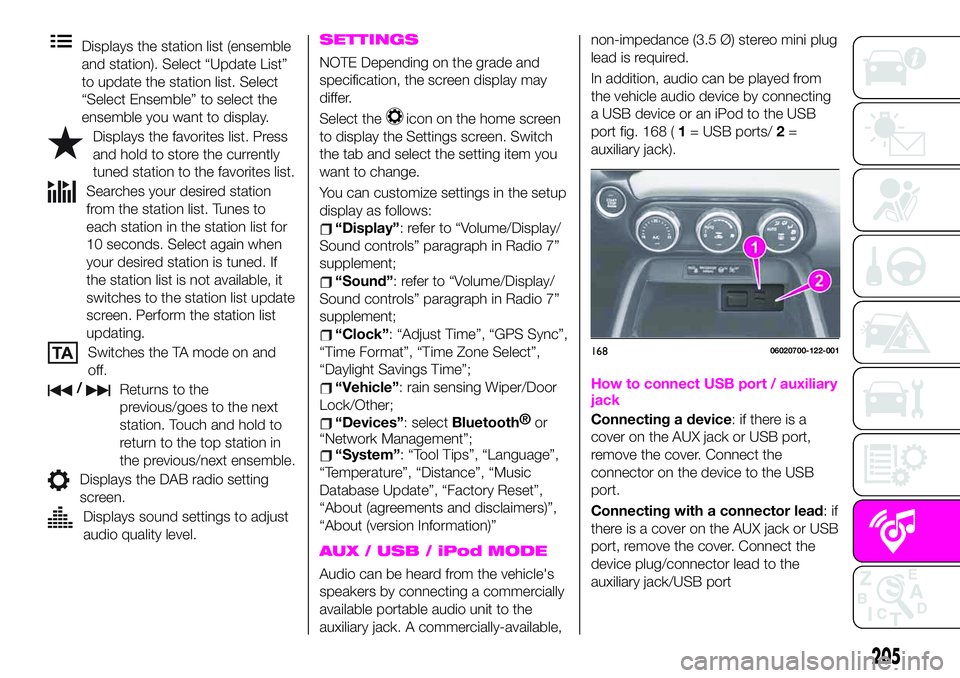
port fig. 168 (1= USB ports/2=
auxiliary jack).
How to connect USB port / auxiliary
jack
Connecting a device: if there is a
cover on the AUX jack or USB port,
remove the cover. Connect the
connector on the device to the USB
port.
Connecting with a connector lead:if
there is a cover on the AUX jack or USB
port, remove the cover. Connect the
device plug/connector lead to the
auxiliary jack/USB port
16806020700-122-001
205
Page 210 of 224
NAVIGATION
SD CARD
To use the navigation system, the SD
card containing the map information
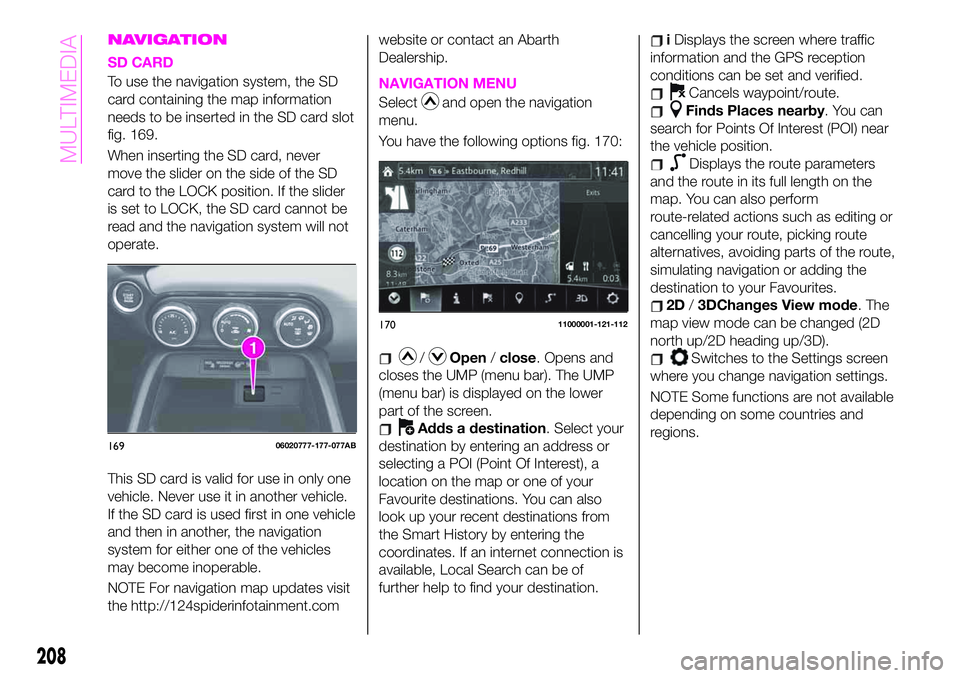
needs to be inserted in the SD card slot
fig. 169.
When inserting the SD card, never
move the slider on the side of the SD
card to the LOCK position. If the slider
is set to LOCK, the SD card cannot be
read and the navigation system will not
operate.
This SD card is valid for use in only one
vehicle. Never use it in another vehicle.
If the SD card is used first in one vehicle
and then in another, the navigation
system for either one of the vehicles
may become inoperable.
NOTE For navigation map updates visit
the http://124spiderinfotainment.comwebsite or contact an Abarth
Dealership.NAVIGATION MENU
Selectand open the navigation
menu.
You have the following options fig. 170:
/Open/close. Opens and
closes the UMP (menu bar). The UMP
(menu bar) is displayed on the lower
part of the screen.
Adds a destination. Select your
destination by entering an address or
selecting a POI (Point Of Interest), a
location on the map or one of your
Favourite destinations. You can also
look up your recent destinations from
the Smart History by entering the
coordinates. If an internet connection is
available, Local Search can be of
further help to find your destination.
iDisplays the screen where traffic
information and the GPS reception
conditions can be set and verified.
Cancels waypoint/route.
Finds Places nearby. You can
search for Points Of Interest (POI) near
the vehicle position.
Displays the route parameters
and the route in its full length on the
map. You can also perform
route-related actions such as editing or
cancelling your route, picking route
alternatives, avoiding parts of the route,
simulating navigation or adding the
destination to your Favourites.
2D/3DChanges View mode. The
map view mode can be changed (2D
north up/2D heading up/3D).
Switches to the Settings screen
where you change navigation settings.
NOTE Some functions are not available
depending on some countries and
regions.
16906020777-177-077AB
17011000001-121-112
208
MULTIMEDIA