lights Abarth 500 2016 Owner handbook (in English)
[x] Cancel search | Manufacturer: ABARTH, Model Year: 2016, Model line: 500, Model: Abarth 500 2016Pages: 215, PDF Size: 19.08 MB
Page 39 of 215
 IMPORTANT When the SPORT button
is pressed, the function is activated
about 5 seconds later.
IMPORTANT During acceleration using
the SPORT function the steering may
shudder which is typical of a sport")
IMPORTANT When the SPORT button
is pressed, the function is activated
about 5 seconds later.
IMPORTANT During acceleration using
the SPORT function the steering may
shudder which is typical of a sports
setting.
HAZARD WARNING
LIGHTS
They are turned on by pressing the
button B fig. 31, regardless of the
position of the ignition key.
With the device on, warning lights
andlight up in the instrument
panel.
Press button B again to switch the
lights off.
IMPORTANT The use of hazard warning
lights is governed by the highway
code of the country you are driving in:
comply with legal requirements.Emergency braking
In the event of an emergency braking,
the hazard warning light switch on
automatically together with warning
lights
andon the instrument
panel.
The lights switch off automatically when
emergency braking ceases.
FRONT FOG
LIGHTS/REAR FOG
LIGHTS
(for versions/markets, where provided)
The fog lights can be activated only
when the dipped headlamps are on.
To turn on the front/rear fog lights, use
the button C fig. 31 as follows:
❒First pressing: front fog lights on;
❒second pressing: rear fog lamps
on;
❒third pressing: front/rear fog lights
off.
With front fog lights on, the
warning
light on the instrument panel will come
on at the same time.
With rear fog lights on, the
warning
light on the instrument panel will come
on at the same time.REAR FOG LIGHTS
When the dipped beam headlights are
on, these can be activated by pressing
button
fig. 32.
With lights on, the warning light
on
the instrument panel will come on at the
same time.
Press the button again to switch the
lights off.
FUEL CUT-OFF SYSTEM
This intervenes in the case of an impact
causing:
❒the fuel supply cut-off with the engine
consequently switching off
❒the automatic unlocking of the doors
❒turning on the lights inside the
vehicle.
32AB0A0030
35
Page 55 of 215
 HEADLIGHTS
LIGHT BEAM ALIGNMENT
The correct alignment of the headlights
is important for the comfort and safety
of not only the driver but all other road
users. This is also covered by a specific
rule")
HEADLIGHTS
LIGHT BEAM ALIGNMENT
The correct alignment of the headlights
is important for the comfort and safety
of not only the driver but all other road
users. This is also covered by a specific
rule of the highway code.
The headlights must be correctly aimed
to guarantee the best visibility
conditions for all drivers while travelling
with headlights on.
Contact an Abarth Dealership to have
them properly adjusted.
Check light beam alignment every time
the load or its distribution changes.
IMPORTANT When the gas discharge
(Xenon) headlights (for versions/
markets, where provided) are switched
on, normally parabolas and light beam
move vertically for about 2 seconds
until headlight alignment has stabilised.HEADLIGHT ALIGNMENT
CORRECTOR
This device works with the ignition key
in the MAR-ON position and the dipped
headlights on.
Headlight alignment
adjustment
When the car is loaded, it slopes
backwards. This means the light beam
rises.
In this case, restore the correct
alignment by operating buttons+and–
fig. 59.The adjustment positions are shown on
the display.
Position 0 - one or two people in the
front seats.
Position1-4passengers.
Position2-4passengers + load in the
luggage compartment.
Position 3 - driver + maximum
permitted load stowed in the luggage
compartment.
IMPORTANT Gas discharge headlights
(Xenon headlights) are automatically
adjusted. Headlight alignment
adjustment is electronic and therefore
cannot be manually adjusted using
the+and–buttons.
FOG LIGHTS ALIGNMENT
(for versions/markets, where provided)
Contact an Abarth Dealership to have
the fog lights properly adjusted.
59AB0A0002
51
Page 56 of 215
 ADJUSTING THE
HEADLIGHTS ABROAD
Dipped headlights are adjusted for
driving in the country where the vehicle
was originally purchased. When
travelling in countries with opposite
driving direction, to a")
ADJUSTING THE
HEADLIGHTS ABROAD
Dipped headlights are adjusted for
driving in the country where the vehicle
was originally purchased. When
travelling in countries with opposite
driving direction, to avoid dazzling the
drivers on the other side of the road,
you need to cover areas of the
headlight according to the Highway
Code of the country you are travelling
in.ESC SYSTEM
IN BRIEF
The ESC system improves the
directional control and stability of the
car in various driving conditions.
The ESC system corrects the car’s
understeer and oversteer, distributing
the brake force on the appropriate
wheels. The torque supplied by
the engine can also be reduced in
order to maintain control of the car.
The system is capable of recognising
potentially dangerous situations in
terms of the stability and intervenes
automatically on the brakes in a
differentiated manner for the four
wheels in order to provide a stabilising
torque.The ESC system also includes the
following subsystems:
❒EBD
❒ABS
❒ASR
❒HILL HOLDER
❒HBA
❒MSR
❒TTC
SYSTEM ACTIVATION
The ESC system switches on
automatically when the engine is
started and cannot be switched off.
SYSTEM INTERVENTION
It is signalled by the blinking of the ESC
warning light on the instrument panel,
to inform the driver that the car is in
critical stability and grip conditions.
52
GETTING TO KNOW YOUR CAR
Page 63 of 215
 EOBD SYSTEM
The EOBD (European On Board
Diagnosis system) carries out a
continuous diagnosis of the
components of the car related to
emissions. It also alerts the driver, by
turning on the warning lig")
EOBD SYSTEM
The EOBD (European On Board
Diagnosis system) carries out a
continuous diagnosis of the
components of the car related to
emissions. It also alerts the driver, by
turning on the warning light
on the
instrument panel together with relevant
message on the display, when these
components are no longer in peak
conditions (see chapter "Warning lights
and messages").
The goal of the system is to:
❒monitor system efficiency
❒indicate an increase in emissions due
to vehicle malfunction
❒indicate the need to replace
damaged components.
The system also has a connector that
can be interfaced with appropriate
equipment, which makes it possible to
read the error codes stored in the
control unit together with a series of
specific parameters for engine
operation and diagnosis.
IMPORTANT After eliminating the
failure, to check the system completely,
Abarth Dealerships must run a bench
test and, if necessary, road tests which
may also call for a long journey.
DUALDRIVE
ELECTRIC POWER
STEERING
(for versions/markets, where provided)
OPERATION
This only operates with the ignition key
turned to MAR-ON and the engine
started.
Electric power steering allows the force
required at the steering wheel to be
adapted to the driving conditions.
IMPORTANT When turning the ignition
key quickly, full power steering
functionality can be achieved after a
few seconds.
When the SPORT function is turned on
(see "Controls" paragraph in this
chapter) the electric power steering
assistance is altered, increasing the
sensitivity of the steering wheel.
54) 55)
IMPORTANT During parking
manoeuvres requiring a lot of steering,
the steering may become harder: this is
normal and is due to the intervention
of the system to protect the electric
steering motor from overheating, so no
repair is required. When the car is
used again later on, the power steering
will work normally.
WARNING
54) It is absolutely forbidden to carry
out any after-market operation
involving steering system or
steering column modifications
(e.g. installation of anti-theft
device) that could adversely affect
performance and safety,
invalidate the warranty and also
result in the car not meeting
type-approval requirements.
55) Before servicing the car, switch
off the engine and remove the key
from the ignition switch to
activate the steering lock. This is
especially important when the car
wheels are not touching the
ground. If this is not possible (for
example if the key needs to be
turned to MAR-ON or the engine
must be running), remove the
main fuse that protects the
electric power steering.
59
Page 67 of 215
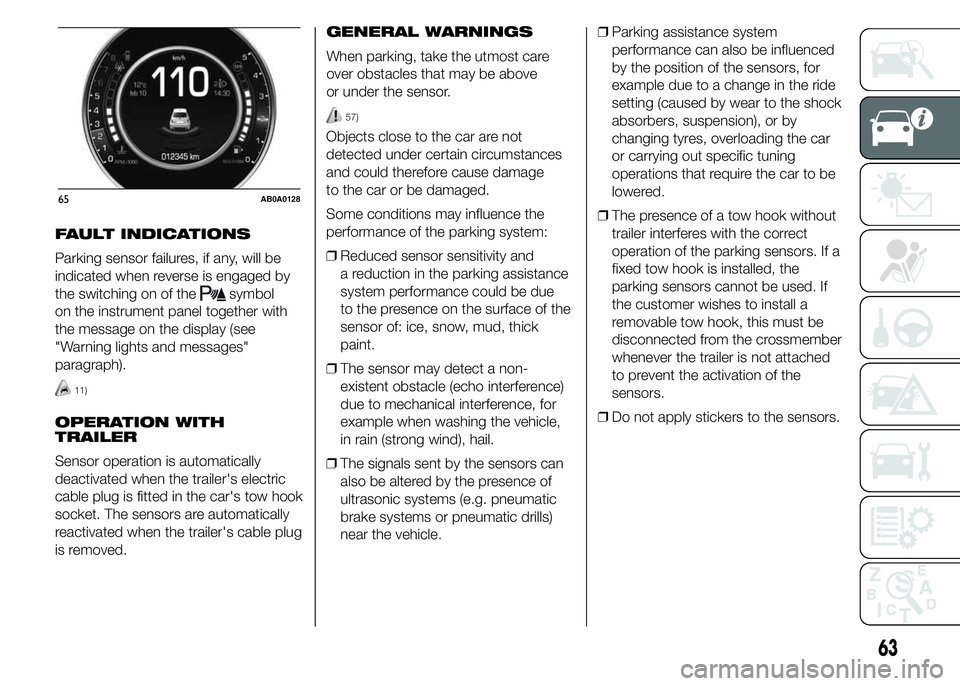
FAULT INDICATIONS
Parking sensor failures, if any, will be
indicated when reverse is engaged by
the switching on of the
symbol
on the instrument panel together with
the message on the display (see
"Warning lights and messages"
paragraph).
11)
OPERATION WITH
TRAILER
Sensor operation is automatically
deactivated when the trailer's electric
cable plug is fitted in the car's tow hook
socket. The sensors are automatically
reactivated when the trailer's cable plug
is removed.GENERAL WARNINGS
When parking, take the utmost care
over obstacles that may be above
or under the sensor.
57)
Objects close to the car are not
detected under certain circumstances
and could therefore cause damage
to the car or be damaged.
Some conditions may influence the
performance of the parking system:
❒Reduced sensor sensitivity and
a reduction in the parking assistance
system performance could be due
to the presence on the surface of the
sensor of: ice, snow, mud, thick
paint.
❒The sensor may detect a non-
existent obstacle (echo interference)
due to mechanical interference, for
example when washing the vehicle,
in rain (strong wind), hail.
❒The signals sent by the sensors can
also be altered by the presence of
ultrasonic systems (e.g. pneumatic
brake systems or pneumatic drills)
near the vehicle.❒Parking assistance system
performance can also be influenced
by the position of the sensors, for
example due to a change in the ride
setting (caused by wear to the shock
absorbers, suspension), or by
changing tyres, overloading the car
or carrying out specific tuning
operations that require the car to be
lowered.
❒The presence of a tow hook without
trailer interferes with the correct
operation of the parking sensors. If a
fixed tow hook is installed, the
parking sensors cannot be used. If
the customer wishes to install a
removable tow hook, this must be
disconnected from the crossmember
whenever the trailer is not attached
to prevent the activation of the
sensors.
❒Do not apply stickers to the sensors.
65AB0A0128
63
Page 71 of 215
 KNOWING THE INSTRUMENT PANEL
This section of the handbook gives you
all the information you need to
understand, interpret and use the
instrument panel correctly.DISPLAY ...............................")
KNOWING THE INSTRUMENT PANEL
This section of the handbook gives you
all the information you need to
understand, interpret and use the
instrument panel correctly.DISPLAY ......................................... 68
MENU ITEMS .................................. 71
CONTROL PANEL AND
ON-BOARD INSTRUMENTS ........... 78
TRIP COMPUTER ........................... 80
WARNING LIGHTS AND
MESSAGES .................................... 83
- LOW BRAKE FLUID/HANDBRAKE
ENGAGED .......................................... 83
- EBD FAILURE .................................. 84
- AIRBAG FAILURE ............................. 84
- SEAT BELTS NOT FASTENED .......... 85
- ABS FAILURE ................................... 86
- PASSENGER SIDE AIRBAG
DEACTIVATED .................................... 86
- INJECTION/EOBD SYSTEM
FAILURE ............................................. 87
- ELECTRONIC STABILITY CONTROL
(ESC) SYSTEM ................................... 88
- SIDE LIGHTS AND DIPPED
HEADLIGHTS ..................................... 89
- FOLLOW ME HOME ........................ 89
- LEFT-HAND DIRECTION INDICATOR
............................................................ 89
- RIGHT-HAND DIRECTION
INDICATOR ........................................ 90
- MAIN BEAM HEADLIGHTS .............. 90
-FOG LIGHTS ..................................... 90
-REAR FOG LIGHT ............................. 90
-WORN BRAKE PADS ........................ 91
-DUALDRIVE ELECTRIC POWER
STEERING FAILURE ........................... 91
- INSUFFICIENT ENGINE OIL
PRESSURE/ENGINE OIL
DETERIORATED ................................. 92
-ENGINE OIL DETERIORATED ........... 93
- ENGINE COOLANT TEMPERATURE
TOO HIGH .......................................... 94-LOW BATTERY CHARGE .................. 95
-HILL HOLDER FAILURE .................... 95
- FIAT CODE SYSTEM FAILURE ......... 95
- FUEL RESERVE/LIMITED RANGE .... 96
- FUEL CUT-OFF ................................ 96
- FUEL CUT-OFF SYSTEM FAILURE ... 96
-INCOMPLETE DOOR LOCKING ........ 96
-EXTERIOR LIGHTS FAILURE ............. 97
-ASR SYSTEM ................................... 97
- POSSIBLE ICE ON ROAD ................ 97
- BRAKE LIGHT FAILURE ................... 97
- PARKING SENSOR FAILURE ........... 97
-iTPMS ............................................... 98
-SERVICE (SCHEDULED SERVICING)
............................................................ 99
-SPEED LIMIT EXCEEDED ................. 99
-ENGAGEMENT OF SPORT
FUNCTION ......................................... 99
67
Page 72 of 215
 DISPLAY
The car is equipped with a colour
display that, according to the previously
applied settings, will show useful
driving information.
With the ignition key removed, the
display lights up and, de")
DISPLAY
The car is equipped with a colour
display that, according to the previously
applied settings, will show useful
driving information.
With the ignition key removed, the
display lights up and, depending on the
version, shows the time, the total
odometer reading (in km or miles) and
the 500 logo for a few seconds when a
front door is opened.
NOTE With a low outside temperature
(below 0°C) it may take longer than
normal for information to appear on the
display.COLOUR DISPLAY
"STANDARD" SCREEN
The standard screen fig. 67 can display
the following information:
1Odometer (display of distance
travelled in kilometres/miles)
2Digital engine coolant temperature
gauge
3Digital rev counter
4Gear Shift Indicator
5Date
6Outside temperature gauge
7Car speed indication
8Headlight alignment position (only
with dipped headlights on)
9Time
10eco Index
11Digital fuel level gaugeSPORT MODE
If the SPORT function is used, the
longitudinal/lateral accelerometer
indicator screen (G-meter information)
is displayed automatically. This
considers gravitational acceleration (G)
fig. 68.
2
3
4
5
6
11
10
9
8
7
67AB0A0129
68AB0A0133
68
KNOWING THE INSTRUMENT PANEL
Page 74 of 215
 NoteButtons+and–activate different
functions according to the following
situations:
❒within the menu, they allow you to
scroll up or down through the
options;
❒during setting operations, they
in")
NoteButtons+and–activate different
functions according to the following
situations:
❒within the menu, they allow you to
scroll up or down through the
options;
❒during setting operations, they
increase or decrease values.
NoteWhen one of the front doors is
opened, the display is activated
showing the time and mileage for a few
seconds.SETUP MENU
The menu comprises a series of
options which can be selected using
buttons+and–to access the different
selection and setting operations (Setup)
indicated below.
Some options have a submenu.
The menu can be activated by briefly
pressing the MENU button
. Single
presses on buttons+or–will scroll
through the setup menu options.
Operating modes are different
according to the characteristics of the
option selected.
The menu comprises the following
functions:
❒MENU
❒LIGHTING
❒SPEED WARNING
❒HEADLIGHT SENSOR
❒TRIP B ACTIVATION
❒SET TIME
❒SET DATE
❒SEE RADIO
❒AUTOCLOSE
❒UNITS OF MEASUREMENT
❒LANGUAGE
❒WARNINGS VOLUME❒BUTTON VOLUME
❒SEAT BELT BUZZER
❒SERVICE
❒PASSENGER AIRBAG
❒DAYTIME RUNNING LIGHTS
❒TYRE RESET
❒EXIT MENU
Selecting an option from the main
menu without a submenu:
❒briefly press the MENU button
to
select the main menu option to be
set;
❒press buttons+or–(with single
presses) to select the new setting;
❒briefly press the MENU button
to
store the new setting and to go back
to the same main menu option
selected previously.
Selecting an option from the main
menu with a submenu:
❒briefly press the MENU button
to
display the first submenu option;
❒press buttons+or–(with single
presses) to scroll through all the
submenu options;
❒briefly press the MENU button
to
select the displayed submenu option
and to open the relevant setup menu;
70AB0A0002
70
KNOWING THE INSTRUMENT PANEL
Page 75 of 215
 ❒press buttons+or–(with single
presses) to select the new setting for
this submenu option;
❒briefly press the MENU button
to
store the new setting and to go back
to the same submenu option
selec")
❒press buttons+or–(with single
presses) to select the new setting for
this submenu option;
❒briefly press the MENU button
to
store the new setting and to go back
to the same submenu option
selected previously.
MENU ITEMS
Menu
This option allows you to access the
Setup menu.
Press the+or–button to select the
various Menu items.
Hold down the MENU button
to
return to the standard screen.
Lighting (Car interior
lighting adjustment)
On some versions, the instrument panel
is provided with a light sensor capable
of detecting environmental light
conditions and adjusting the brightness
of the panel accordingly.
The brightness of the instrument panel
may therefore change while travelling
following an event causing a switch
from "day" to "night" conditions (or vice
versa) in the passenger compartment
(e.g. in a tunnel, on avenues in
shadows, under flyovers, etc.). The
lighting can be adjusted in night mode
only with dipped headlights on. If the
headlights are not on, it can be
adjusted in day mode.This function is available, with the
dipped headlights on and in night-time
conditions, to adjust the brightness
of the instrument panel, control
buttons, radio and automatic climate
control displays.
On some versions, during the daytime
and with dipped headlights on, the
instrument panel, control buttons, radio
and automatic climate control displays
are set to maximum brightness.
To adjust the brightness, proceed as
follows:
❒press the MENU button
briefly to
make the display flash the previously
stored level;
❒press button+or–to adjust the
brightness level;
❒press the MENU button
briefly to
return to the menu screen or hold the
button down to return to the
standard screen without storing.
71
Page 76 of 215
 Speed warning (Speed
limit)
With this function it is possible to set
the car speed limit (km/h or mph); when
this limit is exceeded the driver is
alerted.
To set the desired speed limit, proceed
as fo")
Speed warning (Speed
limit)
With this function it is possible to set
the car speed limit (km/h or mph); when
this limit is exceeded the driver is
alerted.
To set the desired speed limit, proceed
as follows:
❒briefly press the MENU button
:
the display will show the words
(Speed Buzzer);
❒press button+or–to select speed
limit activation ("On") or deactivation
("Off");
❒if the function is on, press+or–to
select the required speed limit and
then press MENU
to confirm.
NoteSetting is possible between 30
and 200 km/h, or 20 and 125 mph,
according to the previously set unit.
See the "Units of measurement
adjustment (Units of measurement)"
paragraph described below. The setting
will increase/decrease by five units
each time button+/–is pressed. Hold
down the button+/–to increase/
decrease the setting rapidly. Complete
the adjustment with single presses of
the button when you approach the
desired value.Press the MENU button
briefly to
return to the menu screen or hold
the button down to return to the
standard screen without storing.
To cancel the setting, proceed as
follows:
❒press the MENU button
briefly:
("On") will flash on the display;
❒press button–: ("Off") will flash on
the display;
❒press the MENU button
briefly to
return to the menu screen or hold the
button down to return to the
standard screen without storing.Headlight sensor
(Automatic
headlight/dusk sensor
sensitivity adjustment)
(for versions/markets, where provided)
This function is used to turn the
headlights on or off according to
external lighting conditions.
The dusk sensor sensitivity can be
adjusted according to 3 levels (level 1=
minimum sensitivity, level 2= average
sensitivity, level 3 = maximum
sensitivity); the greater the sensitivity
set, the lower the variation in outside
light required to activate the lights (e.g.
with setting at level 3, the headlights
switch on earlier at sunset compared to
levels 1 and 2).
Proceed as follows to set:
❒press the MENU button
briefly.
The level set previously flashes on
the display;
❒press+or–to set the value;
❒press the MENU button
briefly to
return to the menu screen or hold the
button down to return to the
standard screen without storing.
72
KNOWING THE INSTRUMENT PANEL