check engine Abarth 500 2018 Owner handbook (in English)
[x] Cancel search | Manufacturer: ABARTH, Model Year: 2018, Model line: 500, Model: Abarth 500 2018Pages: 192, PDF Size: 5.86 MB
Page 116 of 192

Thousands of miles 9 18 27 36 45 54 63 72 81 90
Thousands of kilometres 15 30 45 60 75 90 105 120 135 150
Years 1 2 3 4 5 6 7 8 9 10
Visually inspect conditions of toothed timing drive belt
Check the oil level in the robotised sequential gearbox
activation system (2)
Check and, if necessary, restore the self-locking differential
pre-loading (where present) (3)
Change the oil of the transmission equipped with limited
slip differential (where present)(3) (4)
Change engine oil and replace oil filter
Spark plug replacement (5)
(2) Only for cars on the road in countries with particularly severe climates (cold countries).
(3) It is recommended to carry out this operation immediately after each time the car has undergone demanding use
(4) The first transmission oil change must be done on reaching the first 10,000 km, independently of the time passed
(5) The following are essential to ensure correct operation and prevent serious damage to the engine: only use spark plugs of the same make and type specially
certified for 1.4 Turbo petrol Abarth engines (see the information in the "Engine" paragraph); strictly comply with the spark plug replacement interval given in the
Scheduled Servicing Plan; for spark plug replacement it is advisable to contact an Abarth Dealership.
114
SERVICING AND CARE
Page 118 of 192
PERIODIC CHECKS
Every 1,000 km or before long
journeys, check and, if necessary, top
up the following:
engine coolant level;
brake fluid level;
windscreen washer fluid level;
tyre inflation pressure and condition;
operation of lighting system
(headlights, direction indicators, hazard
warning lights, etc.);
operation of screen washer/wiper
system and positioning/wear of
windscreen/rear window wiper blades.
Every 3,000 km check and top up if
required: engine oil level.
You are advised to use PETRONAS
LUBRICANTS products, which have
been designed and produced
specifically for Abarth cars (see table
"Capacities" in the "Technical
specifications" chapter).
DEMANDING USE OF
THE CAR
If the car is used mainly under one of
the following conditions:
if the car is used under demanding
conditions, e.g. on track;
dusty roads;
short, repeated journeys (less than
7-8 Km) at sub-zero outdoor
temperatures;
engine often idling or driving long
distances at low speeds or long periods
of inactivity;
the following checks must be carried
out more often than indicated in the
Scheduled Servicing Plan:
check front disc brake pad condition
and wear;
check cleanliness of bonnet and
luggage compartment locks,
cleanliness and lubrication of linkage;
visually inspect conditions of:
engine, gearbox, transmission, pipes
and hoses (exhaust/fuel system/brakes)
and rubber elements (gaiters/sleeves/
bushes, etc.);
check battery charge and battery
fluid level (electrolyte);
visually inspect conditions of the
accessory drive belts;
check and, if necessary, change
engine oil and replace oil filter;
check and, if necessary, replace
pollen filter;
check and, if necessary, replace air
cleaner.
116
SERVICING AND CARE
Page 119 of 192
CHECKING LEVELS
29)
28) 133) 134).
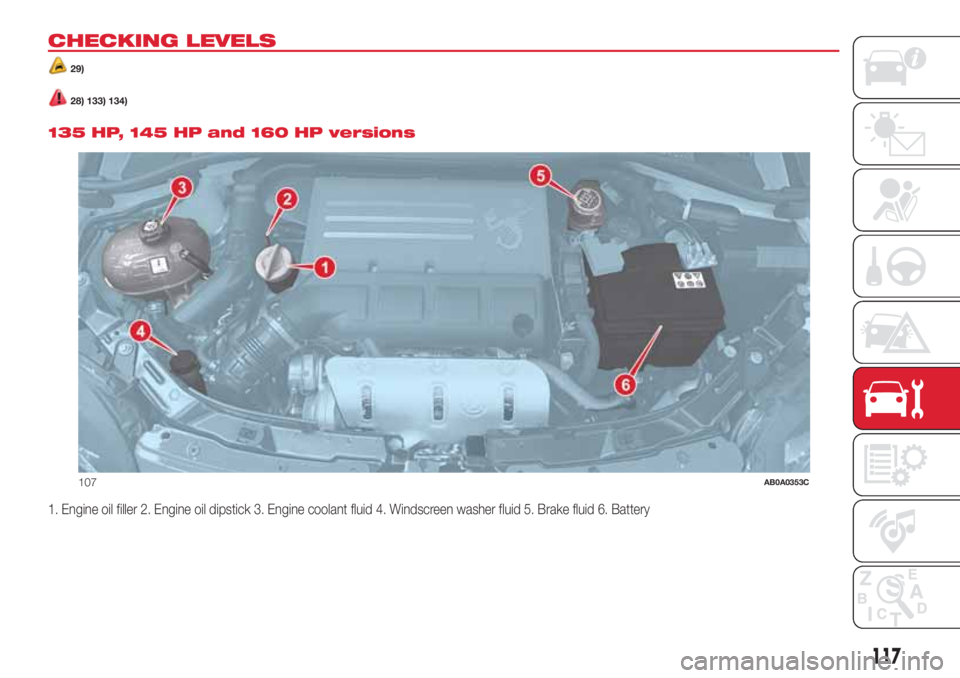
135 HP, 145 HP and 160 HP versions
1. Engine oil filler 2. Engine oil dipstick 3. Engine coolant fluid 4. Windscreen washer fluid 5. Brake fluid 6. Battery
107AB0A0353C
117
Page 121 of 192
ENGINE OIL
30)
4)
Check the oil level a few minutes (about
5) after the engine has stopped, with
the vehicle parked on level ground.
Take out the engine oil dipstick 2 fig.
107 or fig. 108, clean it with a lint-free
cloth and reinsert it. Extract the engine
oil dipstick again and check that the
level is between the MIN and MAX
marks on the dipstick.
The range between the MIN. and MAX.
marks corresponds to about 1 litre of
oil.
If the level of the oil is close to or below
the MIN mark, add oil via filler 1 fig.
107 or fig. 108 until the MAX mark is
reached.
The oil level must never exceed the
MAX reference.
Engine oil consumption
The maximum engine oil consumption
is usually 400 grams every 1000 km.
When the car is new, the engine needs
to run in, therefore the engine oil
consumption can only be considered
stabilised after the first 5000 - 6000
km.IMPORTANT The oil consumption
depends on driving style and the
conditions under which the car is used.
IMPORTANT After adding or changing
the oil, let the engine turn over for a few
seconds and wait a few minutes after
turning it off before you check the level.
ENGINE COOLANT FLUID
The coolant level must be checked
when the engine is cold and must
range between the MIN and MAX
marks on the reservoir.
If the level is too low, unscrew the cap 3
fig. 107 or fig. 108 of reservoir and
add the fluid described in the "Technical
Specifications" chapter.
31)
135)
WINDSCREEN/REAR
WINDOW WASHER FLUID
Check fluid level through the reservoir.
If the fluid level is too low, unscrew
the reservoir cap 4 fig. 107 or fig. 108
and add the fluid described in the
"Technical Specifications" chapter.
After topping up, close cap 4, making
sure it is correctly locked.BRAKE FLUID
Check that the fluid is at the maximum
level (the fluid level in the reservoir
must not exceed the MAX mark).
If the fluid level in the reservoir is too
low, undo the reservoir cap 5 fig. 107 or
fig. 108 and add the fluid described in
the "Technical Specifications" chapter.
137) 138)
32)
IMPORTANT Carefully clean reservoir
cap 5 and the surrounding surface.
Take great care to ensure that
impurities do not enter the reservoir
when the cap is opened.
Always use a funnel with a built-in filter
with a mesh of 0.12 mm or less.
IMPORTANT Brake fluid is hygroscopic
(i.e. it absorbs moisture). For this
reason, if the car is mainly used in areas
with a high degree of atmospheric
humidity, the fluid must be replaced at
more frequent intervals than specified in
the "Scheduled Servicing Plan".
119
Page 123 of 192
BATTERY
The car is fitted with a low-maintenance
battery: no electrolyte top-ups with
distilled water are needed in standard
conditions of use.
INSPECTING THE
CHARGE AND THE
ELECTROLYTE LEVEL
The operations must be carried out as
described in this Owner Handbook only
by specialised personnel. Any top-up
operations must be carried out by
skilled personnel and by an Abarth
Dealership.
REPLACING THE
BATTERY
139) 140) 141) 142)
33)
5)If required, replace the battery with a
genuine spare part with the same
specifications.
If a battery with different specifications
is fitted, the service intervals given in
the "Scheduled Servicing Plan" will no
longer be valid.
Follow the battery manufacturer's
instructions for maintenance.USEFUL ADVICE FOR
EXTENDING THE LIFE OF
YOUR BATTERY
To avoid draining your battery and
make it last longer, observe the
following instructions:
when you park the car, ensure that
the doors, tailgate and bonnet are
closed properly, to prevent any lights
from remaining on inside the
passenger's compartment;
switch off all roof lights inside the
car: the car is however equipped with a
system which switches all internal
lights off automatically;
do not keep accessories (e.g.
Uconnect™, hazard warning lights,
etc.) switched on for a long time when
the engine is not running;
before performing any operation on
the electrical system, disconnect the
negative battery pole;
completely tighten the battery
terminals.
IMPORTANT If the charge level remains
under 50% for a long time, the battery
is damaged by sulphation, reducing
its capacity and efficiency at start-up.The battery will also be more at risk of
freezing (this can happen as early as
-10°C). Refer to the paragraph "Car
inactivity" in "Starting and driving" if the
car is left parked for a long time.
If after buying the car, you want to
install electrical accessories that require
permanent electrical supply (alarm,
etc.) or accessories that in any case
burden the electrical supply, contact an
Abarth Dealership whose qualified
personnel, in addition to suggesting the
most suitable devices available in
Lineaccessori Abarth, will evaluate the
overall electric consumption, checking
whether the car’s electrical system is
capable of withstanding the load
required, or whether it should
be integrated with a more powerful
battery.
Since some of these devices continue
to consume electricity even when
the engine is off, they gradually run
down the battery.
WARNING
139)Battery fluid is poisonous and
corrosive. Avoid contact with skin and
eyes. Keep naked flames and sources of
sparks away from the battery: risk of
explosion and fire.
121
Page 162 of 192

Select “Enter” in the top right corner
of TomTom HOME.
Select “Create account” and enter
the required details to create a
MyTomTom account. A MyTomTom
account is required to receive map
updates.
After the account is created, you are
asked whether you wish to connect the
Uconnect™system to your account.
The USB device prepared represents
yourUconnect™system.
Select “Connect device”, then select
“close”.
A map can now be downloaded to the
USB device.
Download a map
The map can be updated in two ways:
Most recent maps guarantee: if a
new map is available for your system
within 90 days of initial use, it can
be downloaded once free of charge.
Map update: it is possible to
purchase a new version of the map
installed on the system.
To check availability or purchase a map,
make sure that you have prepared a
USB device and installed TomTom
HOME on your computer.
Connect the USB device to the
computer.Downloading a map
If a map update is available for the
system, this update is included in the
list of updates available.
NOTE If the most recent map is already
installed on the system, the update is
not proposed.
Select the map that you wish to
download, then select “Update and
install”.
The map is downloaded and copied to
your USB device.
Select “Done” when the process is
complete.
NOTE Don’t disconnect the USB device
from the computer while map
downloading and copying is in
progress.
The map can now be installed on the
system.
Installing the map
After downloading a map to your USB
device, it can be installed on your
system.
IMPORTANT The map update MUST
be made with the vehicle engine
running and may require more than 30
minutes.
IMPORTANT Do not disconnect the
USB device during the map installation
process, otherwise installation will be
interrupted.
Insert the USB device containing the
new map in theUconnect™system.
The system detects a new map on
the USB device.
Select “Start”.
Keep the device inserted. Before
updating the map, the system indicates
that this process may take several
minutes. Select “OK”.
NOTE Do not remove the USB device
and do not disconnect the system’s
power supply before the update is
complete. The system cannot be used
until the update is completed correctly.
If the update is interrupted, the system
update is started again.
Once the map has been updated, the
following message is displayed.
Click on “Close”.
The new map is now available on the
system.
Troubleshooting
The following problems may occur
during the update:
The map on the USB device is not
valid. In this case, download the map to
the USB device again, using TomTom
HOME. It may be necessary to prepare
the USB device again.
160
MULTIMEDIA
Page 187 of 192
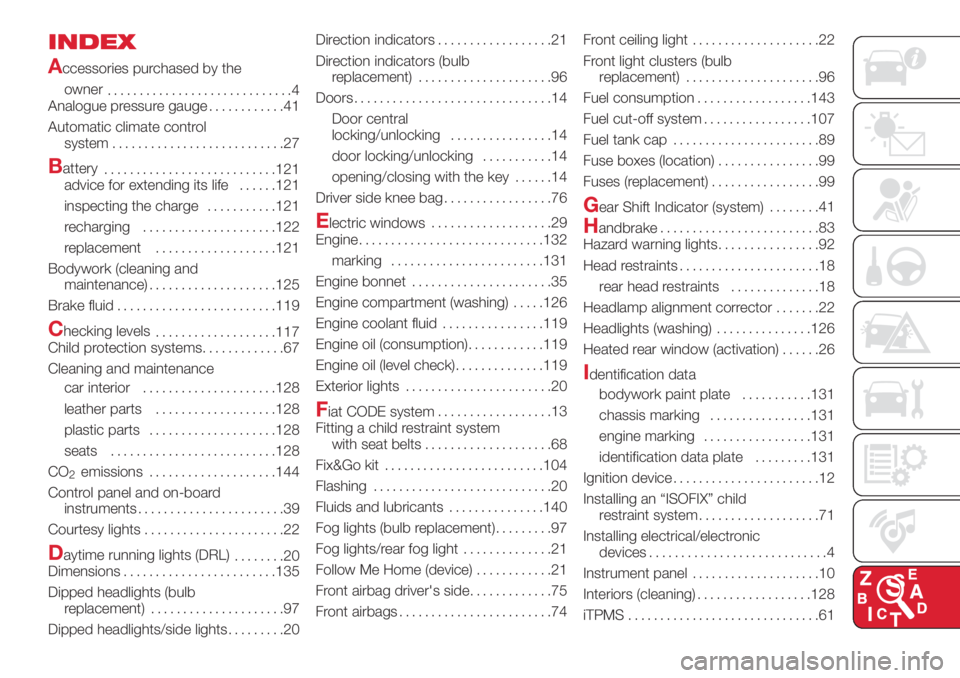
INDEX
A
ccessories purchased by the
owner
.............................4
Analogue pressure gauge............41
Automatic climate control
system...........................27
Battery
...........................121
advice for extending its life......121
inspecting the charge...........121
recharging.....................122
replacement...................121
Bodywork (cleaning and
maintenance)....................125
Brake fluid.........................119
Checking levels
...................117
Child protection systems.............67
Cleaning and maintenance
car interior.....................128
leather parts...................128
plastic parts....................128
seats..........................128
CO
2emissions....................144
Control panel and on-board
instruments.......................39
Courtesy lights......................22
Daytime running lights (DRL)
........20
Dimensions........................135
Dipped headlights (bulb
replacement).....................97
Dipped headlights/side lights.........20Direction indicators..................21
Direction indicators (bulb
replacement).....................96
Doors...............................14
Door central
locking/unlocking................14
door locking/unlocking...........14
opening/closing with the key . . . . . .14
Driver side knee bag.................76
Electric windows...................29
Engine.............................132
marking........................131
Engine bonnet......................35
Engine compartment (washing).....126
Engine coolant fluid................119
Engine oil (consumption)............119
Engine oil (level check)..............119
Exterior lights.......................20
Fiat CODE system..................13
Fitting a child restraint system
with seat belts....................68
Fix&Go kit.........................104
Flashing............................20
Fluids and lubricants...............140
Fog lights (bulb replacement).........97
Fog lights/rear fog light..............21
Follow Me Home (device)............21
Front airbag driver's side.............75
Front airbags........................74Front ceiling light....................22
Front light clusters (bulb
replacement).....................96
Fuel consumption..................143
Fuel cut-off system.................107
Fuel tank cap.......................89
Fuse boxes (location)................99
Fuses (replacement).................99
Gear Shift Indicator (system)........41
Handbrake.........................83
Hazard warning lights................92
Head restraints......................18
rear head restraints..............18
Headlamp alignment corrector.......22
Headlights (washing)...............126
Heated rear window (activation)......26
Identification data
bodywork paint plate...........131
chassis marking................131
engine marking.................131
identification data plate.........131
Ignition device.......................12
Installing an “ISOFIX” child
restraint system...................71
Installing electrical/electronic
devices............................4
Instrument panel....................10
Interiors (cleaning)..................128
iTPMS..............................61
Page 188 of 192
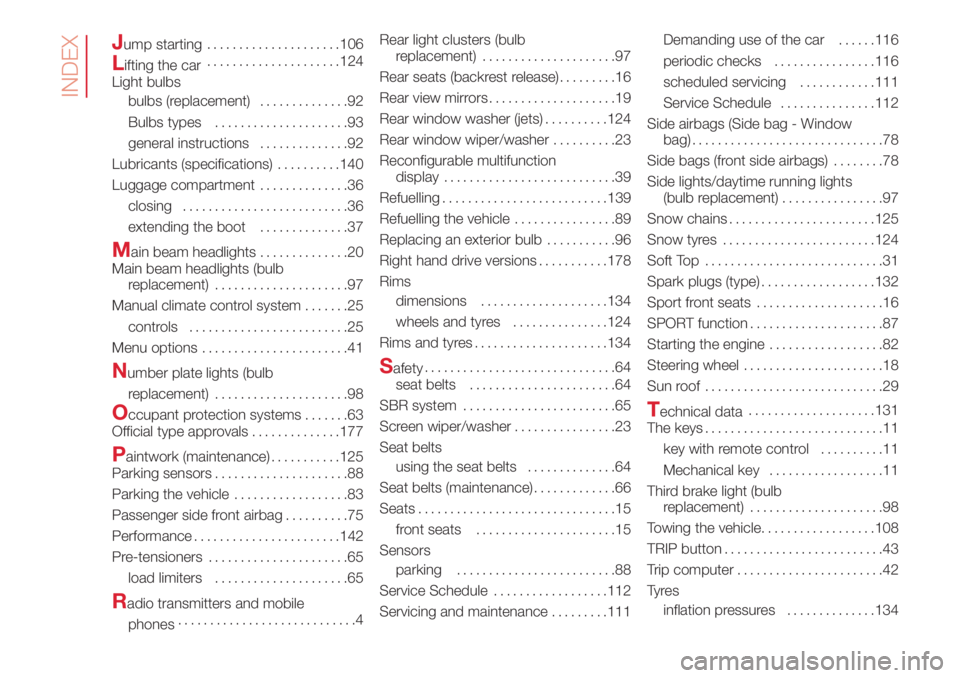
Jump starting.....................106
Lifting the car.....................124
Light bulbs
bulbs (replacement)..............92
Bulbs types.....................93
general instructions..............92
Lubricants (specifications)..........140
Luggage compartment..............36
closing..........................36
extending the boot..............37
Main beam headlights..............20
Main beam headlights (bulb
replacement).....................97
Manual climate control system.......25
controls.........................25
Menu options.......................41
Number plate lights (bulb
replacement).....................98
Occupant protection systems.......63
Official type approvals..............177
Paintwork (maintenance)...........125
Parking sensors.....................88
Parking the vehicle..................83
Passenger side front airbag..........75
Performance.......................142
Pre-tensioners......................65
load limiters.....................65
Radio transmitters and mobile
phones............................4Rear light clusters (bulb
replacement).....................97
Rear seats (backrest release).........16
Rear view mirrors....................19
Rear window washer (jets)..........124
Rear window wiper/washer..........23
Reconfigurable multifunction
display...........................39
Refuelling..........................139
Refuelling the vehicle................89
Replacing an exterior bulb...........96
Right hand drive versions...........178
Rims
dimensions....................134
wheels and tyres...............124
Rims and tyres.....................134
Safety..............................64
seat belts.......................64
SBR system........................65
Screen wiper/washer................23
Seat belts
using the seat belts..............64
Seat belts (maintenance).............66
Seats...............................15
front seats......................15
Sensors
parking.........................88
Service Schedule..................112
Servicing and maintenance.........111Demanding use of the car......116
periodic checks................116
scheduled servicing............111
Service Schedule...............112
Side airbags (Side bag - Window
bag)..............................78
Side bags (front side airbags)........78
Side lights/daytime running lights
(bulb replacement)................97
Snow chains.......................125
Snow tyres........................124
Soft Top............................31
Spark plugs (type)..................132
Sport front seats....................16
SPORT function.....................87
Starting the engine..................82
Steering wheel......................18
Sun roof ............................29
Technical data....................131
The keys............................11
key with remote control..........11
Mechanical key..................11
Third brake light (bulb
replacement).....................98
Towing the vehicle..................108
TRIP button.........................43
Trip computer.......................42
Ty r e s
inflation pressures..............134
INDEX