steering wheel Acura ILX 2013 Owner's Guide
[x] Cancel search | Manufacturer: ACURA, Model Year: 2013, Model line: ILX, Model: Acura ILX 2013Pages: 351, PDF Size: 8.21 MB
Page 126 of 351
Continued
125
uuAdjusting the SeatsuAdjusting the Seat Positions
Controls
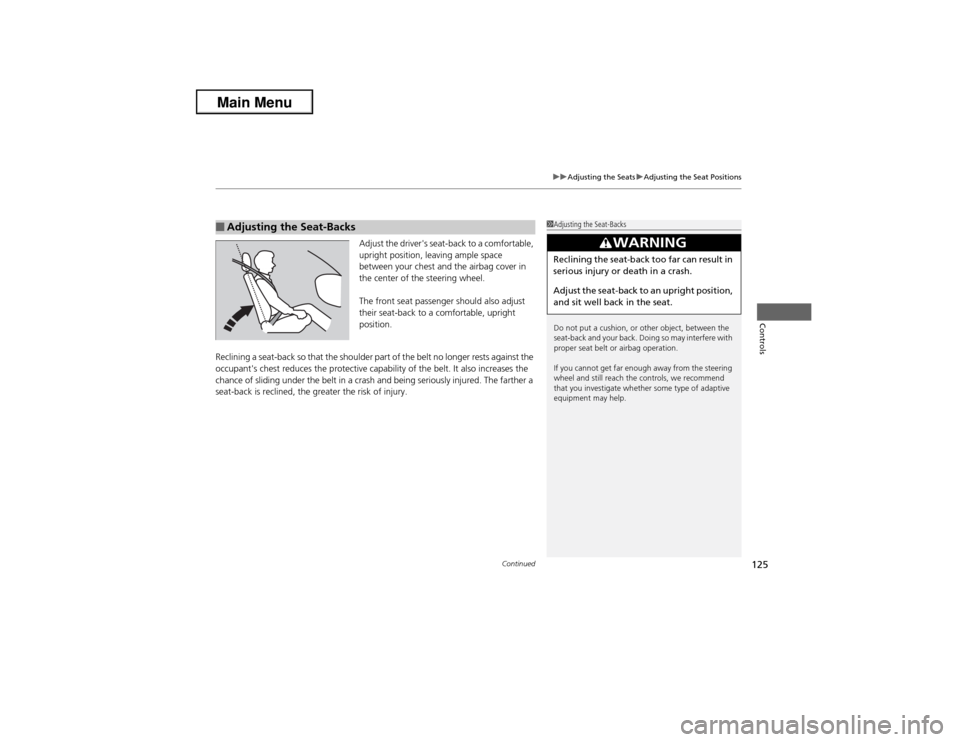
Adjust the driver's seat-back to a comfortable,
upright position, leaving ample space
between your chest and the airbag cover in
the center of the steering wheel.
The front seat passenger should also adjust
their seat-back to a comfortable, upright
position.
Reclining a seat-back so that the shoulder part of the belt no longer rests against the
occupant's chest reduces the protective capability of the belt. It also increases the
chance of sliding under the belt in a crash and being seriously injured. The farther a
seat-back is reclined, the greater the risk of injury.
■Adjusting the Seat-Backs
1Adjusting the Seat-Backs
Do not put a cushion, or other object, between the
seat-back and your back. Doing so may interfere with
proper seat belt or airbag operation.
If you cannot get far enough away from the steering
wheel and still reach the controls, we recommend
that you investigate whether some type of adaptive
equipment may help.
3
WARNING
Reclining the seat-back too far can result in
serious injury or death in a crash.
Adjust the seat-back to an upright position,
and sit well back in the seat.
Page 143 of 351
142Features
Audio SystemAbout Your Audio SystemOn models with navigation system, see Navigation System Manual for operation of
the audio system, AcuraLink
*, Bluetooth®HandsFreeLink®, and voice commands for
these features.
The audio system features AM/FM radio and the XM® Radio service. It can also play
audio CDs, WMA/MP3/AAC files, iPod®, iPhone®, USB flash drives, and Bluetooth®
devices.
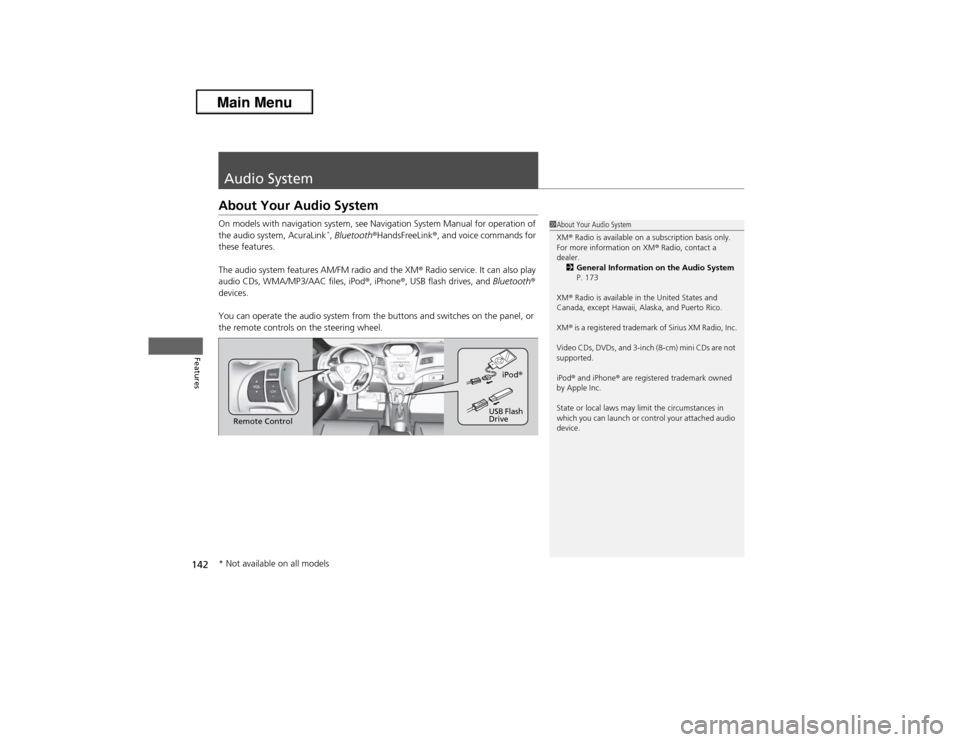
You can operate the audio system from the buttons and switches on the panel, or
the remote controls on the steering wheel.
1About Your Audio System
XM® Radio is available on a subscription basis only.
For more information on XM® Radio, contact a
dealer.
2General Information on the Audio System
P. 173
XM® Radio is available in the United States and
Canada, except Hawaii, Alaska, and Puerto Rico.
XM® is a registered trademark of Sirius XM Radio, Inc.
Video CDs, DVDs, and 3-inch (8-cm) mini CDs are not
supported.
iPod® and iPhone® are registered trademark owned
by Apple Inc.
State or local laws may limit the circumstances in
which you can launch or control your attached audio
device.
Remote ControliPod®
USB Flash
Drive
* Not available on all models
Page 146 of 351
145Features
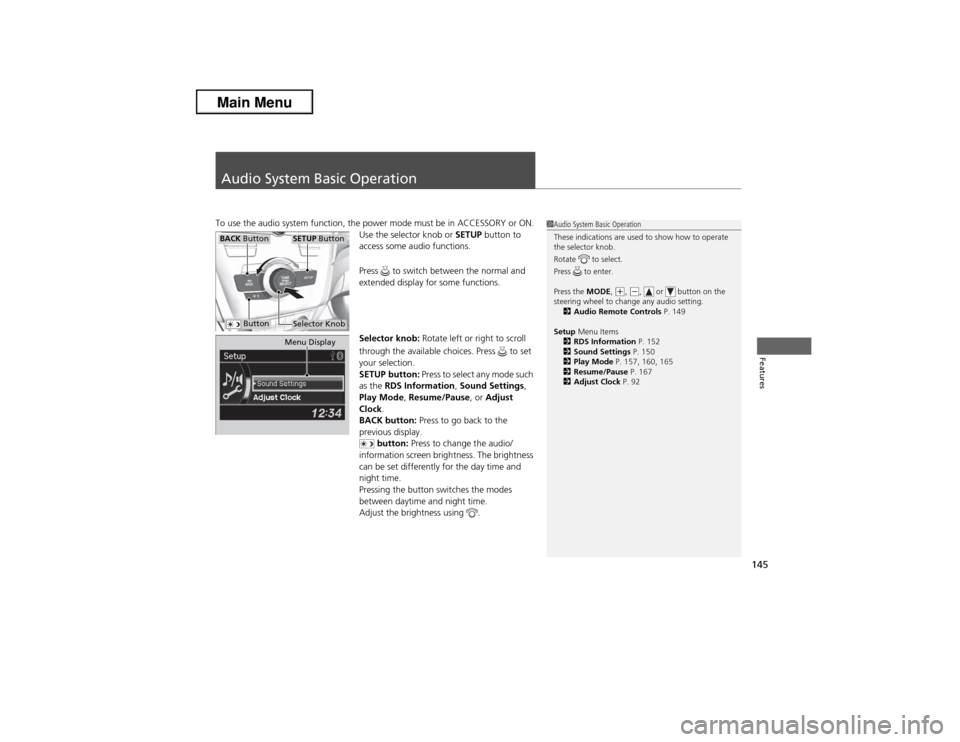
Audio System Basic OperationTo use the audio system function, the power mode must be in ACCESSORY or ON.
Use the selector knob or SETUP button to
access some audio functions.
Press to switch between the normal and
extended display for some functions.
Selector knob: Rotate left or right to scroll
through the available choices. Press to set
your selection.
SETUP button: Press to select any mode such
as the RDS Information, Sound Settings,
Play Mode, Resume/Pause, or Adjust
Clock.
BACK button: Press to go back to the
previous display.
button: Press to change the audio/
information screen brightness. The brightness
can be set differently for the day time and
night time.
Pressing the button switches the modes
between daytime and night time.
Adjust the brightness using .
1Audio System Basic Operation
These indications are used to show how to operate
the selector knob.
Rotate to select.
Press to enter.
Press the MODE,
(+, (-, or button on the
steering wheel to change any audio setting.
2Audio Remote Controls P. 149
Setup Menu Items
2RDS Information P. 152
2Sound Settings P. 150
2Play Mode P. 157, 160, 165
2Resume/Pause P. 167
2Adjust Clock P. 92
BACK Button
SETUP ButtonSelector Knob
Button
Menu Display
Page 153 of 351
uuAudio System Basic OperationuPlaying the AM/FM Radio
152Features
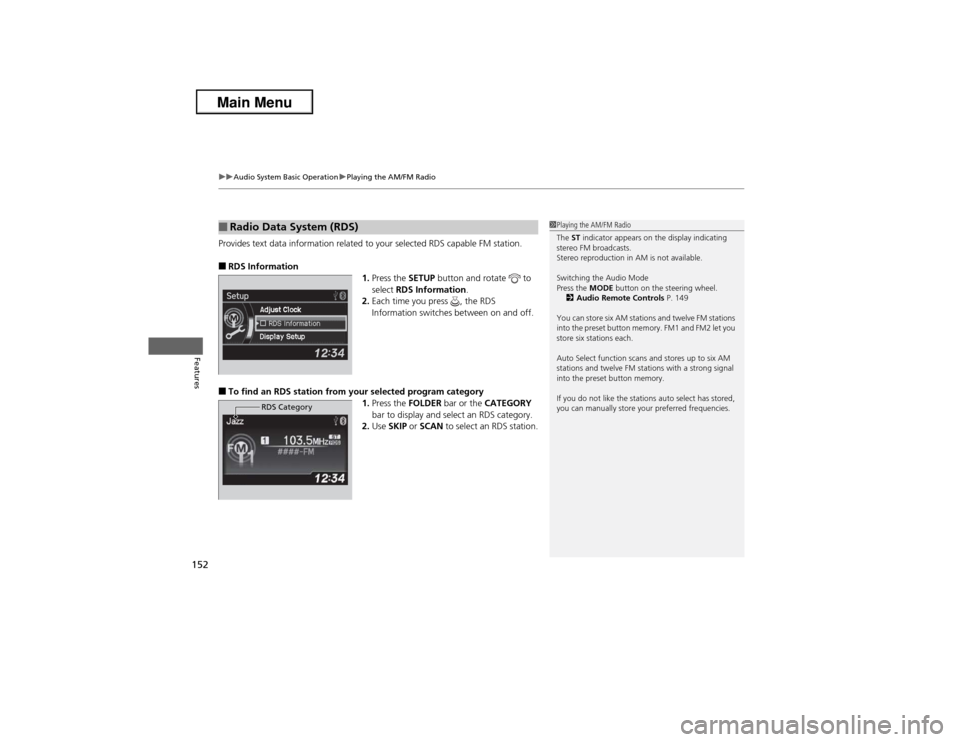
Provides text data information related to your selected RDS capable FM station.■RDS Information
1.Press the SETUP button and rotate to
select RDS Information.
2.Each time you press , the RDS
Information switches between on and off.■To find an RDS station from your selected program category
1.Press the FOLDER bar or the CATEGORY
bar to display and select an RDS category.
2.Use SKIP or SCAN to select an RDS station.■Radio Data System (RDS)
RDS Category
1Playing the AM/FM Radio
The ST indicator appears on the display indicating
stereo FM broadcasts.
Stereo reproduction in AM is not available.
Switching the Audio Mode
Press the MODE button on the steering wheel.
2Audio Remote Controls P. 149
You can store six AM stations and twelve FM stations
into the preset button memory. FM1 and FM2 let you
store six stations each.
Auto Select function scans and stores up to six AM
stations and twelve FM stations with a strong signal
into the preset button memory.
If you do not like the stations auto select has stored,
you can manually store your preferred frequencies.
Page 168 of 351
167
uuAudio System Basic OperationuPlaying Bluetooth® Audio
Features
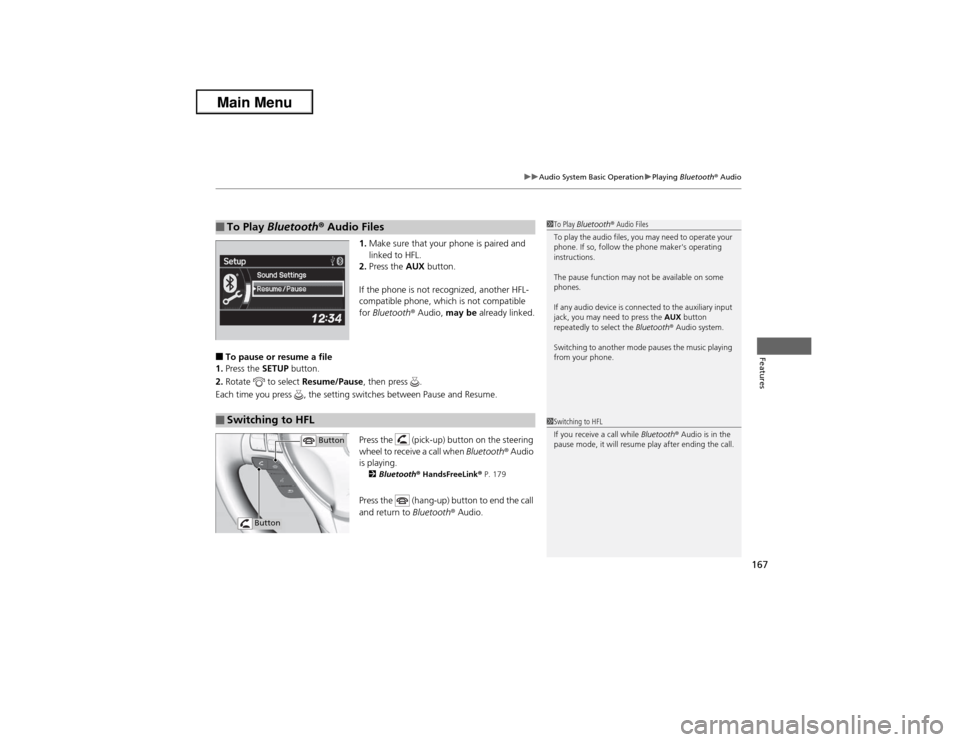
1.Make sure that your phone is paired and
linked to HFL.
2.Press the AUX button.
If the phone is not recognized, another HFL-
compatible phone, which is not compatible
for Bluetooth® Audio, may be already linked.
■To pause or resume a file
1.Press the SETUP button.
2.Rotate to select Resume/Pause, then press .
Each time you press , the setting switches between Pause and Resume.
Press the (pick-up) button on the steering
wheel to receive a call when Bluetooth® Audio
is playing.
2Bluetooth® HandsFreeLink® P. 179Press the (hang-up) button to end the call
and return to Bluetooth® Audio.
■To Play Bluetooth® Audio Files
1To Play Bluetooth® Audio Files
To play the audio files, you may need to operate your
phone. If so, follow the phone maker's operating
instructions.
The pause function may not be available on some
phones.
If any audio device is connected to the auxiliary input
jack, you may need to press the AUX button
repeatedly to select the Bluetooth® Audio system.
Switching to another mode pauses the music playing
from your phone.
■Switching to HFL
1Switching to HFL
If you receive a call while Bluetooth® Audio is in the
pause mode, it will resume play after ending the call.
Button
Button
Page 180 of 351
179
Continued
Features
Bluetooth® HandsFreeLink®For models with the navigation system, see Navigation System Manual for how to
operate the Bluetooth® HandsFreeLink®.
Bluetooth® HandsFreeLink® (HFL) allows you to place and receive phone calls using
your vehicle's audio system, without handling your cell phone.Using HFL
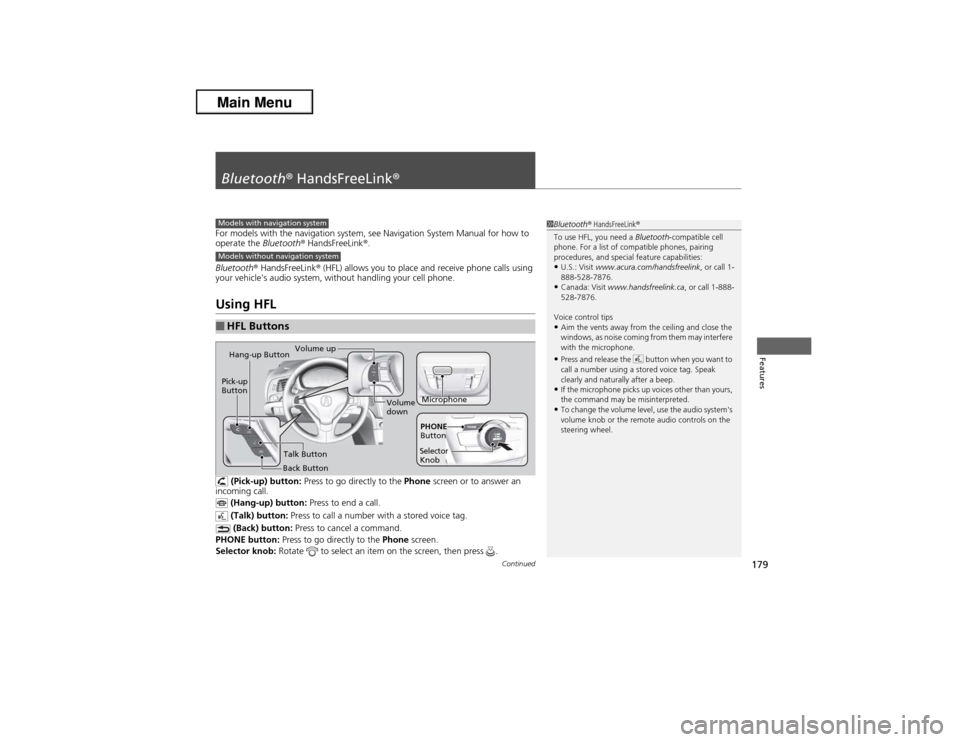
(Pick-up) button: Press to go directly to the Phone screen or to answer an
incoming call.
(Hang-up) button: Press to end a call.
(Talk) button: Press to call a number with a stored voice tag.
(Back) button: Press to cancel a command.
PHONE button: Press to go directly to the Phone screen.
Selector knob: Rotate to select an item on the screen, then press .
■HFL Buttons
1Bluetooth® HandsFreeLink®
To use HFL, you need a Bluetooth-compatible cell
phone. For a list of compatible phones, pairing
procedures, and special feature capabilities:•U.S.: Visit www.acura.com/handsfreelink, or call 1-
888-528-7876.•Canada: Visit www.handsfreelink.ca, or call 1-888-
528-7876.
Voice control tips•Aim the vents away from the ceiling and close the
windows, as noise coming from them may interfere
with the microphone.•Press and release the button when you want to
call a number using a stored voice tag. Speak
clearly and naturally after a beep.•If the microphone picks up voices other than yours,
the command may be misinterpreted.•To change the volume level, use the audio system's
volume knob or the remote audio controls on the
steering wheel.
Models with navigation systemModels without navigation system
Microphone Pick-up
Button
Selector
KnobPHONE
Button
Hang-up Button
Volume up
Volume
down
Back ButtonTalk Button
Page 212 of 351
Continued
211
uuBefore DrivinguDriving Preparation
Driving
•Store or secure all items on board properly.
uCarrying too much cargo, or improperly storing it, can affect your vehicle's
handling, stability, stopping distance, and tires, and make it unsafe.
2Maximum Load Limit P. 213
•Do not pile items higher than the seat height.
uThey can block your view and may be thrown forward in the event of sudden
braking.
•Do not place anything in the front seat footwells. Make sure to secure the floor
mat.
uAn object or unsecured floor mat can interfere with your brake and accelerator
pedal operation while driving.
•If you have any animals on board, do not let them move around in the vehicle.
uThey may interfere with driving and a crash could occur.
•Securely close and lock all doors and the trunk.
2Locking/Unlocking the Doors from the Inside P. 99
•Adjust your seating position properly.
uAdjust the head restraint, too.
2Adjusting the Seats P. 123
2Adjusting the Head Restraints P. 126
•Adjust the mirrors and steering wheel properly for your driving.
uAdjust them while sitting in the proper driving position.
2Adjusting the Mirrors P. 121
2Adjusting the Steering Wheel P. 120
■Interior Checks
1Interior Checks
The headlight aim is set by the factory, and does not
need to be adjusted. However, if you regularly carry
heavy items in the trunk have the aiming readjusted
at a dealer or by a qualified technician.
Page 225 of 351
224
uuWhen DrivinguShifting
Driving
Use the paddle shifters to change between 1st and 5th gears without removing your
hands from the steering wheel. The transmission will switch to the sequential shift
mode.■When the shift lever is in
(D:
The vehicle will go into the sequential shift mode momentarily, and the gear position
indicator will come on.
Once you start traveling at a constant speed, the sequential shift mode will
automatically switch off, and the gear position indicator will go off.
Hold the
(+ paddle shifter for two seconds to return to normal drive.
■When the shift lever is in
(S:
The vehicle will go into the sequential shift mode, and the M (sequential shift)
indicator and gear position indicator will come on. At speeds of 6 mph (10 km/h) or
less, the vehicle automatically shifts down into 1st gear. It will not automatically shift
up, even if vehicle speed increases.
You can only pull away in 1st or 2nd gear.
When switching out of the sequential shift mode, move the shift lever from
(S to
(D. When the sequential shift mode is canceled, the sequential shift mode indicator
and shift indicator go off.■Sequential Shift Mode
Page 230 of 351
229
uuWhen DrivinguCruise Control
Continued
Driving
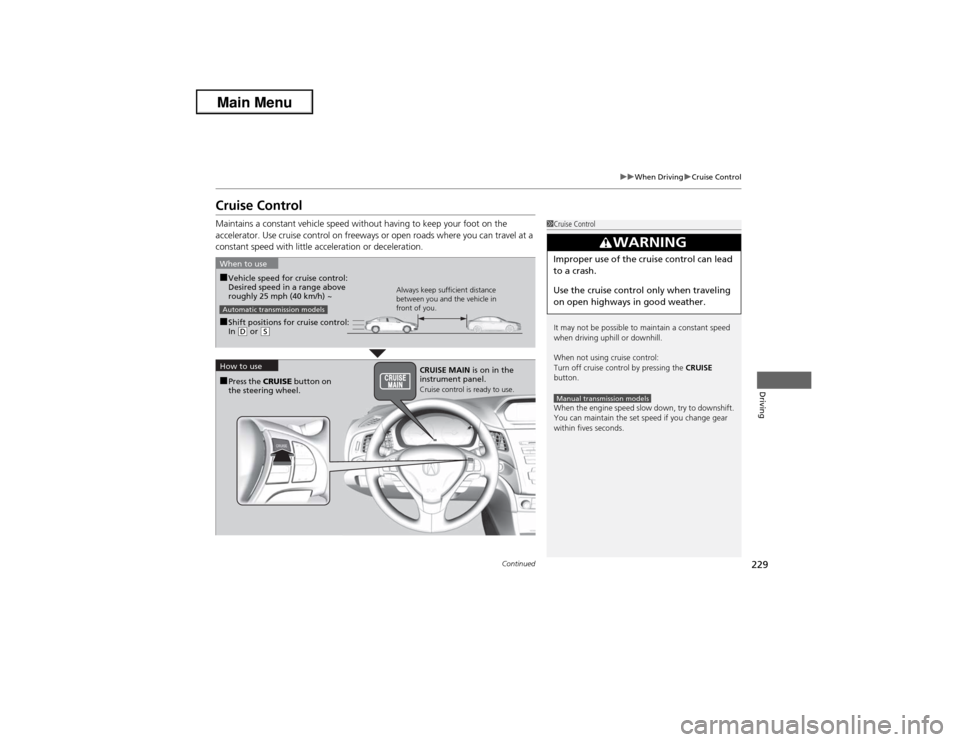
Cruise ControlMaintains a constant vehicle speed without having to keep your foot on the
accelerator. Use cruise control on freeways or open roads where you can travel at a
constant speed with little acceleration or deceleration.
1Cruise Control
It may not be possible to maintain a constant speed
when driving uphill or downhill.
When not using cruise control:
Turn off cruise control by pressing the CRUISE
button.
When the engine speed slow down, try to downshift.
You can maintain the set speed if you change gear
within fives seconds.
3
WARNING
Improper use of the cruise control can lead
to a crash.
Use the cruise control only when traveling
on open highways in good weather.Manual transmission models
■Shift positions for cruise control:
In (D or
(S
When to use
Always keep sufficient distance
between you and the vehicle in
front of you.
■Vehicle speed for cruise control:
Desired speed in a range above
roughly 25 mph (40 km/h) ~
How to use
CRUISE MAIN is on in the
instrument panel.
Cruise control is ready to use.
■Press the CRUISE button on
the steering wheel.Automatic transmission models
Page 232 of 351
231
uuWhen DrivinguCruise Control
Driving
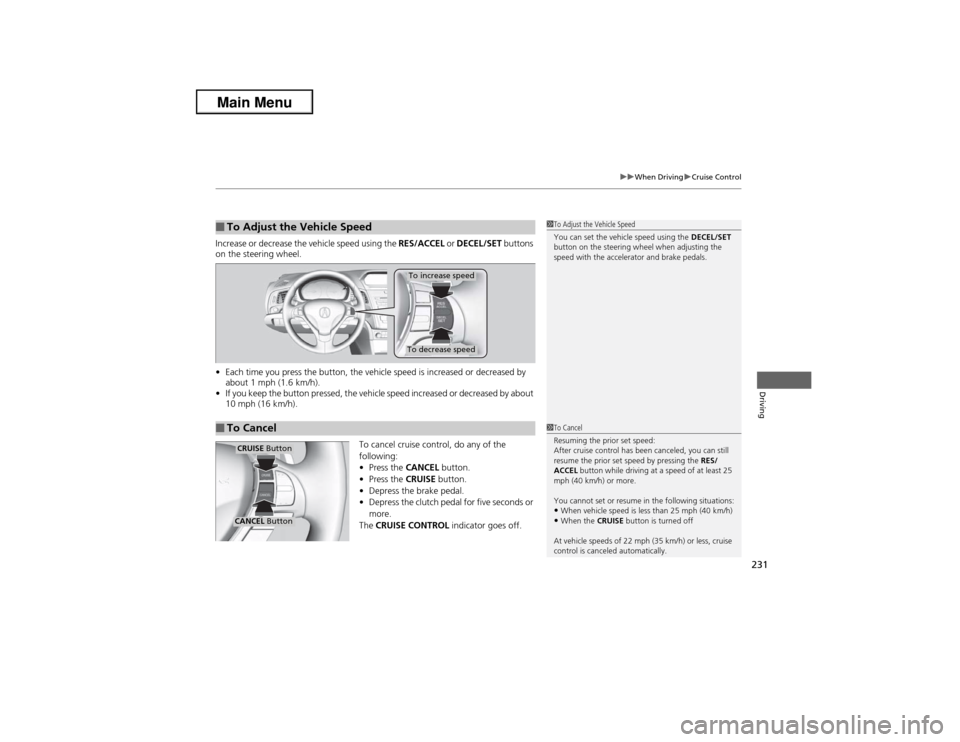
Increase or decrease the vehicle speed using the RES/ACCEL or DECEL/SET buttons
on the steering wheel.
•Each time you press the button, the vehicle speed is increased or decreased by
about 1 mph (1.6 km/h).
•If you keep the button pressed, the vehicle speed increased or decreased by about
10 mph (16 km/h).
To cancel cruise control, do any of the
following:
•Press the CANCEL button.
•Press the CRUISE button.
•Depress the brake pedal.
•Depress the clutch pedal for five seconds or
more.
The CRUISE CONTROL indicator goes off.■To Adjust the Vehicle Speed
1To Adjust the Vehicle Speed
You can set the vehicle speed using the DECEL/SET
button on the steering wheel when adjusting the
speed with the accelerator and brake pedals.
■To Cancel
To decrease speedTo increase speed
1To Cancel
Resuming the prior set speed:
After cruise control has been canceled, you can still
resume the prior set speed by pressing the RES/
ACCEL button while driving at a speed of at least 25
mph (40 km/h) or more.
You cannot set or resume in the following situations:•When vehicle speed is less than 25 mph (40 km/h)•When the CRUISE button is turned off
At vehicle speeds of 22 mph (35 km/h) or less, cruise
control is canceled automatically.
CRUISE ButtonCANCEL Button