engine coolant Acura ILX 2014 Owner's Manual
[x] Cancel search | Manufacturer: ACURA, Model Year: 2014, Model line: ILX, Model: Acura ILX 2014Pages: 351, PDF Size: 7.94 MB
Page 16 of 351
15Quick Reference Guide
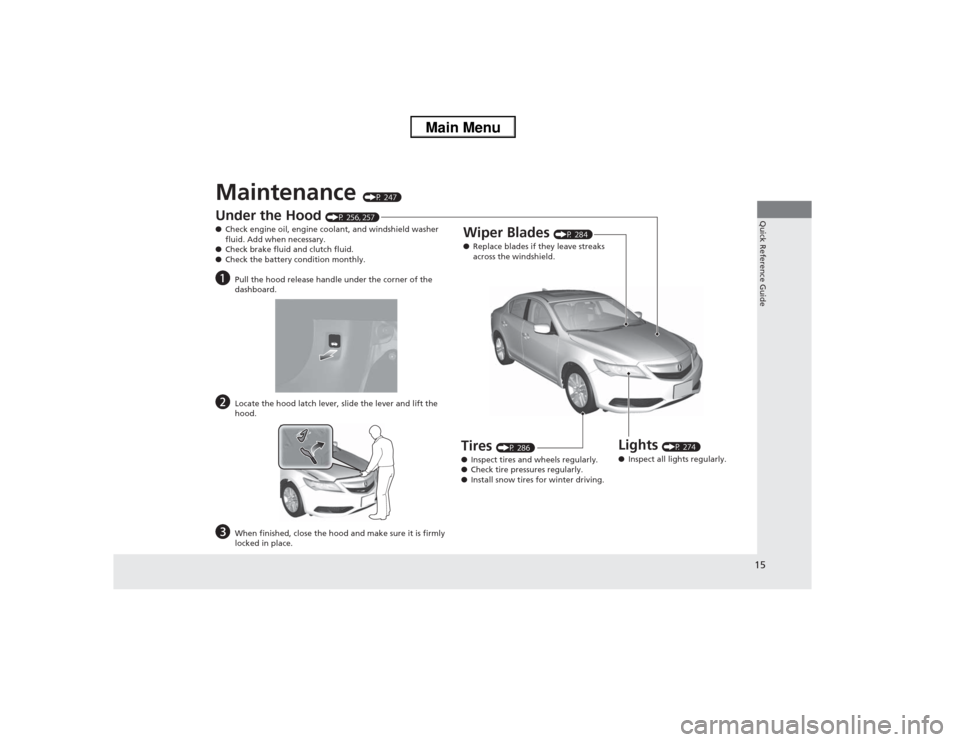
Maintenance
(P 247)
Under the Hood
(P 256, 257)
●Check engine oil, engine coolant, and windshield washer
fluid. Add when necessary.
●Check brake fluid and clutch fluid.
●Check the battery condition monthly.
a
Pull the hood release handle under the corner of the
dashboard.
b
Locate the hood latch lever, slide the lever and lift the
hood.
c
When finished, close the hood and make sure it is firmly
locked in place.
Lights
(P 274)
●Inspect all lights regularly.
Wiper Blades
(P 284)
●Replace blades if they leave streaks
across the windshield.
Tires
(P 286)
●Inspect tires and wheels regularly.
●Check tire pressures regularly.
●Install snow tires for winter driving.
Page 75 of 351
74
uuIndicatorsuMulti-Information Display Warning and Information Messages
Instrument Panel
Message
Condition
Explanation
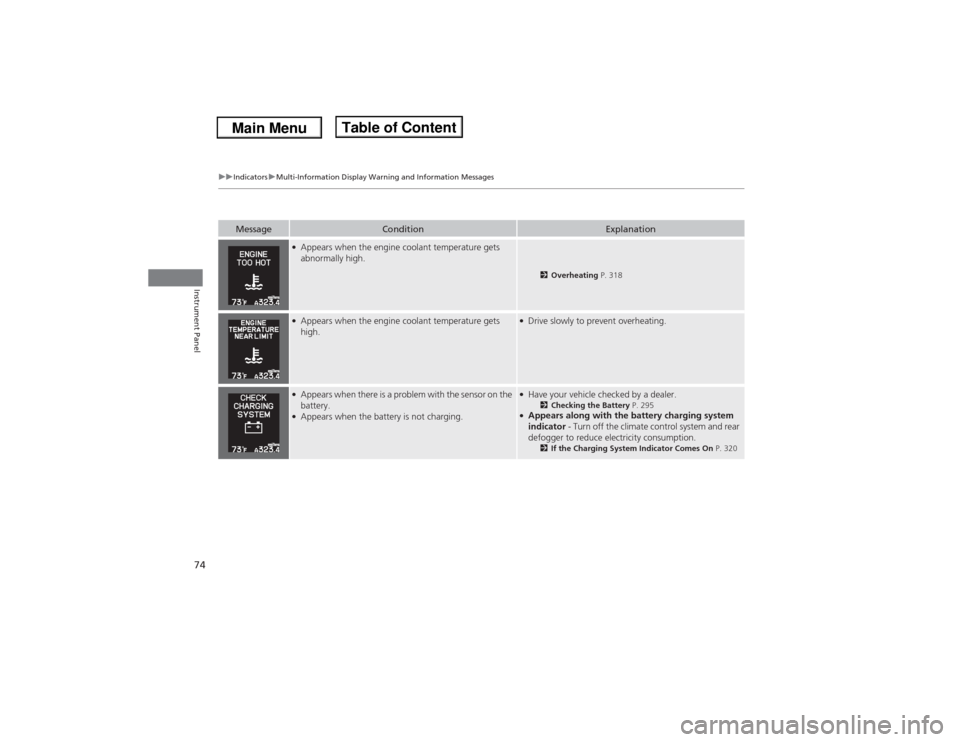
●Appears when the engine coolant temperature gets
abnormally high.
2Overheating P. 318
●Appears when the engine coolant temperature gets
high.
●Drive slowly to prevent overheating.
●Appears when there is a problem with the sensor on the
battery.●Appears when the battery is not charging.
●Have your vehicle checked by a dealer.
2Checking the Battery P. 295
●Appears along with the battery charging system
indicator - Turn off the climate control system and rear
defogger to reduce electricity consumption.
2If the Charging System Indicator Comes On P. 320
Page 79 of 351
78Instrument Panel
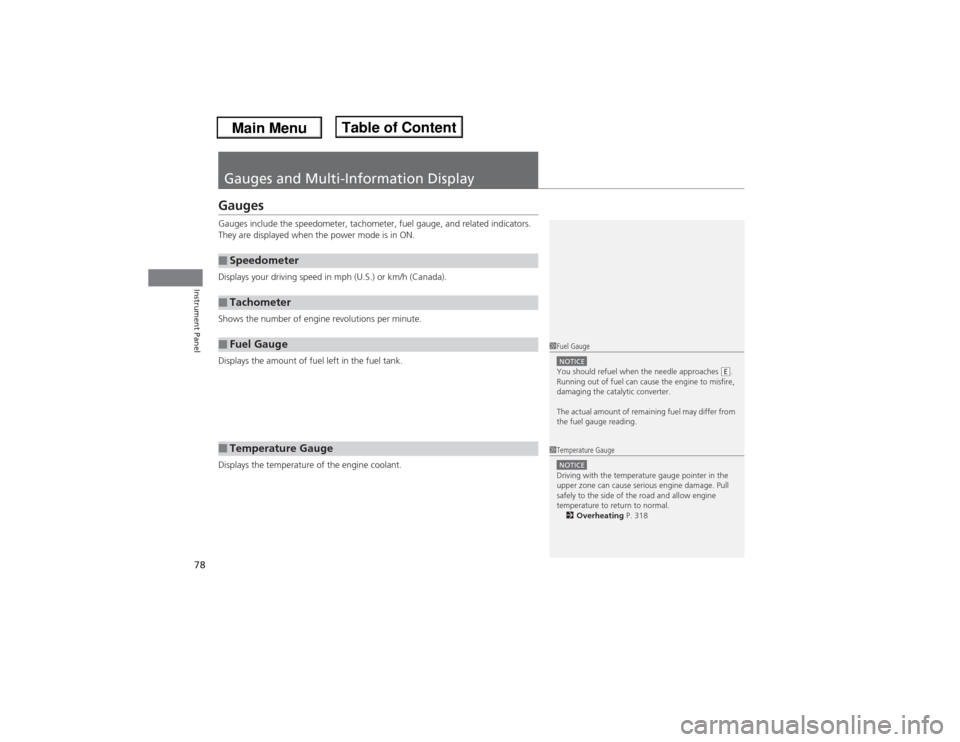
Gauges and Multi-Information Display GaugesGauges include the speedometer, tachometer, fuel gauge, and related indicators.
They are displayed when the power mode is in ON.
Displays your driving speed in mph (U.S.) or km/h (Canada).
Shows the number of engine revolutions per minute.
Displays the amount of fuel left in the fuel tank.
Displays the temperature of the engine coolant.■Speedometer■Tachometer■Fuel Gauge■Temperature Gauge
1Fuel GaugeNOTICEYou should refuel when the needle approaches .
Running out of fuel can cause the engine to misfire,
damaging the catalytic converter.
The actual amount of remaining fuel may differ from
the fuel gauge reading.
E
1Temperature GaugeNOTICEDriving with the temperature gauge pointer in the
upper zone can cause serious engine damage. Pull
safely to the side of the road and allow engine
temperature to return to normal.
2Overheating P. 318
Page 217 of 351
216Driving
When DrivingStarting the Engine
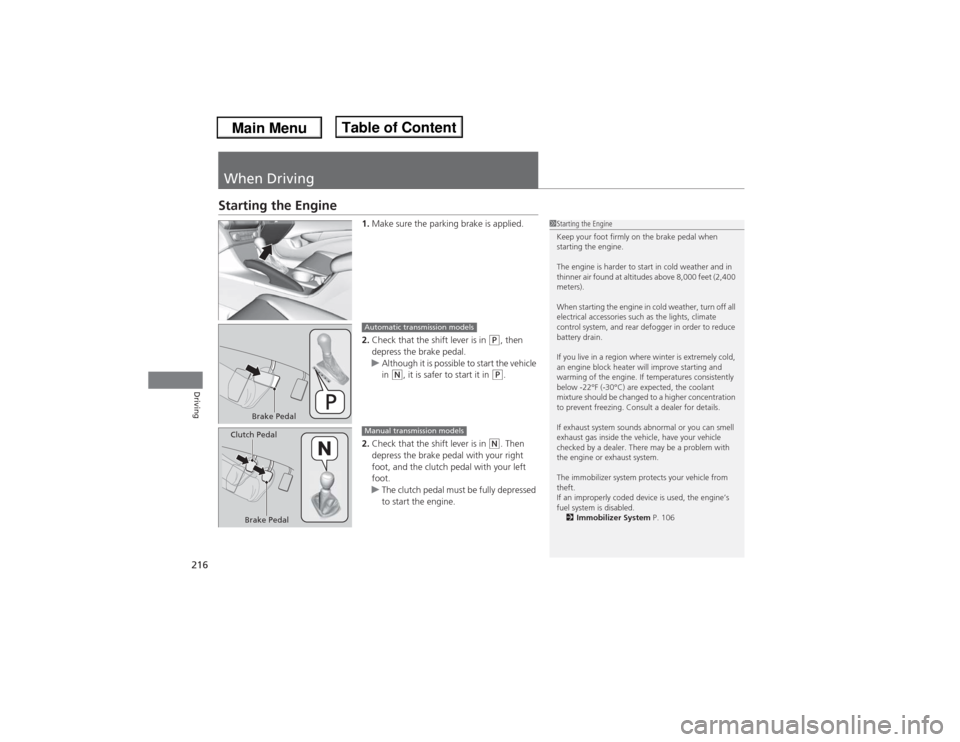
1.Make sure the parking brake is applied.
2.Check that the shift lever is in
(P, then
depress the brake pedal.
uAlthough it is possible to start the vehicle
in
(N, it is safer to start it in
(P.
2.Check that the shift lever is in
(N. Then
depress the brake pedal with your right
foot, and the clutch pedal with your left
foot.
uThe clutch pedal must be fully depressed
to start the engine.
1Starting the Engine
Keep your foot firmly on the brake pedal when
starting the engine.
The engine is harder to start in cold weather and in
thinner air found at altitudes above 8,000 feet (2,400
meters).
When starting the engine in cold weather, turn off all
electrical accessories such as the lights, climate
control system, and rear defogger in order to reduce
battery drain.
If you live in a region where winter is extremely cold,
an engine block heater will improve starting and
warming of the engine. If temperatures consistently
below -22°F (-30°C) are expected, the coolant
mixture should be changed to a higher concentration
to prevent freezing. Consult a dealer for details.
If exhaust system sounds abnormal or you can smell
exhaust gas inside the vehicle, have your vehicle
checked by a dealer. There may be a problem with
the engine or exhaust system.
The immobilizer system protects your vehicle from
theft.
If an improperly coded device is used, the engine’s
fuel system is disabled.
2Immobilizer System P. 106
Brake Pedal
Automatic transmission models
Brake Pedal Clutch Pedal
Manual transmission models
Page 248 of 351
247
Maintenance
This chapter discusses basic maintenance.
Before Performing Maintenance
Inspection and Maintenance ............ 248Safety When Performing Maintenance..... 249Parts and Fluids Used in Maintenance
Service ........................................... 250
Maintenance Minder
TM..................... 251
Maintenance Under the Hood
Maintenance Items Under the Hood ..... 256Opening the Hood ........................... 258
Engine Compartment Cover ............. 259
Recommended Engine Oil ................ 261
Oil Check ......................................... 262
Adding Engine Oil ............................ 264
Changing the Engine Oil and Oil Filter ..... 265Engine Coolant ................................ 268
Transmission Fluid ............................ 270
Brake/Clutch Fluid ............................ 272
Refilling Window Washer Fluid......... 273
Replacing Light Bulbs....................... 274Checking and Maintaining Wiper
Blades.......................................... 284Checking and Maintaining Tires
Checking Tires ................................. 286Tire and Loading Information Label ...... 287Tire Labeling .................................... 287DOT Tire Quality Grading (U.S. Vehicles)....... 289
Wear Indicators ............................... 291
Tire Service Life ................................ 291
Tire and Wheel Replacement ........... 292
Tire Rotation .................................... 293
Winter Tires ..................................... 294
Battery............................................... 295
Remote Transmitter Care
Replacing the Button Battery ........... 296Climate Control System Maintenance
.... 297
Cleaning
Interior Care .................................... 298
Exterior Care.................................... 300
Page 255 of 351
254
uuMaintenance Minder
TMuTo Use Maintenance Minder
TM
Maintenance
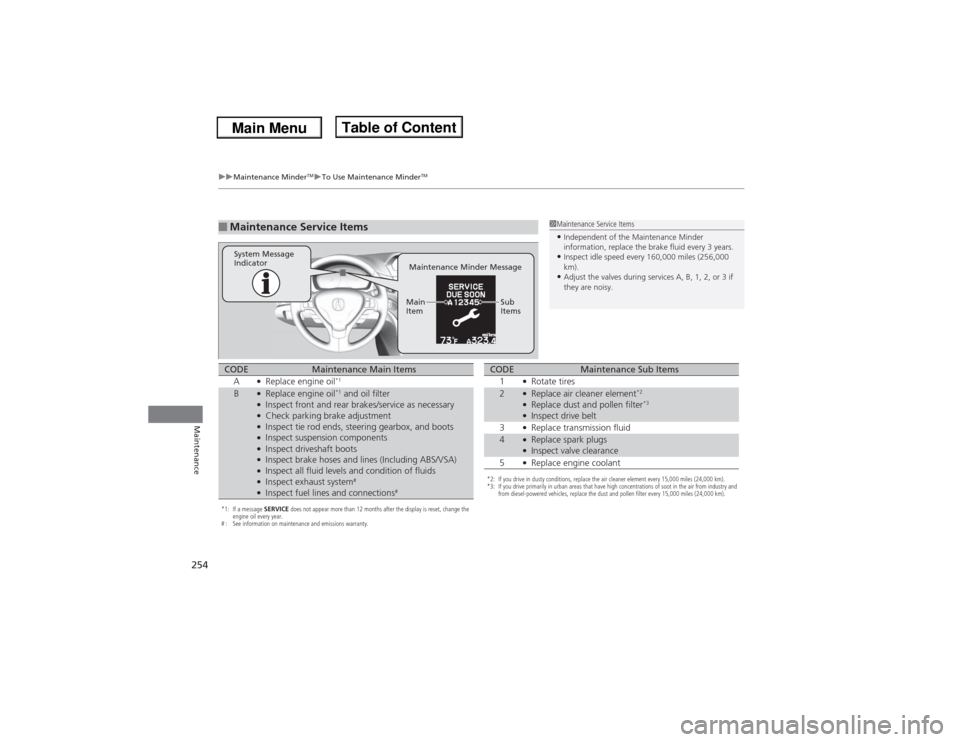
■Maintenance Service Items
1Maintenance Service Items•Independent of the Maintenance Minder
information, replace the brake fluid every 3 years.•Inspect idle speed every 160,000 miles (256,000
km).•Adjust the valves during services A, B, 1, 2, or 3 if
they are noisy.
Maintenance Minder Message System Message
Indicator
Sub
Items Main
Item
*1: If a message SERVICE does not appear more than 12 months after the display is reset, change the
engine oil every year.
# : See information on maintenance and emissions warranty.CODE
Maintenance Main Items
A
●Replace engine oil
*1
B
●Replace engine oil
*1 and oil filter
●Inspect front and rear brakes/service as necessary●Check parking brake adjustment●Inspect tie rod ends, steering gearbox, and boots●Inspect suspension components●Inspect driveshaft boots●Inspect brake hoses and lines (Including ABS/VSA)●Inspect all fluid levels and condition of fluids●Inspect exhaust system
#
●Inspect fuel lines and connections
#
*2: If you drive in dusty conditions, replace the air cleaner element every 15,000 miles (24,000 km).
*3: If you drive primarily in urban areas that have high concentrations of soot in the air from industry and
from diesel-powered vehicles, replace the dust and pollen filter every 15,000 miles (24,000 km).CODE
Maintenance Sub Items
1
●Rotate tires
2
●Replace air cleaner element
*2
●Replace dust and pollen filter
*3
●Inspect drive belt
3●Replace transmission fluid
4
●Replace spark plugs●Inspect valve clearance
5●Replace engine coolant
Page 257 of 351
256Maintenance
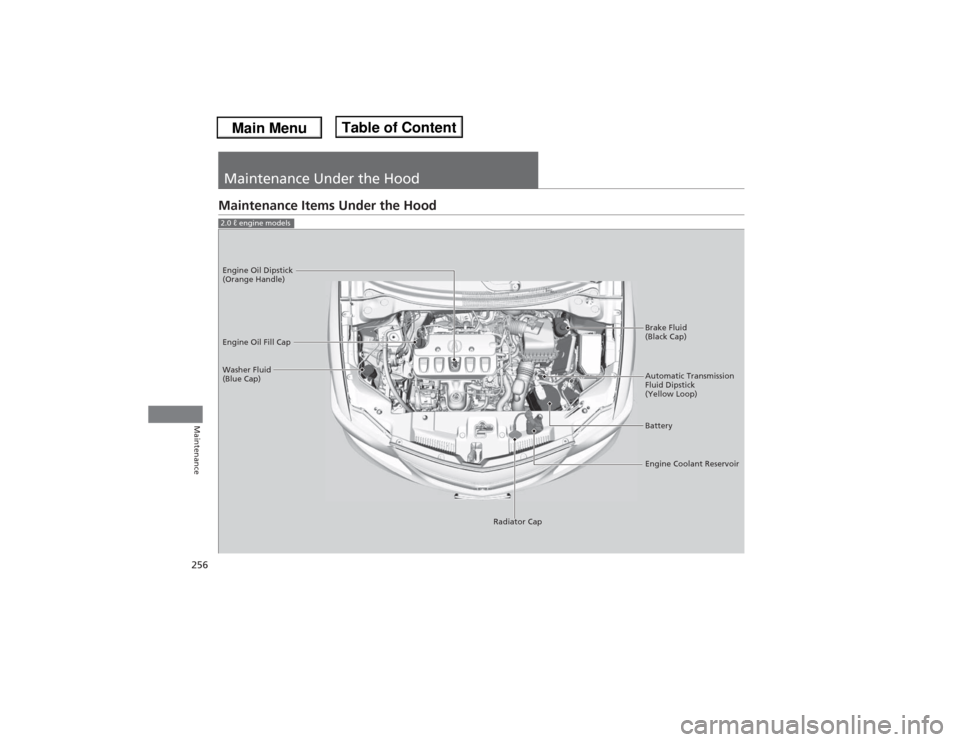
Maintenance Under the HoodMaintenance Items Under the Hood2.0 ℓ engine models
Brake Fluid
(Black Cap)
Washer Fluid
(Blue Cap) Engine Oil Dipstick
(Orange Handle)
Engine Oil Fill Cap
Automatic Transmission
Fluid Dipstick
(Yellow Loop)
Battery
Engine Coolant Reservoir
Radiator Cap
Page 258 of 351
257
uuMaintenance Under the HooduMaintenance Items Under the Hood
Maintenance
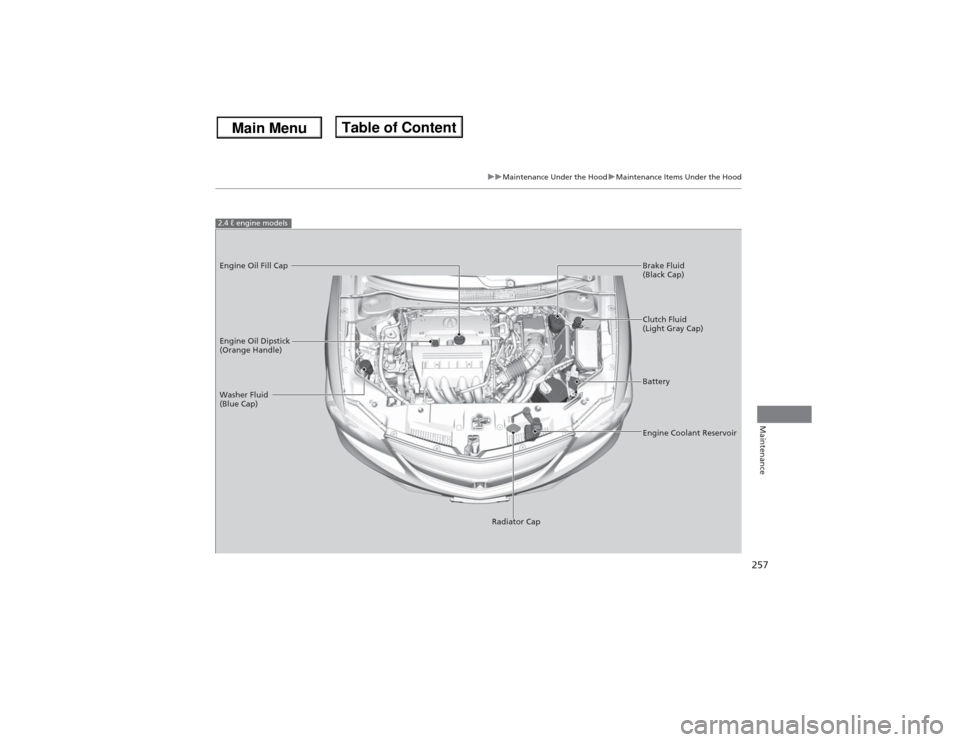
2.4 ℓ engine modelsEngine Oil Dipstick
(Orange Handle)
Washer Fluid
(Blue Cap)
Engine Coolant Reservoir Brake Fluid
(Black Cap) Engine Oil Fill Cap
Clutch Fluid
(Light Gray Cap)
Battery
Radiator Cap
Page 269 of 351
268
uuMaintenance Under the HooduEngine Coolant
Maintenance
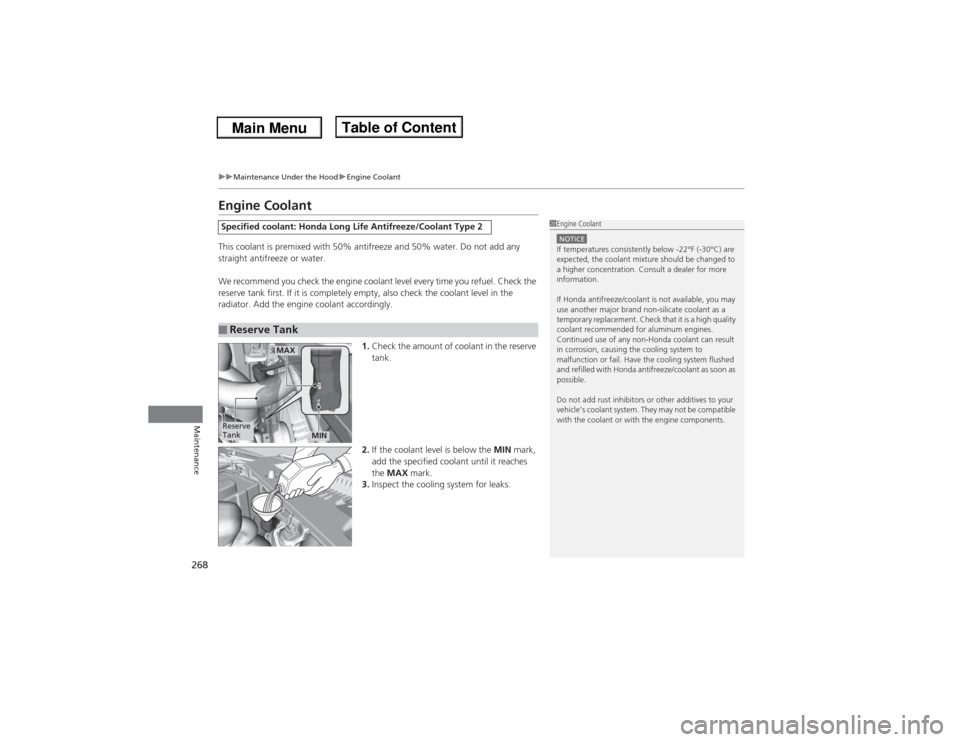
Engine CoolantThis coolant is premixed with 50% antifreeze and 50% water. Do not add any
straight antifreeze or water.
We recommend you check the engine coolant level every time you refuel. Check the
reserve tank first. If it is completely empty, also check the coolant level in the
radiator. Add the engine coolant accordingly.
1.Check the amount of coolant in the reserve
tank.
2.If the coolant level is below the MIN mark,
add the specified coolant until it reaches
the MAX mark.
3.Inspect the cooling system for leaks.Specified coolant: Honda Long Life Antifreeze/Coolant Type 2■Reserve Tank
1Engine CoolantNOTICEIf temperatures consistently below -22°F (-30°C) are
expected, the coolant mixture should be changed to
a higher concentration. Consult a dealer for more
information.
If Honda antifreeze/coolant is not available, you may
use another major brand non-silicate coolant as a
temporary replacement. Check that it is a high quality
coolant recommended for aluminum engines.
Continued use of any non-Honda coolant can result
in corrosion, causing the cooling system to
malfunction or fail. Have the cooling system flushed
and refilled with Honda antifreeze/coolant as soon as
possible.
Do not add rust inhibitors or other additives to your
vehicle's coolant system. They may not be compatible
with the coolant or with the engine components.
Reserve
Tank
MAX
MIN
Page 270 of 351
269
uuMaintenance Under the HooduEngine Coolant
Maintenance
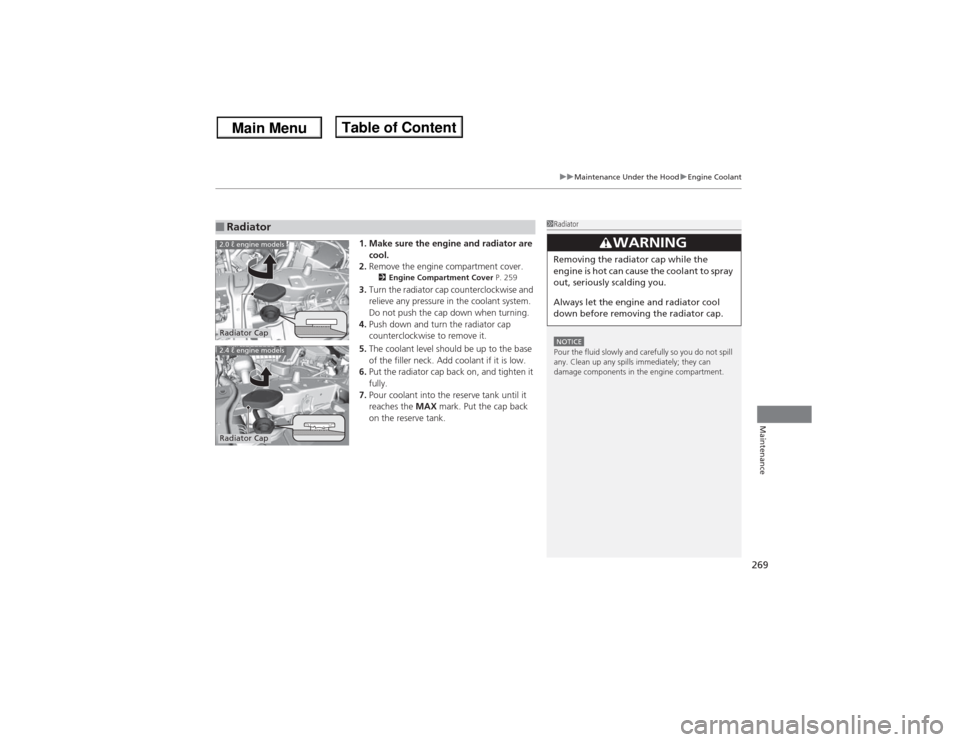
1. Make sure the engine and radiator are
cool.
2.Remove the engine compartment cover.
2Engine Compartment Cover P. 259
3.Turn the radiator cap counterclockwise and
relieve any pressure in the coolant system.
Do not push the cap down when turning.
4.Push down and turn the radiator cap
counterclockwise to remove it.
5.The coolant level should be up to the base
of the filler neck. Add coolant if it is low.
6.Put the radiator cap back on, and tighten it
fully.
7.Pour coolant into the reserve tank until it
reaches the MAX mark. Put the cap back
on the reserve tank.
■Radiator
1RadiatorNOTICEPour the fluid slowly and carefully so you do not spill
any. Clean up any spills immediately; they can
damage components in the engine compartment.
3
WARNING
Removing the radiator cap while the
engine is hot can cause the coolant to spray
out, seriously scalding you.
Always let the engine and radiator cool
down before removing the radiator cap.
2.0 ℓ engine modelsRadiator Cap2.4 ℓ engine modelsRadiator Cap