warning lights Acura ILX 2017 Owner's Manual
[x] Cancel search | Manufacturer: ACURA, Model Year: 2017, Model line: ILX, Model: Acura ILX 2017Pages: 521, PDF Size: 29.65 MB
Page 11 of 521
10
Quick Reference Guide
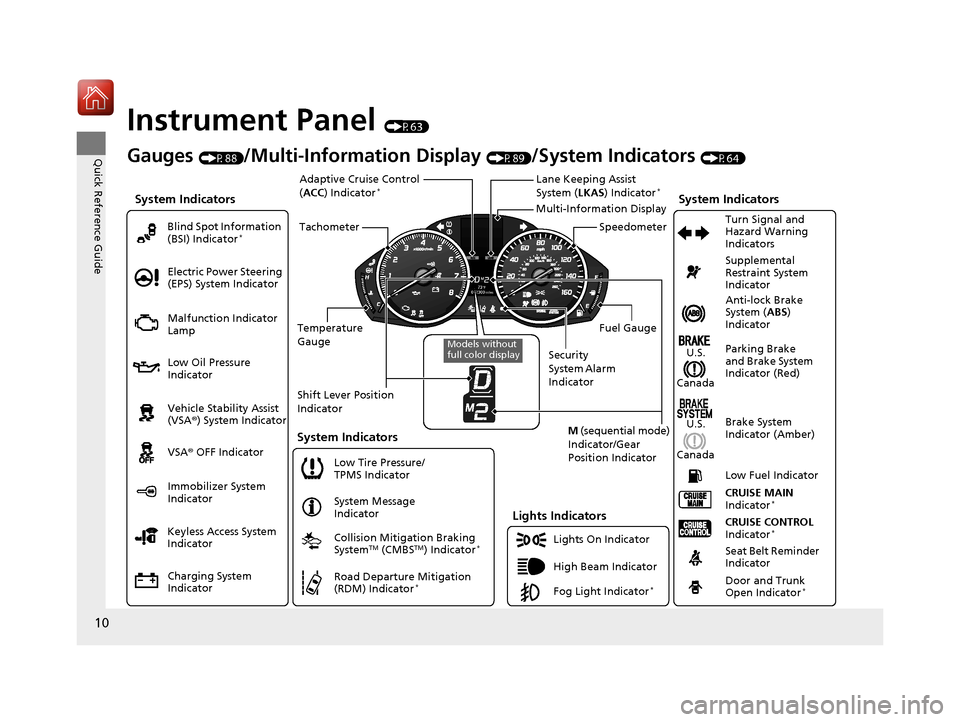
Instrument Panel (P63)
System Indicators
Malfunction Indicator
Lamp
Low Oil Pressure
Indicator
Charging System
Indicator Vehicle Stability Assist
(VSA®) System Indicator
VSA ® OFF Indicator
Electric Power Steering
(EPS) System Indicator
Lights Indicators
Lights On Indicator
High Beam Indicator
Immobilizer System
Indicator
System Indicators
System Message
Indicator
Gauges (P88)/Multi-Information Display (P89)/System Indicators (P64)
Low Tire Pressure/
TPMS Indicator
Keyless Access System
Indicator Blind Spot Information
(BSI) Indicator
*
Collision Mitigation Braking
SystemTM (CMBSTM) Indicator*
Road Departure Mitigation
(RDM) Indicator*Fog Light Indicator*
Temperature
Gauge Security
System Alarm
IndicatorFuel Gauge
Tachometer
Multi-Information Display
Speedometer
Shift Lever Position
Indicator M (sequential mode)
Indicator/Gear
Position Indicator
System Indicators
Lane Keeping Assist
System ( LKAS) Indicator*Adaptive Cruise Control
(ACC ) Indicator*
Models without
full color display
Anti-lock Brake
System ( ABS)
Indicator
Seat Belt Reminder
Indicator CRUISE CONTROL
Indicator
*
Parking Brake
and Brake System
Indicator (Red) Supplemental
Restraint System
Indicator
CRUISE MAIN
Indicator
*
Low Fuel Indicator Turn Signal and
Hazard Warning
Indicators
Brake System
Indicator (Amber)
U.S.
Canada
U.S.
Canada
Door and Trunk
Open Indicator*
17 ACURA ILX-31TX66400.book 10 ページ 2016年3月15日 火曜日 午後5時0分
Page 73 of 521
72
uuIndicators u
Instrument Panel
*1:On the left: Models without full color display
On the right: Models with full color display
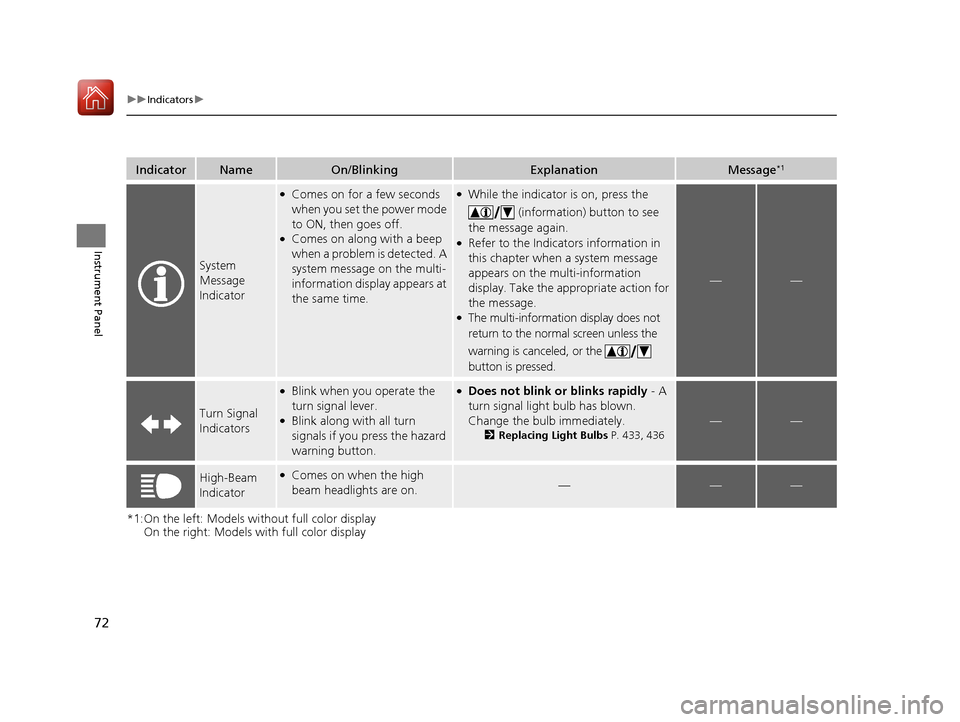
IndicatorNameOn/BlinkingExplanationMessage*1
System
Message
Indicator
●Comes on for a few seconds
when you set the power mode
to ON, then goes off.
●Comes on along with a beep
when a problem is detected. A
system message on the multi-
information display appears at
the same time.
●While the indicator is on, press the
(information) button to see
the message again.
●Refer to the Indicators information in
this chapter when a system message
appears on the mu lti-information
display. Take the appropriate action for
the message.
●The multi-informatio n display does not
return to the normal screen unless the
warning is canceled, or the
button is pressed.
——
Turn Signal
Indicators
●Blink when you operate the
turn signal lever.
●Blink along with all turn
signals if you press the hazard
warning button.
●Does not blink or blinks rapidly - A
turn signal light bulb has blown.
Change the bulb immediately.
2 Replacing Light Bulbs P. 433, 436
——
High-Beam
Indicator●Comes on when the high
beam headlights are on.———
17 ACURA ILX-31TX66400.book 72 ページ 2016年3月15日 火曜日 午後5時0分
Page 86 of 521
85
uuIndicators uMulti-Information Display Warning and Information Messages
Continued
Instrument Panel
*1:On the left: Models wi thout full color display
On the right: Models with full color display
Message*1ConditionExplanation
—
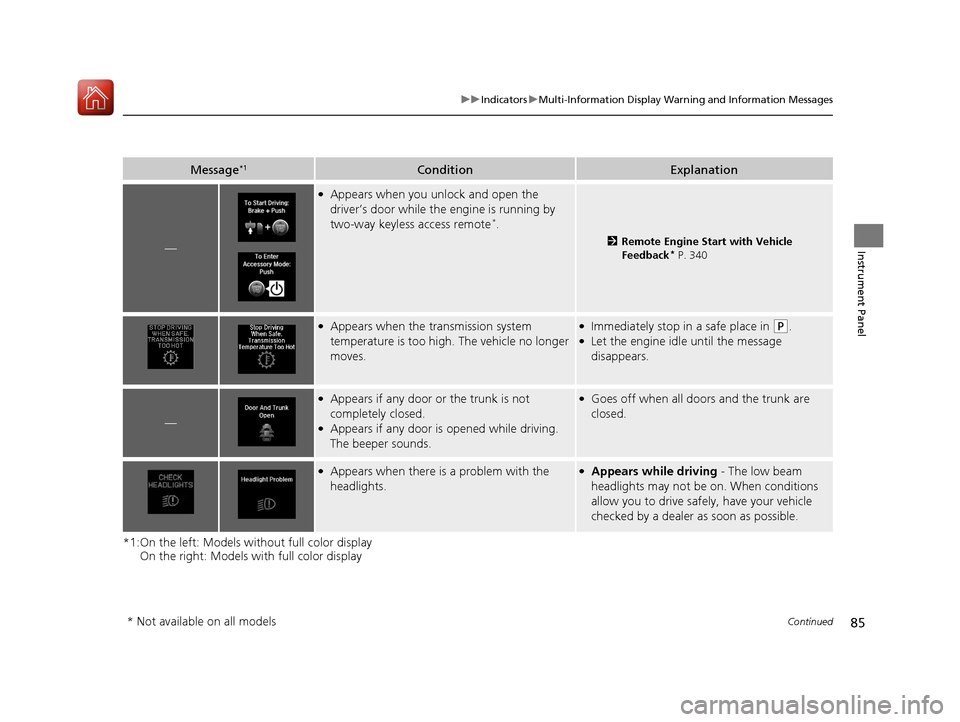
●Appears when you unlock and open the
driver’s door while the engine is running by
two-way keyless access remote
*.
2 Remote Engine Start with Vehicle
Feedback* P. 340
●Appears when the transmission system
temperature is too high. The vehicle no longer
moves.●Immediately stop in a safe place in (P.●Let the engine idle until the message
disappears.
—
●Appears if any door or the trunk is not
completely closed.
●Appears if any door is opened while driving.
The beeper sounds.
●Goes off when all doors and the trunk are
closed.
●Appears when there is a problem with the
headlights.●Appears while driving - The low beam
headlights may not be on. When conditions
allow you to drive safely, have your vehicle
checked by a dealer as soon as possible.
* Not available on all models
17 ACURA ILX-31TX66400.book 85 ページ 2016年3月15日 火曜日 午後5時0分
Page 158 of 521
157
uuInterior Lights/Interior Convenience Items uInterior Convenience Items
Continued
Controls
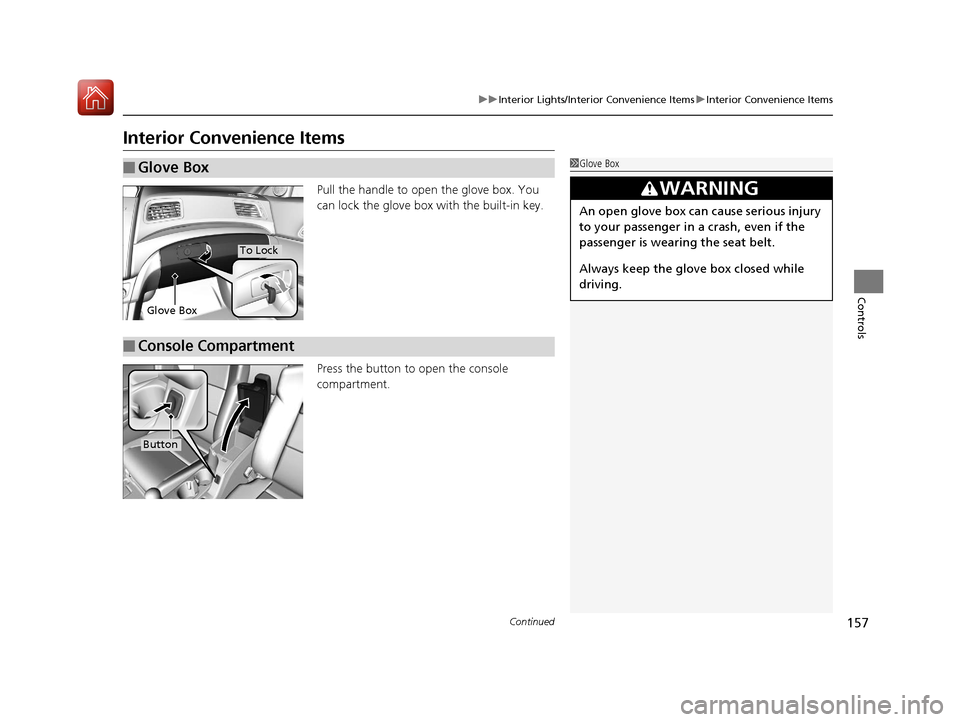
Interior Convenience Items
Pull the handle to open the glove box. You
can lock the glove box with the built-in key.
Press the button to open the console
compartment.
■Glove Box1 Glove Box
3WARNING
An open glove box can cause serious injury
to your passenger in a crash, even if the
passenger is wearing the seat belt.
Always keep the glove box closed while
driving.
Glove Box
To Lock
■Console Compartment
Button
17 ACURA ILX-31TX66400.book 157 ページ 2016年3月15日 火曜日 午後5時0分
Page 161 of 521
uuInterior Lights/Interior Convenience Items uInterior Convenience Items
160
Controls
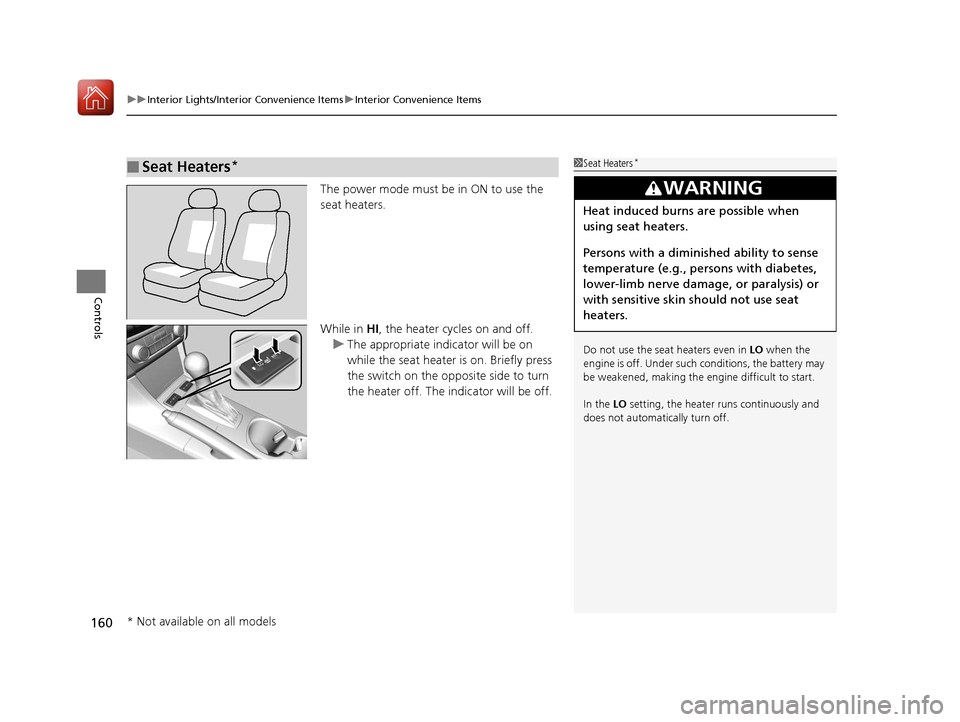
The power mode must be in ON to use the
seat heaters.
While in HI, the heater cycles on and off.
u The appropriate indicator will be on
while the seat heater is on. Briefly press
the switch on the opposite side to turn
the heater off. The indicator will be off.
■Seat Heaters*1Seat Heaters*
Do not use the seat heaters even in LO when the
engine is off. Under such conditions, the battery may
be weakened, making the engine difficult to start.
In the LO setting, the heater runs continuously and
does not automatically turn off.
3WARNING
Heat induced burns are possible when
using seat heaters.
Persons with a diminished ability to sense
temperature (e.g., persons with diabetes,
lower-limb nerve damage, or paralysis) or
with sensitive skin should not use seat
heaters.
* Not available on all models
17 ACURA ILX-31TX66400.book 160 ページ 2016年3月15日 火曜日 午後5時0分
Page 355 of 521
354
uuWhen Driving uAdaptive Cruise Control (ACC)*
Driving
Adaptive Cruise Control (ACC)*
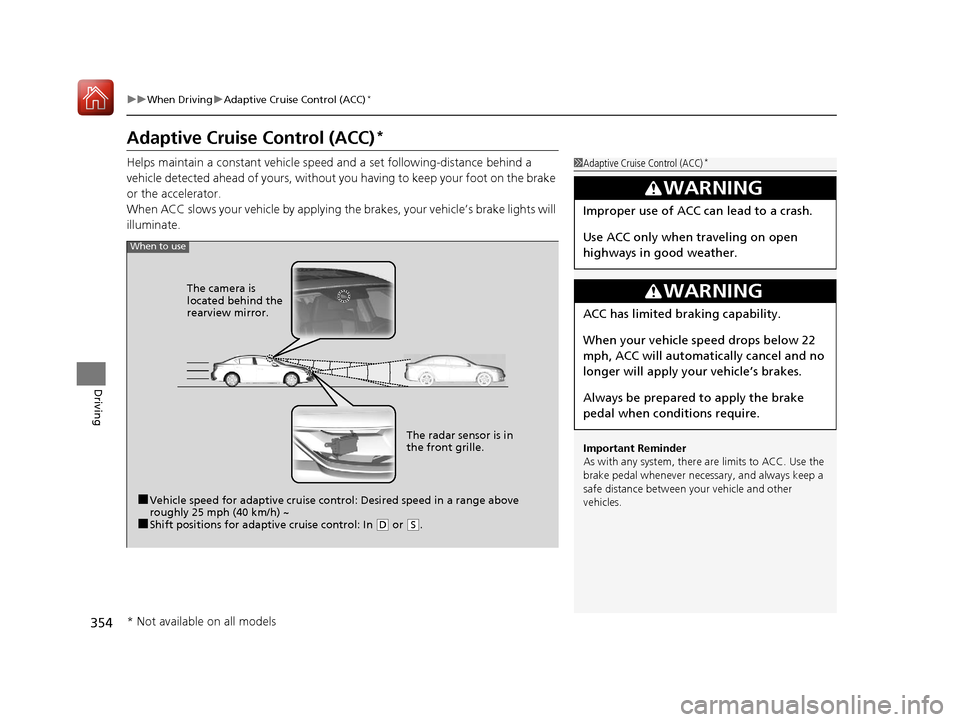
Helps maintain a constant vehicle speed and a set following-distance behind a
vehicle detected ahead of yours, without you having to keep your foot on the brake
or the accelerator.
When ACC slows your vehicle by applying the brakes, your vehicle’s brake lights will
illuminate.1 Adaptive Cruise Control (ACC)*
Important Reminder
As with any system, there are limits to ACC. Use the
brake pedal whenever necessary, and always keep a
safe distance between your vehicle and other
vehicles.
3WARNING
Improper use of ACC can lead to a crash.
Use ACC only when traveling on open
highways in good weather.
3WARNING
ACC has limited braking capability.
When your vehicle speed drops below 22
mph, ACC will automatically cancel and no
longer will apply your vehicle’s brakes.
Always be prepared to apply the brake
pedal when conditions require.
When to use
■Vehicle speed for adaptive cruise control: Desired speed in a range above
roughly 25 mph (40 km/h) ~
■Shift positions for adaptive cruise control: In (D or (S.
The radar sensor is in
the front grille.
The camera is
located behind the
rearview mirror.
* Not available on all models
17 ACURA ILX-31TX66400.book 354 ページ 2016年3月15日 火曜日 午後5時0分
Page 464 of 521
463Continued
Handling the Unexpected
If a Tire Goes Flat
Temporarily Repairing a Flat Tire
If the tire has a large cut or is otherwise severely damaged, you will need to have the
vehicle towed. If the tire only has a small puncture, from a nail for instance, you can
use the temporary tire repair kit so that you can drive to the nearest service station
for a more permanent repair.
If a tire goes flat while driving, grasp the steering wheel firmly, and brake gradually
to reduce speed. Then stop in a safe place.
1. Park the vehicle on a firm, level, and n on-slippery surface and apply the parking
brake.
2. Move the shift lever to
(P.
3. Turn on the hazard warning lights an d set the power mode to VEHICLE OFF
(LOCK).
1 Temporarily Repairing a Flat Tire
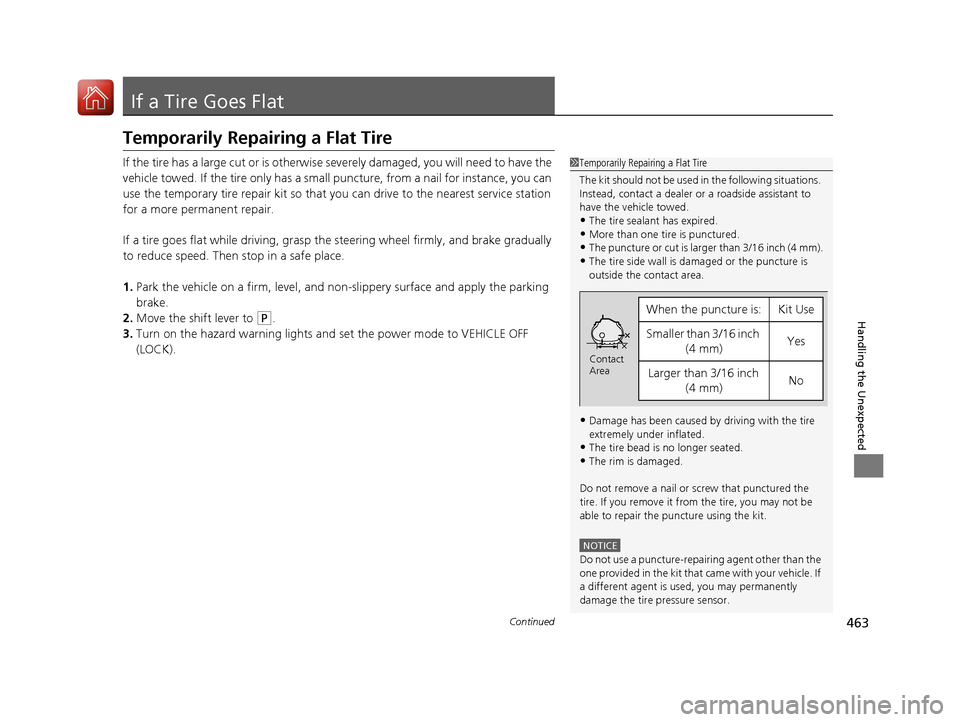
The kit should not be used in the following situations.
Instead, contact a dealer or a roadside assistant to
have the vehicle towed.
•The tire sealant has expired.
•More than one tire is punctured.•The puncture or cut is larger than 3/16 inch (4 mm).
•The tire side wall is da maged or the puncture is
outside the contact area.
•Damage has been caused by driving with the tire
extremely under inflated.
•The tire bead is no longer seated.
•The rim is damaged.
Do not remove a nail or screw that punctured the
tire. If you remove it from the tire, you may not be
able to repair the puncture using the kit.
NOTICE
Do not use a puncture-repairing agent other than the
one provided in the kit that came with your vehicle. If
a different agent is used, you may permanently
damage the tire pressure sensor.
When the puncture is:Kit Use
Smaller than 3/16 inch (4 mm)Yes
Larger than 3/16 inch (4 mm)No
Contact
Area
17 ACURA ILX-31TX66400.book 463 ページ 2016年3月15日 火曜日 午後5時0分
Page 476 of 521
475
uuIf a Tire Goes Flat uChanging a Flat Tire
Continued
Handling the Unexpected
Changing a Flat Tire
If a tire goes flat while driving, grasp the steering wheel firmly, and brake gradually
to reduce speed. Then, stop in a safe plac e. Replace the flat tire with a compact
spare tire. Go to a dealer as soon as possib le to have the full size tire repaired or
replaced.
1. Park the vehicle on firm, level, and non- slippery surface and apply the parking
brake.
2. Move the shift lever in
(P.
3. Turn on the hazard warning lights an d set the power mode to VEHICLE OFF
(LOCK).
Vehicles with optional spare tire
1 Changing a Flat Tire
Periodically check the tire pressure of the compact
spare. It should be set to the specified pressure.
Specified Pressure: 60 psi (420 kPa, 4.2 kgf/cm
2)
When driving with the compact spare tire, keep the
vehicle speed under 50 mph (80 km/h). Replace with
a full size tire as soon as possible.
The compact spare tire and wheel in your vehicle are
specifically for this model. Do not use them with
another vehicle. Do not us e another type of compact
spare tire or wheel with your vehicle.
Do not mount tire chains on a compact spare tire.
If a chain-mounted front tire goes flat, remove one of
the full-size rear tires and replace it with the compact
spare tire. Remove the flat front tire and replace it
with the full size tire that was removed from the rear.
Mount the tire chains on the front tire.
Do not use a puncture-repairi ng agent on a flat tire,
as it can damage the tire pressure sensor.
17 ACURA ILX-31TX66400.book 475 ページ 2016年3月15日 火曜日 午後5時0分
Page 486 of 521
485Continued
Handling the Unexpected
Jump Starting
Turn off the power to electric devices, such as audio and lights. Turn off the engine,
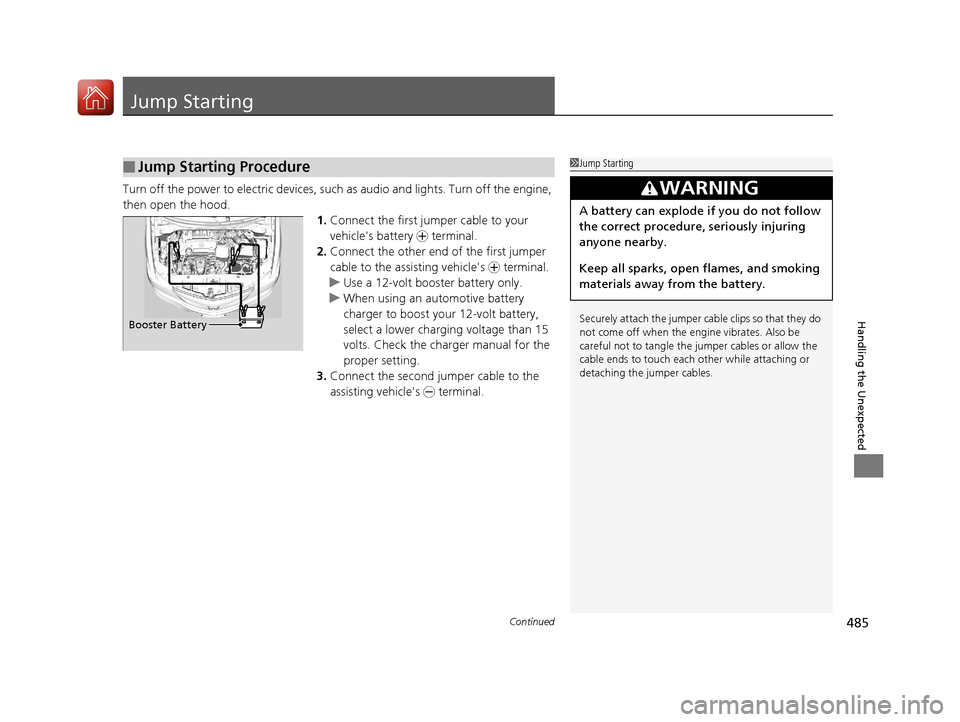
then open the hood. 1.Connect the first jumper cable to your
vehicle's battery + terminal.
2. Connect the other end of the first jumper
cable to the assisting vehicle's + terminal.
u Use a 12-volt booster battery only.
u When using an automotive battery
charger to boost your 12-volt battery,
select a lower charging voltage than 15
volts. Check the ch arger manual for the
proper setting.
3. Connect the second jumper cable to the
assisting vehicle's - terminal.
■Jump Starting Procedure1Jump Starting
Securely attach the jumper cable clips so that they do
not come off when the engine vibrates. Also be
careful not to tangle the ju mper cables or allow the
cable ends to touch each other while attaching or
detaching the jumper cables.
3WARNING
A battery can explode if you do not follow
the correct procedure, seriously injuring
anyone nearby.
Keep all sparks, open flames, and smoking
materials away from the battery.
Booster Battery
17 ACURA ILX-31TX66400.book 485 ページ 2016年3月15日 火曜日 午後5時0分
Page 490 of 521
489Continued
Handling the Unexpected
Overheating
How to Handle Overheating
Overheating symptoms are as follows:
•The temperature gauge needle is at the mark or the engine suddenly loses
power.
• Steam or spray comes out of the engine compartment.
■First thing to do
1. Immediately park the vehicle in a safe place.
2. Turn off all accessories and turn on the hazard warning lights.
u No steam or spray present: Keep the engine running and open the hood.
u Steam or spray is present: Turn off the engine and wait until it subsides.
Then open the hood.
1 How to Handle Overheating
NOTICE
Continuing to drive with the temperature gauge
needle at the mark may damage the engine.
3WARNING
Steam and spray from an overheated
engine can seriously scald you.
Do not open the hood if steam is coming
out.
H
H
17 ACURA ILX-31TX66400.book 489 ページ 2016年3月15日 火曜日 午後5時0分