warning Acura ILX Hybrid 2015 Owner's Guide
[x] Cancel search | Manufacturer: ACURA, Model Year: 2015, Model line: ILX Hybrid, Model: Acura ILX Hybrid 2015Pages: 365, PDF Size: 12.67 MB
Page 141 of 365
uuAdjusting the Seats uArmrest
140Controls
After all occupants have adjusted their seats and head restraints, and put on their
seat belts, it is very important that they continue to sit upright, well back in their
seats, with their feet on the floor, until the vehicle is safely parked and the engine is
off.
Sitting improperly can increase the chance of injury during a crash. For example, if
an occupant slouches, lies down, turns sideways, sits forward, leans forward or
sideways, or puts one or both feet up, the chance of injury during a crash is greatly
increased.
In addition, an occupant who is out of position in the front seat can be seriously or
fatally injured in a crash by striking interior parts of the vehicle or being struck by an
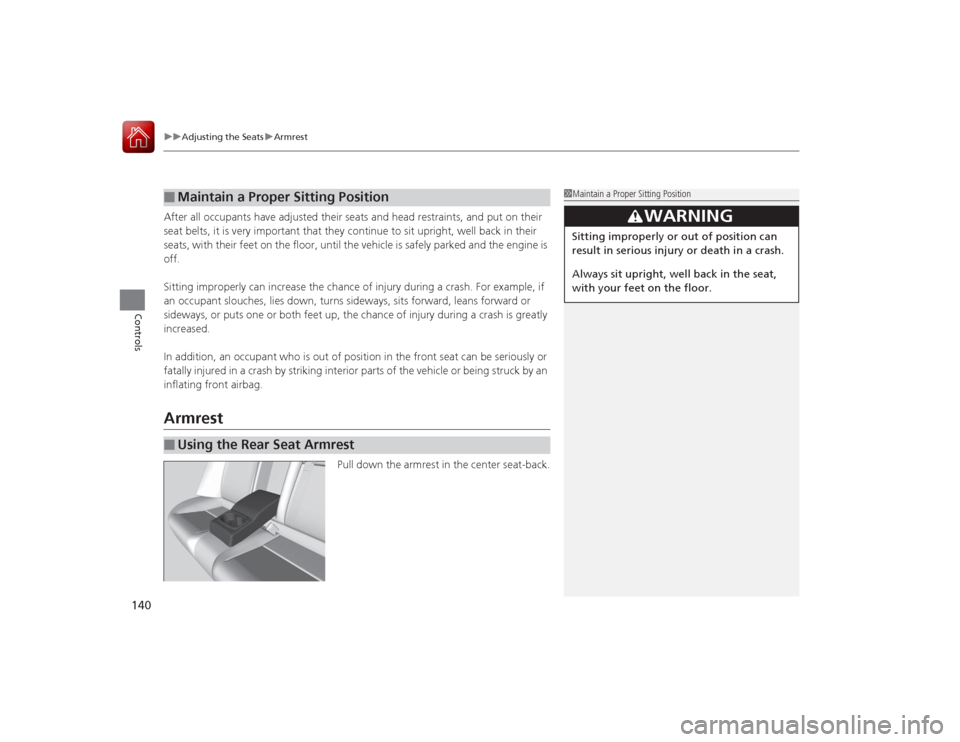
inflating front airbag.Armrest
Pull down the armrest in the center seat-back.
■
Maintain a Proper Sitting Position
■
Using the Rear Seat Armrest
1Maintain a Proper Sitting Position
3
WARNING
Sitting improperly or out of position can
result in serious injury or death in a crash.
Always sit upright, well back in the seat,
with your feet on the floor.
Page 143 of 365
142
uuInterior Lights/Interior Convenience Items uInterior Convenience Items
Controls
Interior Convenience Items
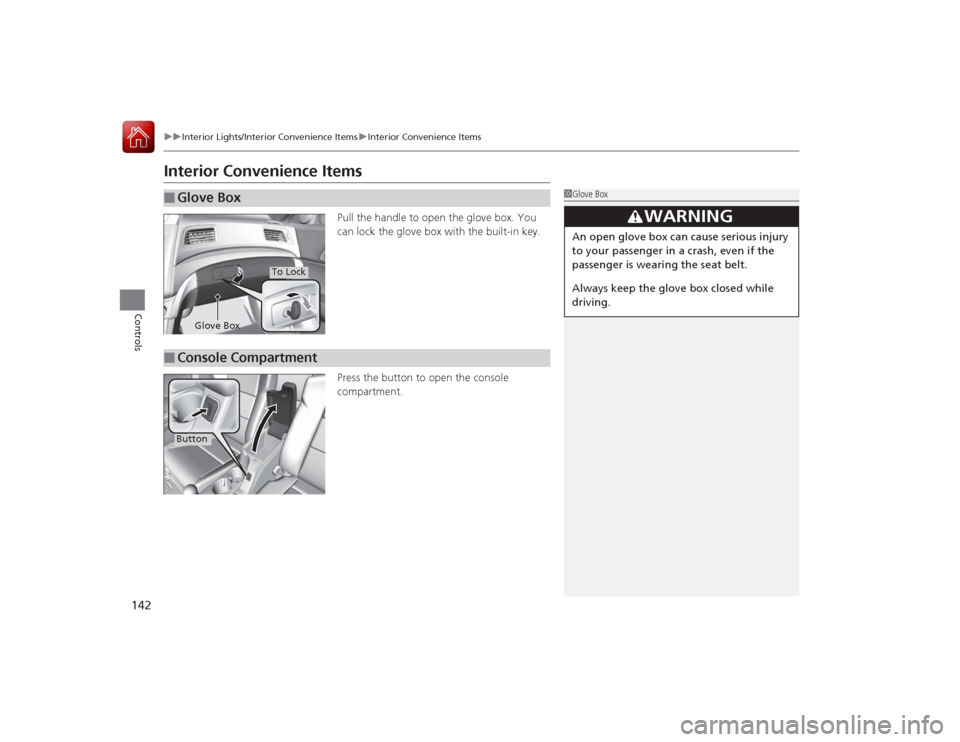
Pull the handle to open the glove box. You
can lock the glove box with the built-in key.
Press the button to open the console
compartment.
■
Glove Box
1Glove Box
3
WARNING
An open glove box can cause serious injury
to your passenger in a crash, even if the
passenger is wearing the seat belt.
Always keep the glove box closed while
driving.
Glove Box
To Lock
■
Console CompartmentButton
Page 146 of 365
145
uuInterior Lights/Interior Convenience Items uInterior Convenience Items
Controls
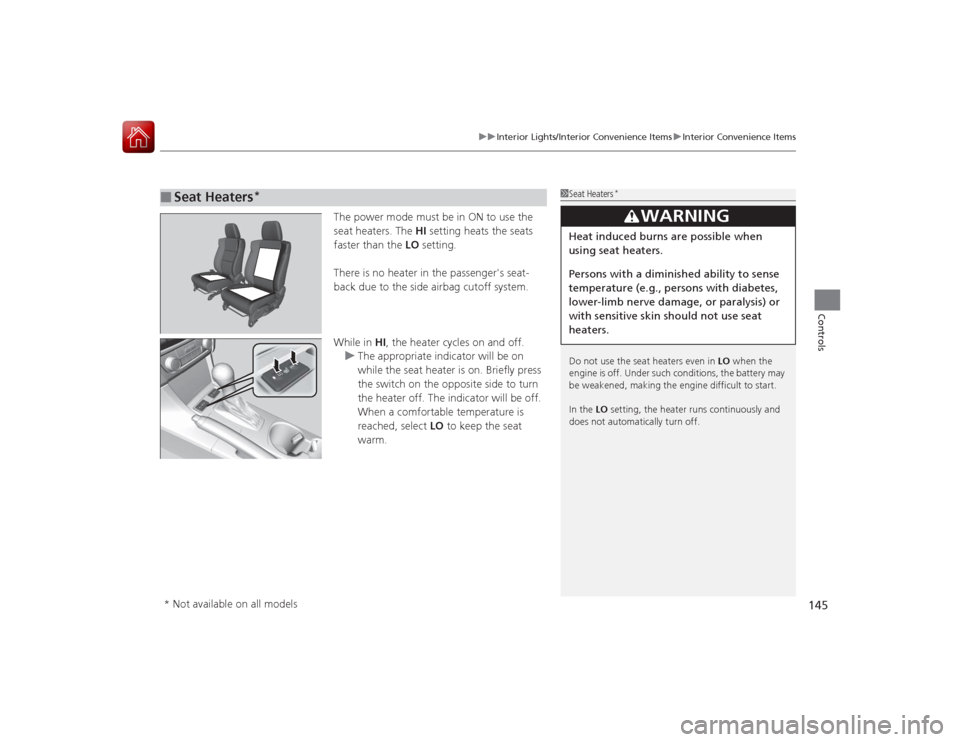
The power mode must be in ON to use the
seat heaters. The HI setting heats the seats
faster than the LO setting.
There is no heater in the passenger's seat-
back due to the side airbag cutoff system.
While in HI , the heater cycles on and off.
u The appropriate indicator will be on
while the seat heater is on. Briefly press
the switch on the opposite side to turn
the heater off. The indicator will be off.
When a comfortable temperature is
reached, select LO to keep the seat
warm.
■
Seat Heaters
*
1 Seat Heaters
*
Do not use the seat heaters even in LO when the
engine is off. Under such conditions, the battery may
be weakened, making the engine difficult to start.
In the LO setting, the heater runs continuously and
does not automatically turn off.
3
WARNING
Heat induced burns are possible when
using seat heaters.
Persons with a diminished ability to sense
temperature (e.g., persons with diabetes,
lower-limb nerve damage, or paralysis) or
with sensitive skin should not use seat
heaters.
* Not available on all models
Page 224 of 365
223
uuBefore Driving uMaximum Load Limit
Continued
Driving
Maximum Load LimitThe maximum load for your vehicle is 850 lbs (385 kg).
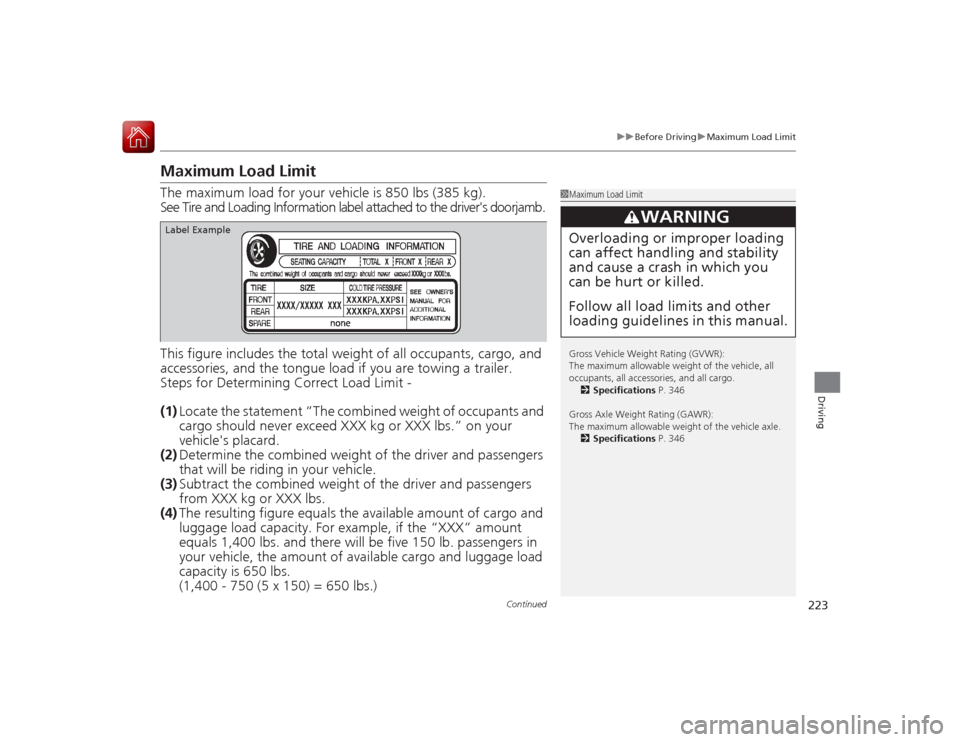
See Tire and Loading Information label attached to the driver's doorjamb.
This figure includes the total weight of all occupants, cargo, and
accessories, and the tongue lo ad if you are towing a trailer.
Steps for Determining Correct Load Limit -
(1) Locate the statement “The combined weight of occupants and
cargo should never exceed XXX kg or XXX lbs.” on your
vehicle's placard.
(2) Determine the combined weight of the driver and passengers
that will be riding in your vehicle.
(3) Subtract the combined weight of the driver and passengers
from XXX kg or XXX lbs.
(4) The resulting figure equals th e available amount of cargo and
luggage load capacity. For example, if the “XXX” amount
equals 1,400 lbs. an d there will be five 150 lb. passengers in
your vehicle, the amount of available cargo and luggage load
capacity is 650 lbs.
(1,400 - 750 (5 x 150) = 650 lbs.)
1 Maximum Load Limit
Gross Vehicle Weight Rating (GVWR):
The maximum allowable weight of the vehicle, all
occupants, all accessories, and all cargo.
2 Specifications P. 346
Gross Axle Weight Rating (GAWR):
The maximum allowable weight of the vehicle axle. 2 Specifications P. 346
3
WARNING
Overloading or improper loading
can affect handling and stability
and cause a crash in which you
can be hurt or killed.
Follow all load limits and other
loading guidelines in this manual.
Label Example
Page 241 of 365
240
uuWhen Driving uCruise Control
Driving
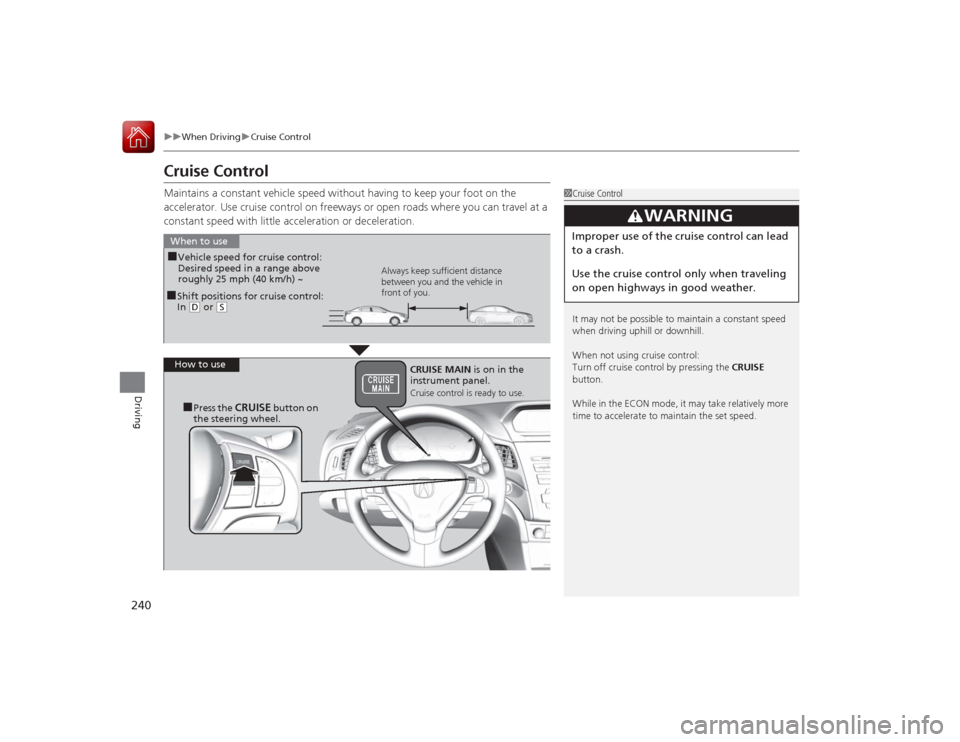
Cruise ControlMaintains a constant vehicle speed without having to keep your foot on the
accelerator. Use cruise control on freeways or open roads where you can travel at a
constant speed with little acceleration or deceleration.
1Cruise Control
It may not be possible to maintain a constant speed
when driving uphill or downhill.
When not using cruise control:
Turn off cruise control by pressing the CRUISE
button.
While in the ECON mode, it may take relatively more
time to accelerate to maintain the set speed.
3
WARNING
Improper use of the cruise control can lead
to a crash.
Use the cruise control only when traveling
on open highways in good weather.
■Shift positions for cruise control:
In ( D or
(S
When to use
Always keep sufficient distance
between you and the vehicle in
front of you.
■Vehicle speed for cruise control:
Desired speed in a range above
roughly 25 mph (40 km/h) ~
How to use CRUISE MAIN is on in the
instrument panel.
Cruise control is ready to use.
■Press the
CRUISE
button on
the steering wheel.
Page 249 of 365
248Driving
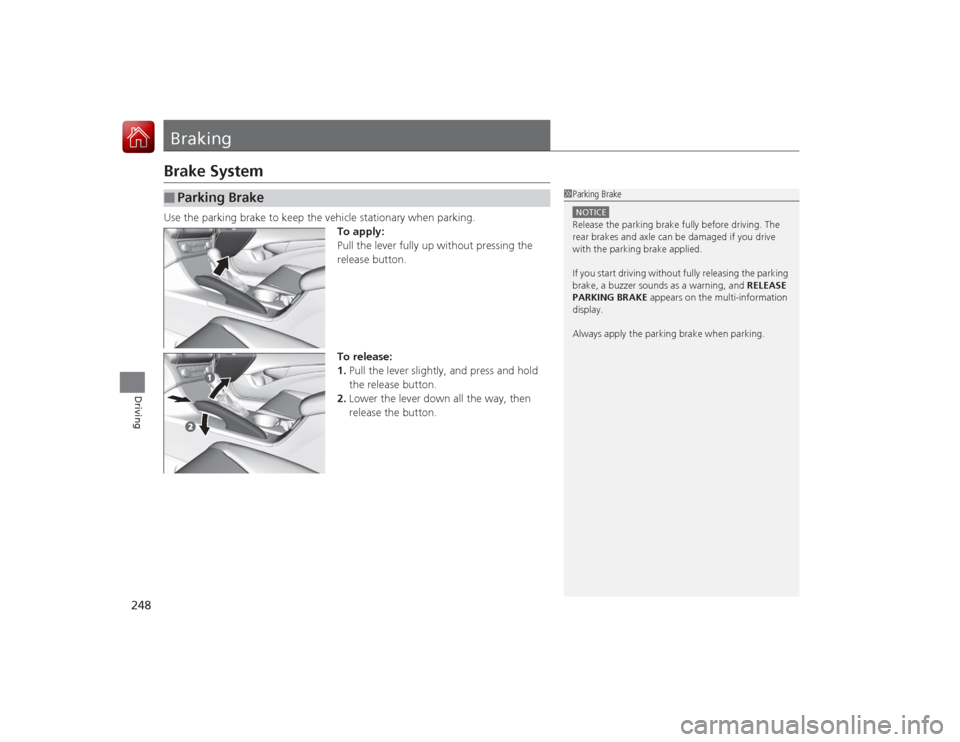
BrakingBrake SystemUse the parking brake to keep the vehicle stationary when parking.To apply:
Pull the lever fully up without pressing the
release button.
To release:
1.Pull the lever slightly, and press and hold
the release button.
2. Lower the lever down all the way, then
release the button.■
Parking Brake
1Parking BrakeNOTICERelease the parking brake fully before driving. The
rear brakes and axl e can be damaged if you drive
with the parking brake applied.
If you start driving without fully releasing the parking
brake, a buzzer sounds as a warning, and RELEASE
PARKING BRAKE appears on the multi-information
display.
Always apply the parking brake when parking.
Page 256 of 365
255
uuRefueling uHow to Refuel
Driving
How to Refuel
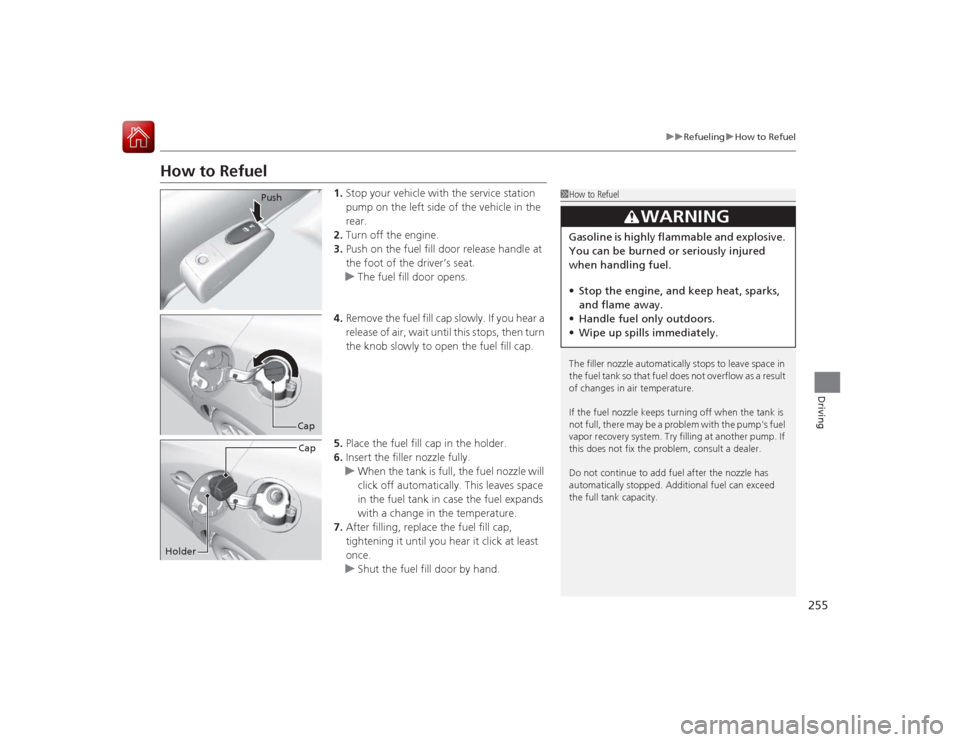
1. Stop your vehicle with the service station
pump on the left side of the vehicle in the
rear.
2. Turn off the engine.
3. Push on the fuel fill door release handle at
the foot of the driver’s seat.
u The fuel fill door opens.
4. Remove the fuel fill cap slowly. If you hear a
release of air, wait until this stops, then turn
the knob slowly to open the fuel fill cap.
5. Place the fuel fill cap in the holder.
6. Insert the filler nozzle fully.
u When the tank is full, the fuel nozzle will
click off automatically. This leaves space
in the fuel tank in case the fuel expands
with a change in the temperature.
7. After filling, replace the fuel fill cap,
tightening it until you hear it click at least
once.
u Shut the fuel fill door by hand.
1How to Refuel
The filler nozzle automatically stops to leave space in
the fuel tank so that fuel does not overflow as a result
of changes in air temperature.
If the fuel nozzle keeps turning off when the tank is
not full, there may be a problem with the pump's fuel
vapor recovery system. Try filling at another pump. If
this does not fix the problem, consult a dealer.
Do not continue to add fuel af ter the nozzle has
automatically stopped. Additional fuel can exceed
the full tank capacity.
3
WARNING
Gasoline is highly flammable and explosive.
You can be burned or seriously injured
when handling fuel.
• Stop the engine, and keep heat, sparks,
and flame away.
• Handle fuel only outdoors.
• Wipe up spills immediately.
Push
CapCap
Holder
Page 258 of 365
257Driving
Accessories and ModificationsAccessoriesWhen installing accessories, check the following:
•Do not install accessories on the windshield. They can obstruct your view and
delay your reaction to driving conditions.
• Do not install any accessories over areas marked SRS Airbag, on the sides or backs
of the front seats, on front or side pillars, or near the side windows. Accessories
installed in these areas may interfere with proper operation of the vehicle’s
airbags or may be propelled into you or another occupant if the airbags deploy.
• Be sure electronic accessories do not overload electrical circuits or interfere with
proper operation of your vehicle.
2 Fuses P. 341
•Before installing any electronic accessory, have the installer contact a dealer for
assistance. If possible, have a dealer inspect the final installation.ModificationsDo not modify your veh icle or use non-Acura components that can affect its
handling, stability, and reliability.
Overall vehicle performance can be affected. Always make sure all equipment is
properly installed and maintained, and that it meets federal, state, province,
territory, and local regulations.
1 Accessories and Modifications
Acura Genuine accessories are recommended to
ensure proper operation on your vehicle.
3
WARNING
Improper accessories or modifications can
affect your vehicle's handling, stability, and
performance, and cause a crash in which
you can be seriously hurt or killed.
Follow all instruc tions in this owner's
manual regarding accessories and
modifications.
Page 262 of 365
261
uuBefore Performing Maintenance uSafety When Performing Maintenance
Maintenance
Safety When Performing MaintenanceSome of the most important safety precautions are given here.
However, we cannot warn you of every conc eivable hazard that can arise in
performing maintenance. Only you can decide whether or not you should perform
a given task.
• To reduce the possibility of fire or explosion, keep cigarettes, sparks, and flames
away from the battery and all fuel related parts.
• Never leave rags, towels, or other flammable objects under the hood.
u Heat from the engine and exhaust can ignite them causing a fire.
• To clean parts, use a commercially available degreaser or parts cleaner, not
gasoline.
• Wear eye protection and protective clothing when working with the 12 volt
battery or compressed air.
• Engine exhaust contains carbon monoxide, which is poisonous and can kill you.
u Only operate the engine if there is sufficient ventilation.
• The vehicle must be in a stationary condition.
u Make sure your vehicle is parked on level ground, the parking brake is set, and
the engine is off.
• Be aware that hot parts can burn you.
u Make sure to let the engine and exhaust system cool thoroughly before
touching vehicle parts.
• Be aware that moving parts can injure you.
u Do not start the engine unless instructed, and keep your hands and limbs away
from moving parts.
• Do not touch the IMA battery and wiring (orange).■
Maintenance Safety
■
Vehicle Safety
1Safety When Performing Maintenance
3
WARNING
Improperly maintaining this vehicle or
failing to correct a problem before driving
can cause a crash in which you can be
seriously hurt or killed.
Always follow the inspection and
maintenance recommendations according
to the schedules in this owner's manual.
3
WARNING
Failure to properly follow maintenance
instructions and precautions can cause you
to be seriously hurt or killed.
Always follow th e procedures and
precautions in this owner's manual.
Page 279 of 365
uuMaintenance Under the Hood uEngine Coolant
278Maintenance
1. Make sure the engine and radiator are
cool.
2. Remove the engine compartment cover.
2 Engine Compartment Cover P. 270
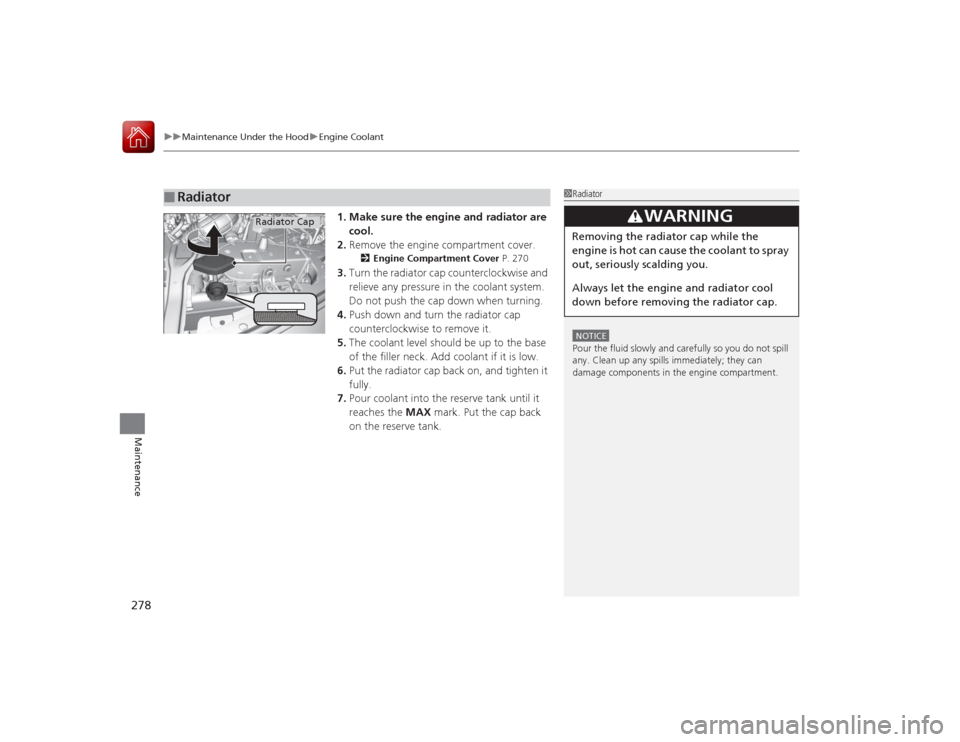
3.Turn the radiator cap counterclockwise and
relieve any pressure in the coolant system.
Do not push the cap down when turning.
4. Push down and turn the radiator cap
counterclockwise to remove it.
5. The coolant level should be up to the base
of the filler neck. Add coolant if it is low.
6. Put the radiator cap back on, and tighten it
fully.
7. Pour coolant into the reserve tank until it
reaches the MAX mark. Put the cap back
on the reserve tank.
■
Radiator
1 RadiatorNOTICEPour the fluid slowly and carefully so you do not spill
any. Clean up any spills immediately; they can
damage components in the engine compartment.
3
WARNING
Removing the radiator cap while the
engine is hot can cause the coolant to spray
out, seriously scalding you.
Always let the engine and radiator cool
down before removing the radiator cap.
Radiator Cap