sub frame ACURA INTEGRA 1998 Service Repair Manual
[x] Cancel search | Manufacturer: ACURA, Model Year: 1998, Model line: INTEGRA, Model: ACURA INTEGRA 1998Pages: 1680, PDF Size: 53.14 MB
Page 815 of 1680

!
Body
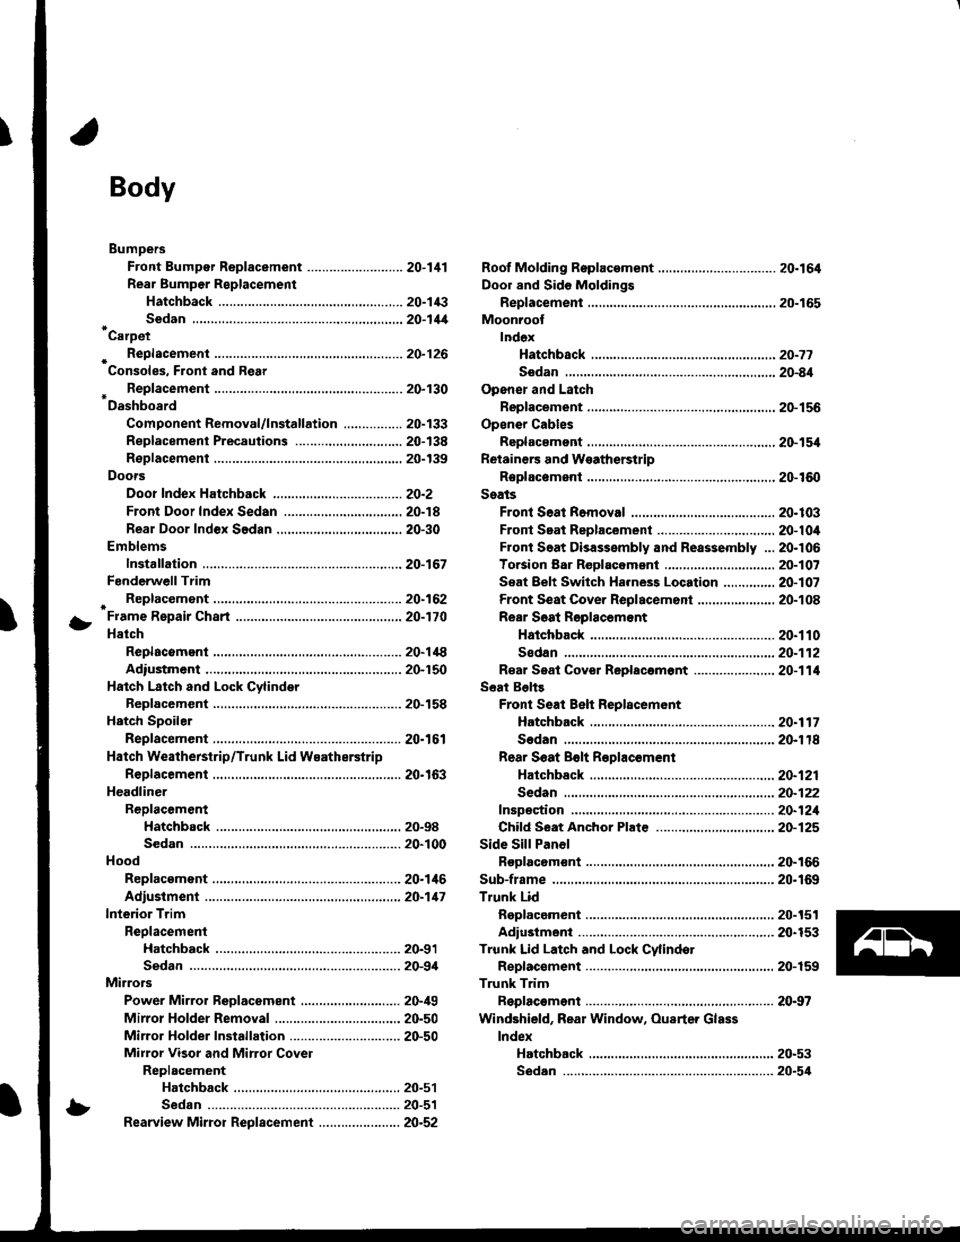
Bumpers
Front Bumper Replacement ....................-..... 20-111
Rear Bumpar Replacemeni
Hatchback ................. 20-1/B
Sedan .................... ....20-111'Carpet
. Repfacemenl .,.,.,.,,..-....-.20-126
Consoles, Front and Rear
* Replacement ..................20-130
Dashboard
Component Removal/lnstallation ................ 20-133
Replacement Precautions ...........,................. 20-138
R€placement ....,.,...........20-139
Doors
Door Index Hatchback ................................... 20-2
Front Door Index Sedan .................,.,..,.,....,.. 20-18
Rear Door Index Sedan ........,.,........,.............. 20-30
Emblems
Installation .....................20-167
FenderwellTrim
+ Replacement., ................20.162
Fram€ Repair Chart .-..........20-170
Hatch
Replacoment .......,..........20-118
Adiustment .................... 20-150
Hatch Latch and Lock Cylinder
Replacement ..,.,..... ........ 20-158
Hstch Spoiler
Replacement ......... .......-.20.161
Hatch Weatherstrip/Trunk Lid Wsatherstrip
Replacement ..................20.163
Headliner
ReDlacement
Hatchbsck ,.,....,......,.. 20-98
Sedan .........................................................20-100
Hood
Replacsment ......... ......... 20.146
Adiustment ....................20-117
lnterior Trim
Reolacement
Hatchback ................. 20-91
Sedan .........................................................20-9,1
Mirrors
Power Mirror Reolacement ..........,................ 20-49
Mirrol Holder Removal ............................,..... 20.50
Mirror Holder Installation .............................. 20-50
Mirror Visor and Mirrot Covet
Replacement
Haichback ............20-51
Sedan .................................................... 20-51
Rearview Mirror Reolacement ..........-....-.-.... 20.52
Roof Molding Rep|acament ................................ 20.164
Door and Sid€ Moldings
Replacement .,..........,..... 20-165
Moonroot
lnd6x
Hatchback -................20-77
Sodan .........................................................20-8il
Opener and Latch
Replacement .......... ......,. 20-156
Opensr Cables
Replacamsnt .,.,...,.. ......., 20-154
Retainers and W€atherstrip
Replacement .................. 20-160
Seats
Front Seat Romoval ....................................... 20-103
Front Seat Replacement ...........................,.,.. 20-104
Front Soat Disassembly and Reassembly ...20-106
Torsion Bar ReDlacomant .....,...,......,.......,..,., 2O-1O7
Seat Eelt Switch Ha.ness Location ..,...,.,.,..,2O-1O7
Front Seat Cover Replacemont ..,....,..,..,.....,. 20-108
Rear Soat Roplscemont
Hatchback ................. 20.110
Sedan.........................................................20-112
R€al Seat Cover Replacomont ...................... 20-114
Seat Belts
Front Seat Beh Replacement
Hatchback..................20.117
Sedan20-r18
Rear S6at Bolt R€plac€ment
Hatchback .-......-.-......20-121
Sedan.......................-.-....-.-..........-.............20-122
fnspection ......-.-.,....-.-....20-121
Chifd Seat Anchor Plate ................................ 20-125
Side Sill Panol
Beplacom€nt .................. 20-166
Sub-frame ........................... 20.169
Trunk Lid
Replacement ......... ..,..,.,.20-151
Adiustmeni .................... 20-153
Trunk Lid Latch and Lock Cvlindot
Replac€ment ......... ......... 20-159
Trunk Trim
Replacement .,.,,.,........... 20-97
Windshield, Rear Window, Ouarter Glass
lndex
Hatchback ...........,,.20-53
!
S6dan ......................................................... 20.54
Page 902 of 1680

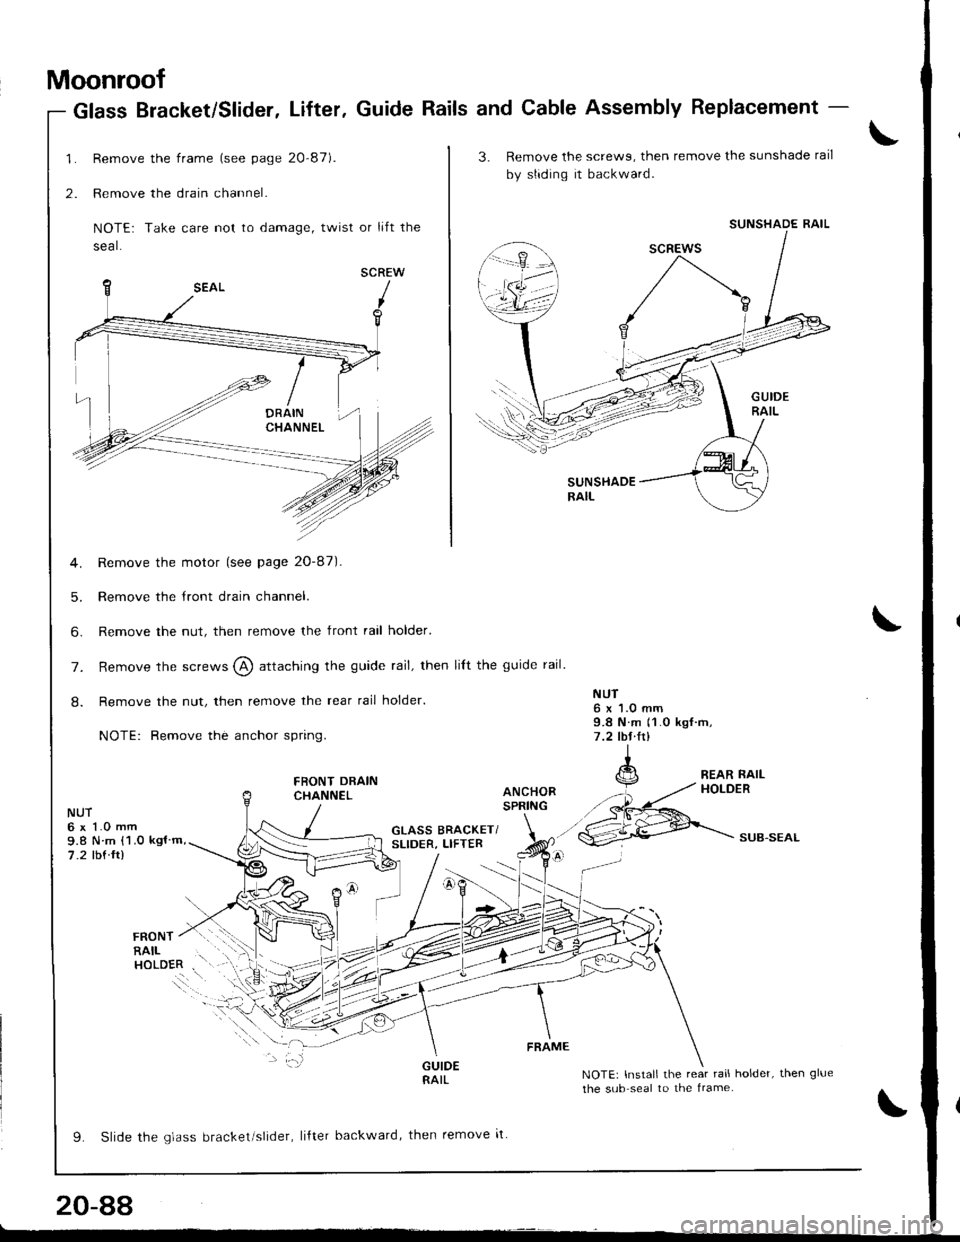
Moonroof
Remove the frame (see page 20-87).
Remove the drain channel.
NOTE: Take care not to damage, twist or lift the
seal.
SCREW
Remove the motor (see page 20-87).
Remove the tront drain channel.
Remove the nut, then remove the front rail holder'
Glass Bracket/Slider, Lifter. Guide Rails and Cable Assembly Replacement -
1.
2.
5.
6.
NUT6x1.0mm9.8 N m 11.0 kgf rrt,7 .2 lbl.lrl
GLASS BRACKET/SLIDER, LIFTERSUB.SEAL
rnorur / r.l .i:'r
RAIL . ',.;.
"o.ol.. i\
9. Slide rhe qldss brackel slrder, liftel backward, then remove it
NOTE: Install the rear rail holder, then glue
the sub seal to the lrame.
FRAME
20-88
3. Remove the screwg, then remove the sunshade rail
by sliding it backward.
SUNSHADERAIL
SUNSHADE RAIL
7. Remove the screws @ attaching the guide rail, then lilt the guide rail.
8. Remove the nut, then remove the rear rail holder.
NOTE: Remove the anchor spring.
FRONT DRAINCHANNEL
NUT6 x 1.0 mm9.8 N m {1.0 kgl m,
7.2 tbf ft)
L-
Page 983 of 1680

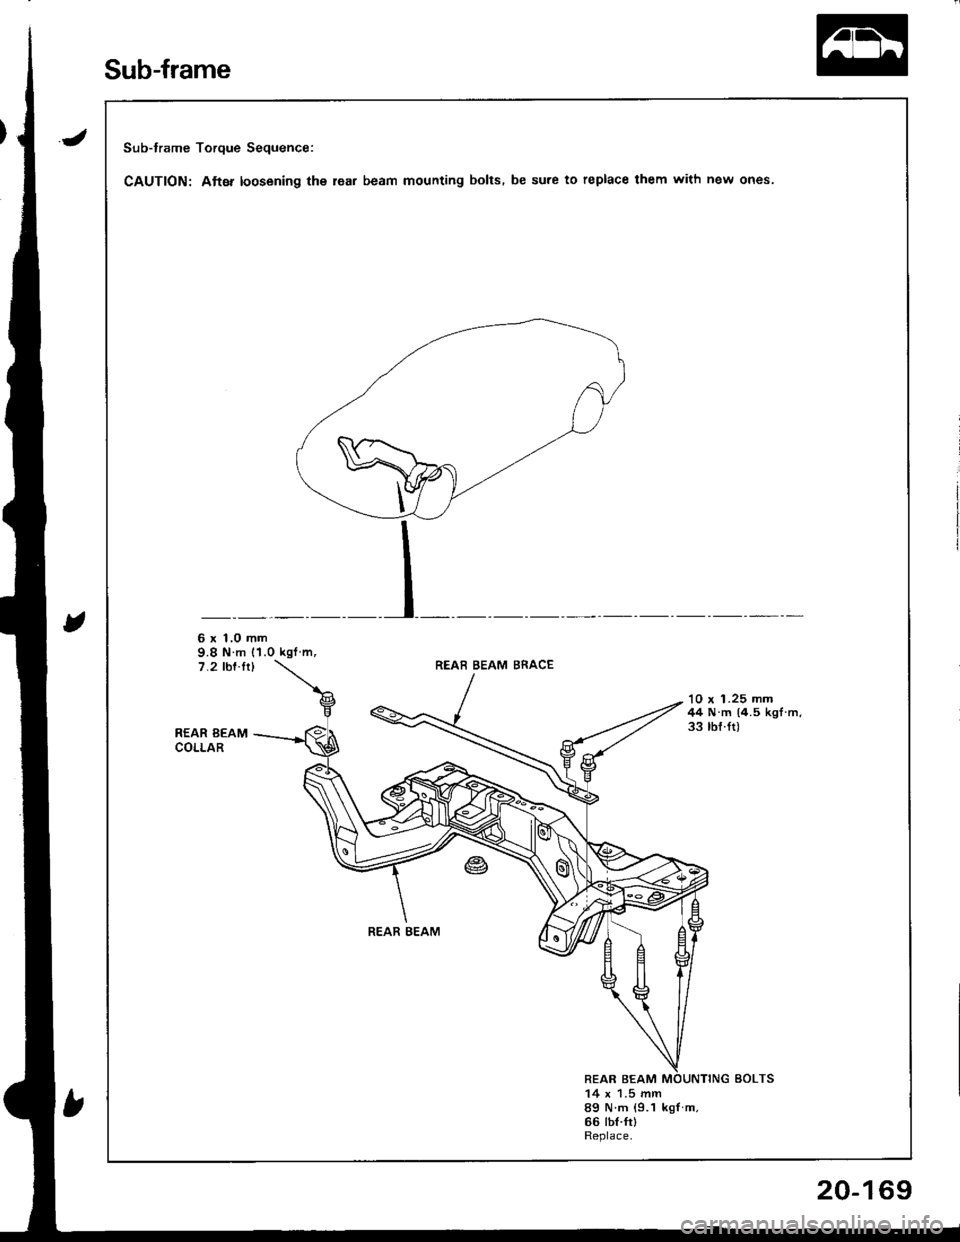
Sub-frame Torque Sequence:
CAUTION: Atter loosening the lea. beam mounting bolts. be sure to replace them with new ones.
6 x 1,0 mm9.8 N m (1.0 kgf m,7.2 rbf.ft)REAB BEAM BRACE
REAR BEAMCOLLAR
'10 x 1.25 mm44 N.m (4.5 kgl.m.33 tbf.ft)
REAR BEAM
REAR BEAM14 x 1.5 mm89 N m {9.1 kgf m.66 tbt.frlReplace.
Sub-frame
20-169