steering Acura Integra 2000 Hatchback User Guide
[x] Cancel search | Manufacturer: ACURA, Model Year: 2000, Model line: Integra, Model: Acura Integra 2000Pages: 279, PDF Size: 3.57 MB
Page 23 of 279

Protectin
g Adult s
Do not place hard or sharp objects
between yourself and an airbag.
Carrying hard or sharp objects on
your lap, or driving with a pipe or other sharp object in your mouth,
can result in injuries if your airbags inflate.
Do not attach or place objects on
the front airbag covers. Any object
attached to or placed on the covers
marked "SRS AIRBAG," in the
center of the steering wheel and on top of the dashboard could
interfere with the proper operationof the airbags. Or, if the airbags
inflate, the objects could be
propelled inside the car and hurt
someone.
Keep your hands and arms away
from the airbag covers. If your
hands or arms are close to the airbag covers in the center of the
steering wheel and on top of the
dashboard, they could be injured if the airbags inflate.
Drive r an d Passenge r Safet y
Page 48 of 279
Additiona
l Informatio n Abou t You r SR S
SR S Component s
Your Supplemental Restraint System (SRS) includes:
Two front airbags. The driver'sairbag is stored in the center of
the steering wheel; the front
passenger's airbag is stored in the dashboard. Both are marked "SRS
AIRBAG." Sensors that can detect a
moderate to severe frontal
collision.
A sophisticated electronic system
that continually monitors thesensors, control unit, the airbag
activators, and all related wiring
when the ignition is ON (II). An indicator light on the
instrument panel that alerts you to
a possible problem with the
system (see page 47).
Emergency backup power in case your car's electrical system isdisconnected in a crash. Ho
w Your Airbag s Work
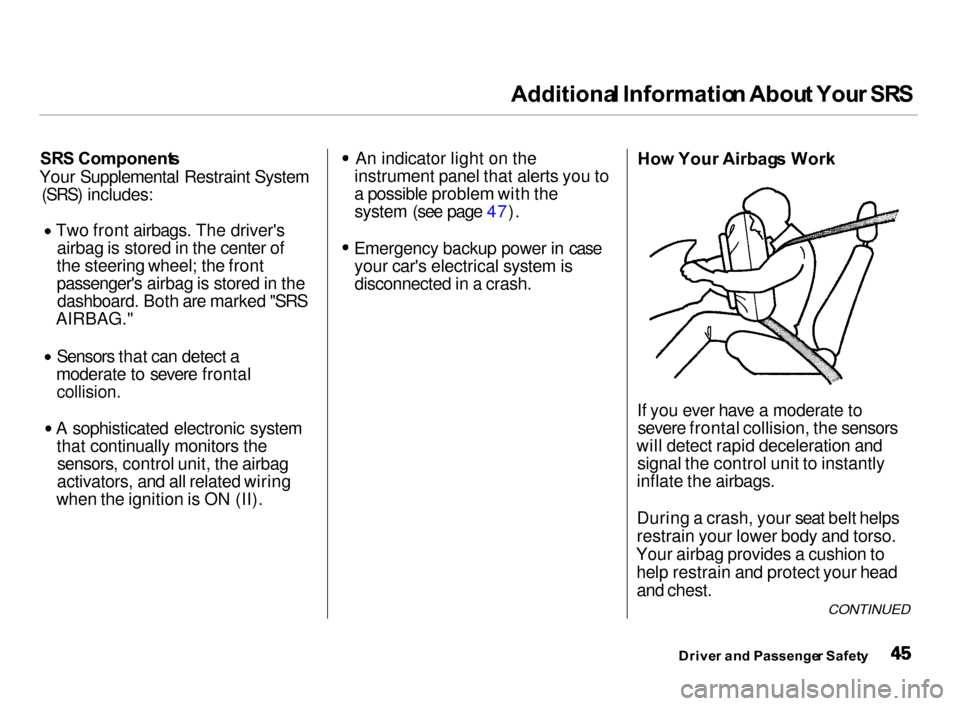
If you ever have a moderate to severe frontal collision, the sensors
will detect rapid deceleration and signal the control unit to instantly
inflate the airbags.
During a crash, your seat belt helps
restrain your lower body and torso.
Your airbag provides a cushion to help restrain and protect your headand chest.
Driver an d Passenge r Safet y
CONTINUED
Page 54 of 279
Instrument
s an d Control s
This section gives information about the controls and displays thatcontribute to the daily operation of
your Acura. All the essential controls
are within easy reach.
Control Locations............................ 52
Indicator Lights................................ 53
Gauges.............................................. 58
Speedometer................................ 58
Tachometer.................................. 58
Odometer...................................... 58
Trip Meter.................................... 58
Fuel Gauge................................... 59
Temperature Gauge.................... 59 Maintenance Required
Indicator.................................... 60
Controls Near the Steering Wheel....................................... 61
Headlights.................................... 62
Daytime Running Lights............. 62 Instrument Panel Brightness..... 63
Turn Signals................................. 63
Windshield Wipers...................... 64
Windshield Washers................... 64
Rear Window Wiper and
Washer...................................... 65
Hazard Warning .......................... 65
Rear Window Defogger
.............. 65
Steering Wheel Adjustment ...... 66
Steering Wheel Controls................ 67
Cruise Control.............................. 67
Keys and Locks................................
71
Keys...............................................
71
Immobilizer System....................
. 72
Ignition Switch............................. 73
Door Locks................................... 75
Power Door/Hatch Locks.......... 75
Hatch............................................. 76
Glove Box..................................... 78
Seat Adjustments............................ 79
Front Seat Adjustments.............. 79
Driver's Seat Height
Adjustment
.............................. 80
Driver's Lumbar Support............ 80
Rear Seat Access........................ 81
Head Restraints...........................
82
Folding Rear Seat .......................... 83 Cargo Area Cover............................ 83
Power Windows............................... 84
Moonroof.......................................... 85
Mirrors.............................................. 86
Adjusting the Power Mirrors .....
86
Parking Brake..................................
87
Digital Clock .................................... 88
Beverage Holder.............................. 89
Console Compartment.................... 90
Cigarette Lighter............................. 90
Ashtrays............................................ 91 Interior Lights.................................. 92
Instrument s an d Control s
Page 63 of 279
Gauge
s
Maintenanc e Require d Indicato r
This indicator reminds you that it is time to take your car in for
scheduled maintenance.
Refer to the Maintenance Schedules
for Normal and Severe Driving Conditions on pages 162 — 166 .
For the first 6,000 miles (9,600 km) after the Maintenance Required
Indicator is reset, it will come on for
two seconds when you turn the ignition switch ON (II). Between 6,000 miles (9,600 km) and
7,500 miles (12,000 km) this
indicator will light for two seconds
when you first turn the ignition switch ON (II), and then flash for
ten seconds.
If you exceed 7,500 miles (12,000
km) without having the scheduled
maintenance performed, this
indicator will remain on as a constant
reminder.
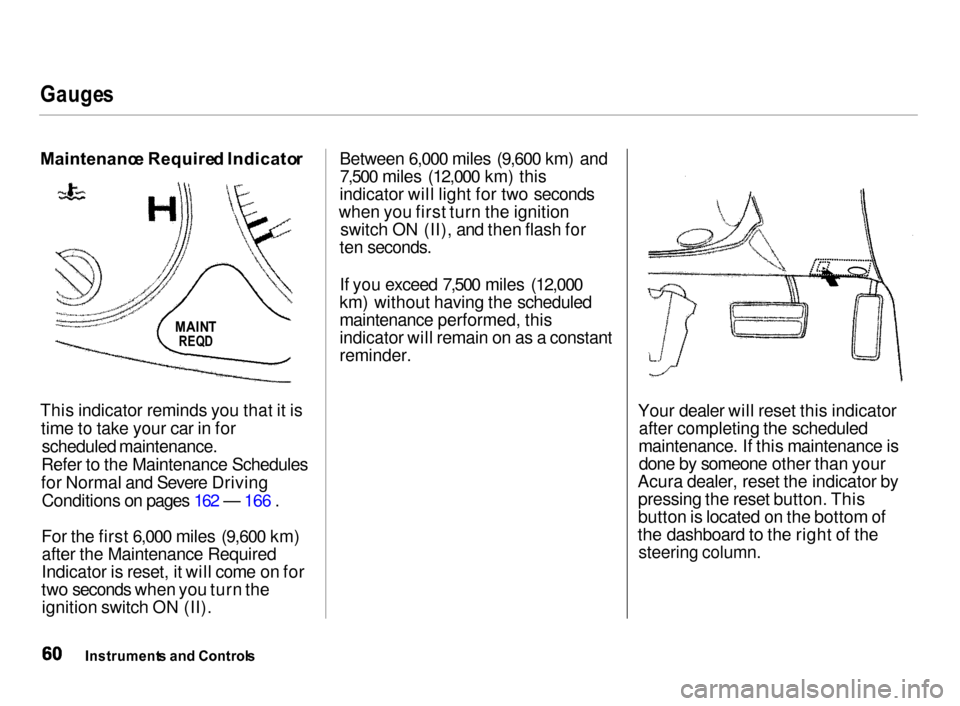
Your dealer will reset this indicatorafter completing the scheduled
maintenance. If this maintenance is done by someone other than your
Acura dealer, reset the indicator by pressing the reset button. This
button is located on the bottom of
the dashboard to the right of the
steering column.
Instrument s an d Control s
MAIN
T
REQ D
Page 64 of 279
Control
s Nea r th e Steerin g Whee l
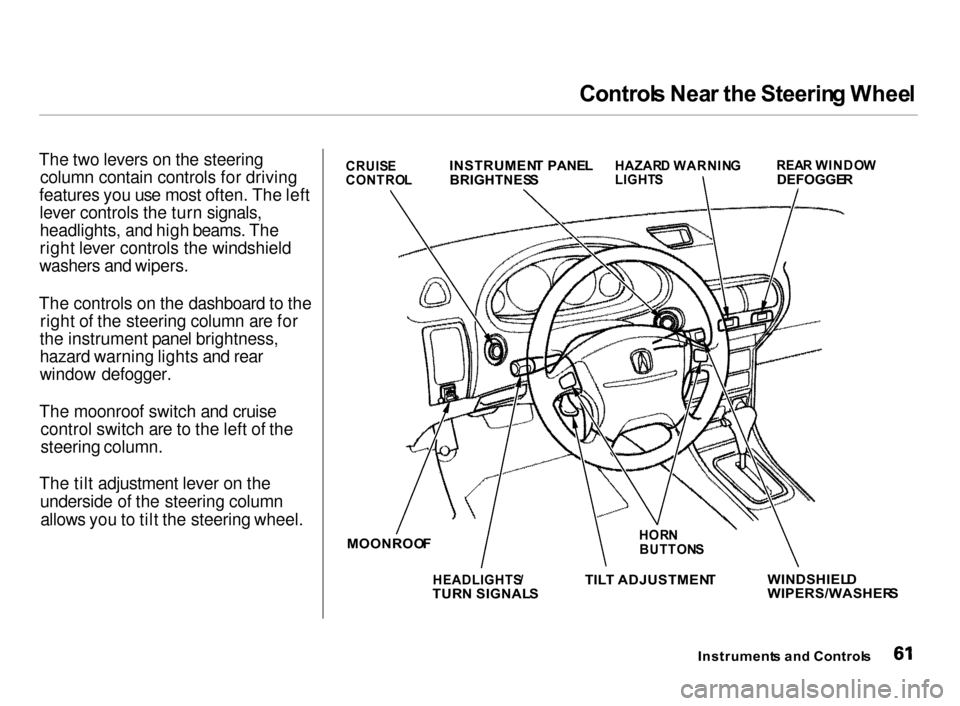
The two levers on the steering column contain controls for driving
features you use most often. The left lever controls the turn signals,
headlights, and high beams. The
right lever controls the windshield
washers and wipers.
The controls on the dashboard to the right of the steering column are for
the instrument panel brightness,
hazard warning lights and rear
window defogger.
The moonroof switch and cruise control switch are to the left of the
steering column.
The tilt adjustment lever on the underside of the steering columnallows you to tilt the steering wheel.
Instruments an d Control s
WINDSHIEL
D
WIPERS/WASHER S
HOR
N
BUTTON S
TIL T ADJUSTMEN T
HEADLIGHTS /
TUR N SIGNAL S
MOONROO
F
HAZAR
D WARNIN G
LIGHT S REA
R WINDO W
DEFOGGE R
INSTRUMEN
T PANE L
BRIGHTNES S
CRUIS
E
CONTRO L
Page 66 of 279
Control
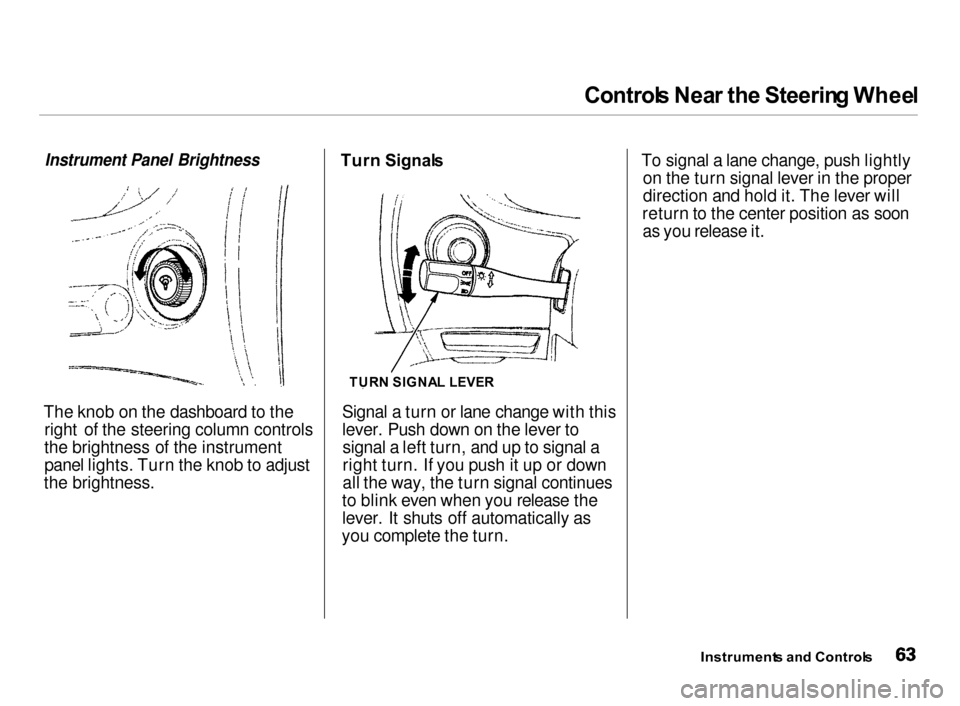
s Nea r th e Steerin g Whee lInstrument Panel Brightness
The knob on the dashboard to the
right of the steering column controls
the brightness of the instrument
panel lights. Turn the knob to adjust
the brightness. Turn
Signal s
Signal a turn or lane change with this
lever. Push down on the lever to signal a left turn, and up to signal a
right turn. If you push it up or down
all the way, the turn signal continues
to blink even when you release the
lever. It shuts off automatically as
you complete the turn. To signal a lane change, push lightly
on the turn signal lever in the proper
direction and hold it. The lever will
return to the center position as soon as you release it.
Instrument s an d Control s
TUR
N SIGNA L LEVER
Page 69 of 279
Control
s Nea r th e Steerin g Whee l
Make sure the rear window is clear
and you have good visibility before
starting to drive.
The defogger wires on the inside of the rear window can be accidentallydamaged. When cleaning the glass,
always wipe side to side.
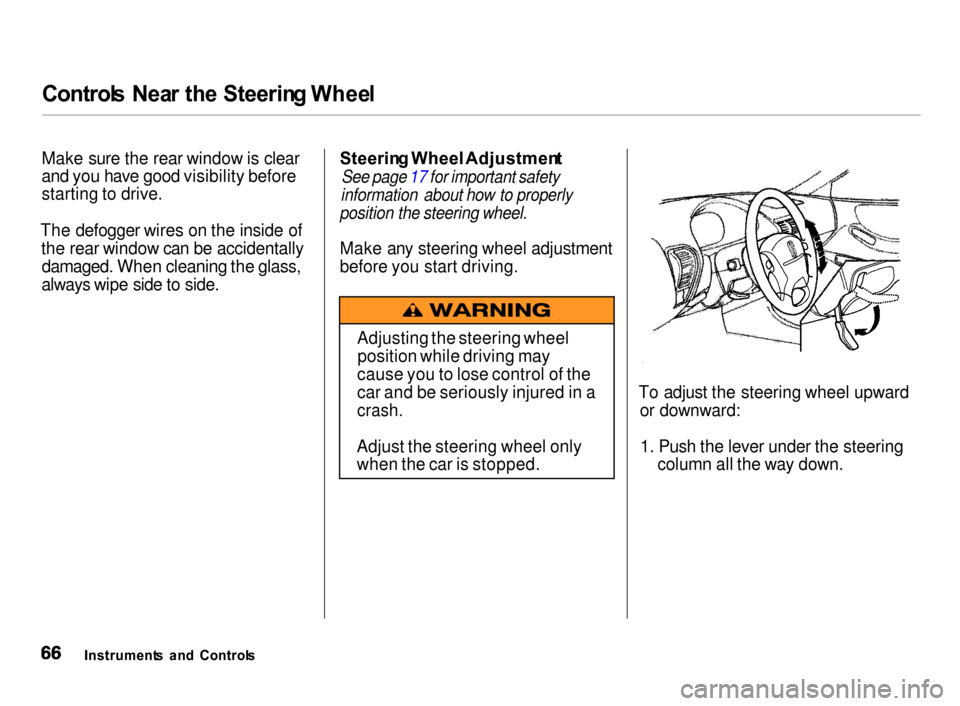
Steerin
g Wheel Adjustmen t
See page 17 for important safety
information about how to properly
position the steering wheel.
Make any steering wheel adjustment
before you start driving.
To adjust the steering wheel upwardor downward:
1. Push the lever under the steering column all the way down.
Instrument s an d Control s Adjusting the steering wheel
position while driving may
cause you to lose control of the
car and be seriously injured in a
crash.
Adjust the steering wheel only
when the car is stopped.
Page 70 of 279
Control
s Nea r th e Steerin g Wheel , Steerin g Whee l Control s
2. Move the steering wheel to the desired position, making sure the
wheel points toward your chest, not toward your face. Make sure
you can see the instrument panel gauges and the indicator lights.
3. Push the lever up to lock the
steering wheel in that position.
4. Make sure you have securely locked the steering wheel in place
by trying to move it up and down. Cruis
e Contro l
LS, GS and GS-R models
Cruise control allows you to maintain
a set speed above 25 mph (40 km/h)
without keeping your foot on the accelerator pedal. It should be used
for cruising on straight, open
highways. It is not recommended for conditions such as city driving,
winding roads, slippery roads, heavy rain, or bad weather. You should
have full control of the car under
those conditions.
The cruise control, as it operates,
moves the accelerator pedal. You can damage your car's accelerator
mechanism by resting your foot under the pedal and blocking the movement.
CONTINUED
Instrument s an d Control s
Improper use of the cruise
control can lead to a crash.
Use the cruise control only
when traveling on open highways in good weather.
NOTIC
E
Page 71 of 279
Steerin
g Whee l Control s
Using the Cruise Control
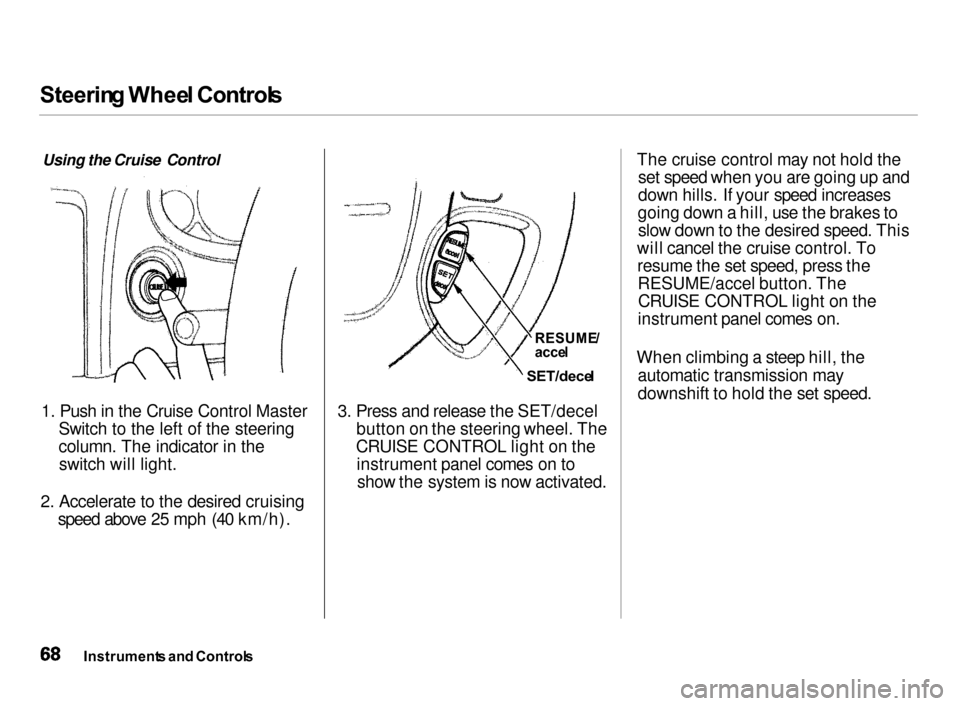
1. Push in the Cruise Control Master
Switch to the left of the steering
column. The indicator in the switch will light.
2. Accelerate to the desired cruising
speed above 25 mph (40 km/h). 3. Press and release the SET/decel
button on the steering wheel. The
CRUISE CONTROL light on the instrument panel comes on toshow the system is now activated.
The cruise control may not hold the
set speed when you are going up and
down hills. If your speed increases
going down a hill, use the brakes to slow down to the desired speed. This
will cancel the cruise control. To resume the set speed, press theRESUME/accel button. TheCRUISE CONTROL light on the
instrument panel comes on.
When climbing a steep hill, the automatic transmission may
downshift to hold the set speed.
Instrument s an d Control s
RESUME
/
acce l
SET/dece l
Page 76 of 279
Key
s an d Lock s
Do not attempt to alter this system
or add other devices to it. Electrical
problems could result that may make
your car undriveable.
If you have lost your key and you
cannot start the engine, contact your
Acura dealer.
As required by the FCC:
This device complies with Part 15 of the FCC rules. Operation is subject to the
following two conditions: (1) This device may not cause harmful interference, and (2) this device must accept any
interference received, including
interference that may cause undesired
operation.
Changes or modifications not expressly
approved by the party responsible for
compliance could void the user's
authority to operate the equipment.
This device complies with Industry
Canada Standard RSS-210.
Operation is subject to the following two conditions: (1) this device may not causeinterference, and (2) this device must
accept any interference that may cause
undesired operation of the device.
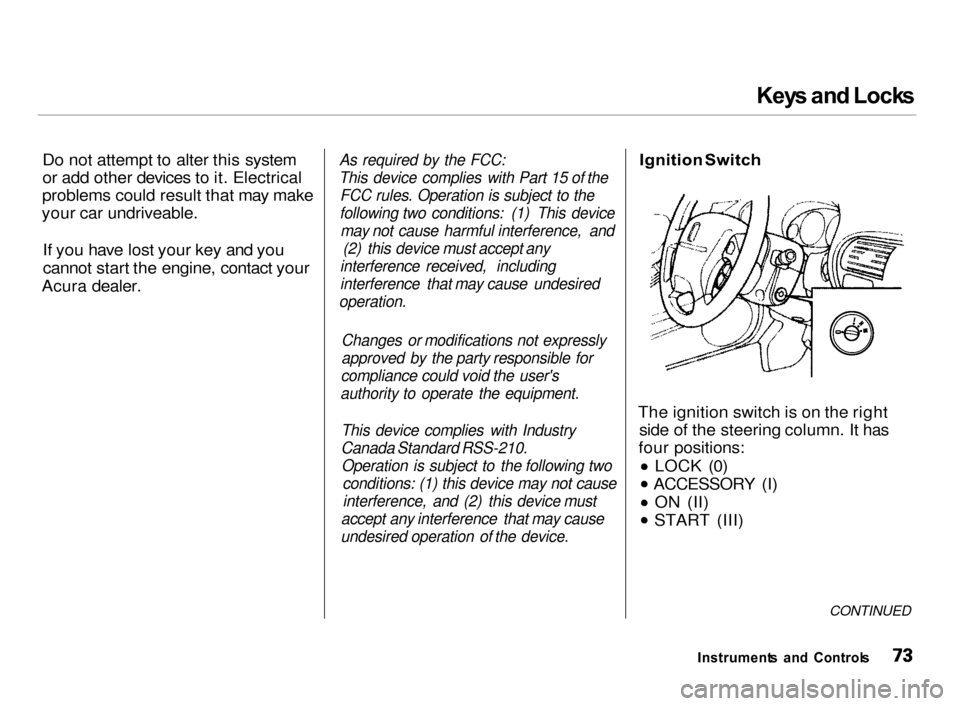
Ignition
Switch
The ignition switch is on the right side of the steering column. It has
four positions:
LOCK (0) ACCESSORY (I)
ON (II)
START (III)
CONTINUED
Instrument s an d Control s