change Acura Integra 2000 Hatchback Owner's Guide
[x] Cancel search | Manufacturer: ACURA, Model Year: 2000, Model line: Integra, Model: Acura Integra 2000Pages: 279, PDF Size: 3.57 MB
Page 152 of 279
Drivin
g in Ba d Weathe r
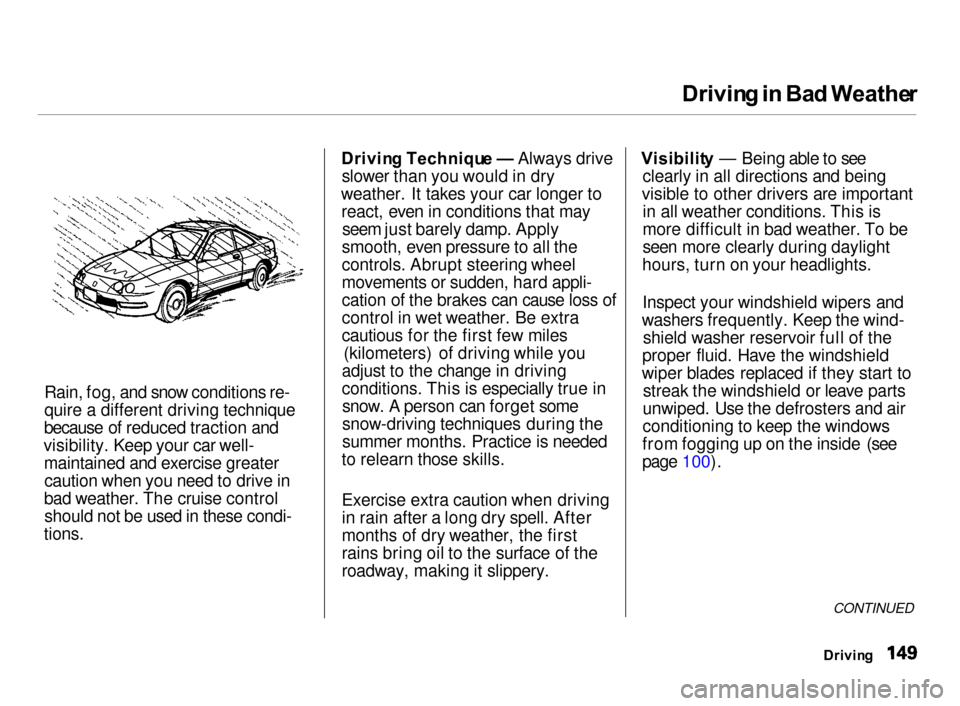
Rain, fog, and snow conditions re-
quire a different driving technique
because of reduced traction and
visibility. Keep your car well- maintained and exercise greatercaution when you need to drive in
bad weather. The cruise control should not be used in these condi-
tions.
Drivin
g Techniqu e — Always drive
slower than you would in dry
weather. It takes your car longer to react, even in conditions that may seem just barely damp. Apply
smooth, even pressure to all the
controls. Abrupt steering wheel
movements or sudden, hard appli-
cation of the brakes can cause loss of
control in wet weather. Be extra
cautious for the first few miles (kilometers) of driving while you
adjust to the change in driving
conditions. This is especially true in snow. A person can forget some
snow-driving techniques during the
summer months. Practice is needed
to relearn those skills.
Exercise extra caution when driving
in rain after a long dry spell. After
months of dry weather, the first
rains bring oil to the surface of the
roadway, making it slippery. Visibilit
y — Being able to see
clearly in all directions and being
visible to other drivers are important in all weather conditions. This is
more difficult in bad weather. To be
seen more clearly during daylight
hours, turn on your headlights.
Inspect your windshield wipers and
washers frequently. Keep the wind- shield washer reservoir full of the
proper fluid. Have the windshield
wiper blades replaced if they start to streak the windshield or leave parts
unwiped. Use the defrosters and air
conditioning to keep the windows
from fogging up on the inside (see
page 100).
CONTINUED
Drivin g
Page 153 of 279
Drivin
g in Ba d Weathe r
Tractio n — Check your tires
frequently for wear and proper
pressure. Both are important in
preventing "hydroplaning" (loss of
traction on a wet surface). In the
winter, mount snow tires on all four
wheels for the best handling.
Watch road conditions carefully, they can change from moment to
moment. Wet leaves can be as slip-
pery as ice. "Clear" roads can have
patches of ice. Driving conditionscan be very hazardous when theoutside temperature is near freezing.
The road surface can become covered with areas of water puddles
mixed with areas of ice, so your
traction can change without warning.
Be careful when downshifting. If
traction is low, you can lock up the drive wheels for a moment and cause
a skid.
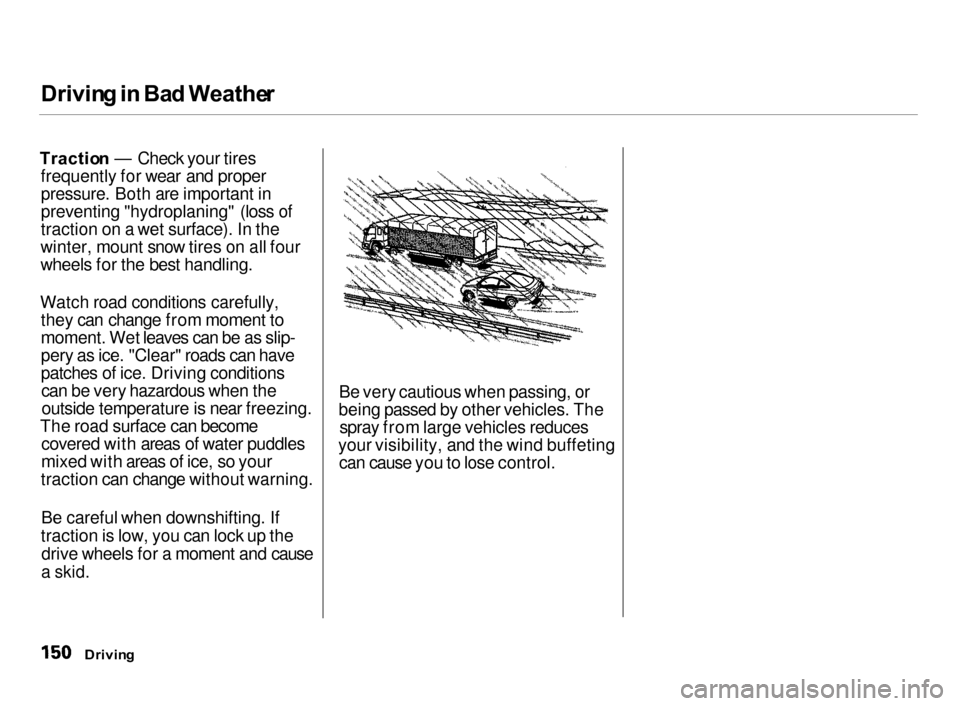
Be very cautious when passing, or
being passed by other vehicles. The spray from large vehicles reduces
your visibility, and the wind buffeting can cause you to lose control.
Drivin g
Page 155 of 279

Towin
g a Traile r
Checkin g Load s
The best way to confirm that vehicle and trailer weights are within limits
is to have them checked at a public
scale.
Using a suitable scale or a special
tongue load gauge, check the tongue
load the first time you set up a
towing combination (a fully-loaded
vehicle and trailer), then recheck the
tongue load whenever the conditions
change.
Safety Chain
Always use a safety chain. Make sure that it is secured to both the
trailer and hitch, and that it crosses under the tongue so it can catch the
trailer if it becomes unhitched. Leave enough slack to allow the
trailer to turn corners easily, but do not let the chain drag on the ground. Towin
g Equipmen t an d
Accessorie s
Towing can require a variety of equipment, depending on the size of
your trailer, how it will be used, and how much load you are towing.
Discuss your needs with your trailersales or rental agency, and follow the
guidelines in the rest of this section.
Also make sure that all equipment is properly installed and that it meets
federal, state, province, and local regulations.
Hitches
Any hitch used on your vehicle must be properly bolted to the underbody.
Drivin g
Page 176 of 279

Engin
e Oi l
Syntheti c Oi l
You may use a synthetic motor oil if it meets the same requirements
given for conventional motor oil:energy conserving, a service
classification of SJ, and the proper
weight as shown on the chart. When using synthetic oil, you must follow
the oil and filter change intervals
given in the maintenance schedule. Additive
s
Your Acura does not need any oil additives. Purchasing additives for
the engine or transmission will not increase your car's performance or
longevity. It only increases the cost of operating your car. Changin
g th e Oi l and Filte r
Always change the oil and filter according to the time and distance(miles/kilometers) recommenda-
tions in the maintenance schedule.
The oil and filter collect contami- nants that can damage your engine if
they are not removed regularly.
Changing the oil and filter requires
special tools and access from
underneath the car. The car should
be raised on a service station-type
hydraulic lift for this service. Unless
you have the knowledge and proper equipment, you should have this
maintenance done by a skilled
mechanic.
CONTINUED
Maintenanc e
Page 178 of 279
Engin
e Oi l
5. Put a new washer on the drain bolt,
then reinstall the drain bolt.
Tighten it to: 3 3 Ibf .
f t (4 4 N .
m , 4. 5 kgf .
m )
6. Refill the engine with the recom-
mended oil.
Engine oil change capacity
(including filter):
(SE, LS, GS)
4.
0 U S q t (3. 8
, 3.3 Im p qt )
(GS-R,Type-R)
4.
2 U S q t (4. 0
, 3.5 Im p qt ) 7. Replace the engine oil fill cap.
Start the engine. The oil pressure
indicator light should go out within
five seconds. If it does not, turn off
the engine and reinspect your
work.
8. Let the engine run for several
minutes and check the drain bolt
and oil filter for leaks.
9. Turn off the engine, let it sit for
several minutes, then check the oil
level. If necessary, add oil to bring
the level to the upper mark on the
dipstick.
Improper disposal of engine oil can be harmful to the environment. If you
change your own oil, please dispose of
the used oil properly. Put it in a sealed
container and take it to a recycling
center. Do not discard it in a trash bin
or dump it on the ground.
Maintenance
NOTIC
E
Page 204 of 279
Tire
s
Wheel s an d Tire s
Wheels:
(SE)
14 x 5 1/ 2 J J
(LS, GS, GS-R, Type-R)
15x6 JJ
Tires:
(SE)
P195/60R1 4 85 H
(LS,
GS,
GS-R)
P195/55R1 5 84 V
(Type-R)
195/55R1 5 84 V
See page 252 for information about
DOT Tire Quality Grading.
Winte
r Drivin g
SE, LS, GS and GS-R models
Tires that are marked "M+S" or "All Season" on the sidewall have an
all-weather tread design. They
should be suitable for most winter
driving conditions. Tires without
these markings are designed for optimum traction in dry conditions.
They may not provide adequate performance in winter driving.For the best performance in snowyor icy conditions, you should install
snow tires or tire chains. They may
be required by local laws under certain conditions.
Type-R model
You should mount winter tires on
your Type-R before winter starts
(before consistent sub-freezing
temperatures). Change back to
"summer" tires after winter weather
has stopped.
Maintenance
CONTINUED
Page 210 of 279
Light
s
Replacin g a Headligh t Bul b
Your car has two bulbs on each side, four in total. Make sure you arereplacing the bulb that is burned out.
Your car uses halogen headlight bulbs. When replacing a bulb, handle
it by its plastic case and protect the
glass from contact with your skin or
hard objects. If you touch the glass,clean it with denatured alcohol and a
clean cloth.
Halogen headlight bulbs get very hot when lit. Oil, perspiration, or a scratch
on the glass can cause the bulb to
overheat and shatter.
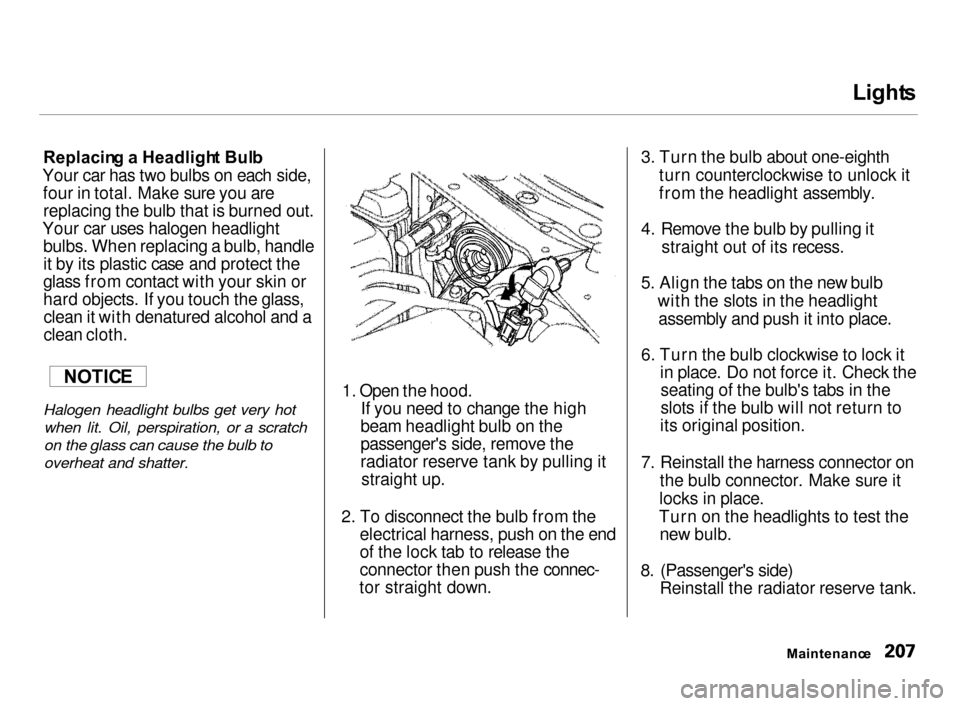
1. Open the hood.
If you need to change the high
beam headlight bulb on the
passenger's side, remove the
radiator reserve tank by pulling it straight up.
2. To disconnect the bulb from the
electrical harness, push on the end
of the lock tab to release the
connector then push the connec-
tor straight down.
3. Turn the bulb about one-eighth
turn counterclockwise to unlock it
from the headlight assembly.
4. Remove the bulb by pulling it
straight out of its recess.
5. Align the tabs on the new bulb
with the slots in the headlightassembly and push it into place.
6. Turn the bulb clockwise to lock it
in place. Do not force it. Check the seating of the bulb's tabs in the
slots if the bulb will not return to
its original position.
7. Reinstall the harness connector on
the bulb connector. Make sure it
locks in place.
Turn on the headlights to test the new bulb.
8. (Passenger's side)
Reinstall the radiator reserve tank.
Maintenanc e
NOTIC
E
Page 217 of 279
Storin
g You r Ca r
If you need to park your car for an
extended period (more than one
month), there are several things you should do to prepare it for storage.
Proper preparation helps prevent deterioration and makes it easier to
get your car back on the road. If
possible, store your car indoors.
Fill the fuel tank.Change the engine oil and filter (see page 173). Wash and dry the exterior
completely.
Clean the interior. Make sure the
carpeting, floor mats, etc. are
completely dry.
Leave the parking brake off. Put
the transmission in Reverse (5- speed manual) or Park (automatic). Block the rear wheels.
If the car is to be stored for a
longer period, it should be supported on jackstands so the
tires are off the ground. Leave one window open slightly (if
the car is being stored indoors). Disconnect the battery.
Support the front and rear wiper
blade arms with a folded towel or rag so they do not touch the
windshield.
To minimize sticking, apply a
silicone spray lubricant to all door
and hatch seals. Also, apply a body
wax to the painted surfaces that mate with the door and hatch seals. Cover the car with a "breathable"
cover, one made from a porous
material such as cotton.
Nonporous materials, such as
plastic sheeting, trap moisture,
which can damage the paint. If possible, run the engine for a
while periodically (preferably once a month).
If you store your car for 12 months or longer, have your Acura dealer
perform the inspections called for in
the 24 months/30,000 miles (48,000
km) maintenance schedule (Normal Conditions) as soon as you take it
out of storage (see page 162 ). The
replacements called for in the
maintenance schedule are not needed unless the car has actually
reached that time or mileage.
Maintenanc e
Page 228 of 279
Changin
g a Fla t Tir e
If you have a flat tire while driving, stop in a safe place to change it.
Stopping in traffic or on the shoulderof a busy road is dangerous. Drive
slowly along the shoulder until you
get to an exit or an area to stop that is far away from the traffic lanes.
1. Park the car on firm, level and
non-slippery ground away from
traffic. Put the transmission in Park (automatic) or Reverse (manual). Apply the parking brake.
2. Turn on the hazard warning lights
and turn the ignition switch to
LOCK (0). Have all the
passengers get out of the car while
you change the tire.
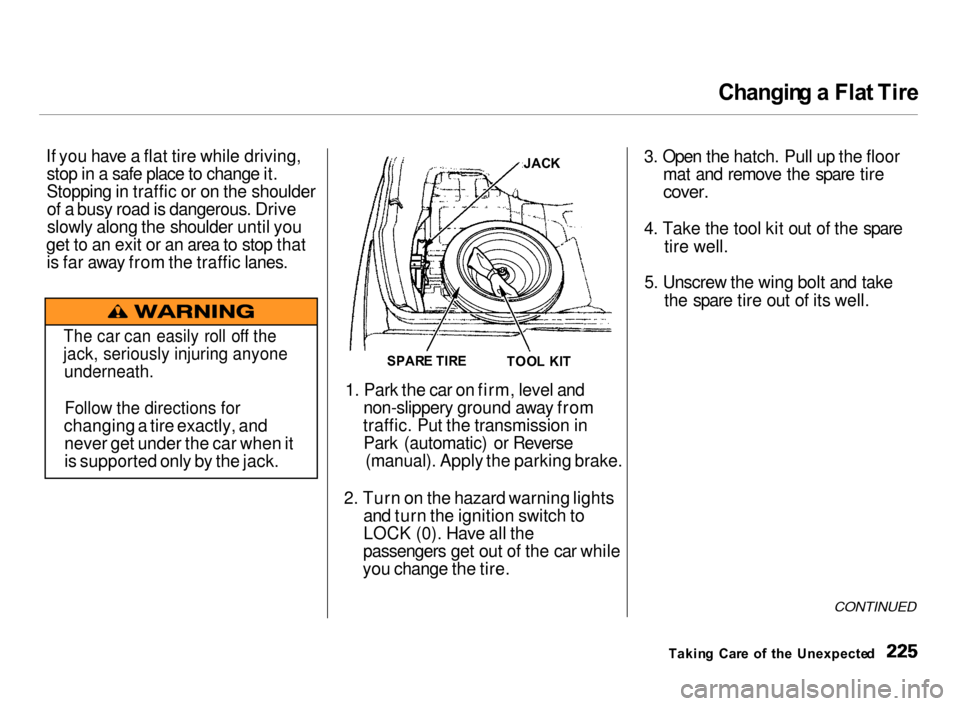
3. Open the hatch. Pull up the floor
mat and remove the spare tire
cover.
4. Take the tool kit out of the spare
tire well.
5. Unscrew the wing bolt and take
the spare tire out of its well.
CONTINUED
Takin g Car e o f th e Unexpecte d
The car can easily roll off the
jack, seriously injuring anyone
underneath.
Follow the directions for
changing a tire exactly, and never get under the car when it
is supported only by the jack. JAC
K
SPAR E TIR E
TOOL KI T
Page 271 of 279
Inde
x
Brakes Anti-lock System (ABS)............ 146Break-in, New Linings.............. 123
Fluid............................................ 183
Light, Burned-out...................... 210
Parking.......................................... 87
System Indicator.................. 54, 238
Wear Indicators......................... 145
Brakes, ABS Operation.................................... 146
System Indicator.................. 55, 148
Braking System.............................. 145
Break-in, New Car......................... 123
Brightness Control, Instruments... 63 Brights, Headlights......................... 62
Bulb Replacement Back-up Lights........................... 210
Brake Lights............................... 210
Cargo Area Light....................... 212
Ceiling Lights............................. 212
Front Parking Lights................. 208
Front Side Marker Lights......... 208
Headlights.................................. 207
High-mount Brake Light.......... 209
License Plate Light.................... 212
Rear Side Marker Lights.......... 210 Specifications............................. 251
Spotlights.................................... 212
Turn Signal Lights..................... 208
Bulbs, Halogen............................... 207
Cables, Jump Starting With.......... 231
Capacities Chart.................... 250, 251
Carbon Monoxide Hazard.............. 49
Cargo Area Cover............................ 83
Carrying Cargo.............................. 132
Cassette Player Care............................................. 118
Operation.................................... 115
CAUTION, Explanation of............... ii
CD Changer.................................... 111
CD Player........................................ 109
Certification Label......................... 248
Chains............................................. 202
Change Oil
How to......................................... 173
When to....................................... 162
Changing a Flat Tire..................... 225
Changing Engine Coolant............. 178
Charging System Indicator.... 54, 236 Checking
Automatic Transmission
Fluid........................................ 182
Battery Condition...................... 189
Brake Fluid................................. 184
Clutch Fluid................................ 184
Drive Belts.................................. 195
Engine Coolant........................... 128
Engine Oil................................... 127
Fuses........................................... 241
Manual Transmission Fluid..... 183
Power Steering Fluid................. 185
Checklist, Before Driving............. 136
Child Safety...................................... 21 Cleaner Element, Air..................... 186
Cleaning
Aluminum Wheels..................... 217
Antenna...................................... 216
Carpeting.................................... 218
Exterior....................................... 216
Fabric.......................................... 218
Interior........................................ 218
Leather........................................ 218
Seat Belts.................................... 218
Vinyl............................................ 218
Windows..................................... 219