lights Acura Integra 2000 Hatchback Owner's Guide
[x] Cancel search | Manufacturer: ACURA, Model Year: 2000, Model line: Integra, Model: Acura Integra 2000Pages: 279, PDF Size: 3.57 MB
Page 213 of 279
Light
s
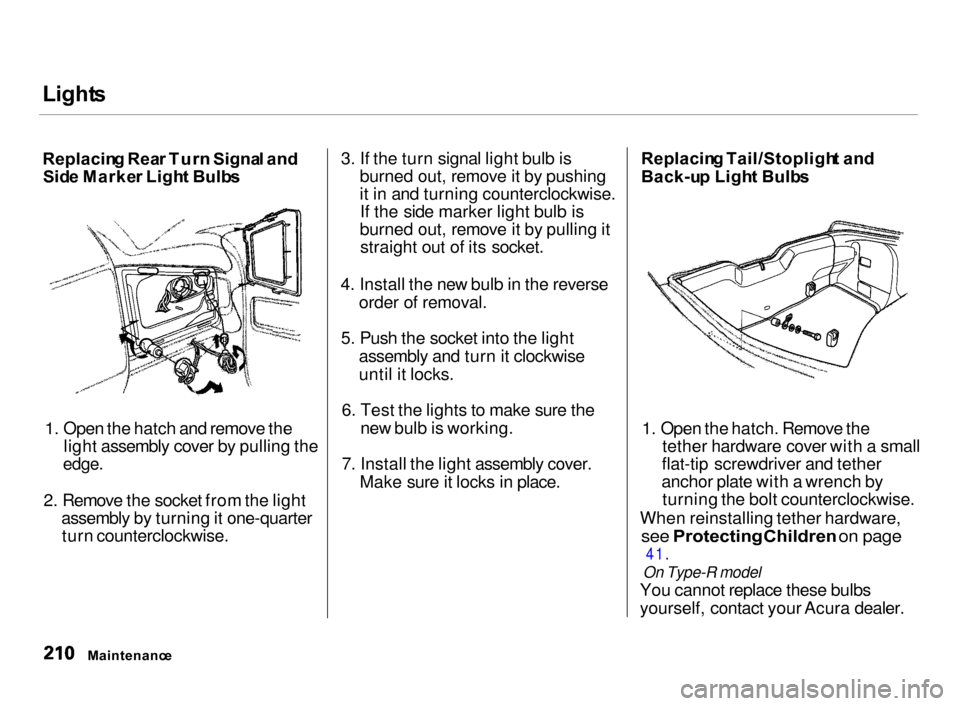
Replacin g Rea r Tur n Signa l an d
Sid e Marke r Ligh t Bulb s
1. Open the hatch and remove the
light assembly cover by pulling the
edge.
2. Remove the socket from the light assembly by turning it one-quarter
turn counterclockwise.
3. If the turn signal light bulb is
burned out, remove it by pushing
it in and turning counterclockwise.If the side marker light bulb is
burned out, remove it by pulling it straight out of its socket.
4. Install the new bulb in the reverse
order of removal.
5. Push the socket into the light
assembly and turn it clockwise
until it locks.
6. Test the lights to make sure the
new bulb is working.
7. Install the light assembly cover.
Make sure it locks in place.
Replacin g Tail/Stopligh t an d
Back-u p Ligh t Bulb s
1. Open the hatch. Remove the
tether hardware cover with a small
flat-tip screwdriver and tether
anchor plate with a wrench by turning the bolt counterclockwise.
When reinstalling tether hardware,
see Protecting Children on page
41.
On Type-R model
You cannot replace these bulbs
yourself, contact your Acura dealer.
Maintenanc e
Page 214 of 279
Light
s
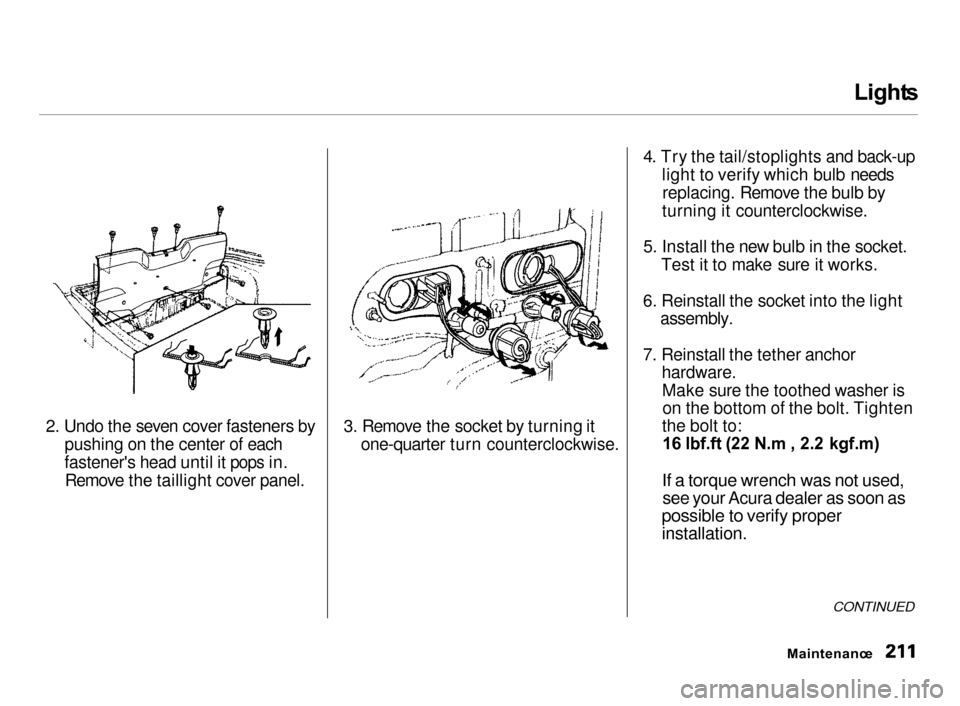
2. Undo the seven cover fasteners by
pushing on the center of each
fastener's head until it pops in. Remove the taillight cover panel.
3. Remove the socket by turning it
one-quarter turn counterclockwise. 4
. Try the tail/stoplights and back-up
light to verify which bulb needsreplacing. Remove the bulb by
turning it counterclockwise.
5. Install the new bulb in the socket.
Test it to make sure it works.
6. Reinstall the socket into the light
assembly.
7. Reinstall the tether anchor
hardware. Make sure the toothed washer ison the bottom of the bolt. Tighten
the bolt to:
16 lbf.ft (22 N.m , 2.2 kgf.m)
If a torque wrench was not used,
see your Acura dealer as soon as
possible to verify proper
installation.
CONTINUED
Maintenanc e
Page 215 of 279
Light
s
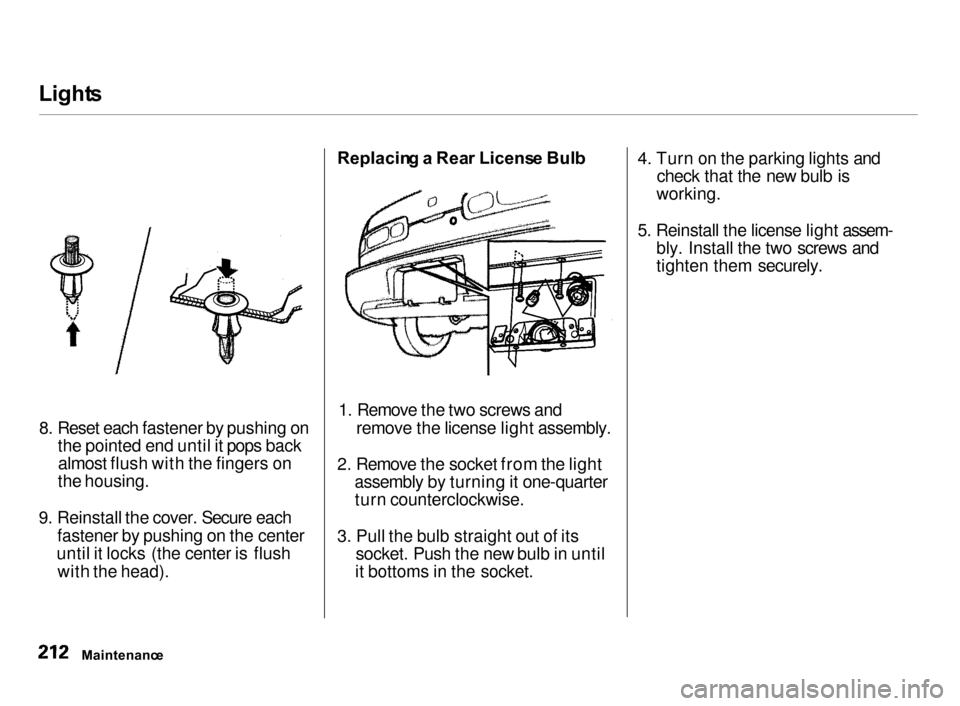
8. Reset each fastener by pushing onthe pointed end until it pops back almost flush with the fingers on
the housing.
9. Reinstall the cover. Secure each
fastener by pushing on the center
until it locks (the center is flush with the head).
Replacin g a Rea r Licens e Bul b
1. Remove the two screws and
remove the license light assembly.
2. Remove the socket from the light assembly by turning it one-quarter
turn counterclockwise.
3. Pull the bulb straight out of its
socket. Push the new bulb in until
it bottoms in the socket.
4. Turn on the parking lights and
check that the new bulb is
working.
5. Reinstall the license light assem-
bly. Install the two screws and
tighten them securely.
Maintenanc e
Page 216 of 279

Light
s
Replacin g Ceiling , Spo t an d Carg o
Are a Ligh t Bulb s
The ceiling, spot and cargo area lights come apart the same way.
They do not all use the same bulb.
1. Remove the lens by carefully
prying on the edge of the lens with
a fingernail file or a small flat-tip
screwdriver. Do not pry on the
edge of the housing around the
lens.
2. Remove the bulb by pulling it
straight out of its metal tabs.
3. Push the new bulb into the metal
tabs. Snap the lens back in place.
LS, GS and GS-R models
Maintenance
SPOTLIGHT
S
CEILIN G LIGH T CARG
O ARE A LIGH T
Page 228 of 279
Changin
g a Fla t Tir e
If you have a flat tire while driving, stop in a safe place to change it.
Stopping in traffic or on the shoulderof a busy road is dangerous. Drive
slowly along the shoulder until you
get to an exit or an area to stop that is far away from the traffic lanes.
1. Park the car on firm, level and
non-slippery ground away from
traffic. Put the transmission in Park (automatic) or Reverse (manual). Apply the parking brake.
2. Turn on the hazard warning lights
and turn the ignition switch to
LOCK (0). Have all the
passengers get out of the car while
you change the tire.
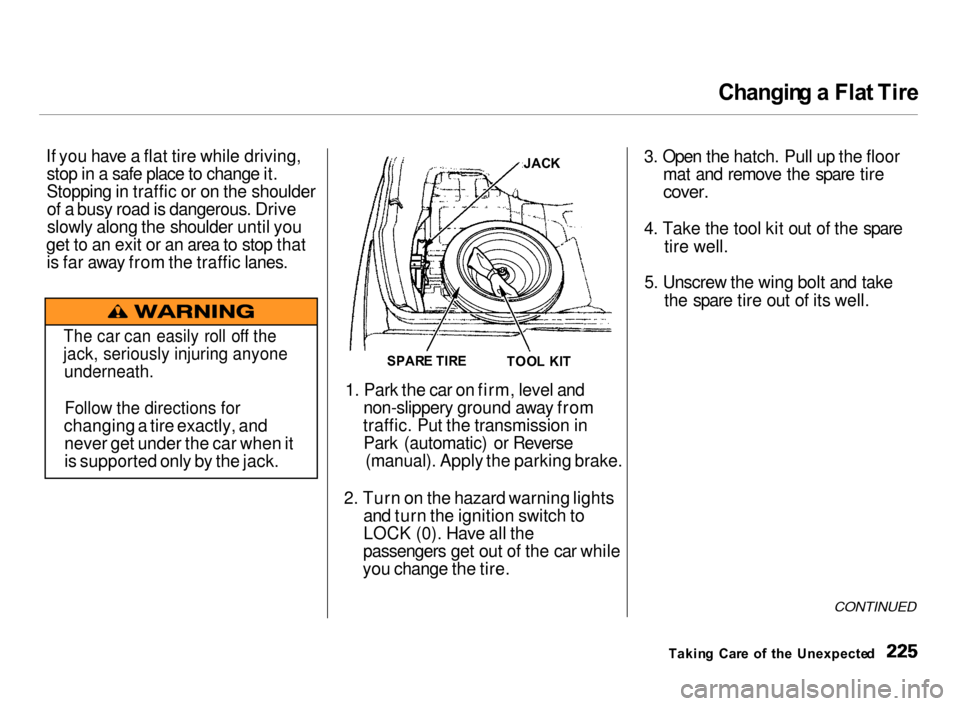
3. Open the hatch. Pull up the floor
mat and remove the spare tire
cover.
4. Take the tool kit out of the spare
tire well.
5. Unscrew the wing bolt and take
the spare tire out of its well.
CONTINUED
Takin g Car e o f th e Unexpecte d
The car can easily roll off the
jack, seriously injuring anyone
underneath.
Follow the directions for
changing a tire exactly, and never get under the car when it
is supported only by the jack. JAC
K
SPAR E TIR E
TOOL KI T
Page 233 of 279
I
f You r Engin e Won' t Star t
Nothin g Happen s o r th e Starte r
Moto r Operate s Ver y Slowl y
When you turn the ignition switch to START (III), you do not hear the
normal noise of the engine trying tostart. You may hear a clicking sound
or series of clicks, or nothing at all.Check these things: Your car has the Immobilizer
System. You should use a
properly-coded master or valet key
to start the engine (see page 72 ).
A key that is not properly coded will cause the immobilizer systemindicator in the dash panel to blink
rapidly. Check the transmission interlock.
If you have a manual transmission,
the clutch pedal must be pushed all the way to the floor or thestarter will not operate. With an
automatic transmission, it must be
in Park or Neutral. Turn the ignition switch to ON (II).
Turn on the headlights and check
their brightness. If the headlightsare very dim or don't light at all,
the battery is discharged. See
Jum p Startin g on page 231. Turn the ignition switch to START
(III). If the headlights do not dim,
check the condition of the fuses. If
the fuses are OK, there is proba-
bly something wrong with the electrical circuit for the ignition
switch or starter motor. You will
need a qualified technician to determine the problem. (See
Emergenc y Towin g on page 245.)
If the headlights dim noticeably or
go out when you try to start the
engine, either the battery is dis-
charged or the connections are
corroded. Check the condition of
the battery and terminal connec-
tions (see page 189). You can
then try jump starting the car from a booster battery (see page
231).
Takin g Car e o f th e Unexpecte d
Page 234 of 279
I
f You r Engin e Won' t Start , Jum p Startin g
Th e Starte r Operate s Normall y
In this case, the starter motor's speed sounds normal, or even faster
than normal, when you turn the ignition switch to START (III), but
the engine does not run. Are you using the proper starting
procedure? Refer to Startin g th e
Engin e on page 137. Do you have fuel? Turn the
ignition switch to ON (II) for a
minute and watch the fuel gauge.
The low fuel level warning light may not be working, so you were
not reminded to fill the tank. There may be an electrical
problem, such as no power to the
fuel pump. Check all the fuses (see page 240).
If you find nothing wrong, you will
need a qualified technician to find
the problem. See Emergenc y
Towin g on page 245 . Jum
p Startin g
If your car's battery has run down,
you may be able to start the engine
by using a booster battery. Although this seems like a simple procedure,
you should take several precautions.
You cannot start an Acura with an automatic transmission by pushing
or pulling it. To jump start your car, follow these
directions closely:
1. Open the hood and check the
physical condition of the battery(see page 189). In very cold
weather, check the condition of
the electrolyte. If it seems slushy or like ice, do not try jump starting
until it thaws.
If a battery sits in extreme cold, the
electrolyte inside can freeze.
Attempting to jump start with a frozen battery can cause it to rupture.
2. Turn off all the electrical acces-
sories: heater, A/C, stereo system,
lights, etc.
Put the transmission in Neutral or
Park and set the parking brake.
CONTINUED
Takin g Car e o f th e Unexpecte d
NOTIC
E
A battery can explode if you do
not follow the correct procedure,
seriously injuring anyone
nearby.
Keep all sparks, open flames,
and smoking materials away
from the battery.
Page 244 of 279
Fuse
s
Checkin g an d Replacin g Fuse s
If something electrical in your car stops working, the first thing you
should check for is a blown fuse.
Determine from the chart on pages 243 and 244, or the diagram on the
fuse box lid, which fuse or fuses control that component. Check those
fuses first, but check all the fuses
before deciding that a blown fuse is not the cause. Replace any blown
fuses and check the component's
operation.
1. Turn the ignition switch to LOCK(0). Make sure the headlights and
all other accessories are off.
2. Remove the cover from the fuse
box.
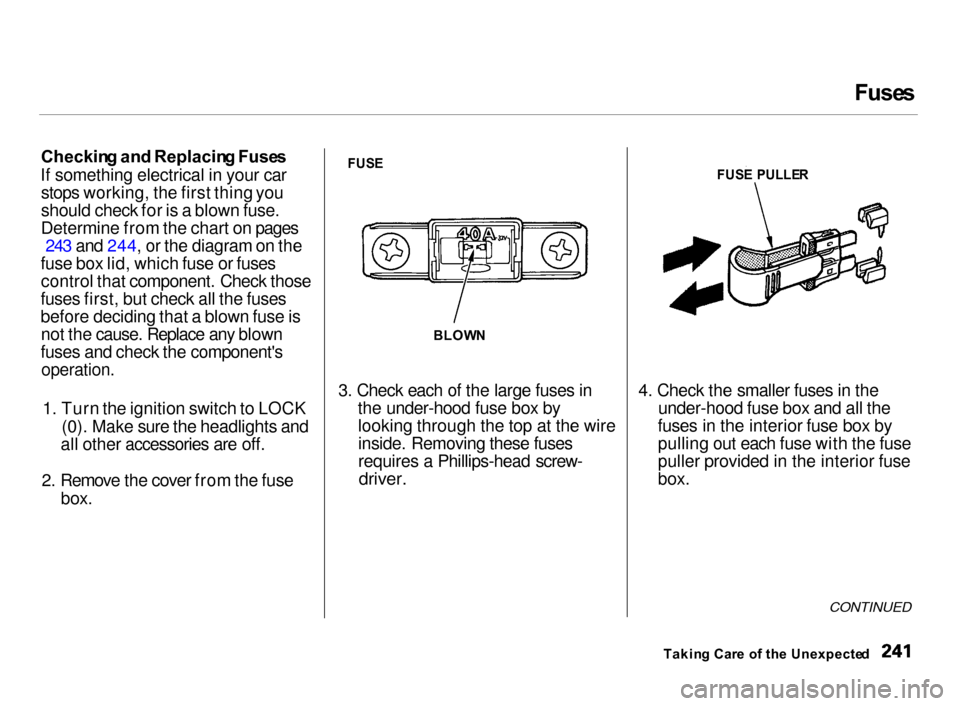
FUS E
3. Check each of the large fuses in
the under-hood fuse box by
looking through the top at the wire inside. Removing these fuses
requires a Phillips-head screw-
driver.
4. Check the smaller fuses in the
under-hood fuse box and all the
fuses in the interior fuse box by
pulling out each fuse with the fuse
puller provided in the interior fuse
box.
CONTINUED
Takin g Car e o f th e Unexpecte d
BLOW
N
FUS
E PULLE R
Page 270 of 279
Inde
x
Accessories and Modifications.... 130 Accessories................................. 130
Additional Safety Precaution.... 131Modifications............................. 131
ACCESSORY (Ignition Key Position)........................................ 74
Adding Automatic Transmission Fluid........................................ 182
Brake Fluid................................. 184
Clutch Fluid................................ 184
Engine Coolant........................... 176
Engine Oil................................... 171
Manual Transmission Fluid..... 183
Power Steering Fluid................. 185
Windshield Washer Fluid......... 181
Additional Information About
Your Seat Belts........................ 42
Lap/Shoulder Belt....................... 42
Seat Belt Maintenance................ 43
Seat Belt System Components... 42
Additional Information About
Your SRS................................... 45
Additional Safety Precautions.... 48
How Your Airbags Work............ 45
How the SRS Indicator Light
Works........................................ 47
SRS Components......................... 45
Additives, Engine Oil..................... 173
Adjustments
Headlights.................................. 205
Head Restraints........................... 82
Mirrors.......................................... 86
Seats.............................................. 79
Steering Wheel............................ 66
Airbag (SRS)...............................
9, 45
Air Cleaner Element...................... 186
Air Conditioning System................. 94
Maintenance............................... 194
Usage............................................. 94
Air Outlets (Vents).......................... 96
Air Pressure, Tires........................ 196
Alcohol in Gasoline........................ 254
Antifreeze....................................... 176
Anti-lock Brakes (ABS)
Indicator Light..................... 55, 148Operation.................................... 146
Anti-theft Steering Column
Lock............................................... 74
Appearance Care........................... 215 Ashtrays............................................ 91
Audio System................................. 102
Automatic Speed Control................ 67
Automatic Transmission............... 140
Capacity, Fluid........................... 251
Checking Fluid Level................ 182
Shifting........................................ 140
Shift Lever Position Indicator.. 140
Shift Lever Positions................. 140
Shift Lock Release..................... 143
Battery Charging SystemIndicator............................ 54, 236
Jump Starting............................. 231 Maintenance............................... 189
Specifications............................. 251
Before Driving............................... 121
Belts, Seat..................................... 8, 42
Beverage Holder.............................. 89
Body Repair.................................... 221
CONTINUED
Page 271 of 279
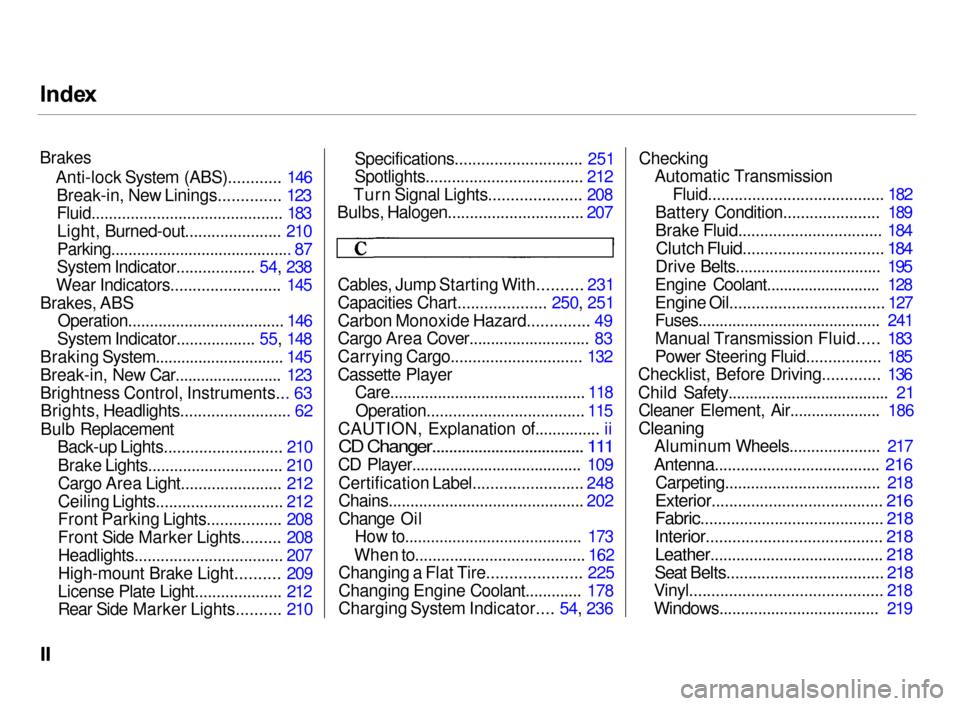
Inde
x
Brakes Anti-lock System (ABS)............ 146Break-in, New Linings.............. 123
Fluid............................................ 183
Light, Burned-out...................... 210
Parking.......................................... 87
System Indicator.................. 54, 238
Wear Indicators......................... 145
Brakes, ABS Operation.................................... 146
System Indicator.................. 55, 148
Braking System.............................. 145
Break-in, New Car......................... 123
Brightness Control, Instruments... 63 Brights, Headlights......................... 62
Bulb Replacement Back-up Lights........................... 210
Brake Lights............................... 210
Cargo Area Light....................... 212
Ceiling Lights............................. 212
Front Parking Lights................. 208
Front Side Marker Lights......... 208
Headlights.................................. 207
High-mount Brake Light.......... 209
License Plate Light.................... 212
Rear Side Marker Lights.......... 210 Specifications............................. 251
Spotlights.................................... 212
Turn Signal Lights..................... 208
Bulbs, Halogen............................... 207
Cables, Jump Starting With.......... 231
Capacities Chart.................... 250, 251
Carbon Monoxide Hazard.............. 49
Cargo Area Cover............................ 83
Carrying Cargo.............................. 132
Cassette Player Care............................................. 118
Operation.................................... 115
CAUTION, Explanation of............... ii
CD Changer.................................... 111
CD Player........................................ 109
Certification Label......................... 248
Chains............................................. 202
Change Oil
How to......................................... 173
When to....................................... 162
Changing a Flat Tire..................... 225
Changing Engine Coolant............. 178
Charging System Indicator.... 54, 236 Checking
Automatic Transmission
Fluid........................................ 182
Battery Condition...................... 189
Brake Fluid................................. 184
Clutch Fluid................................ 184
Drive Belts.................................. 195
Engine Coolant........................... 128
Engine Oil................................... 127
Fuses........................................... 241
Manual Transmission Fluid..... 183
Power Steering Fluid................. 185
Checklist, Before Driving............. 136
Child Safety...................................... 21 Cleaner Element, Air..................... 186
Cleaning
Aluminum Wheels..................... 217
Antenna...................................... 216
Carpeting.................................... 218
Exterior....................................... 216
Fabric.......................................... 218
Interior........................................ 218
Leather........................................ 218
Seat Belts.................................... 218
Vinyl............................................ 218
Windows..................................... 219