high beam Acura Integra 2000 Hatchback Owner's Manual
[x] Cancel search | Manufacturer: ACURA, Model Year: 2000, Model line: Integra, Model: Acura Integra 2000Pages: 279, PDF Size: 3.57 MB
Page 60 of 279
Indicato
r Light s
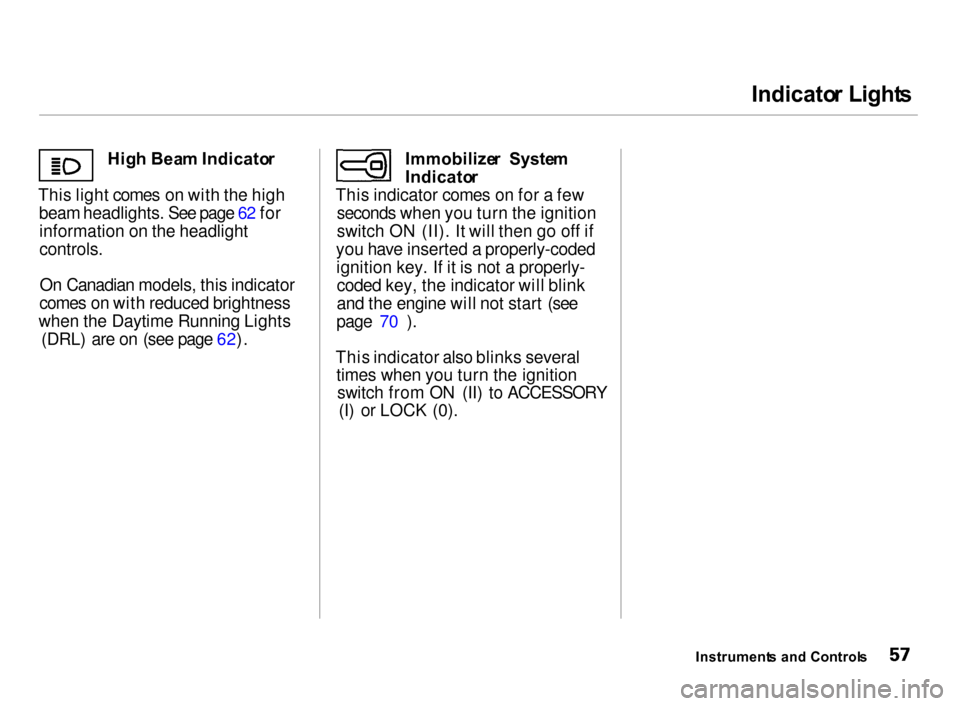
Hig h Bea m Indicato r
This light comes on with the high beam headlights. See page 62 forinformation on the headlight
controls.
On Canadian models, this indicator
comes on with reduced brightness
when the Daytime Running Lights (DRL) are on (see page 62). Immobilize
r Syste m
Indicato r
This indicator comes on for a few seconds when you turn the ignition
switch ON (II). It will then go off if
you have inserted a properly-coded ignition key. If it is not a properly-coded key, the indicator will blink
and the engine will not start (see
page 70 ).
This indicator also blinks several times when you turn the ignitionswitch from ON (II) to ACCESSORY (I) or LOCK (0).
Instruments an d Control s
Page 64 of 279
Control
s Nea r th e Steerin g Whee l
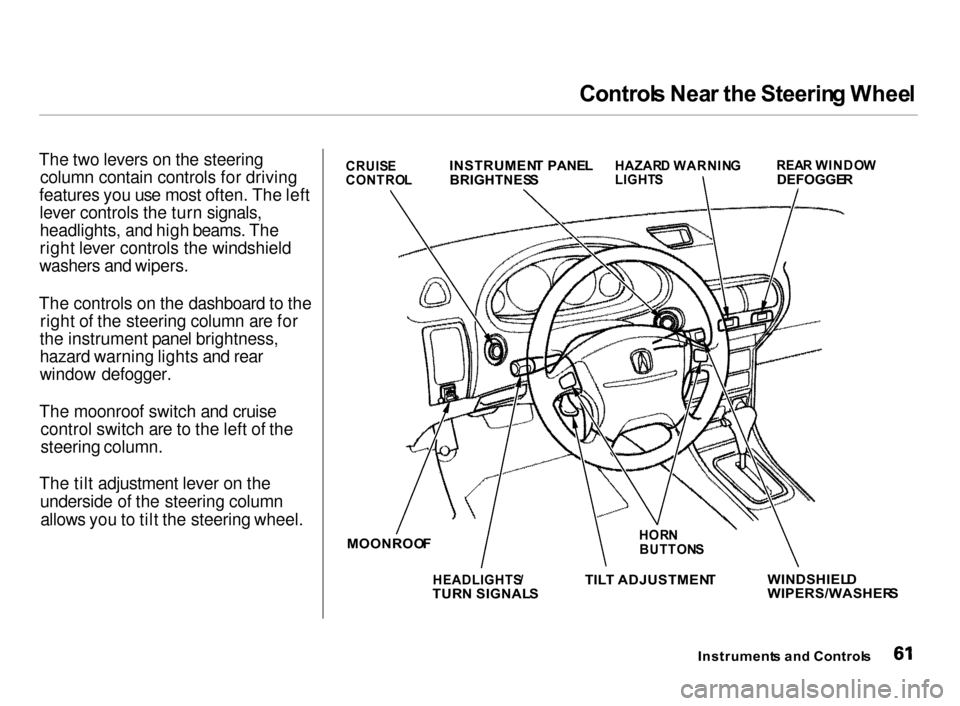
The two levers on the steering column contain controls for driving
features you use most often. The left lever controls the turn signals,
headlights, and high beams. The
right lever controls the windshield
washers and wipers.
The controls on the dashboard to the right of the steering column are for
the instrument panel brightness,
hazard warning lights and rear
window defogger.
The moonroof switch and cruise control switch are to the left of the
steering column.
The tilt adjustment lever on the underside of the steering columnallows you to tilt the steering wheel.
Instruments an d Control s
WINDSHIEL
D
WIPERS/WASHER S
HOR
N
BUTTON S
TIL T ADJUSTMEN T
HEADLIGHTS /
TUR N SIGNAL S
MOONROO
F
HAZAR
D WARNIN G
LIGHT S REA
R WINDO W
DEFOGGE R
INSTRUMEN
T PANE L
BRIGHTNES S
CRUIS
E
CONTRO L
Page 65 of 279
Control
s Nea r th e Steerin g Whee l
Headlight s
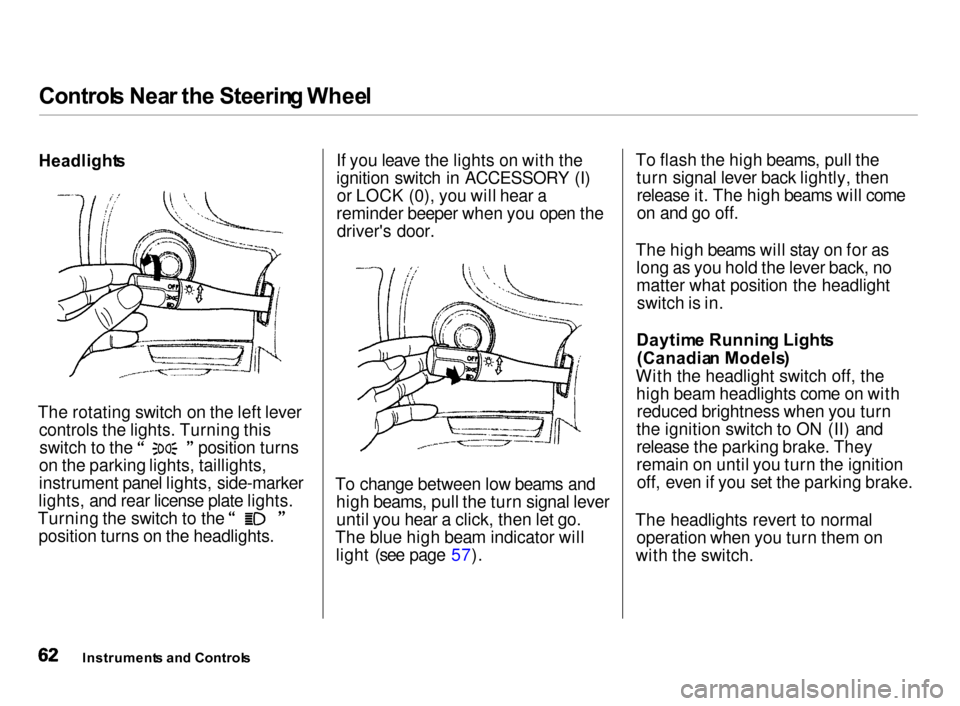
The rotating switch on the left lever controls the lights. Turning this switch to the position turns
on the parking lights, taillights,
instrument panel lights, side-marker
lights, and rear license plate lights. Turning the switch to the
position turns on the headlights. If you leave the lights on with the
ignition switch in ACCESSORY (I)
or LOCK (0), you will hear a
reminder beeper when you open the driver's door.
To change between low beams and high beams, pull the turn signal leveruntil you hear a click, then let go.
The blue high beam indicator will light (see page 57). To flash the high beams, pull the
turn signal lever back lightly, thenrelease it. The high beams will come
on and go off.
The high beams will stay on for as long as you hold the lever back, no
matter what position the headlightswitch is in.
Daytim e Runnin g Light s
(Canadia n Models )
With the headlight switch off, the high beam headlights come on with reduced brightness when you turn
the ignition switch to ON (II) and
release the parking brake. They
remain on until you turn the ignition off, even if you set the parking brake.
The headlights revert to normal operation when you turn them on
with the switch.
Instrument s an d Control s
Page 207 of 279
Light
s
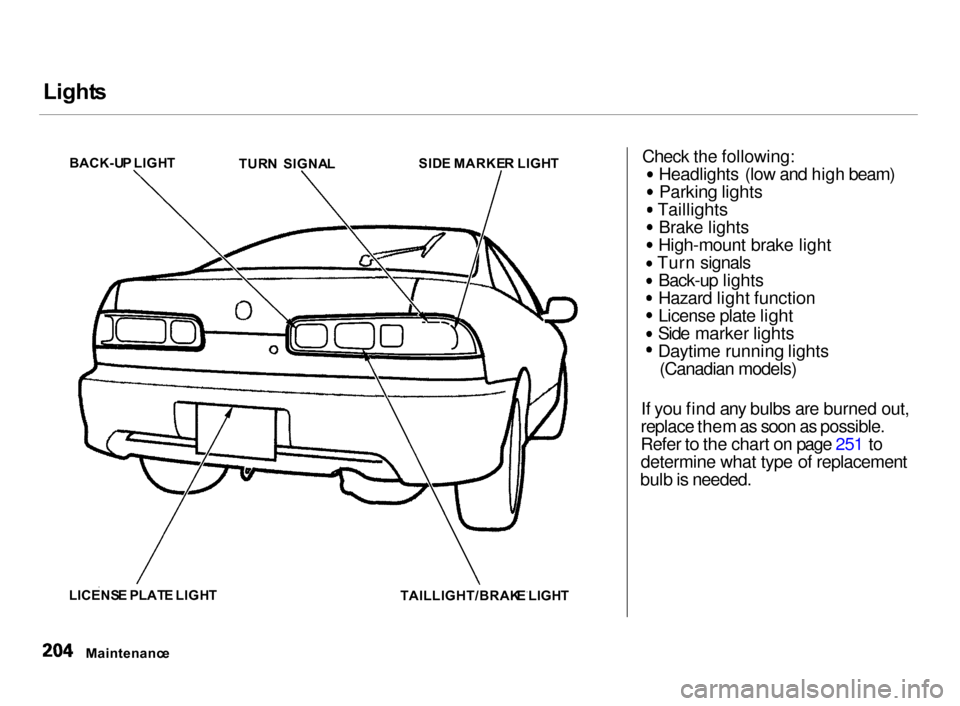
Check the following: Headlights (low and high beam)
Parking lights
Taillights
Brake lights
High-mount brake light
Turn signals Back-up lights
Hazard light function License plate light
Side marker lights
Daytime running lights
(Canadian models)
If you find any bulbs are burned out,
replace them as soon as possible.
Refer to the chart on page 251 to
determine what type of replacement
bulb is needed.
Maintenanc e
BACK-U
P LIGH T
TURN SIGNA L SID
E MARKE R LIGH T
LICENS E PLAT E LIGH T
TAILLIGHT/BRAKE LIGH T
Page 210 of 279
Light
s
Replacin g a Headligh t Bul b
Your car has two bulbs on each side, four in total. Make sure you arereplacing the bulb that is burned out.
Your car uses halogen headlight bulbs. When replacing a bulb, handle
it by its plastic case and protect the
glass from contact with your skin or
hard objects. If you touch the glass,clean it with denatured alcohol and a
clean cloth.
Halogen headlight bulbs get very hot when lit. Oil, perspiration, or a scratch
on the glass can cause the bulb to
overheat and shatter.
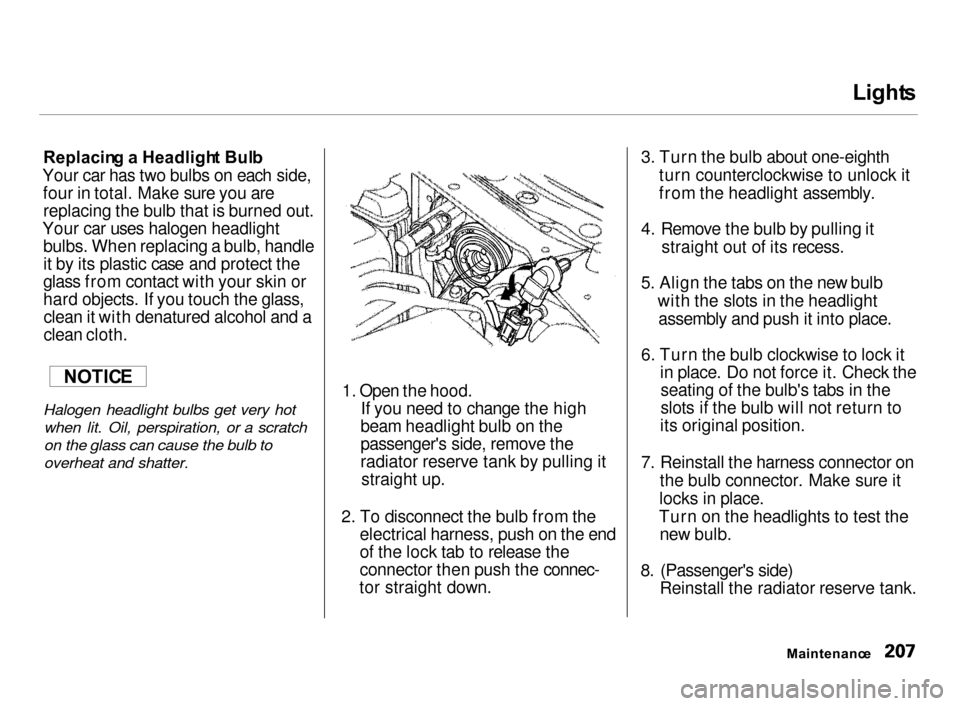
1. Open the hood.
If you need to change the high
beam headlight bulb on the
passenger's side, remove the
radiator reserve tank by pulling it straight up.
2. To disconnect the bulb from the
electrical harness, push on the end
of the lock tab to release the
connector then push the connec-
tor straight down.
3. Turn the bulb about one-eighth
turn counterclockwise to unlock it
from the headlight assembly.
4. Remove the bulb by pulling it
straight out of its recess.
5. Align the tabs on the new bulb
with the slots in the headlightassembly and push it into place.
6. Turn the bulb clockwise to lock it
in place. Do not force it. Check the seating of the bulb's tabs in the
slots if the bulb will not return to
its original position.
7. Reinstall the harness connector on
the bulb connector. Make sure it
locks in place.
Turn on the headlights to test the new bulb.
8. (Passenger's side)
Reinstall the radiator reserve tank.
Maintenanc e
NOTIC
E
Page 274 of 279
Inde
x
Halogen Headlight Bulbs.............. 207
Hatch................................................. 76
Opening the................................. 76
Open Monitor Light.................... 56
Hazard Warning Flashers.............. 65
Headlights
Aiming......................................... 205Daytime Running Lights............. 62
High Beam Indicator................... 57
High Beams, Turning on............ 62
Low Beams, Turning on............. 62
Reminder Chime.......................... 62
Replacing Halogen Bulbs......... 207
Turning on................................... 62
Head Restraints...............................
82
Heating and Cooling........................ 94
High Altitude, Starting at.............. 137
High-Low Beam Switch.................. 62
High-mount Brake Light............... 209
Hood Latch.....................................
187
Hood, Opening the........................
125
Horn..................................................
61
Hot Coolant, Warning About........
176
Hydraulic Clutch............................ 184
Hydroplaning.................................. 150
Identification Number, Vehicle.... 248
If Your Car Has to be Towed....... 245
Ignition Keys............................................... 71
Switch............................................ 71
Timing Control System............. 257
Immobilizer System......................... 72
Important Safety Precautions.......... 6
Indicator Lights, Instrument
Panel.............................................. 53
Infant Restraint................................ 21
Inflation, Proper Tire .................... 196
Inside Mirror.................................... 86
Inspection, Tire.............................. 197
Instrument Panel......................... 2, 52
Instrument Panel Brightness......... 63
Interior Cleaning............................ 218
Interior Lights.................................. 92
Introduction......................................... i
Jacking up the Car......................... 226
Jack, Tire....................................... 226
Jump Starting................................. 231
Keys................................................... 71
Label, Certification........................ 248
Lane Change, Signaling.................. 63
Lap/Shoulder Belts......................... 42
Leaking of Exhaust into Car.......... 49
Leather, Cleaning.......................... 218
Lighter, Cigarette............................ 90
Lights Bulb Replacement..................... 207
Indicator........................................ 53
Parking.......................................... 62
Turn Signal................................... 63
Limited Slip Differential............... 148
LOCK (Ignition Key Position)....... 74
CONTINUED