fuel cap Acura Integra 2000 Sedan Owner's Manual
[x] Cancel search | Manufacturer: ACURA, Model Year: 2000, Model line: Integra, Model: Acura Integra 2000Pages: 273, PDF Size: 4.4 MB
Page 1 of 273
2000 Integra Sedan Online Reference Owner's Manual
Use these links (and links throughout this manual) to navigate through this reference.
For a printed owner's manual, click on authorized manuals or go to www.helminc.com. Contents
Owner's Identification Form
Introduction........................................................................\
...................................................... .................... i
A Few Words About Safety ........................................................................\
................................................ ii
Your Vehicle at a Glance........................................................................\
.................................................... 2
Driver and Passenger Safety ........................................................................\
.............................................
5
Proper use and care of your vehicle's seat belts, and Supplemental Restraint System.
Instruments and Controls........................................................................\
................................................. 51
Instrument panel indica tor and gauge, and how to use dashboard and steering column controls.
Comfort and Convenience Features........................................................................\
...............................
89
How to operate the climate control system, the audio system, and other convenience features.
Before Driving ........................................................................\
.....................................................................117
What gasoline to use, how to break-in your new vehicle, and how to load luggage and other cargo.
Driving........................................................................\
...................................................................................131
The proper way to start the engine, shift the transmission, and park, plus towing a trailer.
Maintenance........................................................................\
.........................................................................153
The Maintenance Schedule shows you when you need to take your vehicle to the dealer.
Appearance Care........................................................................\
.................................................................211
Tips on cleaning and protecting your vehicle. Things to look for if your car ever needs body repairs.
Taking Care of the Unexpected........................................................................\
.......................................219
This section covers several problems motorists sometimes experience, and how to handle them.
Technical Information........................................................................\
.......................................................243
ID numbers, dimensions, capaciti es, and technical information.
Warranty and Customer Relations (U.S. & Canada)..........................................................................255
A summary of the warranties covering your new Honda, and how to contact us.
Authorized Manuals (U.S. only)........................................................................\
.......................................259
How to order manuals and other technical literature.
Index ........................................................................\
......................................................................................... I
Service Information Summary
A summary of information you need when you pull up to the fuel pump.
Page 122 of 273
Servic
e Statio n Procedure s
Fillin g th e Fue l Tan k
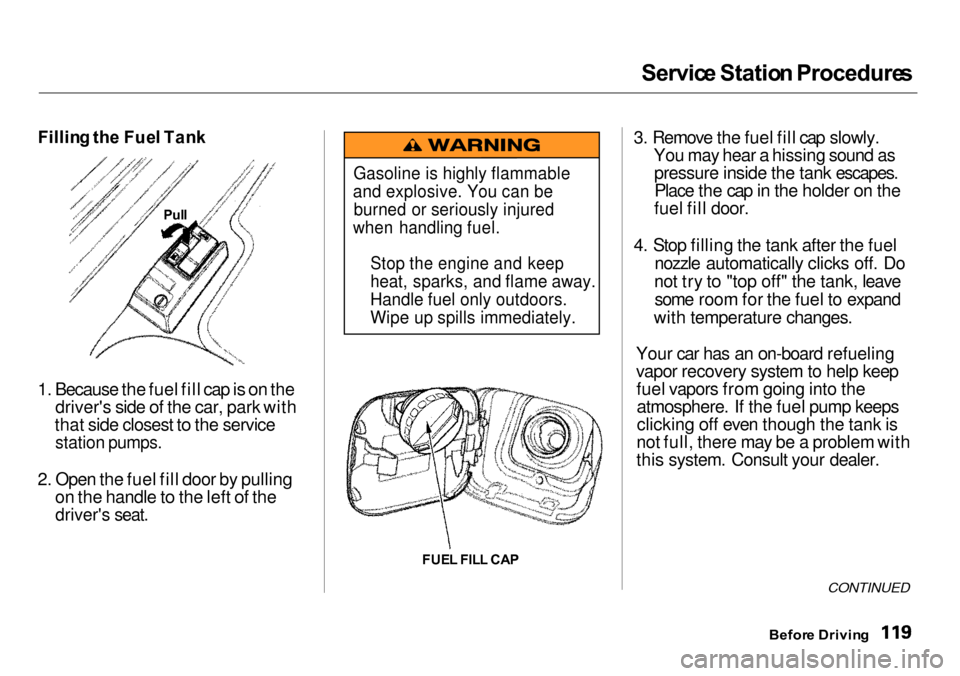
1. Because the fuel fill cap is on the driver's side of the car, park with
that side closest to the service
station pumps.
2. Open the fuel fill door by pulling on the handle to the left of the
driver's seat.
FUEL FIL L CA P 3. Remove the fuel fill cap slowly.
You may hear a hissing sound aspressure inside the tank escapes.Place the cap in the holder on the
fuel fill door.
4. Stop filling the tank after the fuel nozzle automatically clicks off. Do
not try to "top off" the tank, leave some room for the fuel to expand
with temperature changes.
Your car has an on-board refueling
vapor recovery system to help keep fuel vapors from going into theatmosphere. If the fuel pump keeps
clicking off even though the tank is
not full, there may be a problem with
this system. Consult your dealer.
CONTINUED
Befor e Drivin g
Gasoline is highly flammable
and explosive. You can be
burned or seriously injured
when handling fuel.
Stop the engine and keep
heat, sparks, and flame away.
Handle fuel only outdoors.
Wipe up spills immediately.
Pul
l
Page 123 of 273
Servic
e Statio n Procedure s
5. Screw the fuel fill cap back on, tighten it until it clicks several
times. If you do not properly
tighten the cap, the Malfunction
Indicator Lamp may come on (see
page 233 ).
6. Push the fuel fill door closed until it latches. Openin
g th e Hoo d
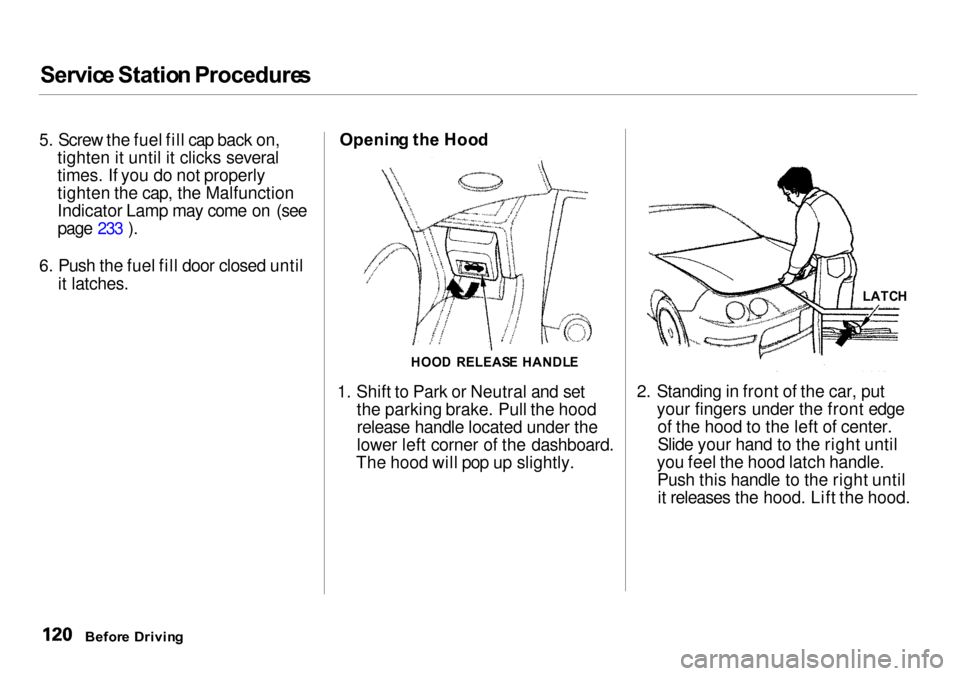
1. Shift to Park or Neutral and set the parking brake. Pull the hood
release handle located under the
lower left corner of the dashboard.
The hood will pop up slightly. 2. Standing in front of the car, put
your fingers under the front edgeof the hood to the left of center.
Slide your hand to the right until
you feel the hood latch handle. Push this handle to the right untilit releases the hood. Lift the hood.
Befor e Drivin g
HOO
D RELEAS E HANDL E LATC
H
Page 180 of 273
Windshiel
d Washer s
Check the level in the windshield
washer reservoir at least monthly during normal usage. In bad weather,
when you use the washers often, check the level every time you stop
for fuel.
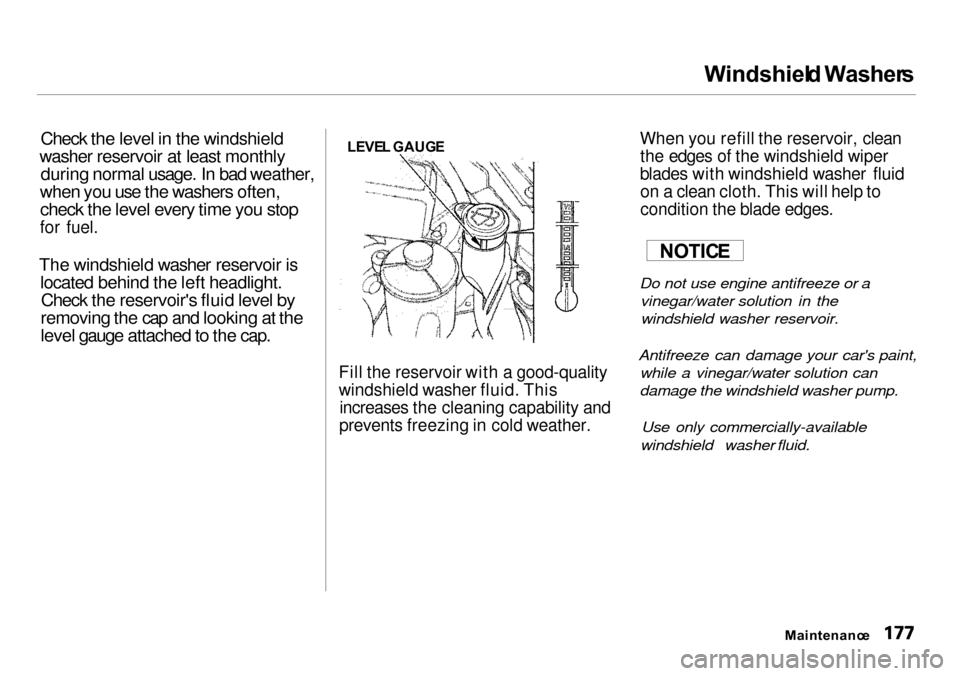
The windshield washer reservoir is located behind the left headlight.Check the reservoir's fluid level by
removing the cap and looking at the
level gauge attached to the cap.
Fill the reservoir with a good-quality
windshield washer fluid. Thisincreases the cleaning capability and
prevents freezing in cold weather. When you refill the reservoir, clean
the edges of the windshield wiper
blades with windshield washer fluid on a clean cloth. This will help to
condition the blade edges.
Do not use engine antifreeze or a vinegar/water solution in thewindshield washer reservoir.
Antifreeze can damage your car's paint, while a vinegar/water solution can
damage the windshield washer pump.
Use only commercially-available
windshield washer fluid.
Maintenance
LEVE
L GAUG E
NOTICE
Page 236 of 273

Malfunctio
n Indicato r Lam p
This indicator comes on for a few
seconds when you turn the ignition
switch ON (II). If it comes on at any
other time, it indicates one of the
engine's emissions control systems
may have a problem. Even though
you may feel no difference in your
car's performance, it can reduce
your fuel economy and cause your
car to put out excessive emissions.
Continued operation may cause
serious damage.
If you have recently refueled your
car, the cause of this indicator
coming on could be a loose or
missing fuel fill cap. Check the cap
and tighten it until it clicks several
times. Replace the fuel fill cap if it is
missing. Tightening the cap will not make the indicator turn off
immediately; it takes three driving
trips.
If the indicator remains on past three driving trips, or the fuel cap was not
loose or missing, have the car
checked by the dealer as soon as possible. Drive moderately until thedealer has inspected the problem.
Avoid full-throttle acceleration and driving at high speed.
You should also have the dealer inspect your car if this indicator
comes on repeatedly, even though it
may turn off as you continue driving. If you keep driving with the
malfunction indicator lamp on, you can
damage your car's emissions controls
and engine. Those repairs may not be covered by your car's warranties.
Takin g Car e o f th e Unexpecte d
NOTIC
E
MALFUNCTIO N INDICATO R LAM P
Page 246 of 273
Technica
l Informatio n
The diagrams in this section give you the dimensions and capacities ofyour Acura, and the locations of theidentification numbers. The explana-
tions of several electronic and mechanical systems on your Acuraare for the more technically-oriented
owner.
Identification Numbers................. 244
Specifications................................. 246
DOT Tire Quality Grading
(U.S. Cars).............................. 248
Treadwear.................................. 248
Traction....................................... 248
Temperature.............................. 249
Oxygenated Fuels.......................... 250
Driving in Foreign Countries....... 251 Emissions Controls........................ 252
The Clean Air Act...................... 252Crankcase Emissions Control
System..................................... 252
Evaporative Emissions Control
System..................................... 252
Onboard Refueling Vapor Recovery................................. 252
Exhaust Emissions Controls.... 253 PGM-FI System..................... 253
Ignition Timing Control
System................................. 253
Three Way Catalytic Converter............................ 253
Replacement Parts..................... 253
Three Way Catalytic Converter... 254
Technical Informatio n
Page 255 of 273

Emission
s Control s
The burning of gasoline in your car's engine produces several byproducts.
Some of these are carbon monoxide (CO), oxides of nitrogen (NOx) and
hydrocarbons (HC). Gasoline evaporating from the tank also
produces hydrocarbons. Controlling
the production of NOx, CO, and HC is important to the environment.
Under certain conditions of sunlight
and climate, NOx and HC react to
form photochemical "smog." Carbon monoxide does not contribute to
smog creation, but it is a poisonous
gas.
Th
e Clea n Ai r Ac t
The United States Clean Air Act sets standards for automobile emissions.
It also requires that automobile
manufacturers explain to owners
how their emissions controls work
and what to do to maintain them.
This section summarizes how the emissions controls work. Scheduled
maintenance is on page 156.
Crankcas e Emission s Contro l
Syste m
Your car has a Positive Crankcase Ventilation System. This keepsgasses that build up in the engine'scrankcase from going into the
atmosphere. The Positive Crankcase
Ventilation valve routes them from the crankcase back to the intake
manifold. They are then drawn into
the engine and burned. Evaporativ
e Emission s Contro l
Syste m
As gasoline evaporates in the fuel tank, an evaporative emissionscontrol canister filled with charcoaladsorbs the vapor. It is stored in this
canister while the engine is off. After
the engine is started and warmed up, the vapor is drawn into the engine
and burned during driving.
Onboar d Refuelin g Vapo r
Recover y
The Onboard Refueling Vapor Recovery (ORVR) system captures
the fuel vapors during refueling. The
vapors are adsorbed in a canister filled with activated carbon. While driving, the fuel vapors are drawn
into the engine and burned off.
Technica l Informatio n
Page 267 of 273

Inde
x
Ethanol in Gasoline ....................... 250
Evaporative Emissions Controls.. 252 Exhaust Fumes................................ 49
Expectant Mothers, Use of Seat Belts by.........................................19
Exterior, Cleaning the................... 212
Fabric, Cleaning............................. 214
Fan, Interior...................................... 90
Features, Comfort and
Convenience................................. 89
Filling the Fuel Tank..................... 119
Filters
Air................................................ 182
Oil................................................ 170
5-speed Manual Transmission
Checking Fluid Level................ 179
Shifting the................................. 134
Flashers, Hazard Warning.............. 64
Flat Tire, Changing a.................... 221
Fluids
Automatic Transmission........... 178
Brake........................................... 179Clutch.......................................... 181 Manual Transmission............... 179
Power Steering........................... 181
Windshield Washer................... 177
FM Stereo Radio Reception.................................... 103
Folding Rear Seat............................ 77
Foreign Countries, Driving in...... 251
Four-way Flashers........................... 64
Front End, Towing by Emergency Wrecker................. 241
Fuel.................................................. 118
Fill Door and Cap....................... 119Gauge............................................ 58
Octane Requirement................. 118
Oxygenated................................ 250
Reserve Indicator......................... 55
Tank, Filling the......................... 119
Fuses, Checking the...................... 237
Gas Mileage, Improving................ 124
Gasohol........................................... 250Gasoline.......................................... 118
Fuel Reserve Indicator................ 55Gauge............................................ 58 Octane Requirement................. 118
Tank, Filling the......................... 119
Gas Station Procedures................. 119
Gauges
Engine Coolant Temperature.... 58
Fuel................................................ 58
Maintenance Required Indicator.................................... 59
Gearshift Lever Positions Automatic Transmission........... 136
5-speed Manual
Transmission.......................... 135
Glass Cleaning............................... 215
Glove Box......................................... 75
Halogen Headlight Bulbs.............. 202
Hazard Warning Flashers............... 64
Headlights
Aiming......................................... 200
High Beam Indicator................... 56
High Beams, Turning on............ 61
Low Beams, Turning on............. 61
Reminder Chime.......................... 61
Replacing Halogen Bulbs ......... 202