torque Acura Integra 2000 Sedan Owner's Manual
[x] Cancel search | Manufacturer: ACURA, Model Year: 2000, Model line: Integra, Model: Acura Integra 2000Pages: 273, PDF Size: 4.4 MB
Page 139 of 273

Automati
c Transmissio n
Your Acura's transmission has four
forward speeds, and is electronically controlled for smoother shifting. It
also has a "lock-up" torque converter
for better fuel economy. You may
feel what seems like another shift when the converter locks. Shif
t Leve r Positio n Indicato r
This indicator on the instrument
panel shows which position the shift
lever is in.
The "D4" indicator comes on for a
few seconds when you turn the
ignition switch ON (II). If it flashes
while driving (in any shift position),
it indicates a possible problem in the
transmission. Avoid rapid acceler-
ation and have the transmission
checked by an authorized Acura
dealer as soon as possible. Shif
t Leve r Position s
The shift lever has seven positions.
It must be in Park or Neutral to start the engine. When you are stopped in
D4, D3, 2,1, N or R, press firmly on
the brake pedal, and keep your foot
off the accelerator pedal.
Drivin g
SHIF
T
LEVE R
Page 178 of 273

Coolin
g Syste m
5. Remove the reserve tank from its holder by pulling it straight up.
Drain the coolant, then put the
tank back in its holder.
6. When the coolant stops draining,
tighten the drain plug at the
bottom of the radiator. Put a new
washer on the drain bolt, then reinstall the drain bolt in theengine block. Tighten it securely.Tightening torque:
58 Ibf .
ft (78 N .
m , 8.0 kgf .
m)
7. Mix the recommended antifreeze
with an equal amount of purifiedor distilled water in a clean
container. The cooling system
capacity is:
With 5-speed manual transmission:
(LS,
GS)
1.16 US gal (4.4 l ,0.97 Imp gal)
(GS-R)
1.24 US gal (4.7 l ,1.03 Imp gal)
With automatic transmission:
1.24 US gal (4.7 l ,1.03 Imp gal)
8. Pour coolant into the radiator up to the base of the filler neck.
9. Start the engine and let it run for about 30 seconds. Then turn off
the engine.
CONTINUED
Maintenanc e
RESERV
E TAN K
RESERVE
TAN K CA P
HOLDE R
FILLE
R NEC K
Fill u p t o her e
Page 187 of 273

Spar
k Plug s
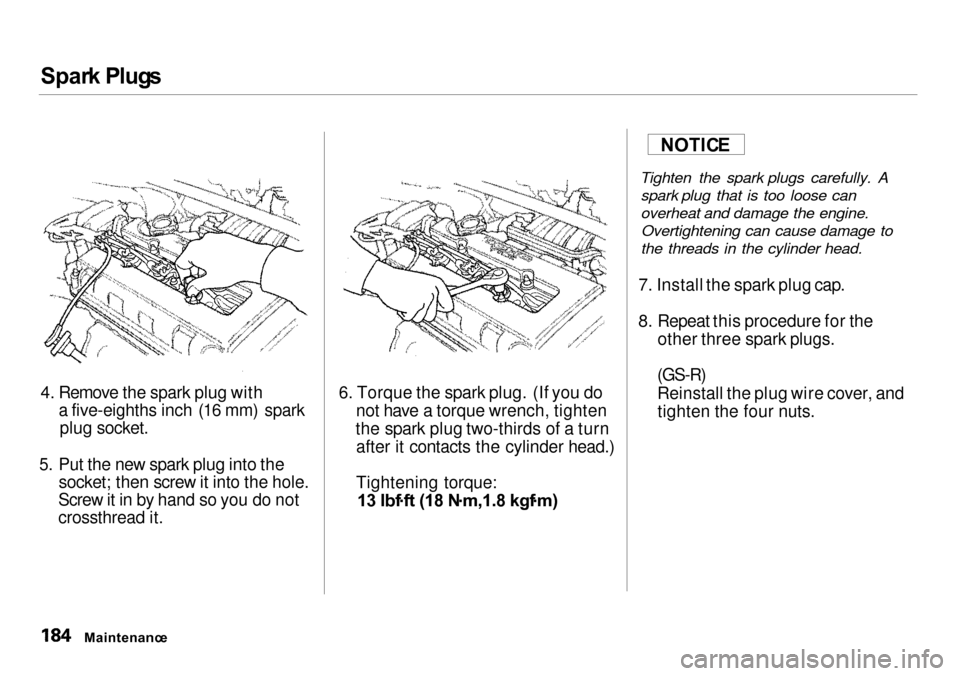
4. Remove the spark plug with a five-eighths inch (16 mm) sparkplug socket.
5. Put the new spark plug into the socket; then screw it into the hole.
Screw it in by hand so you do not
crossthread it. 6. Torque the spark plug. (If you do
not have a torque wrench, tighten
the spark plug two-thirds of a turn after it contacts the cylinder head.)
Tightening torque:
13 lbf .
ft (18 N .
m,1.8 kgf .
m)
Tighten the spark plugs carefully. A
spark plug that is too loose can
overheat and damage the engine.Overtightening can cause damage to
the threads in the cylinder head.
7. Install the spark plug cap.
8. Repeat this procedure for the other three spark plugs.
(GS-R)
Reinstall the plug wire cover, and tighten the four nuts.
Maintenanc e
NOTIC
E
Page 227 of 273

Changin
g a Fla t Tir e
12.Put on the spare tire. Put the wheel nuts back on finger-tight,then tighten them in a crisscross
pattern with the wheel wrench
until the wheel is firmly against
the hub. Do not try to tighten
them fully. 13.Lower the car to the ground and
remove the jack.
14.Tighten the wheel nuts securely in
the same crisscross pattern. Have
the wheel nut torque checked at
the nearest automotive service
facility.
Tighten the wheel nuts to:
80 Ibf .
ft (108 N .
m , 11 kgf .
m)
Takin g Car e o f th e Unexpecte d