start stop button Acura MDX 2003 Owner's Manua
[x] Cancel search | Manufacturer: ACURA, Model Year: 2003, Model line: MDX, Model: Acura MDX 2003Pages: 420, PDF Size: 5.46 MB
Page 160 of 420

To load multiple CDs in one
operation:Press and hold the Load button
until you hear a beep and see
‘‘____’’inthedisplay,then
release the button.
On the lef t side of the display, the
CD Loaded indicator f or an empty
position will begin blinking. Repeat this until all six positions
are loaded. The system will then
begin playing the last CD loaded.
If you are not loading CDs into all six
positions, press the Load button
again after the last CD has loaded.
The system will begin playing the
last CD loaded.
If you stop loading CDs bef ore all six
positions are f illed, and you do not
press the Load button, the system
will wait f or ten seconds, then stop
the load operation and begin playing
the last CD loaded. To load a single CD:
Press and release the Load button.
When the CD Loaded indicator f or
an empty position starts to blink,
andyouseeLOAdinthedisplay,
insert the disc into the CD slot.
Insert it only about halfway, the
drive will pull it in the rest of the
way.
The system will load the CD, and
begin playing it.
When you see LOAd in the display,
insert the disc into the CD slot.
Insert it only about halfway, the
drive will pull it in the rest of the
way. You will again see the dashes
in the display as the CD is loaded.
When LOAd appears again in the
display, insert the next disc into
the CD slot. Do no try to insert a
disc until LOAd appears. You
could damage the audio unit.
1.
2.
3.
4. 5.
1.
2.
3.
Audio System
Comf ort and Convenience Feat ures
L oading CDs in t he Changer
156
Page 161 of 420

CONT INUED
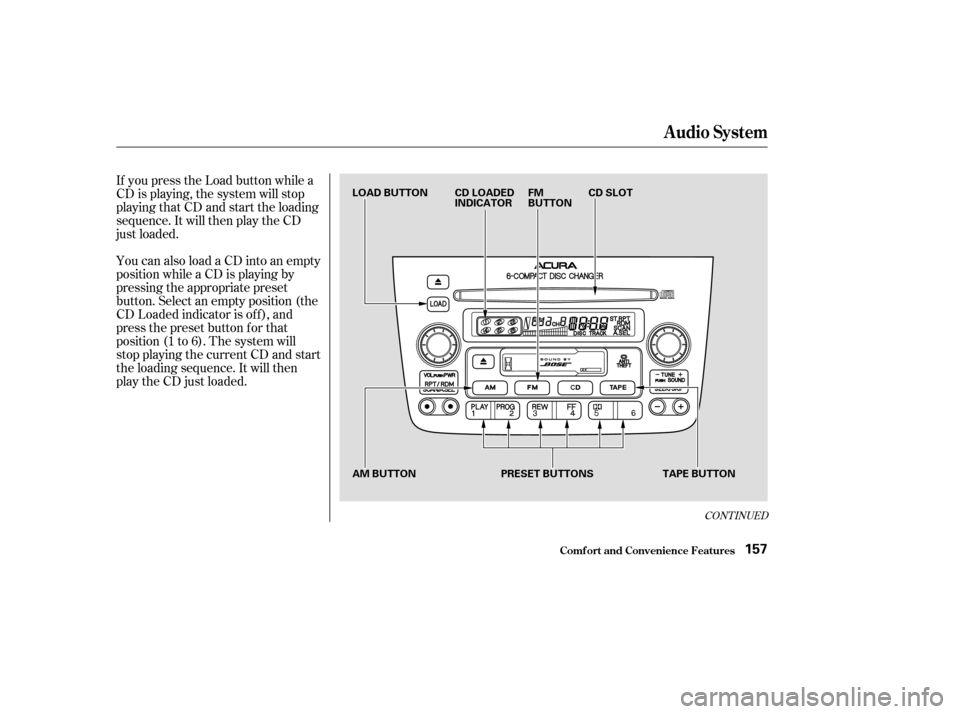
If you press the Load button while a
CD is playing, the system will stop
playing that CD and start the loading
sequence. It will then play the CD
just loaded.
You can also load a CD into an empty
position while a CD is playing by
pressing the appropriate preset
button. Select an empty position (the
CD Loaded indicator is of f ), and
press the preset button f or that
position (1 to 6). The system will
stop playing the current CD and start
the loading sequence. It will then
play the CD just loaded.
Audio System
Comf ort and Convenience Feat ures157
LOAD BUTTON CD LOADEDINDICATORFM
BUTTONCD SLOT
AM BUTTON PRESET BUTTONS
TAPE BUTTON
Page 209 of 420

CONT INUED
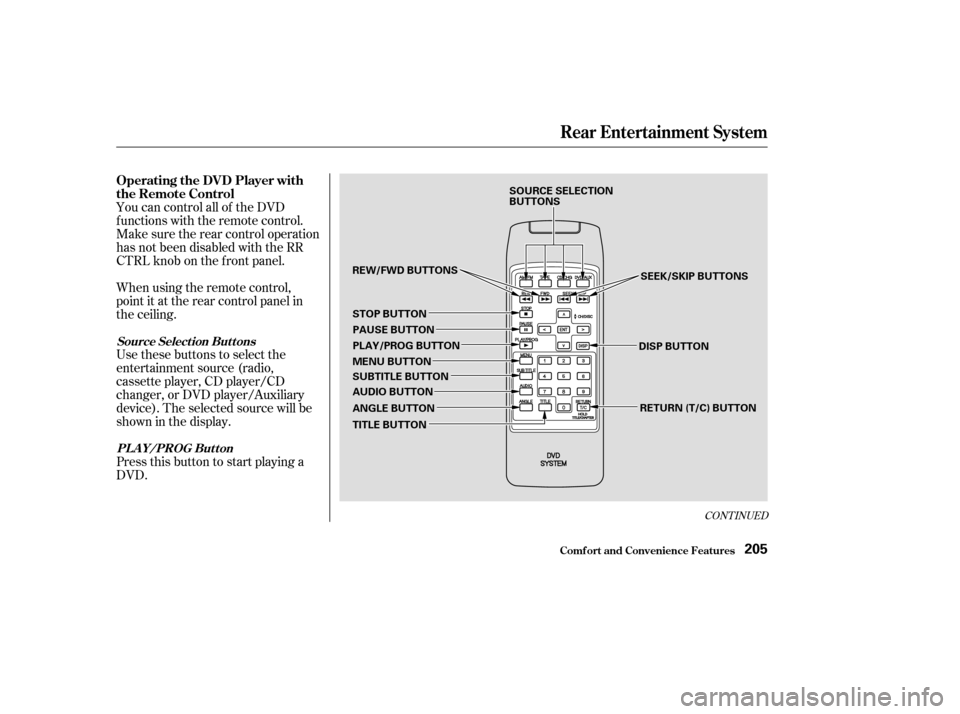
You can control all of the DVD
functions with the remote control.
Make sure the rear control operation
has not been disabled with the RR
CTRL knob on the f ront panel.
When using the remote control,
point it at the rear control panel in
the ceiling.
Press this button to start playing a
DVD. Use these buttons to select the
entertainment source (radio,
cassette player, CD player/CD
changer, or DVD player/Auxiliary
device). The selected source will be
showninthedisplay.
Comf ort and Convenience Feat ures
Rear Entertainment System
Operating the DVD Player with
the Remote Control
Source Select ion But t onsPL A Y/PROG Button
205
SOURCE SELECTION
BUTTONS
REW/FWD BUTTONS STOP BUTTON PAUSE BUTTON
PLAY/PROG BUTTON
MENU BUTTON
SUBTITLE BUTTON
AUDIO BUTTON
ANGLE BUTTON
TITLE BUTTON SEEK/SKIP BUTTONS
DISP BUTTON RETURN (T/C) BUTTON
Page 211 of 420

Many DVDs are recorded, or
dubbed, in more than one language.
To select a dif f erent language than
the one being heard, press the
AUDIO button. Continue to press
and release the AUDIO button to
hear all the available languages.
To change the color, contrast, aspect
ratio, and brightness of the video
screen, press the DISP button. The
current setting of one will be
displayed on the screen each time
you press the button. Use theand buttons to change the
setting as desired. The display will
disappear f rom the screen several
seconds af ter you stop adjusting the
setting. On some DVDs, the scenes are
recorded by more than one camera,
giving dif f erent viewpoints of the
same scene. By pressing the Angle
button, you can select a dif f erent
viewpoint.
In the MENU selection mode,
pressing the RETURN button for
less than two seconds changes the
MENU display to the previous page.
Pressing the RETURN button for
more than two seconds while a DVD
is playing brings the system into the
TITLE enter mode. When you enter
your selection, the DVD player will
start playing f rom the selected title.
Rear Entertainment System
Comf ort and Convenience Feat ures
A UDIO Button
DISP But t on A NGL E Button
RETURN (T/C) Button
207
Page 264 of 420

To engage the VTM-4 Lock:To disengage the VTM-4 Lock, do
one of the f ollowing:
Press the VTM-4 Lock button.
Move the shift lever to D , D or
D.
Turn the ignition to OFF (0).
When you restart your MDX, the
VTM-4 Lock f eature will be of f .
The VTM-4 Lock will temporarily
disengage when the vehicle speed
exceeds 18 mph (30 km/h). It will
automatically engage again as the
speed slows below 18 mph (30
km/h). The light in the VTM-4 Lock
button will remain on the whole time.
The vehicle speed must be below
18 mph (30 km/h).
Move the shift lever to first (1),
second (2) or reverse (R) gear. To
shif t Reverse f rom Neutral, come
to a complete stop and then shift.
Press the VTM-4 Lock button.
The light in the button will come
on.
To get unstuck, apply light pressure
to the accelerator pedal. Do not spin
the f ront tires f or more than a f ew
seconds. Because of the amount of
torque applied to the rear tires, they
should not spin. This is normal. If
you are not able to get the vehicle to
move, apply the brakes to stop the
wheels, then reverse direction. 1.
2.
3.
34
5
Driving
Variable Torque Management 4WD System
260
Do not continuously spin the f ront tires
of your MDX. Continuously spinning
the f ront tires can cause transmission
or rear dif f erential damage.