remove seats Acura MDX 2004 Owner's Manual
[x] Cancel search | Manufacturer: ACURA, Model Year: 2004, Model line: MDX, Model: Acura MDX 2004Pages: 284, PDF Size: 3.92 MB
Page 18 of 284

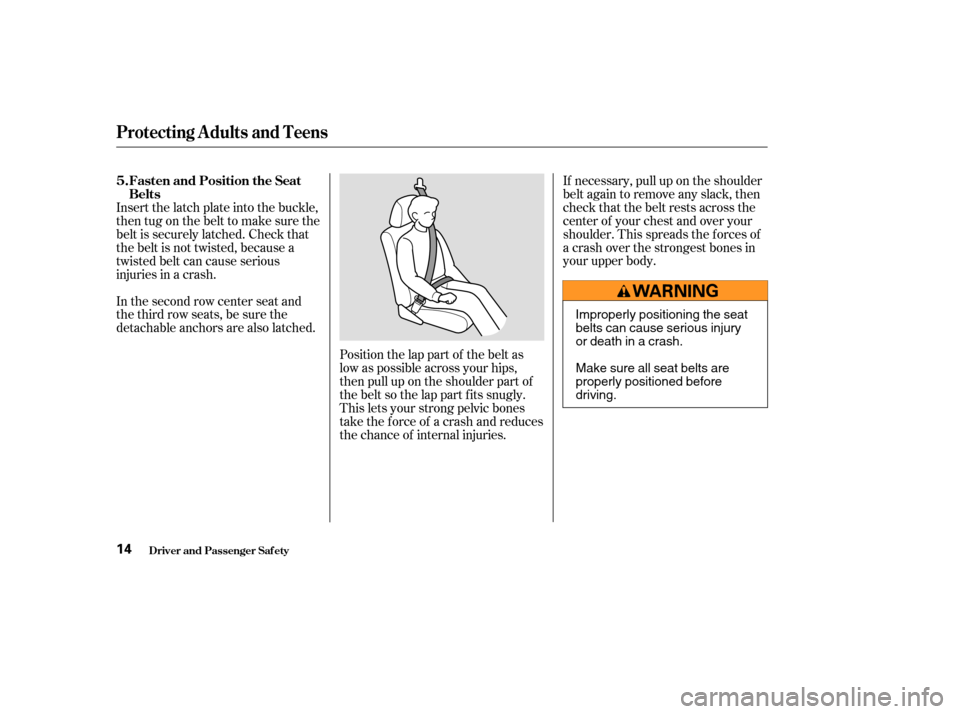
Position the lap part of the belt as
low as possible across your hips,
then pull up on the shoulder part of
the belt so the lap part f its snugly.
This lets your strong pelvic bones
take the force of a crash and reduces
the chance of internal injuries.If necessary, pull up on the shoulder
belt again to remove any slack, then
check that the belt rests across the
center of your chest and over your
shoulder. This spreads the f orces of
a crash over the strongest bones in
your upper body.
Insert the latch plate into the buckle,
then tug on the belt to make sure the
belt is securely latched. Check that
the belt is not twisted, because a
twisted belt can cause serious
injuries in a crash.
In the second row center seat and
thethirdrowseats,besurethe
detachable anchors are also latched. Fasten and Position the Seat
Belts
5.
Protecting A dults and Teens
Driver and Passenger Saf ety14
Improperly positioning the seat
belts can cause serious injury
or death in a crash.
Make sure all seat belts are
properly positioned before
driving.
Page 36 of 284

Pushing or
pulling on the back of the seat,
placing heavy items in the back
seat pocket, pushing cargo against
the seat, or hanging heavy items
on the seat back can interf ere with
the proper operation of the
passenger’s advanced front airbag.
Do not remove or modif y a f ront
seat without consulting an Acura
dealer. This could make the driver’s
seat position sensor or the f ront
passenger’s weight sensors
inef f ective. If it is necessary to
remove or modif y a f ront seat to
accommodate a person with
disabilities, f irst contact Acura
Client Services at 800-382-2238.
Together, airbags and
seat belts provide the best
protection.
Tampering could cause
the airbags to deploy, possibly
causing very serious injury.
If water or another liquid
or spilled water soaks into a seat-
back, it can prevent the side airbag
cutof f system f rom working
properly.
This could make the
driver’s seat position sensor and
the f ront passenger’s weight
sensors inef f ective. This could make the front
passenger’s weight sensors
inef f ective.
Improperly
replacing or covering f ront seat-
back covers can prevent your side
airbags f rom inf lating during a
collision.
This could make the driver’s seat
position sensor and the f ront
passenger’s weight sensors
inef f ective.
Do not do anyt hing t hat would
increase or decrease weight on t hef ront passenger’s seat .
Donotattempttodeactivateyour
airbags.
Do not t amper wit h airbagcomponent s or wiring f or anyreason.
Do not expose t he f ront seat -backsto liquid.
Do not place any it ems under t hefront seats. Do not place t he second row f loor
mat under t he f ront passenger’sseat .
Do not cover or replace f ront seat -back covers wit hout consult ing anAcura dealer.
Do not modif y t he f ront seat s.Additional Saf ety Precautions
Additional Inf ormation About Your Airbags
Driver and Passenger Saf ety32
Page 92 of 284

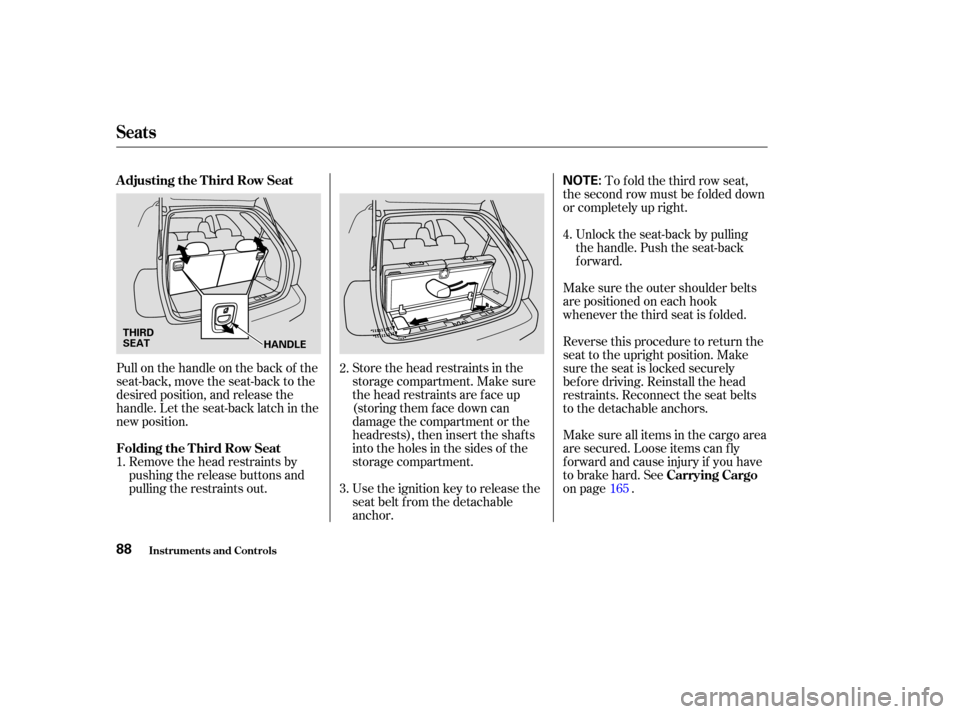
Store the head restraints in the
storage compartment. Make sure
the head restraints are f ace up
(storing them face down can
damage the compartment or the
headrests), then insert the shaf ts
into the holes in the sides of the
storage compartment.
Pull on the handle on the back of the
seat-back, move the seat-back to the
desired position, and release the
handle. Let the seat-back latch in the
new position.
Use the ignition key to release the
seat belt from the detachable
anchor.Unlock the seat-back by pulling
the handle. Push the seat-back
forward.
Make sure the outer shoulder belts
are positioned on each hook
whenever the third seat is f olded.
Remove the head restraints by
pushing the release buttons and
pulling the restraints out. To f old the third row seat,
the second row must be f olded down
or completely up right.
Reverse this procedure to return the
seat to the upright position. Make
sure the seat is locked securely
bef ore driving. Reinstall the head
restraints. Reconnect the seat belts
to the detachable anchors.
Make sure all items in the cargo area
are secured. Loose items can f ly
f orward and cause injury if you have
to brake hard. See
on page .
1. 2.
3.4.
165
Seats
Inst rument s and Cont rols
A djusting the T hird Row Seat
Folding the T hird Row Seat Carrying Cargo
88
NOTE:
HANDLE
THIRD
SEAT