light Acura MDX 2005 Owner's Guide
[x] Cancel search | Manufacturer: ACURA, Model Year: 2005, Model line: MDX, Model: Acura MDX 2005Pages: 312, PDF Size: 4.1 MB
Page 101 of 312

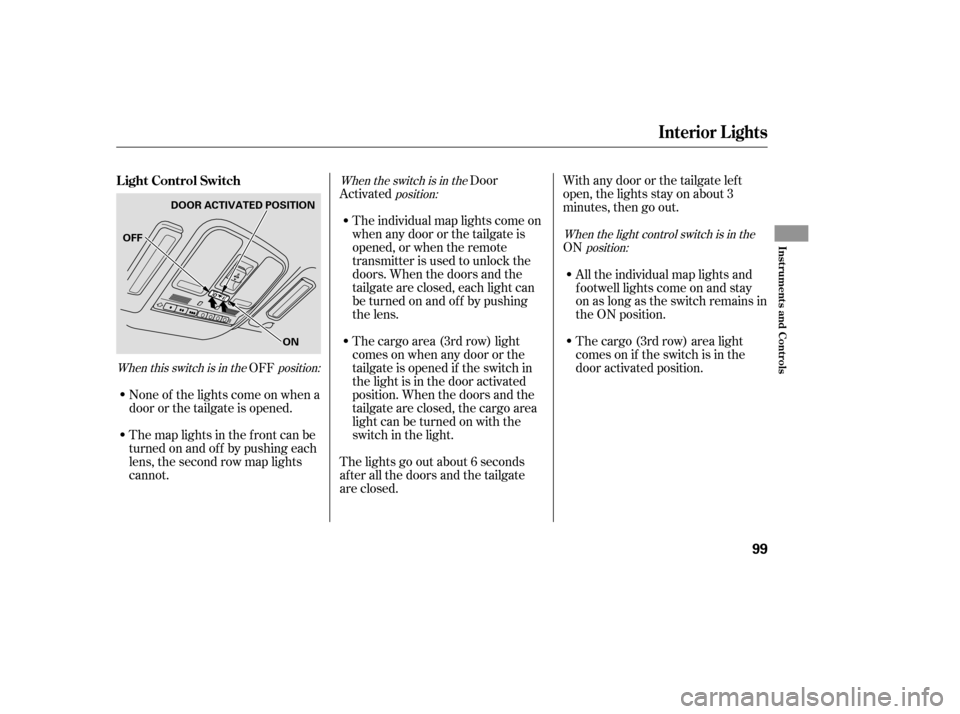
When this switch is in the position:When the switch is in the
position:
When the light control switch is in theposition:OFF
None of the lights come on when a
door or the tailgate is opened. Door
Activated Withanydoororthetailgateleft
open, the lights stay on about 3
minutes, then go out.
ON
The individual map lights come on
whenanydoororthetailgateis
opened, or when the remote
transmitter is used to unlock the
doors. When the doors and the
tailgate are closed, each light can
be turned on and of f by pushing
the lens.
The cargo area (3rd row) light
comes on when any door or the
tailgate is opened if the switch in
the light is in the door activated
position. When the doors and the
tailgate are closed, the cargo area
lightcanbeturnedonwiththe
switch in the light.
The map lights in the f ront can be
turned on and of f by pushing each
lens, the second row map lights
cannot. The lights go out about 6 seconds
after all the doors and the tailgate
are closed. All the individual map lights and
f ootwell lights come on and stay
on as long as the switch remains in
the ON position.
The cargo (3rd row) area light
comes on if the switch is in the
door activated position.
L ight Control Switch
Interior Lights
Inst rument s and Cont rols
99
DOOR ACTIVATED POSITION
ON
OFF
Page 102 of 312

Turn on the f ront row individual map
lights by pushing the lens. Push the
lens again to turn it off. With the
light control switch in the door
activated position, the second row
map lights can be turned on by
pushing the lens. Push the lens again
to turn it off.
The light in the tailgate has an on-of f
switch to control if the light comes
on when the tailgate is opened..
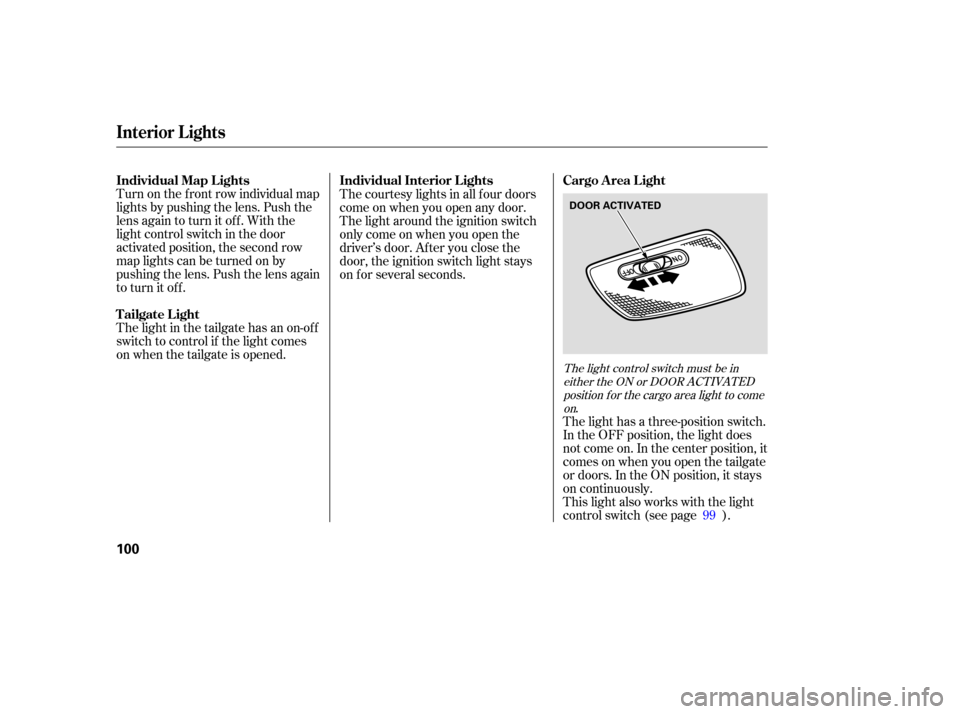
The light has a three-position switch.
In the OFF position, the light does
not come on. In the center position, it
comesonwhenyouopenthetailgate
or doors. In the ON position, it stays
on continuously.
This light also works with the light
control switch (see page ).
The courtesy lights in all f our doors
come on when you open any door.
The light around the ignition switch
only come on when you open the
driver’s door. Af ter you close the
door, the ignition switch light stays
on f or several seconds.
99
The light control switch must be ineither the ON or DOOR ACTIVATEDposition f or the cargo area light to comeon
Individual Map L ights Individual Interior L ights Cargo A rea L ight
Tailgate Light
Interior Lights
100
DOOR ACTIVATED
Page 105 of 312

Storage compartments are located in
the armrests f or the third row seat.
To open a compartment, pull the
lever and lif t the lid.
The hooks on the f loor of the cargo
area enable you to tie down items
stored in the back. Make sure all
stored items are secured bef ore
driving.Whenusingthesunvisorforthe
side window, remove the support rod
f rom the clip and swing it out. Slide
the extension out to get more
coverage on the side window.
Make sure you put the sun visor
back in place when you are getting
into or out of the vehicle. Do not use
the sun visor extension over the rear
view mirror.Pull up the vanity mirror cover to use
it.
The light comes on only when the
parking lights or headlights are on.
Rear Compartment
Cargo Hooks
Sun Visor
Vanity Mirror
Interior Convenience Items
Inst rument s and Cont rols
103
EXTENSION
SUN VISOR
Page 106 of 312

Your vehicle has three accessory
power sockets. The f ront accessory
power socket is located under the
audio system. The second socket is
located in the center console
compartment. The rear socket is
behind the third seat on the driver’s
side.
Tousethesocketintheconsole
compartment, pull the cover up.
To use an accessory power socket,
the ignition switch must be in
ACCESSORY (I) or ON (II).
These sockets are intended to supply
power f or 12 volt DC accessories
that are rated 120 watts or less (10
amps).When both the front and console
sockets are being used, the
combined power rating of both
accessories should be 120 watts or
less (10 amps).
None of the sockets will power an
automotive type cigarette lighter
element.
A ccessory Power Sockets
Interior Convenience Items
104
Page 113 of 312

Press the RR A/C MANUAL button
to enable the rear A/C control panel.
The indicator in the button will come
on. A passenger in the second row
can then use the temperature control
dial, f an speed dial, and mode
buttons to adjust the temperature
and airflow to their preference. This
is limited by the system’s minimum
and maximum temperature.Individual rear control
settings are shut off when the
ignition is turned off and return to
the automatic settings. They must be
reset when the ignition is turned on
again.
Theclimatecontrolsystemhastwo
sensors. A sunlight sensor is in the
top of the dashboard, and a
temperature sensor is next to the
steering column. Do not cover the
sensors or spill any liquid on them.
Rear Climate Control, Climate Control Sensors
Using the Rear A /C Unit Climate Control Sensors
Features
111
NOTE:
TEMPERATURE SENSOR
TEMPERATURE CONTROL DIAL
MODE BUTTONS
FAN SPEED CONTROL DIAL
Page 118 of 312

You can use the instrument panel
brightness control knob to adjust the
illumination of the audio system (see
page ). The audio system
illuminates when the parking lights
are on, even if the radio is turned of f .
Those bands cover these f requen-
cies:
AM band: 530 to 1,710 kilohertz
FM band: 87.7 to 107.9 megahertzStations must use these exact
f requencies. It is f airly common f or
stations to round-of f the f requency in
their advertising, so your radio could
display a f requency of 100.9 even
though the announcer may identif y
the station as ‘‘FM101.’’
A radio station’s signal gets weaker
as you get f arther away f rom its
transmitter. If you are listening to an
AM station, you will notice the sound
volume becoming weaker and the
stationdriftinginandout.If youare
listening to an FM station, you will
see the stereo indicator f lickering of f
and on as the signal weakens.
Eventually, the stereo indicator willgo of f and the sound will f ade
completely as you get out of range of
the station’s signal.
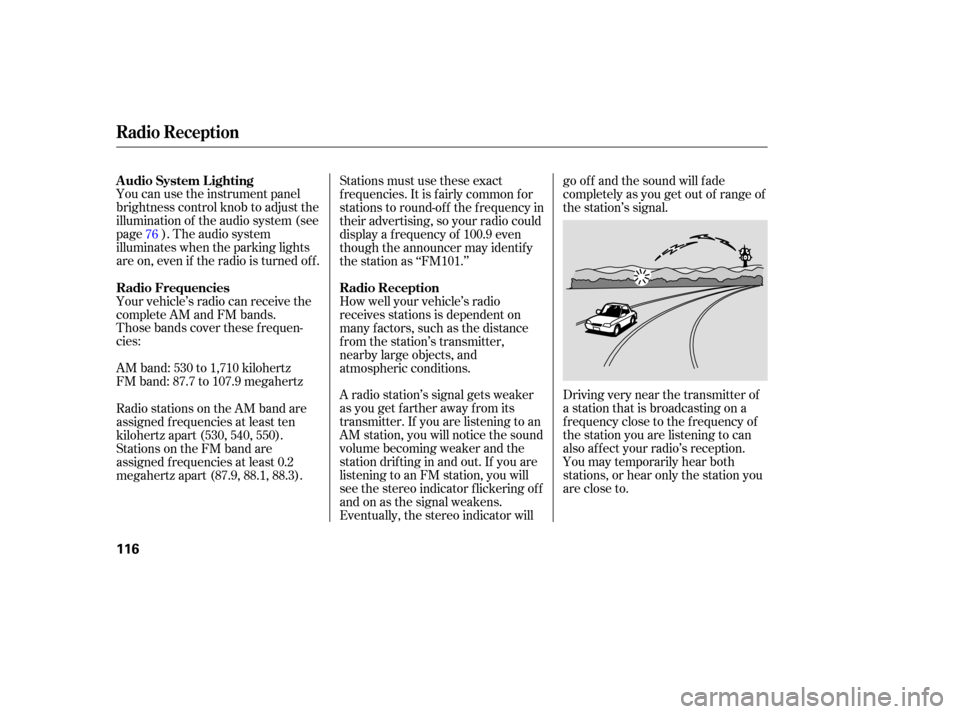
Driving very near the transmitter of
a station that is broadcasting on a
f requency close to the f requency of
the station you are listening to can
also af f ect your radio’s reception.
You may temporarily hear both
stations,orhearonlythestationyou
are close to.
Your vehicle’s radio can receive the
complete AM and FM bands.
How well your vehicle’s radio
receives stations is dependent on
many f actors, such as the distance
from the station’s transmitter,
nearby large objects, and
atmospheric conditions.
Radio stations on the AM band are
assigned f requencies at least ten
kilohertz apart (530, 540, 550).
Stations on the FM band are
assigned f requencies at least 0.2
megahertz apart (87.9, 88.1, 88.3). 76
A udio System L ighting
Radio Frequencies
Radio Reception
Radio Reception
116
Page 130 of 312

When using CD-R discs, use only
high quality CDs labeled f or audio
use.
When recording a CD-R, the
recording must be closed f or it to
be used by the system.
CD-RW discs will not work in this
unit.
Play only standard round CDs.
Odd-shaped CDs may jam in the
driveorcauseotherproblems.When a CD is not being played, store
it in its case to protect it f rom dust
and other contamination. To prevent
warpage, keep CDs out of direct
sunlight and extreme heat.
To clean a CD, use a clean sof t cloth.
Wipe across the CD f rom the center
to the outside edge.
AnewCDmayberoughonthe
inner and outer edges. The small
plastic pieces causing this roughness
can f lake of f and f all on the re-
cording surf ace of the CD, causing
skipping or other problems. Remove
these pieces by rubbing the inner
and outer edges with the side of a
pencil or pen.
Never try to insert f oreign objects in
the CD player or the magazine.
Handle a CD by its edges; never
touch either surf ace. Do not place
stabilizer rings or labels on the CD.
These, along with contamination
f rom f ingerprints, liquids, and f elt-tip
pens, can cause the CD to not play
properly, or possibly jam in the drive.
Handle your CDs properly to
prevent damage and skipping.
General Inf ormation
Protecting CDs
Protecting Your CDs
128
Do not use discs with adhesive labels.
The label can curl up and cause the
disc to jam in the unit.
Page 144 of 312

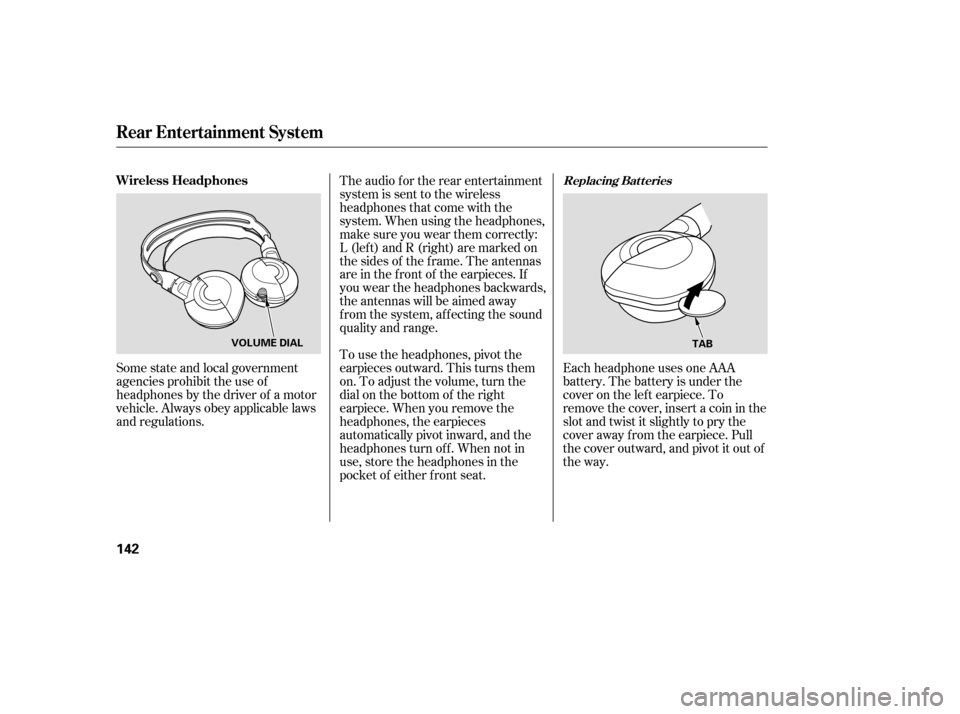
Each headphone uses one AAA
battery. The battery is under the
cover on the lef t earpiece. To
remove the cover, insert a coin in the
slot and twist it slightly to pry the
cover away f rom the earpiece. Pull
the cover outward, and pivot it out of
the way.
Some state and local government
agencies prohibit the use of
headphones by the driver of a motor
vehicle. Always obey applicable laws
and regulations. The audio f or the rear entertainment
system is sent to the wireless
headphones that come with the
system. When using the headphones,
make sure you wear them correctly:
L (lef t) and R (right) are marked on
the sides of the frame. The antennas
are in the f ront of the earpieces. If
you wear the headphones backwards,
the antennas will be aimed away
from the system, affecting the sound
quality and range.
To use the headphones, pivot the
earpieces outward. This turns them
on. To adjust the volume, turn the
dial on the bottom of the right
earpiece. When you remove the
headphones, the earpieces
automatically pivot inward, and the
headphones turn of f . When not in
use, store the headphones in the
pocket of either f ront seat.
Replacing Bat t eriesWireless Headphones
Rear Entertainment System
142
TAB
VOLUME DIAL
Page 147 of 312

The security system automatically
sets 15 seconds after you lock the
doors, hood, and the tailgate. For the
system to activate, you must lock the
doors f rom the outside with the key,
lock tab, door lock switch, or remote
transmitter. The security system
indicator next to the driver’s door
lock starts blinking immediately to
show you the system is setting itself .The security system will not set if
the hood, tailgate, or any door is not
f ully closed. If the system will not set,
check the Door and Tailgate Open
Monitor on the instrument panel
(see page ) to see if the doors and
tailgate are f ully closed. Since it is
notpartofthemonitordisplay,
manually check the hood.
The security system helps to protect
your vehicle and valuables f rom thef t.
The horn sounds and a combination
of headlights, parking lights, side
marker lights, and taillights f lashes if
someone attempts to break into your
vehicleorremovetheradio.This
alarm continues f or 2 minutes, then
the system resets. To reset an
alarming system bef ore the 2
minutes have elapsed, unlock the
driver’s door with the key or the
remote transmitter.
Once the security system is set,
opening any door or the tailgate
without using the key or the remote
transmitter, or the hood, will cause it
to alarm. It also alarms if the radio,
navigation and DVD components are
removed f rom the dashboard or the
wiring is cut. Use the remote transmitter
to quickly check that the hood,
tailgate and all doors are closed.
Push the lock button twice. There
should be an audible conf irmation
beep.
Do not attempt to alter this system
or add other devices to it. 62
Security System
Features
145
NOTE:
SECURITY SYSTEM INDICATOR
Page 149 of 312

You can increase the set cruising
speed in any of these ways:Press and hold the RESUME/
ACCEL button. When you reach
the desired cruising speed, release
the button.
Push on the accelerator pedal.
Accelerate to the desired cruising
speed, and press the SET/DECEL
button.
To increase your speed in very
small amounts, tap the RESUME/
ACCEL button. Each time you do
this, the vehicle will speed up
about 1 mph (1.6 km/h). Even with the cruise control turned
on, you can still use the accelerator
pedal to speed up f or passing. Af ter
completing the pass, take your foot
of f the accelerator pedal. The vehicle
will return to the set cruising speed.
Resting your f oot on the brake pedal
causes cruise control to cancel.
You can decrease the set cruising
speed in any of these ways:
If you need to decrease your
speed quickly, use the brakes as you
normally would.
Press and hold the SET/DECEL
button. Release the button when
you reach the desired speed.
To slow down in very small
amounts, tap the SET/DECEL
button. Each time you do this,
your vehicle will slow down about
1 mph (1.6 km/h).
Tap the brake pedal lightly with
your f oot. The CRUISE
CONTROL indicator on the
instrument panel will go out.
When the vehicle slows to the
desired speed, press the SET/
DECEL button.
Changing the Set Speed
Cruise Control
Features
147
NOTE: