ECO mode Acura MDX 2008 Navigation Manual
[x] Cancel search | Manufacturer: ACURA, Model Year: 2008, Model line: MDX, Model: Acura MDX 2008Pages: 171, PDF Size: 6.52 MB
Page 2 of 171
2Navigation System
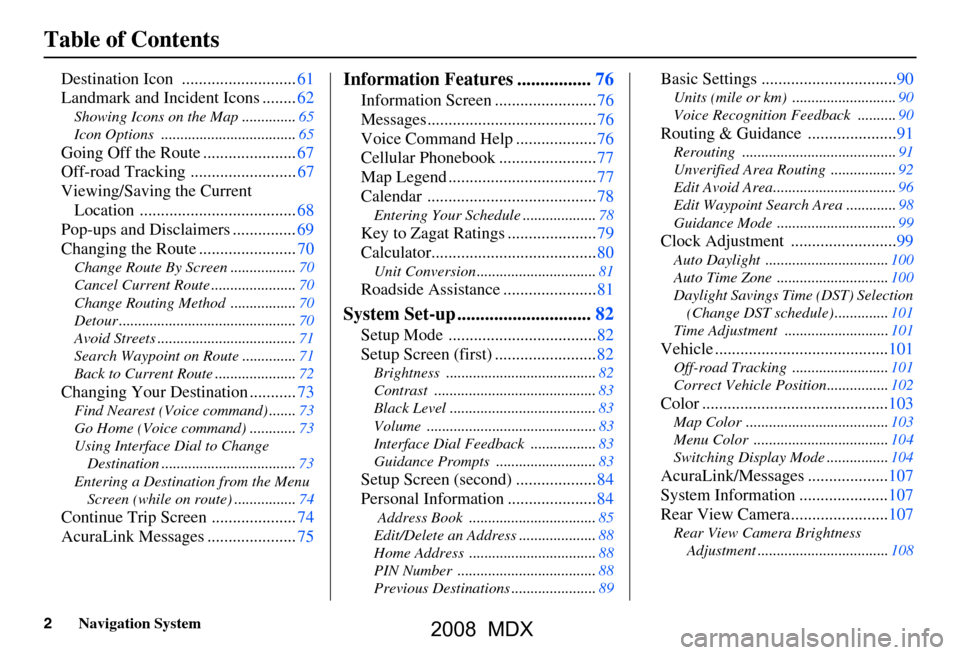
Table of Contents
Destination Icon ...........................61
Landmark and Incident Icons ........62
Showing Icons on the Map ..............65
Icon Options ...................................65
Going Off the Route ......................67
Off-road Tracking .........................67
Viewing/Saving the Current Location .....................................68
Pop-ups and Disclaimers ...............69
Changing the Route .......................70
Change Route By Screen .................70
Cancel Current Route ......................70
Change Routing Met hod .................70
Detour ..............................................70
Avoid Streets ....................................71
Search Waypoint on Route ..............71
Back to Current Route .....................72
Changing Your Destination ...........73
Find Nearest (Voice command) .......73
Go Home (Voice command) ............73
Using Interface Dial to Change Destination ...................................73
Entering a Destination from the Menu Screen (while on route) ................74
Continue Trip Screen ....................74
AcuraLink Messages .....................75
Information Features ................76
Information Screen ........................76
Messages........................................76
Voice Command Help ...................76
Cellular Phonebook .......................77
Map Legend ...................................77
Calendar ........................................78
Entering Your Schedule ...................78
Key to Zagat Ratings .....................79
Calculator.......................................80
Unit Conversion ...............................81
Roadside Assistance ......................81
System Set-up .............................82
Setup Mode ...................................82
Setup Screen (first) ........................82
Brightness .......................................82
Contrast ..........................................83
Black Level ......................................83
Volume ............................................83
Interface Dial Feedbac k .................83
Guidance Prompts ...... ....................83
Setup Screen (second) ...................84
Personal Information .....................84
Address Book .................................85
Edit/Delete an Address ....................88
Home Address .................................88
PIN Number ....................................88
Previous Destinations ......................89
Basic Settings ................................90
Units (mile or km) ...........................90
Voice Recognition Fe edback ..........90
Routing & Guidance .....................91
Rerouting ........................................91
Unverified Area Routing .................92
Edit Avoid Area................................96
Edit Waypoint Search Area .............98
Guidance Mode .......... .....................99
Clock Adjustment .........................99
Auto Daylight ................................100
Auto Time Zone .............................100
Daylight Savings Ti me (DST) Selection
(Change DST schedul e) ..............101
Time Adjustment ...........................101
Vehicle .........................................101
Off-road Tracking ...... ...................101
Correct Vehicle Position................102
Color ............................................103
Map Color .....................................103
Menu Color ...................................104
Switching Display Mode ................104
AcuraLink/Messages ...................107
System Information .....................107
Rear View Camera.......................107
Rear View Camera Brightness
Adjustment ..................................108
2008 MDX
Page 22 of 171
22Navigation System
Getting Started
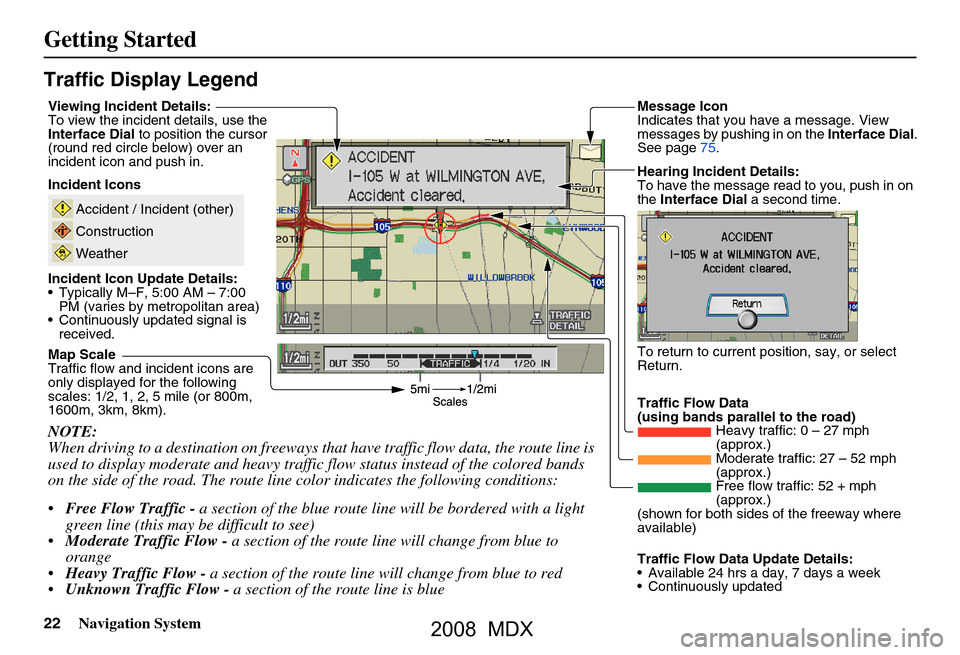
Traffic Display Legend
NOTE:
When driving to a destination on freeways that have traffic flow data, the route line is
used to display moderate and heavy traffic flow status instead of the colored bands
on the side of the road. The route line color indicates the following conditions:
Free Flow Traffic - a section of the blue route line will be bordered with a light
green line (this may be difficult to see)
Moderate Traffic Flow - a section of the route line will change from blue to
orange
Heavy Traffic Flow - a section of the route line will change from blue to red
Unknown Traffic Flow - a section of the route line is blue
Map Scale
Traffic flow and incident icons are
only displayed for the following
scales: 1/2, 1, 2, 5 mile (or 800m,
1600m, 3km, 8km).
Incident Icons
Incident Icon Update Details:
Typically M–F, 5:00 AM – 7:00 PM (varies by metropolitan area)
Continuously updated signal is received.
Accident / Incident (other)
Construction
Weather
Traffic Flow Data
(using bands parallel to the road) Heavy traffic: 0 – 27 mph
(approx.)
Moderate traffic: 27 – 52 mph
(approx.)
Free flow traffic: 52 + mph
(approx.)
(shown for both sides of the freeway where
available)
Viewing Incident Details:
To view the incident
details, use the
Interface Dial to position the cursor
(round red circle below) over an
incident icon and push in. Hearing Incident Details:
To have the message read to you, push in on
the Interface Dial a second time.
To return to current position, say, or select
Return.
Message Icon
Indicates that you have a message. View
messages by pushing in on the Interface Dial.
See page75.
Traffic Flow Data Update Details:
Available 24 hrs a day, 7 days a week
Continuously updated
2008 MDX
Page 29 of 171
Navigation System29
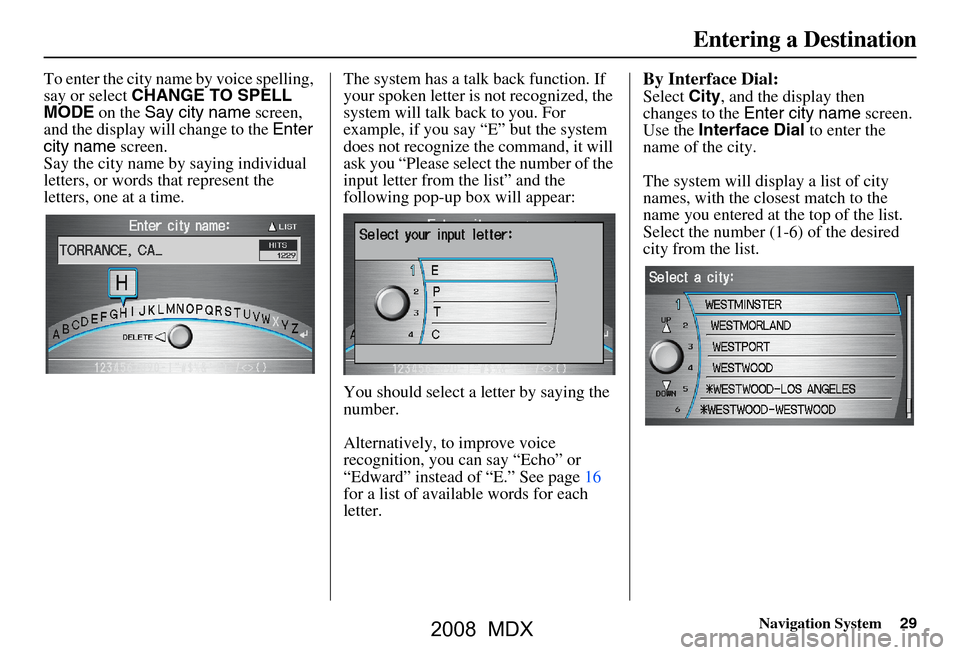
To enter the city name by voice spelling,
say or select CHANGE TO SPELL
MODE on the Say city name screen,
and the display will change to the Enter
city name screen.
Say the city name by saying individual
letters, or words that represent the
letters, one at a time. The system has a talk back function. If
your spoken letter is
not recognized, the
system will talk back to you. For
example, if you say “E” but the system
does not recognize the command, it will
ask you “Please select the number of the
input letter from the list” and the
following pop-up box will appear:
You should select a letter by saying the
number.
Alternatively, to improve voice
recognition, you can say “Echo” or
“Edward” instead of “E.” See page16
for a list of availa ble words for each
letter.By Interface Dial:
Select City, and the display then
changes to the Enter city name screen.
Use the Interface Dial to enter the
name of the city.
The system will display a list of city
names, with the closest match to the
name you entered at the top of the list.
Select the number (1-6) of the desired
city from the list.
Entering a Destination
2008 MDX
Page 40 of 171
40Navigation System
Selecting the City
This is helpful if the street runs through
several cities, and you know what city
includes the street. The city you are in is
displayed on the screen. If the city you
want is displayed on the screen, say
“Select current city.” If your desired
destination is in another city, say or
enter another city.
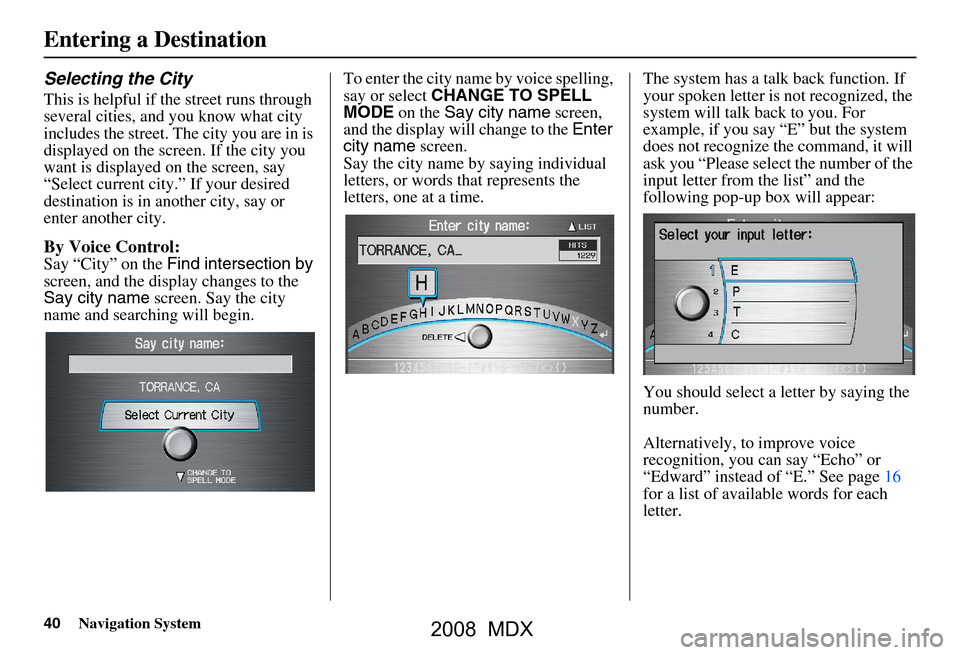
By Voice Control:
Say “City” on the Find intersection by
screen, and the disp lay changes to the
Say city name screen. Say the city
name and searching will begin. To enter the city name by voice spelling,
say or select
CHANGE TO SPELL
MODE on the Say city name screen,
and the display will change to the Enter
city name screen.
Say the city name by saying individual
letters, or words that represents the
letters, one at a time. The system has a talk back function. If
your spoken letter is not recognized, the
system will talk back to you. For
example, if you say “E” but the system
does not recognize the command, it will
ask you “Please select the number of the
input letter from the list” and the
following pop-up box will appear:
You should select a letter by saying the
number.
Alternatively, to improve voice
recognition, you can say “Echo” or
“Edward” instead of “E.” See page16
for a list of available words for each
letter.
Entering a Destination
2008 MDX
Page 51 of 171
Navigation System51
Driving to Your Destination
Changing the Routing Method
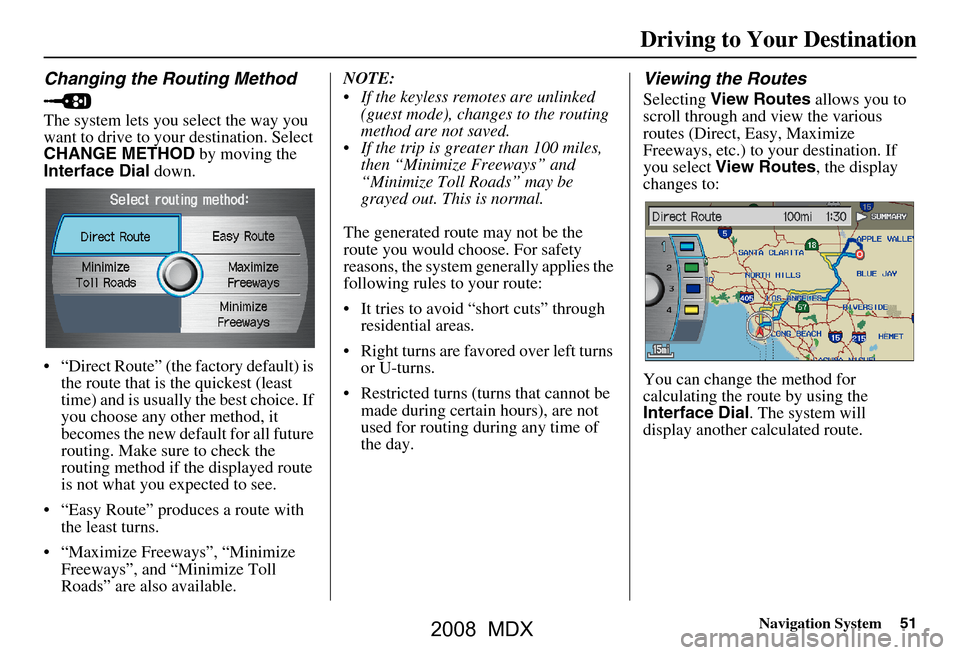
The system lets you select the way you
want to drive to your destination. Select
CHANGE METHOD by moving the
Interface Dial down.
“Direct Route” (the factory default) is the route that is the quickest (least
time) and is usually the best choice. If
you choose any other method, it
becomes the new default for all future
routing. Make sure to check the
routing method if the displayed route
is not what you expected to see.
“Easy Route” produces a route with the least turns.
“Maximize Freeways”, “Minimize Freeways”, and “Minimize Toll
Roads” are also available. NOTE:
If the keyless remo
tes are unlinked
(guest mode), changes to the routing
method are not saved.
If the trip is greater than 100 miles, then “Minimize Freeways” and
“Minimize Toll Roads” may be
grayed out. This is normal.
The generated route may not be the
route you would choose. For safety
reasons, the system generally applies the
following rules to your route:
It tries to avoid “short cuts” through residential areas.
Right turns are favored over left turns or U-turns.
Restricted turns (turns that cannot be made during certain hours), are not
used for routing during any time of
the day.
Viewing the Routes
Selecting View Routes allows you to
scroll through and view the various
routes (Direct, Easy, Maximize
Freeways, etc.) to your destination. If
you select View Routes , the display
changes to:
You can change the method for
calculating the route by using the
Interface Dial . The system will
display another calculated route.
2008 MDX
Page 99 of 171
Navigation System99
System Set-up
For “Places along the route,” the system
looks in front of yo u within a corridor
width specified by your values for “On
Freeways” or “On Surface Street.” The
system checks the upcoming area, based
on your input.
For “Places around the destination,” the
system searches outwards in a spiral
from the destination. In this case,
specific search values are not needed;
the matches are displayed in order of
distance from destination.
NOTE:
These settings do not affect the search
range used for the voice commands like,
“Find nearest gas station,” that are
also available wh en viewing the map
screen.Guidance Mode
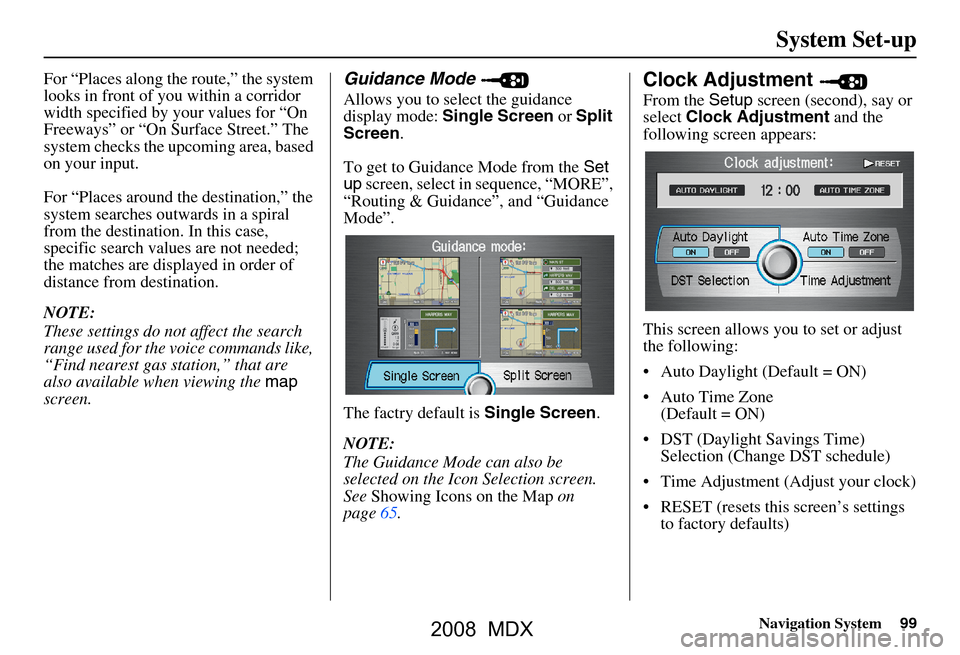
Allows you to select the guidance
display mode: Single Screen or Split
Screen .
To get to Guidance Mode from the Set
up screen, select in sequence, “MORE”,
“Routing & Guidance”, and “Guidance
Mode”.
The factry default is Single Screen.
NOTE:
The Guidance Mode can also be
selected on the Icon Selection screen.
See Showing Icons on the Map on
page65.
Clock Adjustment
From the Setup screen (second), say or
select Clock Adjustment and the
following screen appears:
This screen allows y ou to set or adjust
the following:
Auto Daylight (Default = ON)
Auto Time Zone (Default = ON)
DST (Daylight Savings Time) Selection (Change DST schedule)
Time Adjustment (Adjust your clock)
RESET (resets this screen’s settings to factory defaults)
2008 MDX
Page 103 of 171
Navigation System103
System Set-up
4. Rotate the Interface Dial knob so
the vehicle position arrowhead is
pointing in the corr ect direction, and
push in on the Interface Dial . The
display will return to the previous
screen.
NOTE:
If you continually have to do this, there
are either problems in the database or
GPS reception problems. See
Accessories Precautions on page5.
5. As you drive, the current road will be displayed at the bottom of the screen.Color
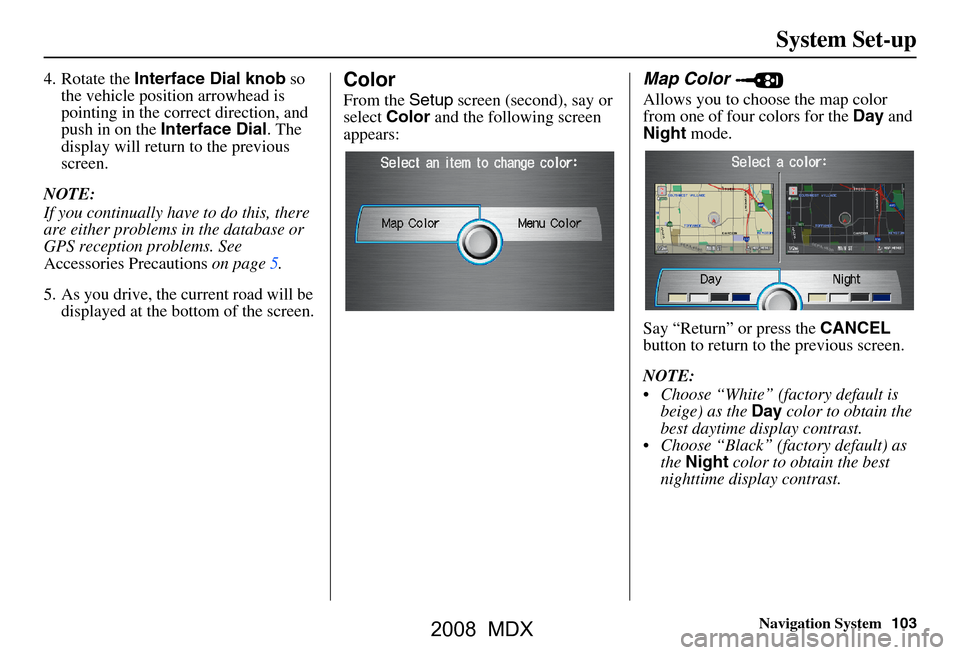
From the Setup screen (second), say or
select Color and the following screen
appears:
Map Color
Allows you to choose the map color
from one of four colors for the Day and
Night mode.
Say “Return” or press the CANCEL
button to return to the previous screen.
NOTE:
Choose “White” (factory default is beige) as the Day color to obtain the
best daytime display contrast.
Choose “Black” (factory default) as the Night color to obtain the best
nighttime display contrast.
2008 MDX
Page 105 of 171
Navigation System105
System Set-up
I
Recommended Display mode Day/Night settings:
With the headlights on, select mid range for the dash illumination (see Own er’s manual for location of knob).
With the headlights off, select mid range for the dash illumination (see Owner’s manual for location of knob).
On the Setup “Color” adjustment screen, choose White for the map Day display, and black for the map Night display (see
page103). Inappropriate adjustment of these colors can cause the Day/Night modes to appear inoperative.
llumination control Priority Operation Override conditions
Display mode button
(
see page11) 1 Allows selection of
Day, Night or Off display
mode. This button has the highest priority and
overrides all other displa y control adjustments
listed below. When the car is restarted, the display mode
previously selected by th
is button is canceled,
and the display mode is determined by one of
the controls below.
Sunlight Sensor (Middle of
dash near the windshield).
(See Owner’s manual for
location) 2 If the sunlight sensor
detects daylight and the
headlights are turned on, the navi automatically
overrides (cancels) the Night display and
displays the Day display mode once the vehicle
begins to move. If desired, use the
Display mode
button to override this automatic choice.
Dash illumination adjustment
knob (See Owner’s manual for
location) 3 When headlights are turned on, and you wish to
have the Day display mode, then adjust the
illumination to the full bright setting (beeps). When the headlights are turned
ON, adjust the
dash brightness down (counterclockwise) from
the maximum brightness position.
Headlights (On/Off) 4 When turned on, it changes the display to the Night display mode. The previous three
controls listed above ca n “cancel” this function. Use the
Display mode
button , or
adjust the dash illuminati on to full bright to set
the display to your desired choice.
Map Day/Night screen color
choice (
see page103 for the
Day and Night color choices) N/A The user can select the color of the screen that
will be displayed for the Day, and Night
display modes described above. For best contrast
, ensure that the Map “color”
is white for Day, and black for Night.
2008 MDX
Page 135 of 171
Navigation System135
Frequently Asked Questions
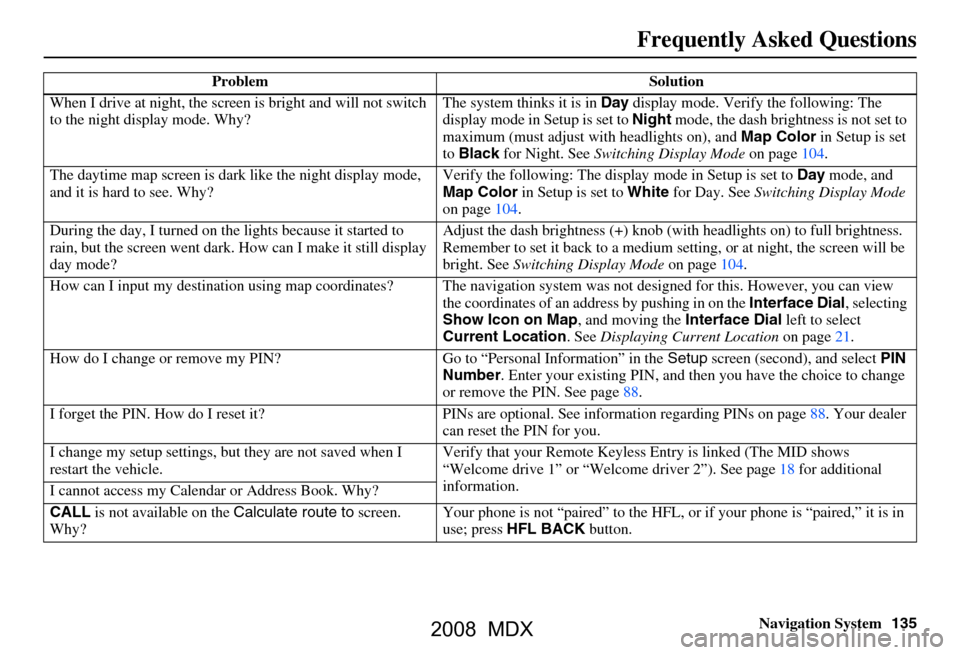
When I drive at night, the screen is bright and will not switch
to the night display mode. Why? The system thinks it is in
Day display mode. Verify the following: The
display mode in Setup is set to Night mode, the dash brightness is not set to
maximum (must adjust with headlights on), and Map Color in Setup is set
to Black for Night. See Switching Display Mode on page104.
The daytime map screen is dark like the night display mode,
and it is hard to see. Why? Verify the following: The disp
lay mode in Setup is set to Day mode, and
Map Color in Setup is set to White for Day. See Switching Display Mode
on page104.
During the day, I turned on the lights because it started to
rain, but the screen went dark. How can I make it still display
day mode? Adjust the dash brightness (+) knob (with
headlights on) to full brightness.
Remember to set it back to a medium set ting, or at night, the screen will be
bright. See Switching Display Mode on page104.
How can I input my destination using map coordinates? The navigation system was not designed for this. However, you can view
the coordinates of an a ddress by pushing in on the Interface Dial, selecting
Show Icon on Map , and moving the Interface Dial left to select
Current Location . See Displaying Current Location on page21.
How do I change or remove my PIN? Go to “Personal Information” in the Setup screen (second) , and select PIN
Number . Enter your existing PIN, and then you have the choice to change
or remove the PIN. See page88.
I forget the PIN. How do I reset it? PI Ns are optional. See information regarding PINs on page88. Your dealer
can reset the PIN for you.
I change my setup settings, bu t they are not saved when I
restart the vehicle. Verify that your Remote Keyless
Entry is linked (The MID shows
“Welcome drive 1” or “Welcome dr iver 2”). See page18 for additional
information.
I cannot access my Calendar or Address Book. Why?
CALL is not available on the Calculate route to screen.
Why? Your phone is not “paired” to the HFL,
or if your phone is “paired,” it is in
use; press HFL BACK button.
Problem Solution
2008 MDX
Page 145 of 171
Navigation System145
Glossary
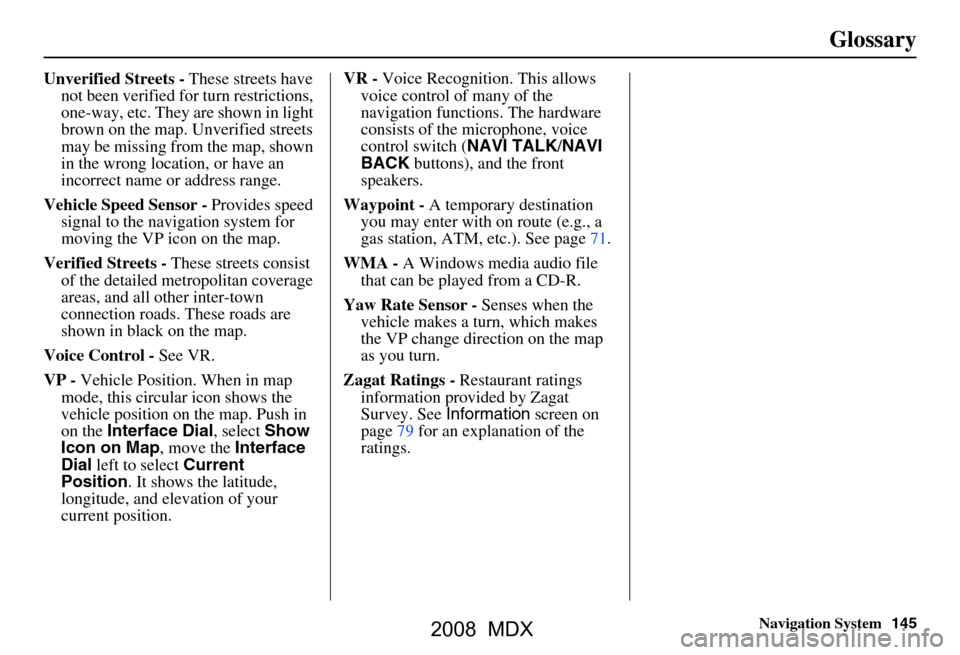
Unverified Streets - These streets have
not been verified for turn restrictions,
one-way, etc. They are shown in light
brown on the map. Unverified streets
may be missing from the map, shown
in the wrong location, or have an
incorrect name or address range.
Vehicle Speed Sensor - Provides speed
signal to the navigation system for
moving the VP icon on the map.
Verified Streets - These streets consist
of the detailed metropolitan coverage
areas, and all other inter-town
connection roads. These roads are
shown in black on the map.
Voice Control - See VR.
VP - Vehicle Position. When in map
mode, this circular icon shows the
vehicle position on the map. Push in
on the Interface Dial , select Show
Icon on Map , move the Interface
Dial left to select Current
Position . It shows the latitude,
longitude, and elevation of your
current position. VR -
Voice Recognition. This allows
voice control of many of the
navigation functions. The hardware
consists of the microphone, voice
control switch ( NAVI TALK/NAVI
BACK buttons), and the front
speakers.
Waypoint - A temporary destination
you may enter with on route (e.g., a
gas station, ATM, etc.). See page71.
WMA - A Windows media audio file
that can be played from a CD-R.
Yaw Rate Sensor - Senses when the
vehicle makes a turn, which makes
the VP change direction on the map
as you turn.
Zagat Ratings - Restaurant ratings
information prov ided by Zagat
Survey. See Information screen on
page79 for an explanation of the
ratings.
2008 MDX