check engine Acura MDX 2012 Owner's Guide
[x] Cancel search | Manufacturer: ACURA, Model Year: 2012, Model line: MDX, Model: Acura MDX 2012Pages: 621, PDF Size: 11.15 MB
Page 467 of 621

As required by the FCC:
This device complies with Part 15 of the
FCC rules. Operation is subject to the
following two conditions: (1) This device
may not cause harmful interference, and
(2) this device must accept any
interference received, including
interference that may cause undesired
operation.
Changes or modifications not expressly
approved by the party responsible for
compliance could void the user's
authority to operate the equipment.
This device complies with Industry
Canada Standard RSS-210.
Operation is subject to the following two
conditions: (1) this device may not cause
interference, and (2) this device must
accept any interference that may cause
undesired operation of the device.
Braking System
Your vehicle is equipped with disc
brakes at all four wheels. A power
assist helps reduce the effort needed
on the brake pedal. The emergency
brake assist system increases the
stopping force when you depress the
brake pedal hard in an emergency
situation. The anti-lock brake system
(ABS) helps you retain steering
control when braking very hard.
Resting your foot on the pedal keeps
the brakes applied lightly, builds up
heat, and reduces their effectiveness
and reduces brake pad life. In
addition, fuel economy can be
reduced. It also keeps your brake
lights on all the time, confusing
drivers behind you.Constant application of the brakes
when going down a long hill builds
up heat and reduces their
effectiveness. Use the engine to
assist the brakes by taking your foot
off the accelerator and downshifting
to a lower gear.
Check the brakes after driving
through deep water. Apply the
brakes moderately to see if they feel
normal. If not, apply them gently and
frequently until they do. Be extra
cautious in your driving.
Tire Pressure Monitoring System (TPMS), Braking System460
Page 481 of 621

You will also see a‘‘CHECK VSA
SYSTEM’’message on the multi-
information display if there is a
problem with the VSA system.
If the low tire pressure/TPMS
indicator comes on, or the multi-
information display shows a‘‘CHECK
TPMS SYSTEM’’message with the
indicator flashing (see page 458), the
VSA system automatically turns on
even if the VSA system is turned off
by pressing the VSA OFF button. If
this case, you cannot turn the VSA
system off by pressing the VSA OFF
button again.
Without VSA, your vehicle will have
normal braking and cornering ability,
but it will not have VSA traction and
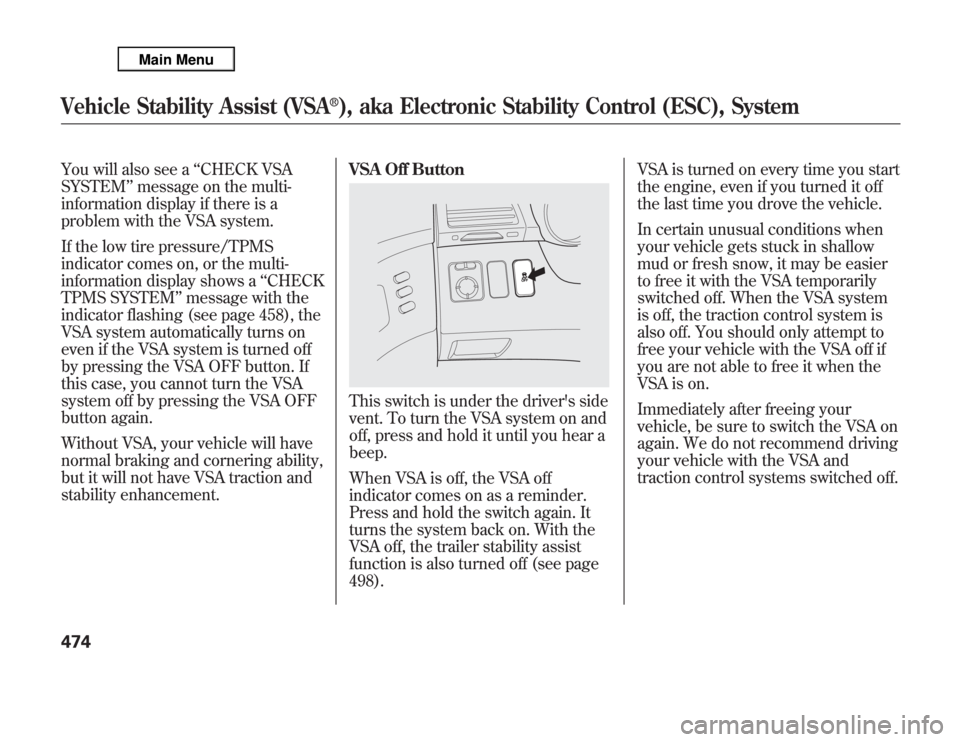
stability enhancement.VSA Off Button
This switch is under the driver's side
vent. To turn the VSA system on and
off, press and hold it until you hear a
beep.
When VSA is off, the VSA off
indicator comes on as a reminder.
Press and hold the switch again. It
turns the system back on. With the
VSA off, the trailer stability assist
function is also turned off (see page
498).VSA is turned on every time you start
the engine, even if you turned it off
the last time you drove the vehicle.
In certain unusual conditions when
your vehicle gets stuck in shallow
mud or fresh snow, it may be easier
to free it with the VSA temporarily
switched off. When the VSA system
is off, the traction control system is
also off. You should only attempt to
free your vehicle with the VSA off if
you are not able to free it when the
VSA is on.
Immediately after freeing your
vehicle, be sure to switch the VSA on
again. We do not recommend driving
your vehicle with the VSA and
traction control systems switched off.
Vehicle Stability Assist (VSA
®), aka Electronic Stability Control (ESC), System
474
Page 494 of 621

Your vehicle has been designed
primarily to carry passengers and
their cargo. You can also use it to tow
a trailer if you carefully observe the
load limits, use the proper
equipment, and follow the guidelines
in this section.
If your vehicle is equipped with the
blind spot information system (BSI),
do not use it when towing a trailer.
For more information see page 482.Break-In PeriodAvoid towing a trailer during your
vehicle's first 600 miles (1,000 km)
(see page 422).
Be sure to read theOff-Highway
Driving Guidelinessection on page
500 if you plan to tow off paved
surfaces.Your vehicle is equipped with a
trailer stability assist to help stabilize
the vehicle/trailer combination by
reducing the vehicle speed. For more
information, see page 498.
Exceeding any load limit or
improperly loading your vehicle
and trailer can cause a crash in
which you can be seriously hurt
or killed.
Check the loading of your
vehicle and trailer carefully
before starting to drive.Load Limit
Total Trailer WeightThe maximum allowable weight of
the trailer and everything in or on it
depends on the number of occupants
in your vehicle and the type of trailer
being towed (see page 490).
Towing a trailer that is too heavy can
seriously affect your vehicle's
handling and performance. It can
also damage the engine and
drivetrain.
CONTINUED
Towing a Trailer
487
Driving
Page 506 of 621

Under these conditions, trailer
stability assist begins to stabilize the
vehicle/trailer combination by
reducing the vehicle speed. The
control unit sends signals to
selectively apply the brakes and
regulate the engine output. The
brake lights of your vehicle will be
turned on automatically by the
system even if you do not keep the
pressure on the brake pedal.
When the brakes are applied, the
trailer's brake lights come on along
with the vehicle brake lights.
When the trailer stability assist
activates, you will see the VSA
system indicator blink. There may
also be some noise from the VSA
hydraulic system.Trailer stability assist cannot prevent
a loss of control. Always reduce the
vehicle speed and steer firmly. Do
not brake suddenly or make quick
steering motion. It could cause the
trailer to jackknife or turn over and
the system becomes ineffective.
Trailer stability assist cannot prevent
swaying that can occur in crosswinds
and in normal and emergency
driving maneuvers. It helps only to
stabilize the vehicle/trailer
combination in these conditions,
after the oscillation becomes severe.
Trailer stability assist will also be
ineffective while driving at high
speed or towing a trailer with a high
center of gravity.
Always obey the recommended
speed limits for towing a trailer, see
page 497.Trailer Stability Assist Failure
The control unit monitors the VSA
circuitry and the braking system. If
there is a problem with the brake
lighting system, the trailer stability
assist function shuts down and the
‘‘CHECK TRAILER STABILITY
ASSIST’’message appears on the
multi-information display.
If you see this message, have your
vehicle checked at your dealer as
soon as possible.
CONTINUED
Trailer Stability Assist
499
Driving
Page 507 of 621

In this case, your vehicle still has the
VSA traction and stability
enhancement, but it will not have the
trailer stability assist function.
If there is a problem with the VSA
system, the system and trailer
stability assist shuts off. The VSA
system indicator also come on (see
page 473).
The ABS indicator and the brake
system indicator may also come on
along with the VSA system indicator.
If you see these warning indicators,
have your vehicle checked at your
dealer as soon as possible.If you turn off the VSA, the trailer
stability assist function also shuts off.
Press and hold the VSA off button
until you hear a beep (see page 474).
The VSA off indicator comes on as a
reminder. Press and hold the switch
again to turn the system on.
The function turns on every time you
start the engine along with the VSA,
even if you turned it off the last time
you drove the vehicle.Off-Highway Driving Guidelines
General Information
Your vehicle has been designed
primarily for use on pavement. But
its higher ground clearance and
super handling-all wheel drive
(SH-AWD) system allow you to
occasionally travel on unpaved roads,
to campgrounds, picnic sites, and
similar locations. It is not designed
for trailblazing, mountain climbing,
or other challenging off-road
activities.
If you decide to drive on unpaved
roads, you will find that it requires
somewhat different driving skills.
Your vehicle will also handle
somewhat differently than it does on
pavement. Be sure to pay extra
attention to the precautions and tips
in this section, and get acquainted
with your vehicle before leaving the
pavement.Trailer Stability Assist, Off-Highway Driving Guidelines500
Page 512 of 621

This section explains why it is
important to keep your vehicle well
maintained and how to follow basic
maintenance safety precautions.
This section also includes
instructions on how to read the
Maintenance Minder messages on
the multi-information display, and
instructions for simple maintenance
tasks you may want to take care of
yourself.
If you have the skills and tools to
perform more complex maintenance
tasks on your vehicle, you may want
to purchase the service manual. See
page 597 for information on how to
obtain a copy, or see your dealer.U.S. Vehicles:
Maintenance, replacement, or
repair of emissions control
devices and systems may be done
by any automotive repair
establishment or individual using
parts that are‘‘certified’’to EPA
standards.Maintenance Safety
.....................
506
Maintenance Minder
TM
...............
507
Fluid Locations
...........................
515
Engine Compartment Cover
........
516
Adding Engine Oil
......................
517
Changing the Engine Oil and
Filter
.......................................
518
Engine Coolant
...........................
520
Windshield Washers
...................
522
Automatic Transmission Fluid
....
523
Brake Fluid
.................................
525
Power Steering Fluid
..................
526
Timing Belt
.................................
526
Lights
..........................................
527
Dust and Pollen Filter
.................
534
Cleaning the Seat Belts
...............
534
Floor Mats
..................................
535
Wiper Blades
..............................
536
Tires
...........................................
540
Checking the Battery
..................
547
Vehicle Storage
...........................
548
Maintenance
505
Maintenance
Page 520 of 621

U.S. Vehicles:
According to state and federal
regulations, failure to perform
maintenance on the items marked
with#will not void your emissions
warranties. However, Acura
recommends that all maintenance
services be performed in accordance
with the intervals indicated by the
multi-information display.Owner's Maintenance Checks
You should check the following
items at the specified intervals. If you
are unsure of how to perform any
check, turn to the appropriate page
listed.
●
Engine oil level-Check every
time you fill the fuel tank. See page
427.
●
Engine coolant level-Check the
radiator reserve tank every time
you fill the fuel tank. See page 427.
●
Automatic transmission-Check
the fluid level monthly. See page
523.
●
Brakes-Check the fluid level
monthly. See page 525.
●
Tires-Check the tire pressure
monthly. Examine the tread for
wear and foreign objects. See page
541.
●
Lights-Check the operation of
all the lights monthly. See page
527.
Maintenance Minder
TM
513
Maintenance
Page 521 of 621

Symbol Maintenance Main Items
A
●Replace engine oil
1
B
●Replace engine oil
1and oil filter
●Inspect front and rear brakes●Check parking brake adjustment●Inspect these items:●Tie rod ends, steering gear box, and boots●Suspension components●Driveshaft boots●Brake hoses and lines (including ABS/VSA)●All fluid levels and condition of fluids●Exhaust system
#
●Fuel lines and connections
#
1: If the message‘‘SERVICE DUE NOW’’does not appear more than
12 months after the display is reset, change the engine oil every
year.
#: See information on maintenance and emissions warranty in the
first column on page 512.
NOTE:
●Independent of the Maintenance Midner information, replace
the brake fluid every 3 years.●Inspect idle speed every 160,000 miles (256,000 km).●Adjust the valves during services A, B, 1, 2, or 3 if they are
noisy.Symbol Maintenance Sub Items
1
●Rotate tires
2●Replace air cleaner element
If you drive in dusty conditions, replace every 15,000
miles (24,000 km).●Replace dust and pollen filter
If you drive primarily in urban areas that have high
concentrations of soot in the air from industry and from
diesel-powered vehicles, replace every 15,000 miles
(24,000 km).●Inspect drive belt
3●Replace transmission and transfer fluid
4●Replace spark plugs●Replace timing belt and inspect water pump
If you drive regularly in very high temperatures (over
110°F, 43°C), in very low temperatures (under-20°F,-
29°C), or towing a trailer, replace every 60,000 miles (U.
S.)/100,000 km (Canada).●Inspect valve clearance
5●Replace engine coolant
6●Replace rear differential fluid
Driving in mountainous areas at very low vehicle
speeds or trailer towing results in higher level of
mechanical (shear) stress to fluid. This requires
differential fluid changes more frequently than
recommended by the Maintenance Minder. If you
regularly drive your vehicle under these conditions,
have the differential fluid changed at 7,500 miles (12,000
km), then every 15,000 miles (24,000 km).
Maintenance Minder
TM
Maintenance Minder
514
Page 524 of 621

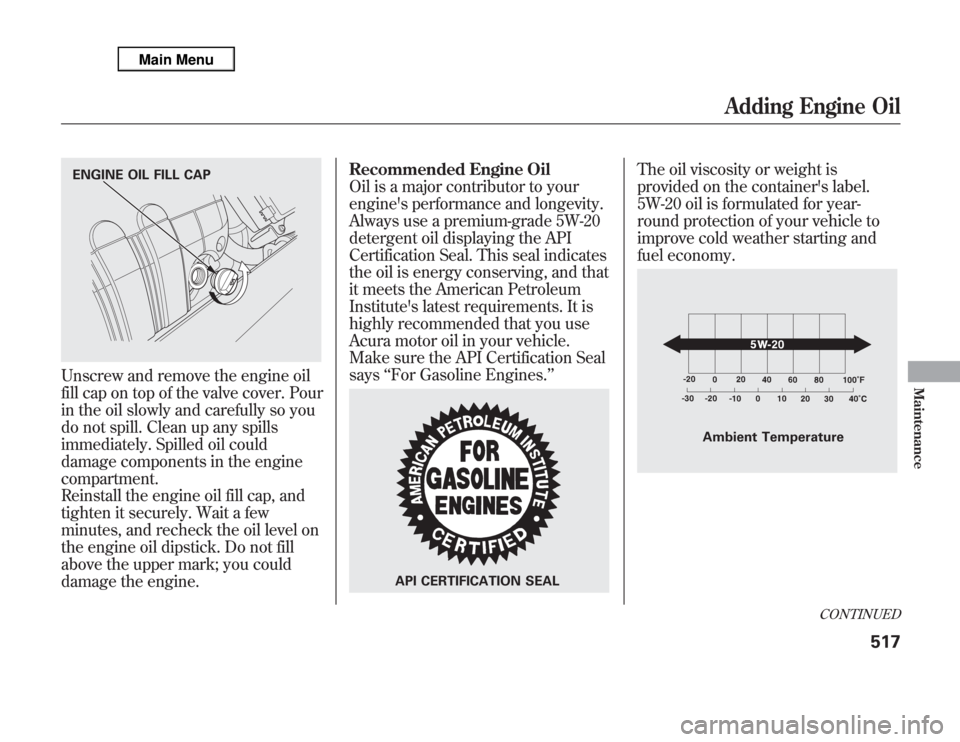
Unscrew and remove the engine oil
fill cap on top of the valve cover. Pour
in the oil slowly and carefully so you
do not spill. Clean up any spills
immediately. Spilled oil could
damage components in the engine
compartment.
Reinstall the engine oil fill cap, and
tighten it securely. Wait a few
minutes, and recheck the oil level on
the engine oil dipstick. Do not fill
above the upper mark; you could
damage the engine.Recommended Engine Oil
Oil is a major contributor to your
engine's performance and longevity.
Always use a premium-grade 5W-20
detergent oil displaying the API
Certification Seal. This seal indicates
the oil is energy conserving, and that
it meets the American Petroleum
Institute's latest requirements. It is
highly recommended that you use
Acura motor oil in your vehicle.
Make sure the API Certification Seal
says‘‘For Gasoline Engines.’’
The oil viscosity or weight is
provided on the container's label.
5W-20 oil is formulated for year-
round protection of your vehicle to
improve cold weather starting and
fuel economy.
ENGINE OIL FILL CAP
API CERTIFICATION SEAL
Ambient Temperature
CONTINUED
Adding Engine Oil
517
Maintenance
Page 526 of 621

3. Remove the oil filter, and let the
remaining oil drain. A special
wrench (available from your
dealer) is required.
Make sure the oil filter gasket is
not stuck to the engine block. If it
is, remove it before installing a
new oil filter.4. Install a new oil filter according to
the instructions that come with it.
Make sure to clean off any dirt and
dust on the connecting surface of a
new oil filter.
5. Put a new washer on the drain
bolt, then reinstall the drain bolt.
Tighten the drain bolt to:
29 lbf·ft (39 N·m, 4.0 kgf·m)
6. Refill the engine with the
recommended oil.
Engine oil change capacity
(including filter):
4.5 US qt (4.3 L)7. Reinstall the engine oil fill cap.
Start the engine. The oil pressure
indicator should go out within 5
seconds. If it does not, turn off the
engine, and check your work.
8. Let the engine run for several
minutes, then check the drain bolt
and oil filter for leaks.
9. Turn off the engine and let it sit for
several minutes, then check the oil
level on the dipstick. If necessary,
add more oil.
Improper disposal of engine oil can be
harmful to the environment. If you
change your own oil, please dispose of
the used oil properly. Put it in a sealed
container, and take it to a recycling
center. Do not discard it in a trash bin
or dump it on the ground.
OIL FILTER
Changing the Engine Oil and Filter
519
Maintenance