light Acura MDX 2015 Owners Manual
[x] Cancel search | Manufacturer: ACURA, Model Year: 2015, Model line: MDX, Model: Acura MDX 2015Pages: 505, PDF Size: 18.62 MB
Page 407 of 505
uuMaintenance Under the Hood uChanging the Engine Oil and Oil Filter
406Maintenance
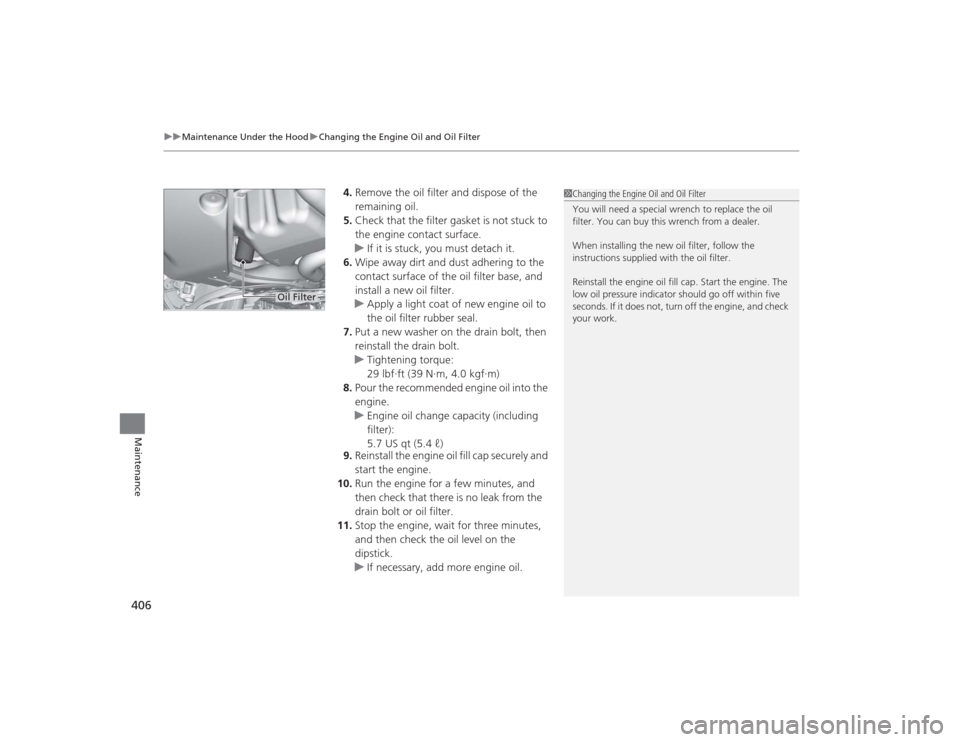
4. Remove the oil filter and dispose of the
remaining oil.
5. Check that the filter gasket is not stuck to
the engine contact surface.
u If it is stuck, you must detach it.
6. Wipe away dirt and dust adhering to the
contact surface of the oil filter base, and
install a new oil filter.
u Apply a light coat of new engine oil to
the oil filter rubber seal.
7. Put a new washer on the drain bolt, then
reinstall the drain bolt.
u Tightening torque:
29 lbf∙ft (39 N∙m, 4.0 kgf∙m)
8. Pour the recommended engine oil into the
engine.
u Engine oil change capacity (including
filter):
5.7 US qt (5.4 ℓ)
9. Reinstall the engine oil fill cap securely and
start the engine.
10. Run the engine for a few minutes, and
then check that there is no leak from the
drain bolt or oil filter.
11. Stop the engine, wait for three minutes,
and then check the oil level on the
dipstick.
u If necessary, add more engine oil.
1Changing the Engine Oil and Oil Filter
You will need a special wrench to replace the oil
filter. You can buy this wrench from a dealer.
When installing the new oil filter, follow the
instructions supplied with the oil filter.
Reinstall the engine oil fill cap. Start the engine. The
low oil pressure indicator should go off within five
seconds. If it does not, turn off the engine, and check
your work.
Oil Filter
Page 412 of 505

411Maintenance
Replacing Light BulbsHeadlight BulbsHeadlight bulbs are LED type. Have an authorized Acura dealer inspect and replace
the light assembly.Daytime Running Light BulbsDaytime running light bulbs are LED type. Have an authorized Acura dealer inspect
and replace the light assembly.
1 Headlight Bulbs
The headlight aim is set by the factory, and does not
need to be adjusted. However, if you regularly carry
heavy items in the cargo area or tow a trailer, have
the aiming readjusted at a dealer or by a qualified
technician.
Page 413 of 505
412
uuReplacing Light Bulbs uFront Turn Signal/Front Side Marker/Parking Light Bulbs
Maintenance
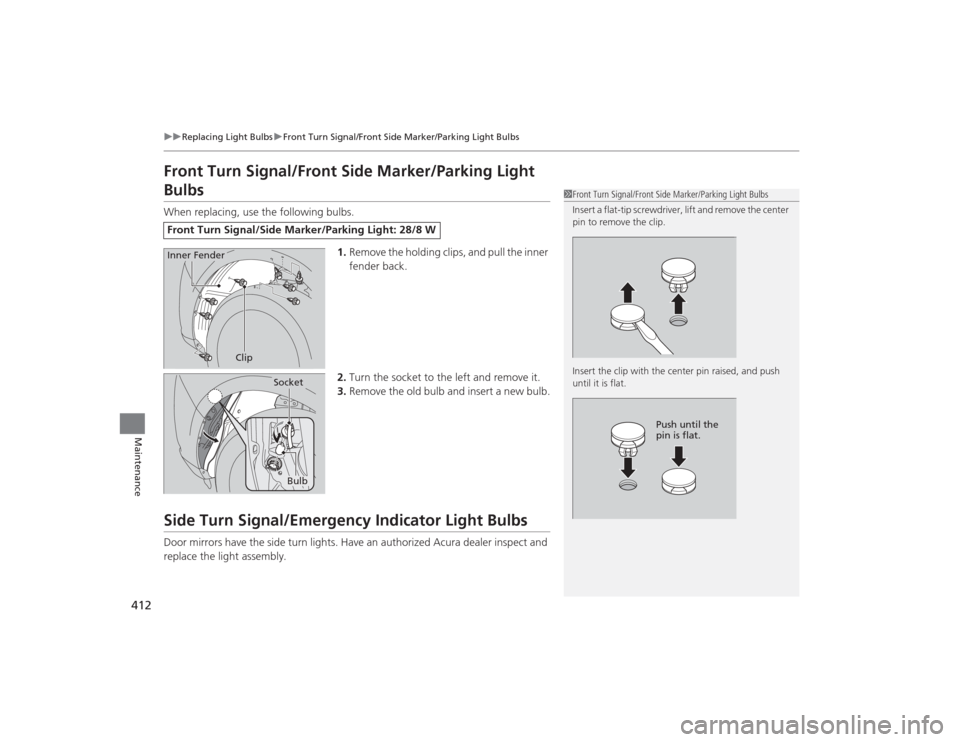
Front Turn Signal/Front Side Marker/Parking Light BulbsWhen replacing, use the following bulbs.
1.Remove the holding clips, and pull the inner
fender back.
2. Turn the socket to the left and remove it.
3. Remove the old bulb a nd insert a new bulb.Side Turn Signal/Emergency Indicator Light BulbsDoor mirrors have the side turn lights. Have an authorized Acura dealer inspect and
replace the light assembly.Front Turn Signal/Side Marker/Parking Light: 28/8 W
1Front Turn Signal/Front Side Marker/Parking Light Bulbs
Insert a flat-tip screwdriver, lift and remove the center
pin to remove the clip.
Insert the clip with the center pin raised, and push
until it is flat.
Push until the
pin is flat.
Clip
Inner Fender
Bulb
Socket
Page 414 of 505
413
uuReplacing Light Bulbs uBrake Light and Turn Signal Light BulbsContinued
Maintenance
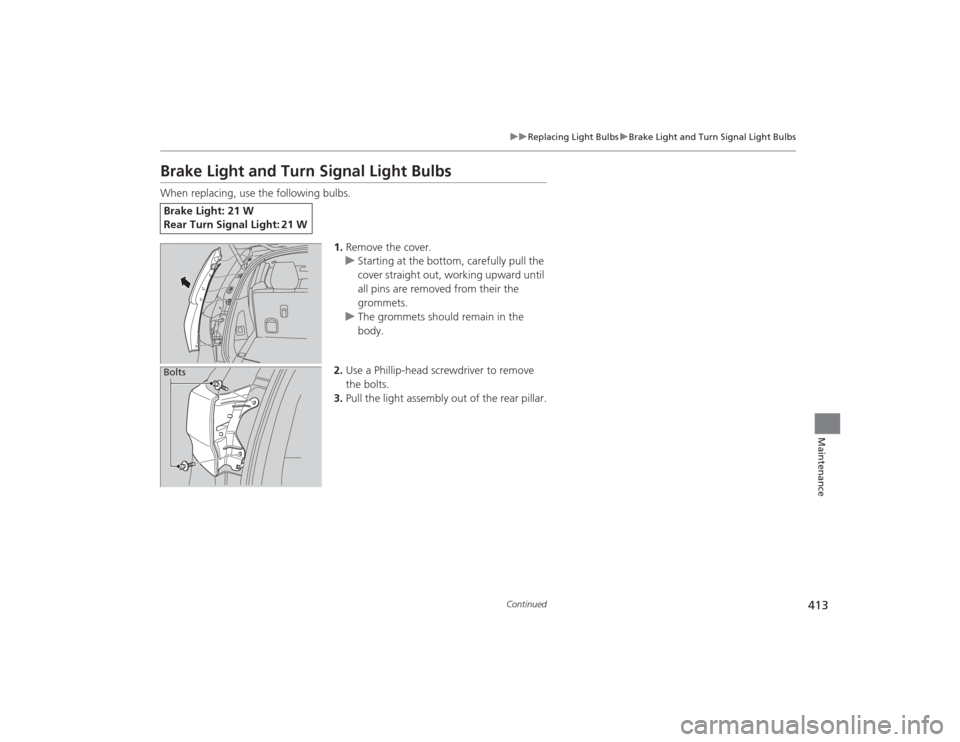
Brake Light and Turn Signal Light BulbsWhen replacing, use the following bulbs.
1.Remove the cover.
u Starting at the bottom, carefully pull the
cover straight out, working upward until
all pins are removed from their the
grommets.
u The grommets should remain in the
body.
2. Use a Phillip-head screwdriver to remove
the bolts.
3. Pull the light assembly out of the rear pillar.Brake Light: 21 W
Rear Turn Signal Light: 21 W Bolts
Page 415 of 505
414
uuReplacing Light Bulbs uTaillight and Rear Side Marker Light Bulbs
Maintenance
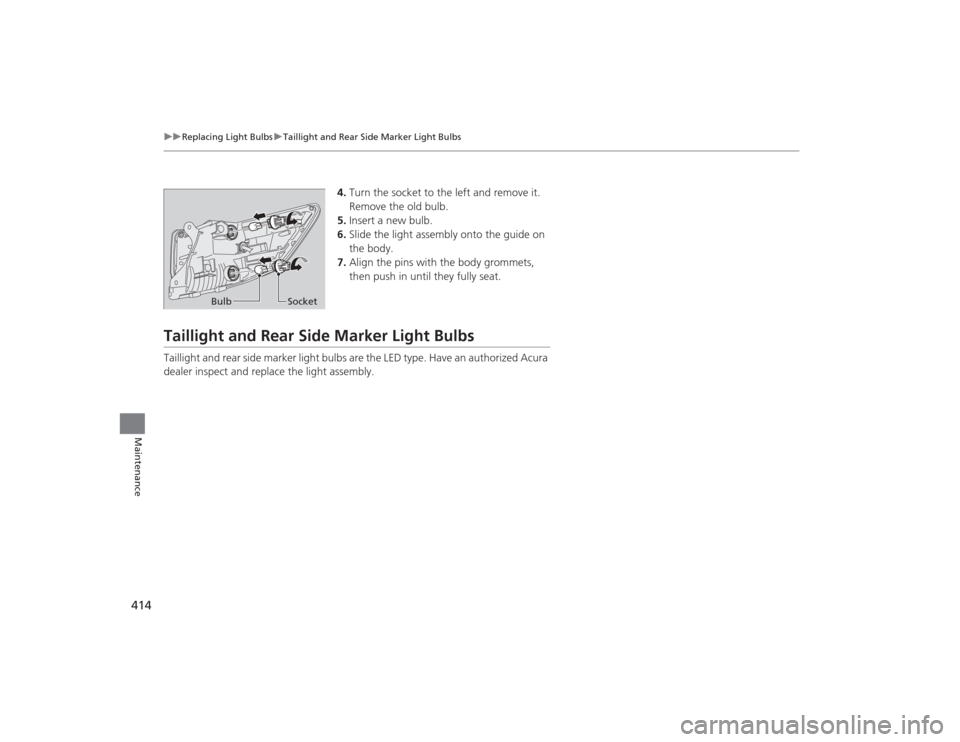
4. Turn the socket to the left and remove it.
Remove the old bulb.
5. Insert a new bulb.
6. Slide the light assembly onto the guide on
the body.
7. Align the pins with the body grommets,
then push in until they fully seat.
Taillight and Rear Side Marker Light BulbsTaillight and rear side marker light bulbs are the LED type. Have an authorized Acura
dealer inspect and replace the light assembly.
Bulb Socket
Page 416 of 505
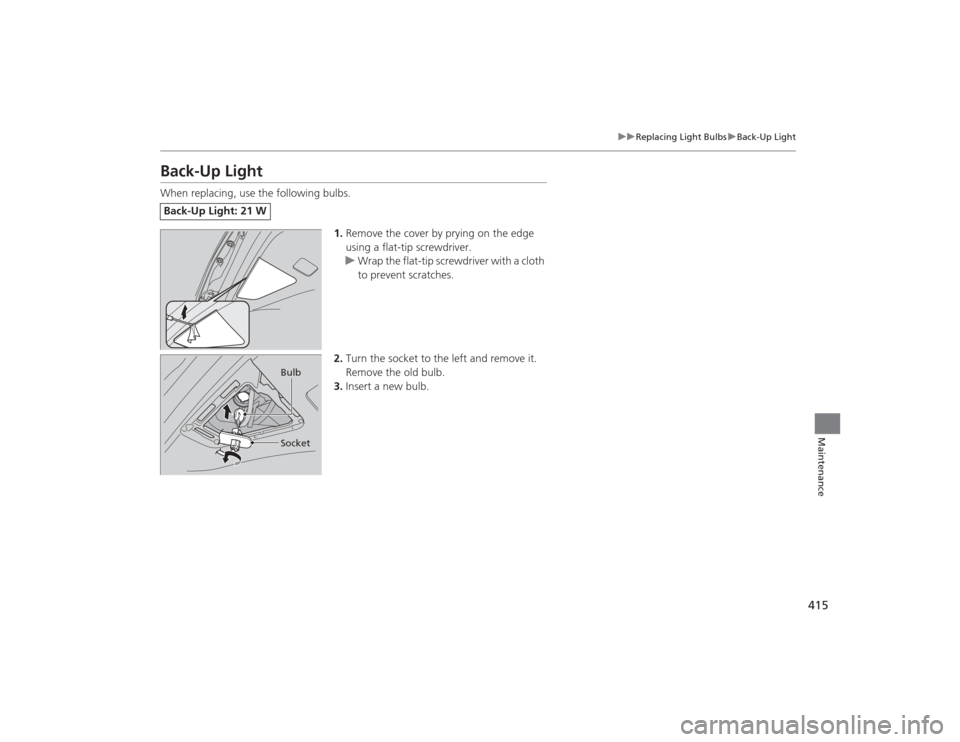
415
uuReplacing Light Bulbs uBack-Up Light
Maintenance
Back-Up LightWhen replacing, use the following bulbs.
1.Remove the cover by prying on the edge
using a flat-tip screwdriver.
u Wrap the flat-tip screwdriver with a cloth
to prevent scratches.
2. Turn the socket to the left and remove it.
Remove the old bulb.
3. Insert a new bulb.Back-Up Light: 21 W
Bulb
Socket
Page 417 of 505

416
uuReplacing Light Bulbs uRear License Plate Light Bulbs
Maintenance
Rear License Plate Light BulbsRear license plate light bulbs are the LED type. Have an authorized Acura dealer
inspect and replace the light assembly.High-Mount Brake Light BulbsHigh-mount brake light bulbs are the LED type. Have an authorized Acura dealer
inspect and replace the light assembly.LED Puddle Light BulbsLED puddle light bulbs are LED type. Have an authorized Acura dealer inspect and
replace the light assembly.
Page 433 of 505

uuRemote Transmitter Care uReplacing the Button Battery
432Maintenance
If the indicator does not come on when the button is pressed, replace the battery.
1.Remove the built-in key.
u As a convenience, lightly place masking
tape over the remote buttons to hold
them in place.
2. Remove the upper half by carefully prying
on the edge with a coin.
u Wrap a coin with a cloth to prevent
scratching the transmitter.
3. Press down on the center of the assembly
and remove the battery.
u When removing the button battery, be
careful not to touch parts around it.
4. Make sure to replace the battery with the
correct polarity.Models with remote control engine start system
1Replacing the Button BatteryNOTICEThe Remote transmitter is equipped with two
batteries: A standard replaceable CR2032 coin
button battery and an integral non-replaceable
rechargeable battery. To prevent permanent damage
to the rechargeable battery, replace the CR2032
battery every three to four years.Models with remote cont rol engine start system
Battery type: CR2032
Battery
Page 435 of 505

434
uuRemote Control and Wireless Headphone Care
*uReplacing the Battery
Maintenance
If there is no sound coming from the wireless headphone, replace the battery.
1.To open the cover, insert a coin in the slot
and twist it slightly to pry the cover away
from the earpiece.
2. Make sure to replace the battery with the
correct polarity.■
Wireless Headphone
Coin
Battery type: AAA
Cover
Battery
Page 441 of 505

440
uuCleaning uExterior Care
Maintenance
The inside lenses of exterior lights (headlights, brake lights, etc.) may fog temporarily
if you have driven in the rain, or after the vehicle has been run through a car wash.
Dew condensation also may build up inside the lenses when there is a significant
enough difference between the ambient and inside lens temperatures (similar to
vehicle windows fogging up in rainy conditions). These conditions are natural
processes, not structural design problems in the exterior lights.
Lens design characteristics may result in moisture developing on the light lens frame
surfaces. This also is not a malfunction.
However, if you see large amounts water accumulation, or large water drops
building up inside the lenses, have your vehicle inspected by a dealer.■
Fogged Exterior Light Lenses