set clock Acura MDX 2015 Owner's Manual
[x] Cancel search | Manufacturer: ACURA, Model Year: 2015, Model line: MDX, Model: Acura MDX 2015Pages: 505, PDF Size: 18.62 MB
Page 115 of 505
114Controls
ClockAdjusting the ClockYou can adjust the time manually in the audio/information screen, with the power
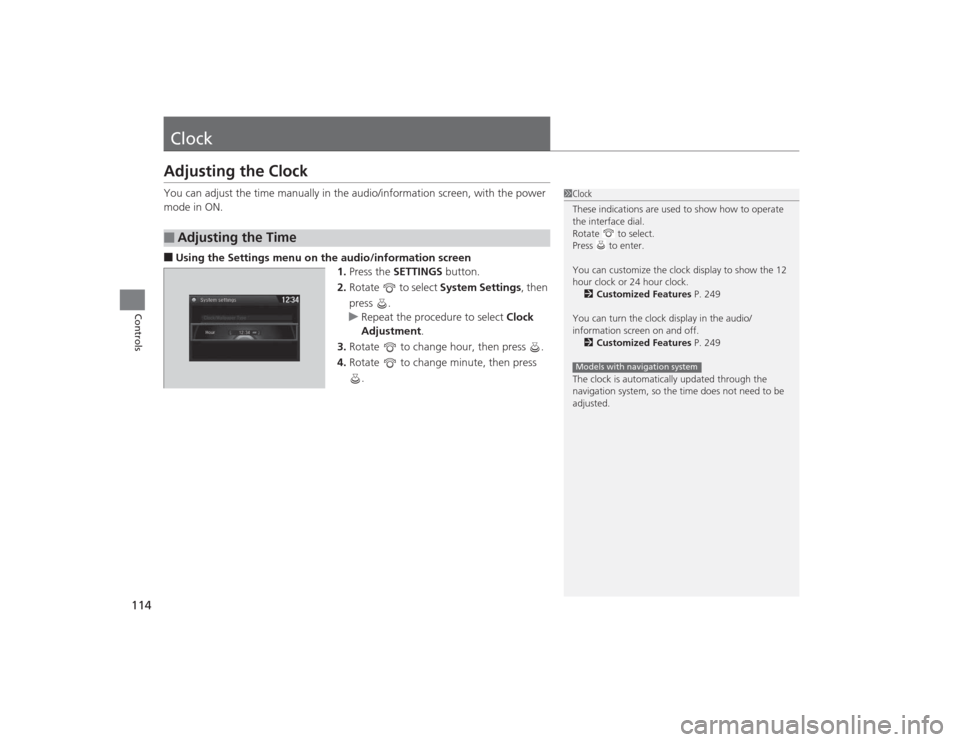
mode in ON.■Using the Settings menu on the audio/information screen1.Press the SETTINGS button.
2. Rotate to select System Settings, then
press .
u Repeat the procedure to select Clock
Adjustment .
3. Rotate to change hour, then press .
4. Rotate to change minute, then press
.■
Adjusting the Time
1Clock
These indications are used to show how to operate
the interface dial.
Rotate to select.
Press to enter.
You can customize the clock display to show the 12
hour clock or 24 hour clock.
2 Customized Features P. 249
You can turn the clock display in the audio/
information screen on and off. 2 Customized Features P. 249
The clock is automatically updated through the
navigation system, so the time does not need to be
adjusted.Models with navigation system
Page 214 of 505
213
uuAudio System Basic Operation uAudio/Information Screen
Continued
Features
■Audio
Shows the current audio information.■Phone
Shows the HFL information.
2 Bluetooth® HandsFreeLink ® P. 269
■Info
Shows the Trip Computer or Clock/Wallpaper and other information. Rotate
to select an item, then press .■Trip computer (Current Drive)
Shows the range, and instant and average fuel economy of the current trip, as well
as the average fuel economy from your last trip.■Trip computer (History of Trip A)
Shows the range, average fuel economy and distances traveled for the current trip,
as well as the average fuel economy and distances traveled during the last three
driving cycles.
Each time you reset the trip meter A, the information on the display updates. The
history of the previous three driving cycles is kept.■Deleting the history manually
1. Move on the History of Trip A screen to select Delete History , then press .
2. A confirmation message appears on the screen. Rotate to select Yes, then
press .■Clock/Wallpaper
Shows a clock screen or an image you import.
Page 215 of 505
uuAudio System Basic Operation uAudio/Information Screen
214Features
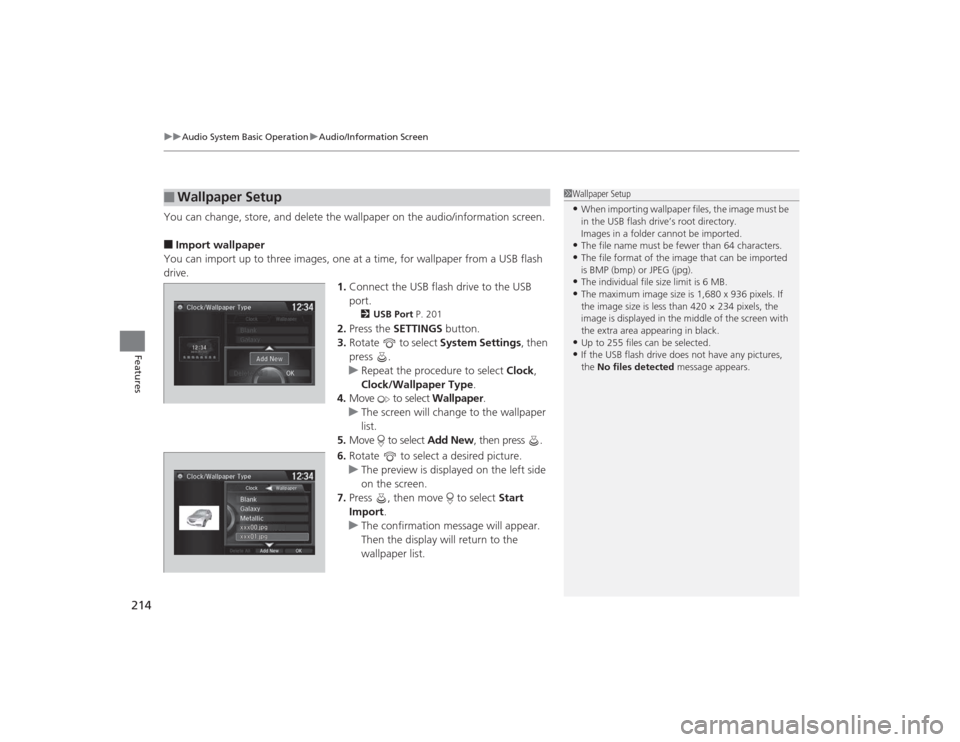
You can change, store, and delete the wallpaper on the audio/information screen.■Import wallpaper
You can import up to three images, one at a time, for wallpaper from a USB flash
drive. 1.Connect the USB flash drive to the USB
port.
2 USB Port P. 201
2.Press the SETTINGS button.
3. Rotate to select System Settings, then
press .
u Repeat the procedure to select Clock,
Clock/Wallpaper Type .
4. Move to select Wallpaper.
u The screen will change to the wallpaper
list.
5. Move to select Add New, then press .
6. Rotate to select a desired picture.
u The preview is displayed on the left side
on the screen.
7. Press , then move to select Start
Import .
u The confirmation message will appear.
Then the display will return to the
wallpaper list.
■
Wallpaper Setup
1Wallpaper Setup•When importing wallpaper files, the image must be
in the USB flash drive’s root directory.
Images in a folder cannot be imported.•The file name must be fewer than 64 characters.•The file format of the image that can be imported
is BMP (bmp) or JPEG (jpg).•The individual file size limit is 6 MB.•The maximum image size is 1,680 x 936 pixels. If
the image size is less than 420 × 234 pixels, the
image is displayed in the middle of the screen with
the extra area appearing in black.•Up to 255 files can be selected.•If the USB flash drive does not have any pictures,
the No files detected message appears.
Page 216 of 505
215
uuAudio System Basic Operation uAudio/Information Screen
Features
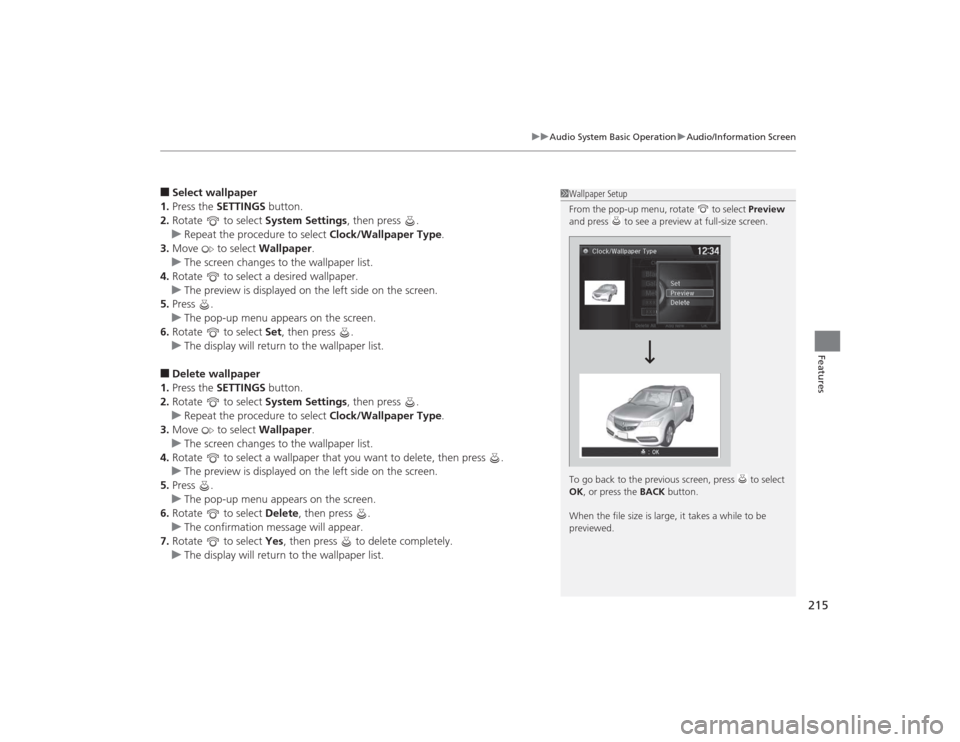
■Select wallpaper
1. Press the SETTINGS button.
2. Rotate to select System Settings, then press .
u Repeat the procedure to select Clock/Wallpaper Type .
3. Move to select Wallpaper.
u The screen changes to the wallpaper list.
4. Rotate to select a desired wallpaper.
u The preview is displayed on the left side on the screen.
5. Press .
u The pop-up menu appears on the screen.
6. Rotate to select Set, then press .
u The display will return to the wallpaper list.■Delete wallpaper
1. Press the SETTINGS button.
2. Rotate to select System Settings, then press .
u Repeat the procedure to select Clock/Wallpaper Type .
3. Move to select Wallpaper.
u The screen changes to the wallpaper list.
4. Rotate to select a wallpaper that you want to delete, then press .
u The preview is displayed on the left side on the screen.
5. Press .
u The pop-up menu appears on the screen.
6. Rotate to select Delete, then press .
u The confirmation message will appear.
7. Rotate to select Yes, then press to delete completely.
u The display will return to the wallpaper list.
1Wallpaper Setup
From the pop-up menu, rotate to select Preview
and press to see a preview at full-size screen.
To go back to the previous screen, press to select
OK , or press the BACK button.
When the file size is large, it takes a while to be
previewed.
Page 251 of 505
250
uuCustomized Features u
Features
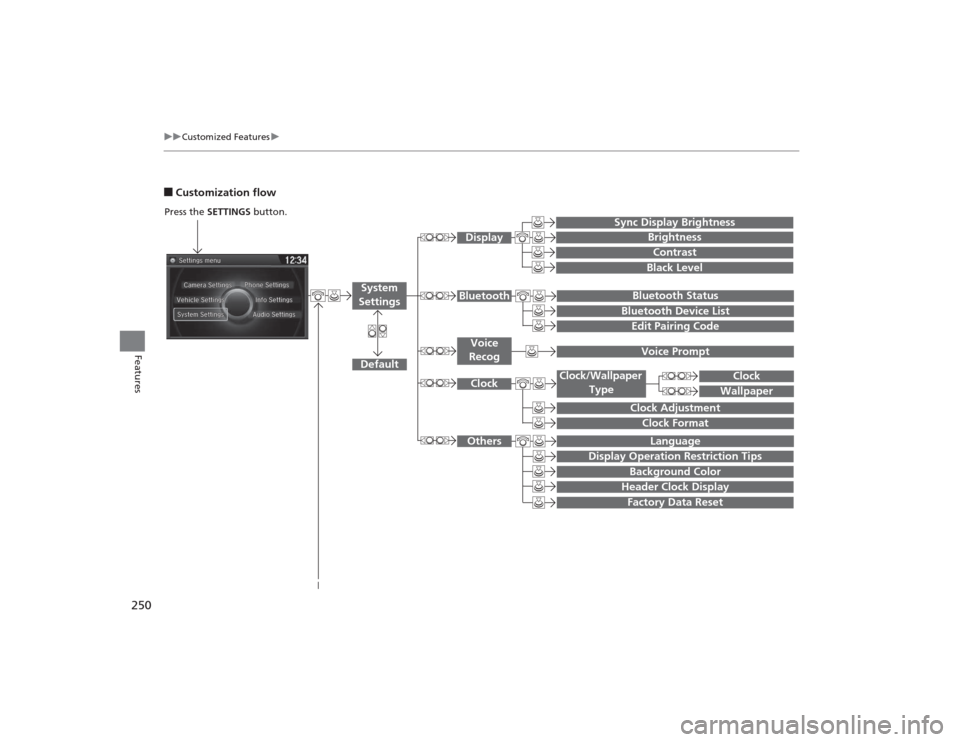
■Customization flowPress the SETTINGS button.
BrightnessContrastBlack Level
Bluetooth StatusBluetooth Device ListEdit Pairing Code
Default
Display
System
Settings
Bluetooth
Sync Display Brightness
Factory Data Reset
Background ColorHeader Clock Display
Clock
Clock AdjustmentClock Format
Clock
Language
Others
Wallpaper
Clock/Wallpaper
Type
Display Operation Restriction Tips
Voice
Recog
Voice Prompt
Page 254 of 505
253
uuCustomized Features u
Continued
Features
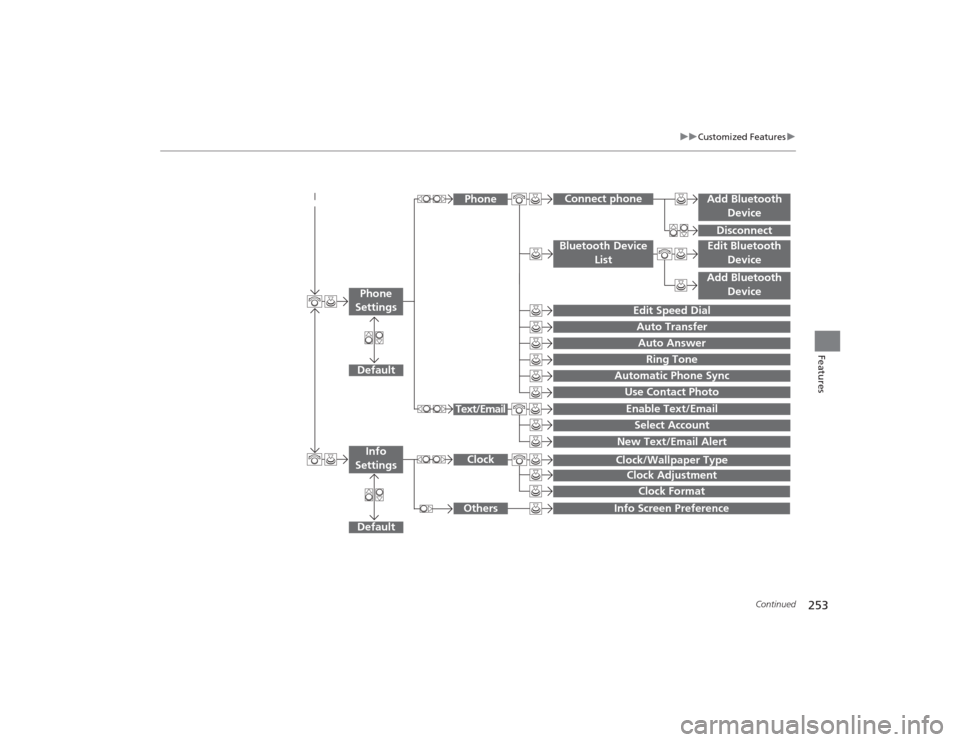
Add Bluetooth
DeviceDisconnect
Default
Phone
Connect phone
Edit Bluetooth DeviceAdd Bluetooth Device
Bluetooth Device
List
Edit Speed DialAuto TransferAuto AnswerRing Tone
Automatic Phone SyncUse Contact PhotoEnable Text/EmailSelect Account
New Text/Email Alert
Text/Email
Phone
Settings
Info Screen Preference
Clock Format
Clock/Wallpaper TypeClock Adjustment
Clock
DefaultInfo
Settings
Others
Page 256 of 505
255
uuCustomized Features u
Continued
Features
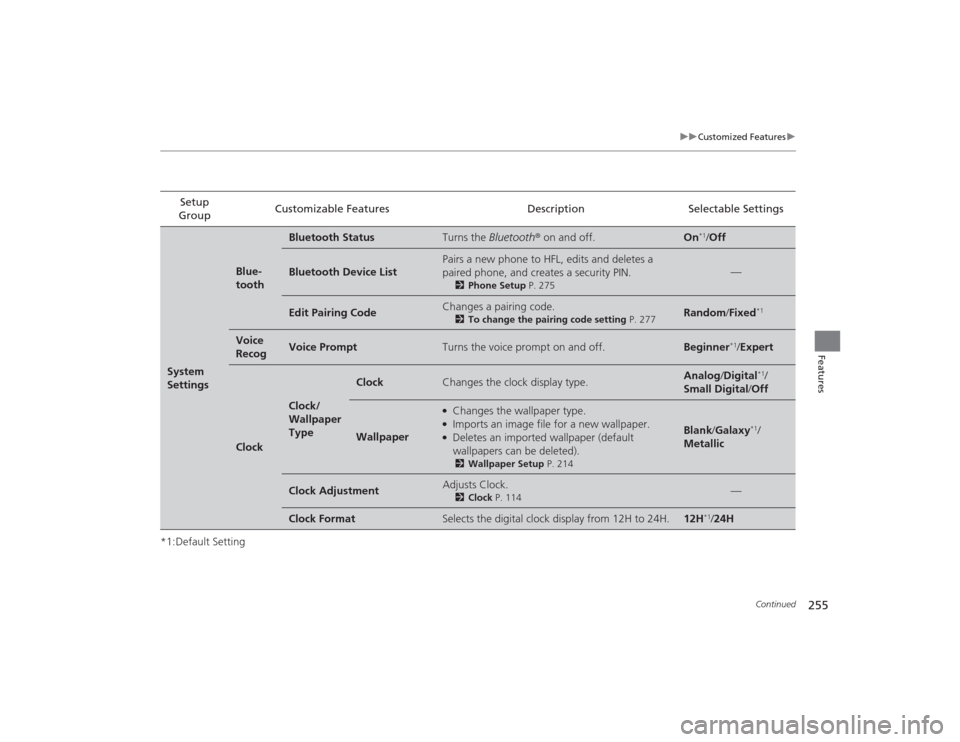
*1:Default SettingSetup
Group Customizable Features Description Selectable SettingsSystem
Settings
Blue-
tooth
Bluetooth Status
Turns the
Bluetooth® on and off.
On
*1/Off
Bluetooth Device List
Pairs a new phone to HFL, edits and deletes a
paired phone, and creates a security PIN.
2 Phone Setup P. 275
—
Edit Pairing Code
Changes a pairing code.
2To change the pairing code setting P. 277
Random/Fixed
*1
Voice
Recog
Voice Prompt
Turns the voice prompt on and off.
Beginner
*1/ Expert
Clock
Clock/
Wallpaper
Type
Clock
Changes the clock display type.
Analog /Digital
*1/
Small Digital /Off
Wallpaper
●Changes the wallpaper type.●Imports an image file for a new wallpaper.●Deletes an imported wallpaper (default
wallpapers can be deleted).2 Wallpaper Setup P. 214
Blank/Galaxy
*1/
Metallic
Clock Adjustment
Adjusts Clock.
2 Clock P. 114
—
Clock Format
Selects the digital clock display from 12H to 24H.
12H
*1/24H
Page 257 of 505
256
uuCustomized Features u
Features
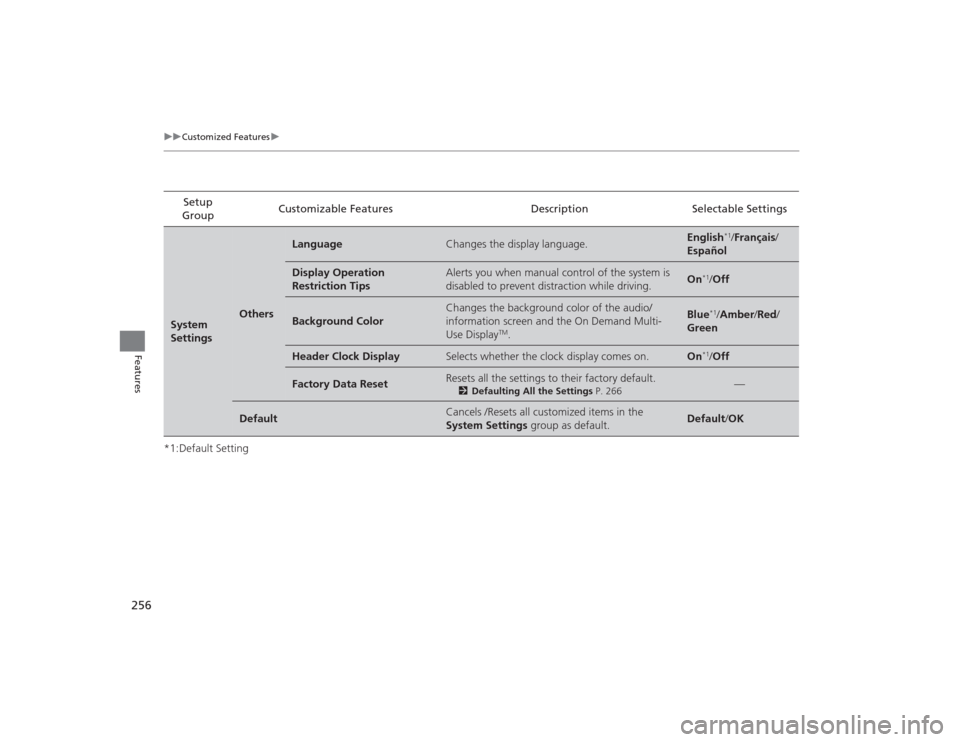
*1:Default SettingSetup
Group Customizable Features Description Selectable SettingsSystem
Settings
Others
Language
Changes the display language.
English
*1/
Français /
Español
Display Operation
Restriction Tips
Alerts you when manual control of the system is
disabled to prevent distraction while driving.
On
*1/ Off
Background Color
Changes the background color of the audio/
information screen and the On Demand Multi-
Use Display
TM.
Blue
*1/Amber /Red/
Green
Header Clock Display
Selects whether the clock display comes on.
On
*1/ Off
Factory Data Reset
Resets all the settings to their factory default.
2 Defaulting All the Settings P. 266
—
Default
Cancels /Resets all customized items in the
System Settings group as default.
Default/OK
Page 266 of 505
265
uuCustomized Features u
Features
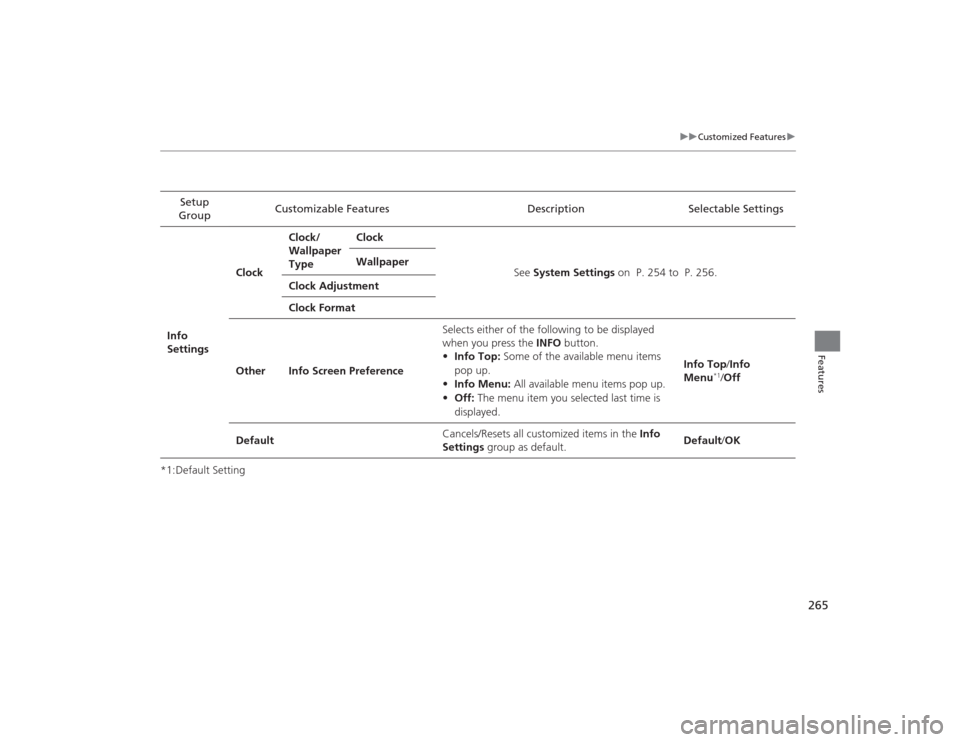
*1:Default SettingSetup
Group Customizable Features Description Selectable SettingsInfo
SettingsClock
Clock/
Wallpaper
Type
Clock
See System Settings on P. 254 to P. 256.
Wallpaper
Clock Adjustment
Clock Format
Other Info Screen Preference Selects either of the following to be displayed
when you press the INFO
button.
• Info Top: Some of the available menu items
pop up.
• Info Menu: All available menu items pop up.
• Off: The menu item you selected last time is
displayed. Info Top
/Info
Menu
*1/ Off
Default Cancels/Resets all customized items in the
Info
Settings group as default. Default
/OK
Page 431 of 505
430Maintenance
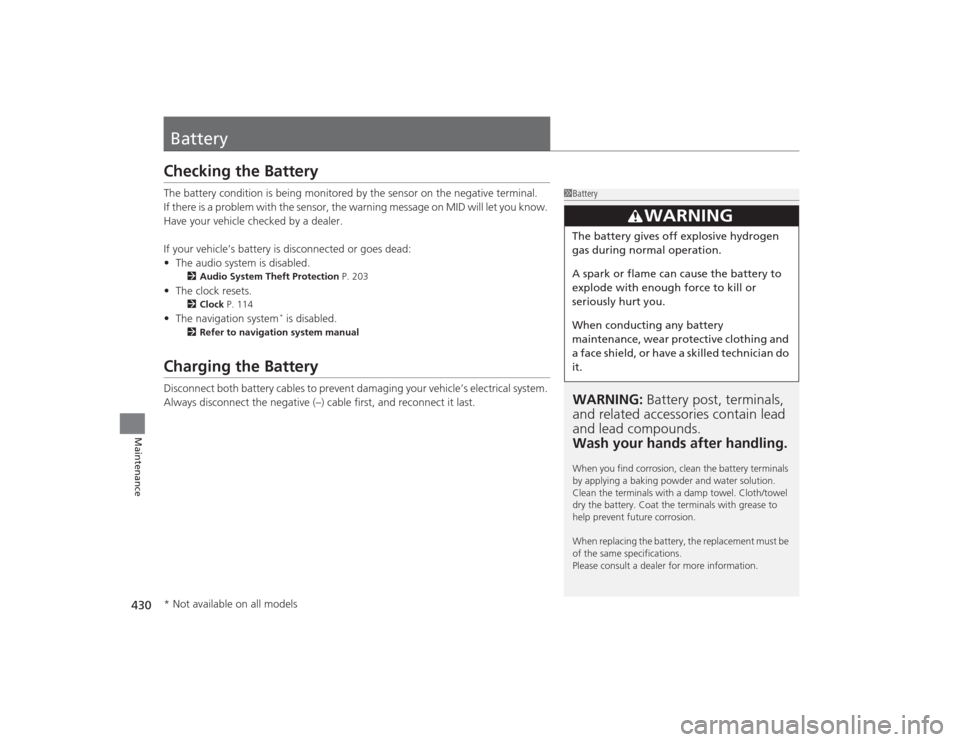
BatteryChecking the BatteryThe battery condition is being monitored by the sensor on the negative terminal.
If there is a problem with the sensor, the warning message on MID will let you know.
Have your vehicle checked by a dealer.
If your vehicle’s battery is disconnected or goes dead:
•The audio system is disabled.
2 Audio System Theft Protection P. 203
•The clock resets.
2 Clock P. 114
•The navigation system
* is disabled.
2 Refer to navigation system manual
Charging the BatteryDisconnect both battery cables to prevent damaging your vehicle’s electrical system.
Always disconnect the negative (–) ca ble first, and reconnect it last.
1BatteryWARNING: Battery post, terminals,
and related accessori es contain lead
and lead compounds.
Wash your hands after handling.When you find corrosion, clean the battery terminals
by applying a baking powder and water solution.
Clean the terminals with a damp towel. Cloth/towel
dry the battery. Coat the terminals with grease to
help prevent future corrosion.
When replacing the battery, the replacement must be
of the same specifications.
Please consult a dealer for more information.
3
WARNING
The battery gives off explosive hydrogen
gas during normal operation.
A spark or flame can cause the battery to
explode with enough force to kill or
seriously hurt you.
When conducting any battery
maintenance, wear protective clothing and
a face shield, or have a skilled technician do
it.
* Not available on all models