warning Acura MDX 2017 Service Manual
[x] Cancel search | Manufacturer: ACURA, Model Year: 2017, Model line: MDX, Model: Acura MDX 2017Pages: 170, PDF Size: 12.43 MB
Page 113 of 170
106 |
DRIVING
During Operation
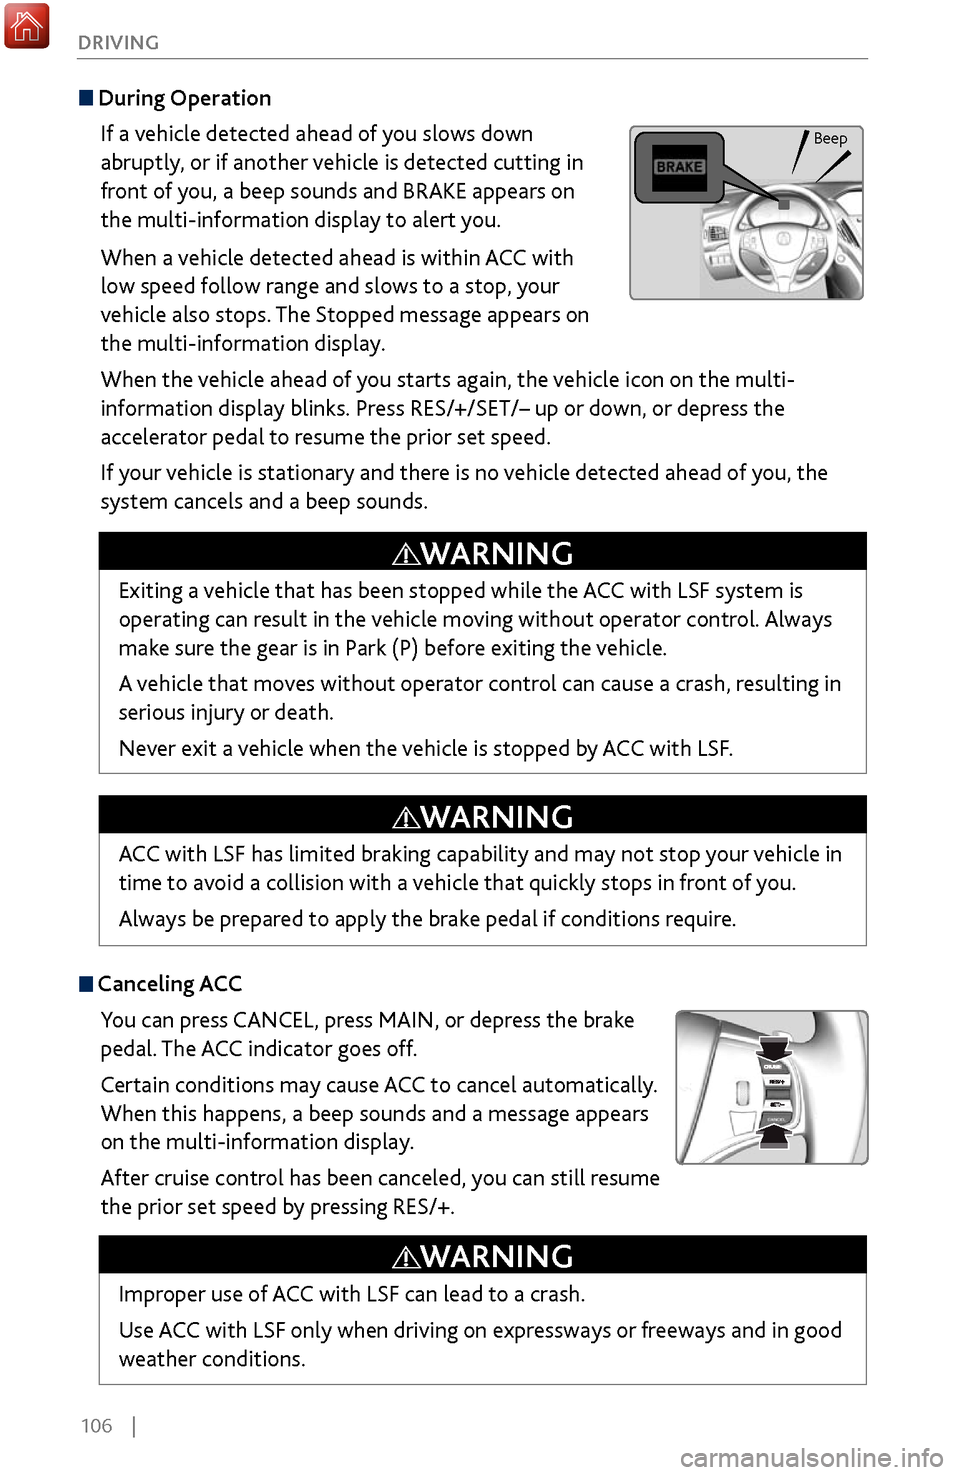
If a vehicle detected ahead of you slows down
abruptly, or if another vehicle is detected cutting in
front of you, a beep sounds and BRAKE appears on
the multi-information display to alert you.
When a vehicle detected ahead is within ACC with
low speed follow range and slows to a stop, your
vehicle also stops. The Stopped message appears on
the multi-information display.
When the vehicle ahead of you starts again, the vehicle icon on the multi-
information display blinks. Press RES/+/SET/– up or down, or depress the
accelerator pedal to resume the prior set speed.
If your vehicle is stationary and there is no vehicle detected ahead of you, the
system cancels and a beep sounds.
Canceling ACCYou can press CANCEL, press MAIN, or depress the brake
pedal. The ACC indicator goes off.
Certain conditions may cause ACC
to cancel automatically.
When
this happens, a beep sounds and a message appears
on the multi-information display.
After cruise control has been canceled, you can still resume
the prior set speed by pressing RES/+.
Exiting a vehicle that has been stopped while the ACC with LSF system is
operating can result in the vehicle moving without operator control. Always
make sure the gear is in Park (P) before exiting the vehicle.
A vehicle that moves without operator control can cause a crash, resulting in
serious injury or death.
Never exit a vehicle when the vehicle is stopped by ACC with LSF.
WARNING
ACC with LSF has limited braking capability and may not stop your vehicle in
time to avoid a collision with a vehicle that quickly stops in front of you.
Always be prepared to apply the brake pedal if conditions require.
WARNING
Improper use of ACC with LSF can lead to a crash.
Use ACC with LSF only when driving on expressways or freeways and in good
weather conditions.
WARNING
Beep
Page 114 of 170
| 107
DRIVING
Forward Collision Warning (FCW) with Pedestrian Detection
Alerts you if the system determines the possibility of your vehicle colliding with
a vehicle detected in front of you when your vehicle speed is 10 mph (15 km/h)
or higher, or a pedestrian is detected in front of you when your vehicle speed is
between 10–62 mph (15–100 km/h).
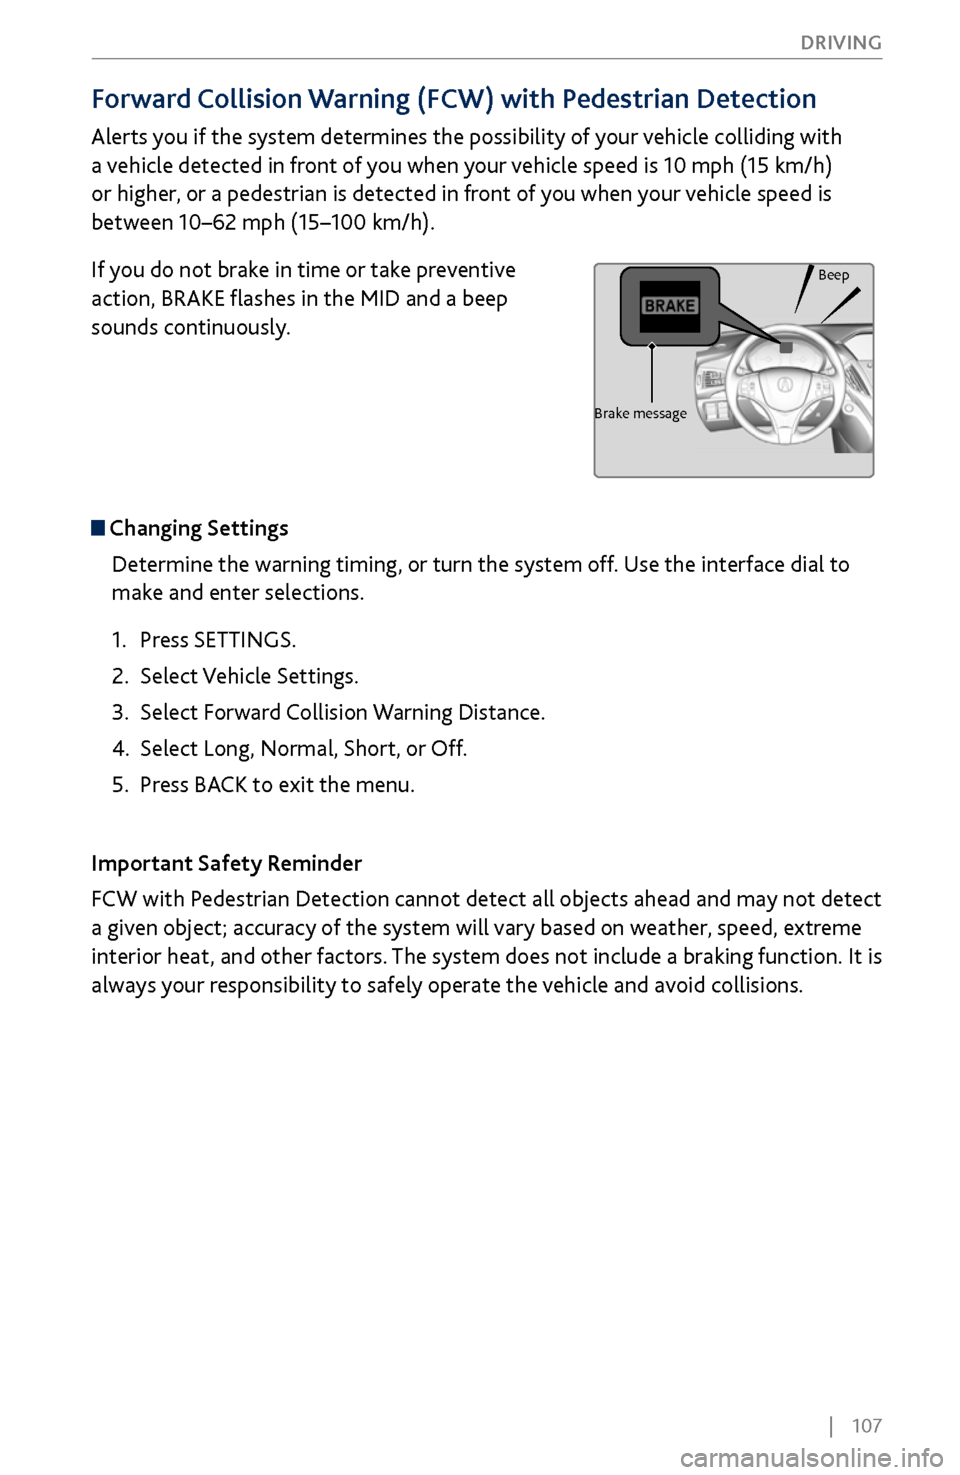
If you do not brake in time or take preventive
action, BRAKE flashes in the MID and a beep
sounds continuously.
Changing Settings
Determine the warning timing, or turn the system off. Use the interface dial to
make and enter selections.
1.
Press SETTINGS.
2.
Select Vehicle Settings.
3.
Select Forward
Collision Warning Distance.
4.
Select Long, Normal, Short
, or Off.
5.
Press BACK
to exit the menu.
Important Safety Reminder
FCW with Pedestrian Detection cannot detect all objects ahead and may not detect
a given object; accuracy of the system will vary based on weather, speed, extreme
interior heat, and other factors. The system does not include a braking function. It is
always your responsibility to safely operate the vehicle and avoid collisions.
Beep
Brake message
Page 115 of 170
108 |
DRIVING
Collision Mitigation Braking System™ (CMBS™)
Can assist you when there is a possibility of your vehicle colliding with a vehicle or a
pedestrian detected in front of yours.
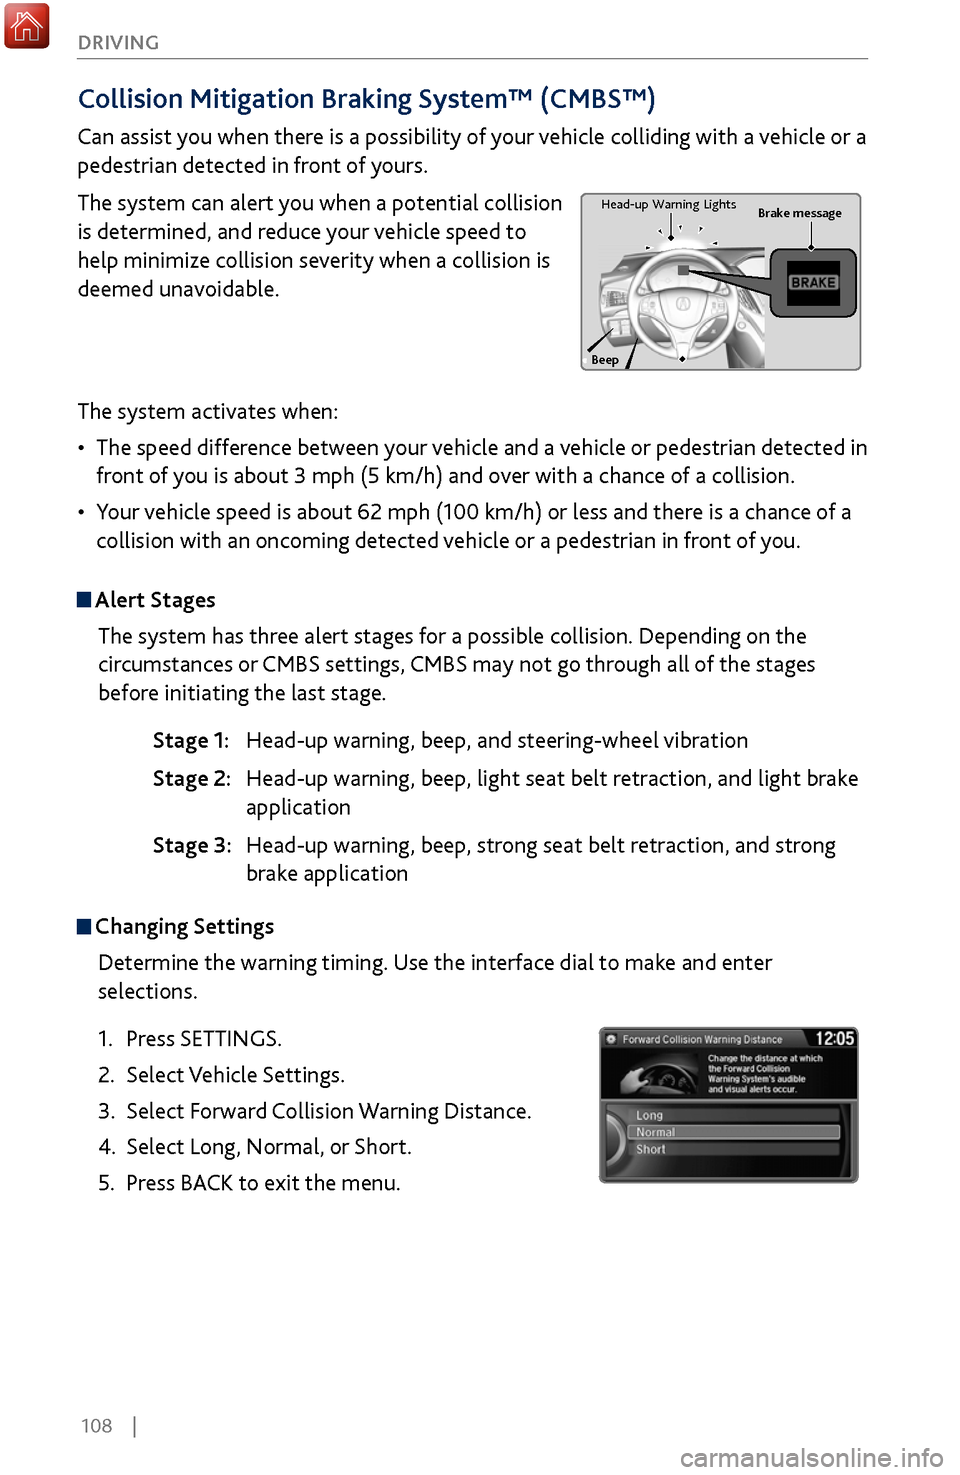
The system can alert you when a potential collision
is determined, and reduce your vehicle speed to
help minimize collision severity when a collision is
deemed unavoidable.
The system activates when:
•
The speed difference between
your vehicle and a vehicle or pedestrian detected in
front of you is about 3 mph (5 km/h) and over with a chance of a collision.
•
Your v
ehicle speed is about 62 mph (100 km/h) or less and there is a chance of a
collision with an oncoming detected vehicle or a pedestrian in front of you.
Alert Stages
The system has three alert stages for a possible collision. Depending on the
circumstances or CMBS settings, CMBS may not go through all of the stages
before initiating the last stage.
Stage 1: Head-up warning, beep
, and steering-wheel vibration
Stage 2: Head-up warning, beep
, light seat belt retraction, and light brake
application
Stage 3:
Head-up warning, beep
, strong seat belt retraction, and strong
brake application
Beep Brake message
Head-up
Warning Lights
Changing Settings
Determine the warning timing. Use the interface dial to make and enter
selections.
1.
Press SETTINGS.
2.
Select Vehicle Settings.
3.
Select Forward
Collision Warning Distance.
4.
Select Long, Normal, or
Short.
5.
Press BACK
to exit the menu.
Page 117 of 170
110 |
DRIVING
Lane Departure Warning (LDW)
Alerts you if the system detects a possibility of your vehicle unintentionally
crossing over detected lane markings while driving between 45–90 mph (72–145
km/h).
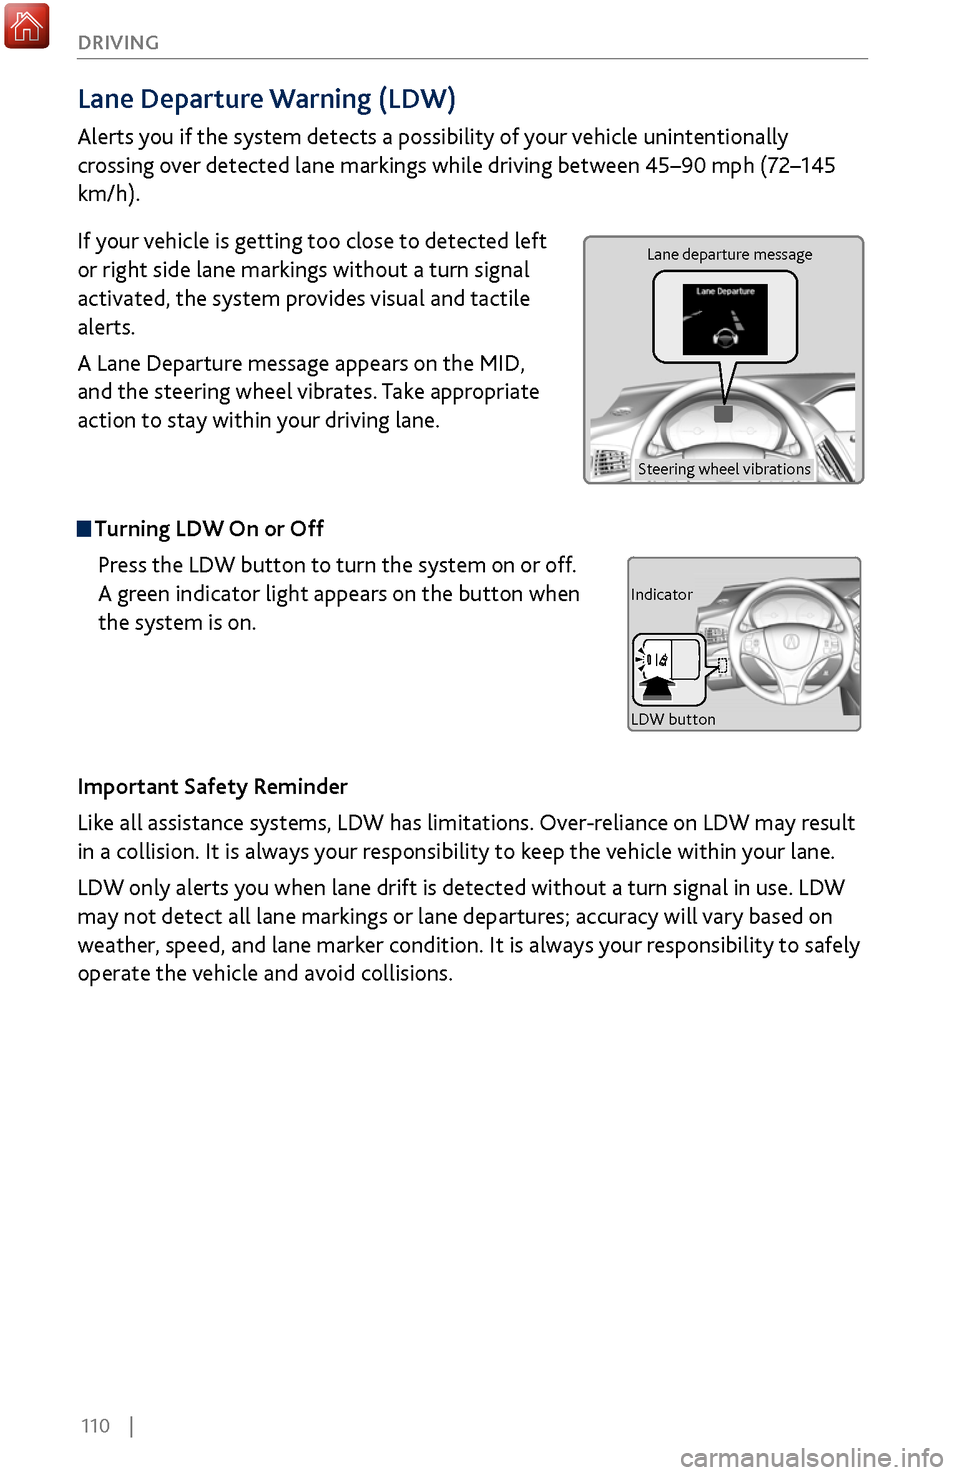
If your vehicle is getting too close to detected left
or right side lane markings without a turn signal
activated, the system provides visual and tactile
alerts.
A Lane Departure message appears on the MID,
and the steering wheel vibrates. Take appropriate
action to stay within your driving lane.
Turning LDW On or Off
Press the LDW button to turn the system on or off.
A green indicator light appears on the button when
the system is on.
Important Safety Reminder
Like all assistance systems, LDW has limitations. Over-reliance on LDW may result
in a collision. It is always your responsibility to keep the vehicle within your lane.
LDW only alerts you when lane drift is detected without a turn signal in use. LDW
may not detect all lane markings or lane departures; accuracy will vary based on
weather, speed, and lane marker condition. It is always your responsibility to safely
operate the vehicle and avoid collisions.
Lane departure message
Steering wheel vibrations
Indicator
LDW button
Page 119 of 170
112 |
DRIVING
Road Departure Mitigation (RDM)
Alerts and helps to assist you if the system determines a possibility of your vehicle
unintentionally crossing over detected lane markings while driving between 45–90
mph (72–145 km/h).
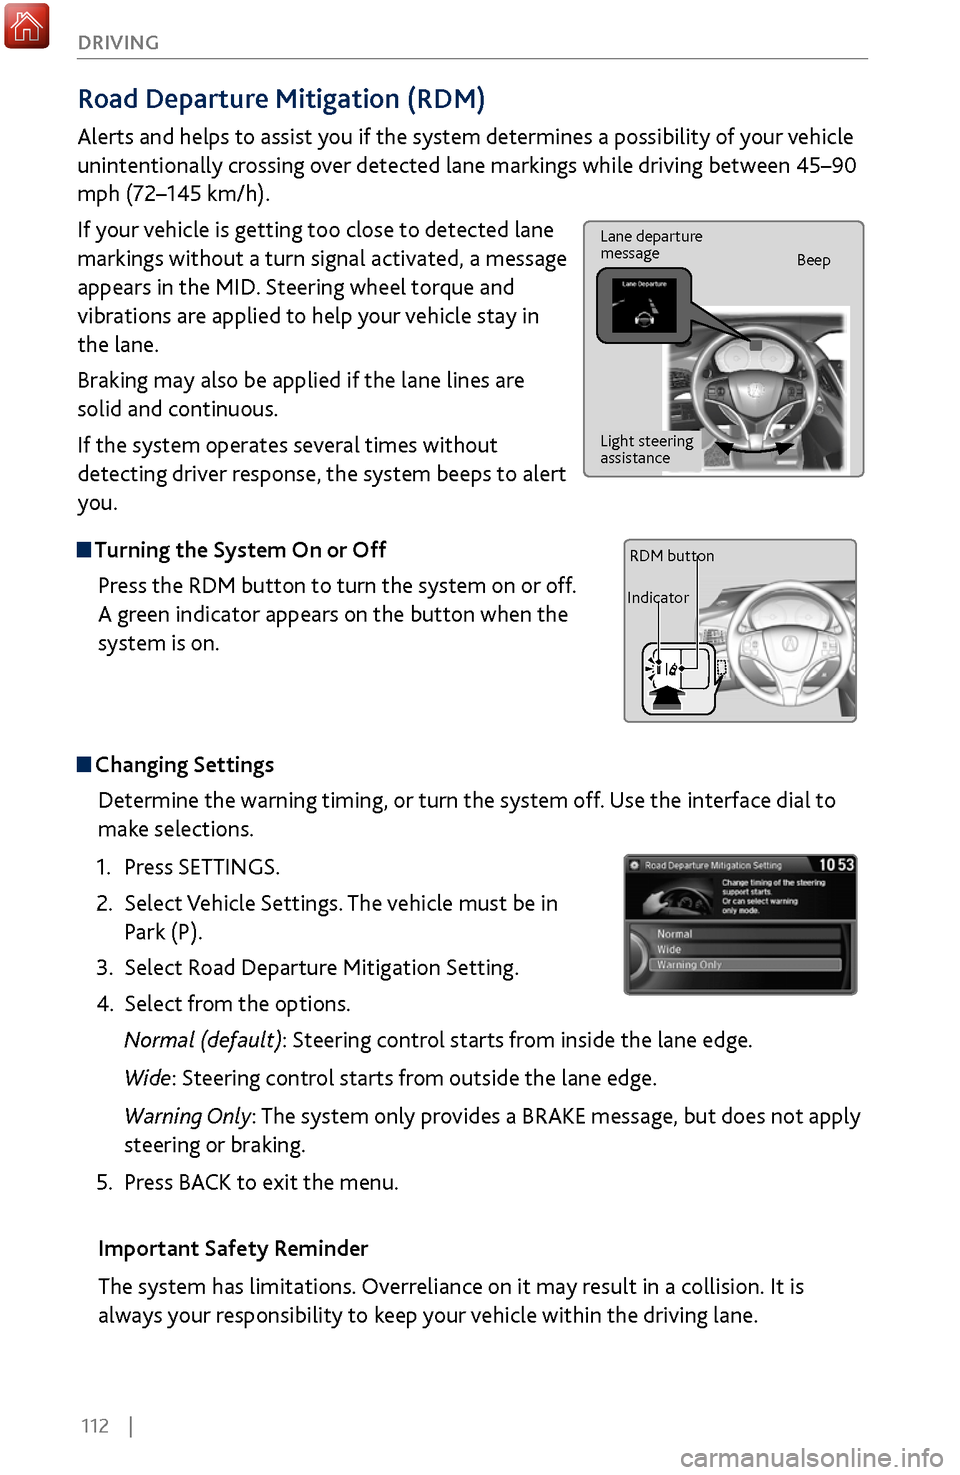
If your vehicle is getting too close to detected lane
markings without a turn signal activated, a message
appears in the MID. Steering wheel torque and
vibrations are applied to help your vehicle stay in
the lane.
Braking may also be applied if the lane lines are
solid and continuous.
If the system operates several times without
detecting driver response, the system beeps to alert
you.
Turning the System On or Off
Press the RDM button to turn the system on or off.
A green indicator appears on the button when the
system is on.
Steering vibrations
Changing SettingsDetermine the warning timing, or turn the system off. Use the interface dial to
make selections.
1.
Press SETTINGS.
2.
Select Vehicle
Settings. The vehicle must be in
Park (P).
3.
Select Road Departure Mitigation
Setting.
4.
Select from the options.
Normal (def
ault): Steering control starts from inside the lane edge.
Wide: Steering control starts from outside the lane edge.
Warning Only: The system only provides a BRAKE message, but does not apply
steering or braking.
5.
Press BACK
to exit the menu.
Important Safety Reminder
The system has limitations. Overreliance on it may result in a collision. It is
always your responsibility to keep your vehicle within the driving lane.
Lane departure
message Beep
Light steering
assistance
IndicatorRDM button
Page 120 of 170
| 113
DRIVING
Blind Spot Information (BSI)*
Alerts you to a detected vehicle in your left or right blind spot while driving 20 mph
(32 km/h) or higher.
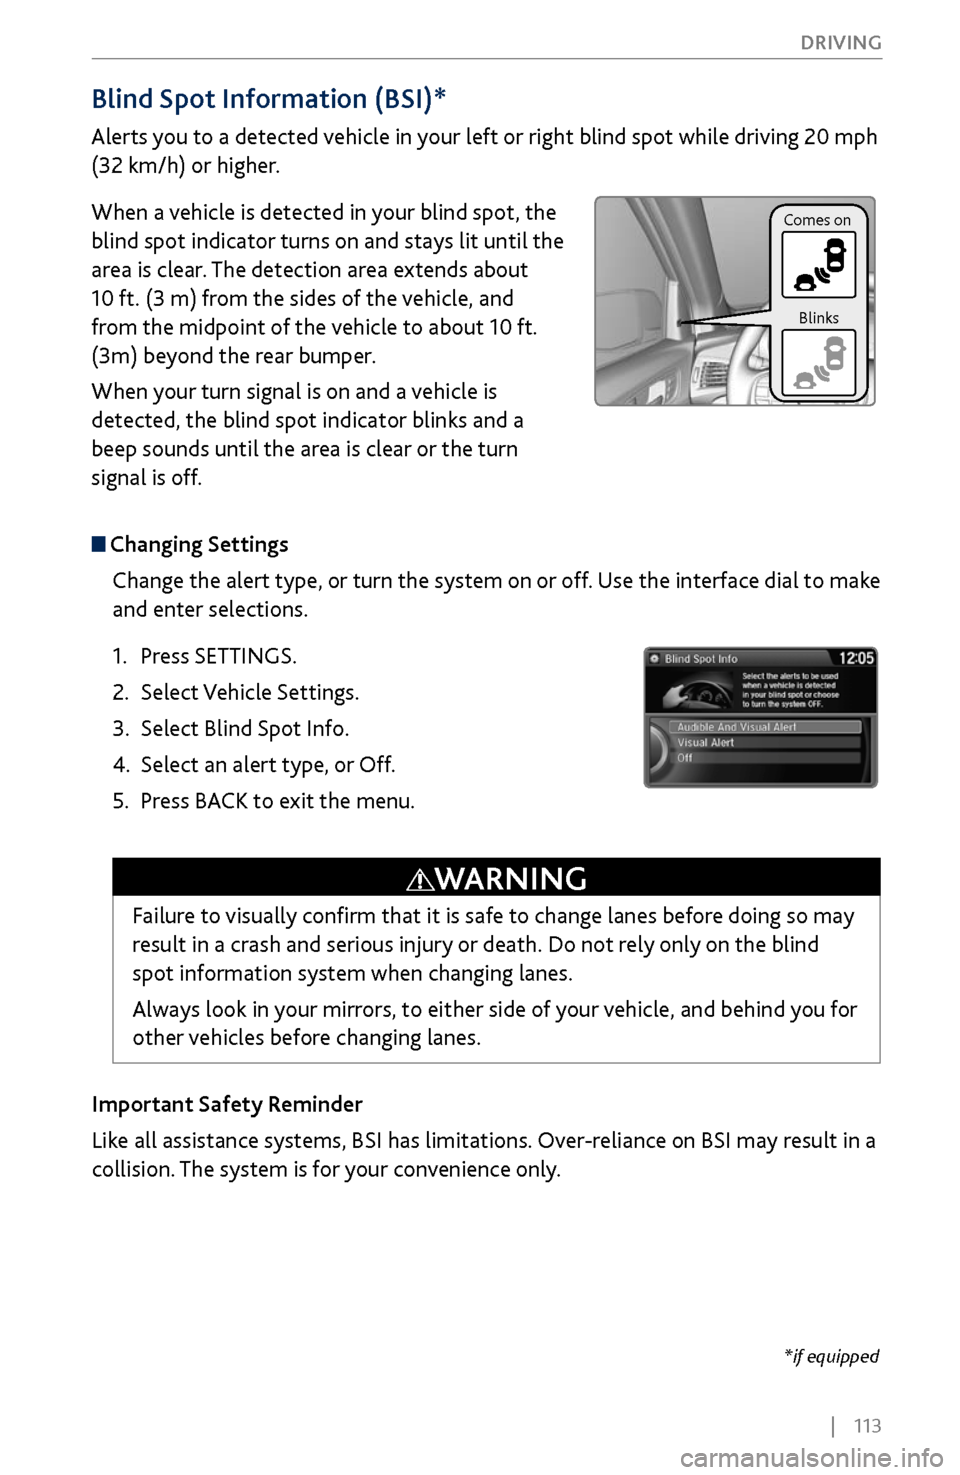
When a vehicle is detected in your blind spot, the
blind spot indicator turns on and stays lit until the
area is clear. The detection area extends about
10
ft. (3 m) fr
om the sides of the vehicle, and
from the midpoint of the vehicle to about 10 ft.
(3m) beyond the rear bumper.
When your turn signal is on and a vehicle is
detected, the blind spot indicator blinks and a
beep sounds until the area is clear or the turn
signal is off.
Changing Settings
Change the alert type, or turn the system on or off. Use the interface dial to make
and enter selections.
1.
Press SETTINGS.
2.
Select Vehicle Settings.
3.
Select Blind Spot Info.
4.
Select an alert type, or
Off.
5.
Press BACK
to exit the menu.
Important Safety Reminder
Like all assistance systems, BSI has limitations. Over-reliance on BSI may result in a
collision. The system is for your convenience only.
Failure to visually confirm that it is safe to change lanes before doing so may
result in a crash and serious injury or death. Do not rely only on the blind
spot information system when changing lanes.
Always look in your mirrors, to either side of your vehicle, and behind you for
other vehicles before changing lanes.
WARNING
Comes on Blinks
*if equipped
Page 125 of 170
118 |
DRIVING
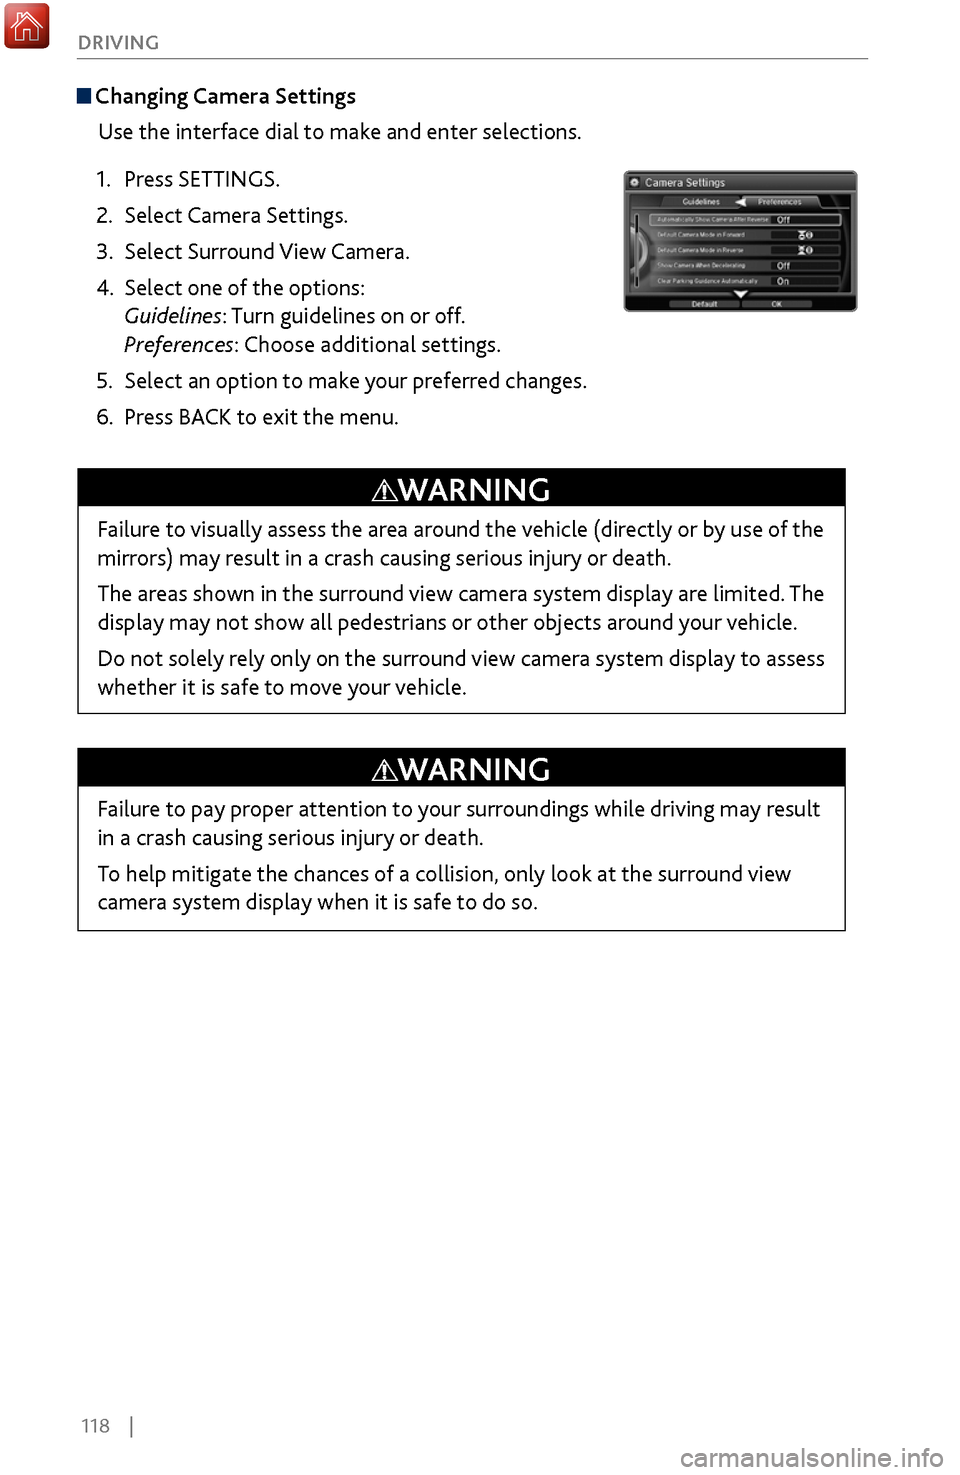
Changing Camera Settings
Use the interface dial to make and enter selections.
1.
Press SETTINGS.
2.
Select Camera Settings.
3.
Select Surround View
Camera.
4.
Select one of the options:
Guidelines:
Turn guidelines on or off.
Preferences: Choose additional settings.
5.
Select an option to mak
e your preferred changes.
6.
Press BACK
to exit the menu.
Failure to visually assess the area around the vehicle (directly or by use of the
mirrors) may result in a crash causing serious injury or death.
The areas shown in the surround view camera system display are limited. The
display may not show all pedestrians or other objects around your vehicle.
Do not solely rely only on the surround view camera system display to assess
whether it is safe to move your vehicle.
WARNING
Failure to pay proper attention to your surroundings while driving may result
in a crash causing serious injury or death.
To help mitigate the chances of a collision, only look at the surround view
camera system display when it is safe to do so.
WARNING
Page 126 of 170
| 119
DRIVING
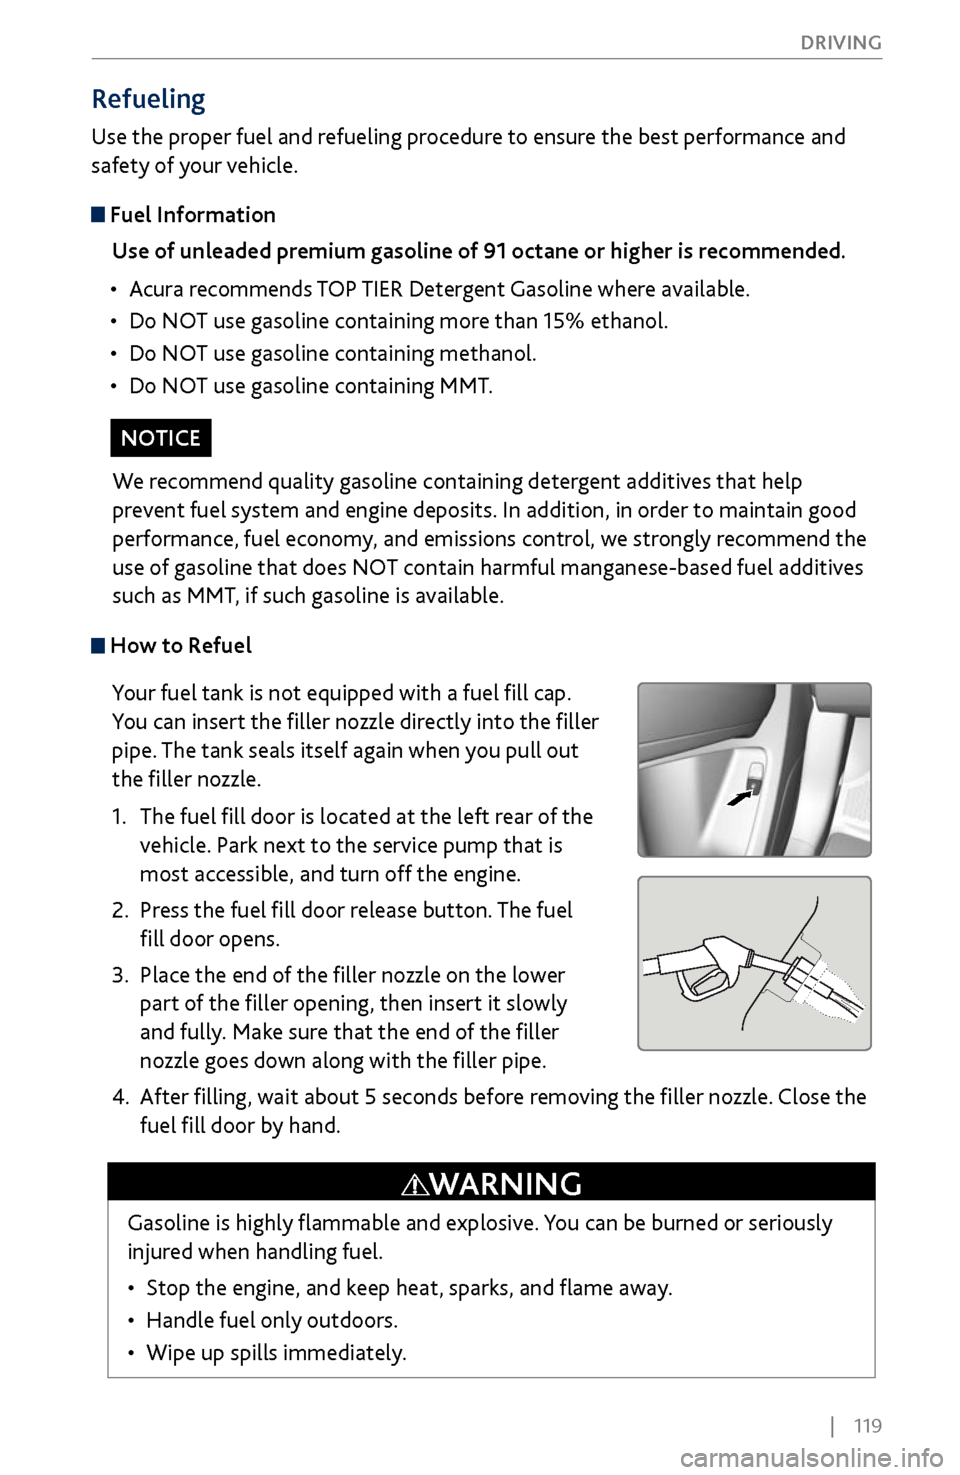
How to Refuel
Your fuel tank is not equipped with a fuel fill cap.
You can insert the filler nozzle directly into the filler
pipe. The tank seals itself again when you pull out
the filler nozzle.
1.
The fuel fill
door is located at the left rear of the
vehicle. Park next to the service pump that is
most accessible, and turn off the engine.
2.
Press the fuel fill
door release button. The fuel
fill door opens.
3.
Place the end of the filler
nozzle on the lower
part of the filler opening, then insert it slowly
and fully. Make sure that the end of the filler
nozzle goes down along with the filler pipe.
4.
After filling,
wait about 5 seconds before removing the filler nozzle. Close the
fuel fill door by hand.
Refueling
Use the proper fuel and refueling procedure to ensure the best performance and
safety of your vehicle.
Fuel Information
Use of unleaded premium gasoline of 91 octane or higher is recommended.
•
Acura recommends
TOP TIER Detergent Gasoline where available.
•
Do NOT use gasoline containing more
than 15% ethanol.
•
Do NOT use gasoline containing methanol.
•
Do NOT use gasoline containing MMT.
Gasoline is highly flammable and explosive. You can be burned or seriously
injured when handling fuel.
•
Stop the engine, and keep heat
, sparks, and flame away.
•
Handle fuel only outdoors.
•
Wipe up spills immediately.
WARNING
We recommend quality gasoline containing detergent additives that help
prevent fuel system and engine deposits. In addition, in order to maintain good
performance, fuel economy, and emissions control, we strongly recommend the
use of gasoline that does NOT contain harmful manganese-based fuel additives
such as MMT, if such gasoline is available.
NOTICE
Page 127 of 170
120 |
HANDLING THE UNEXPECTED
Jump Starting
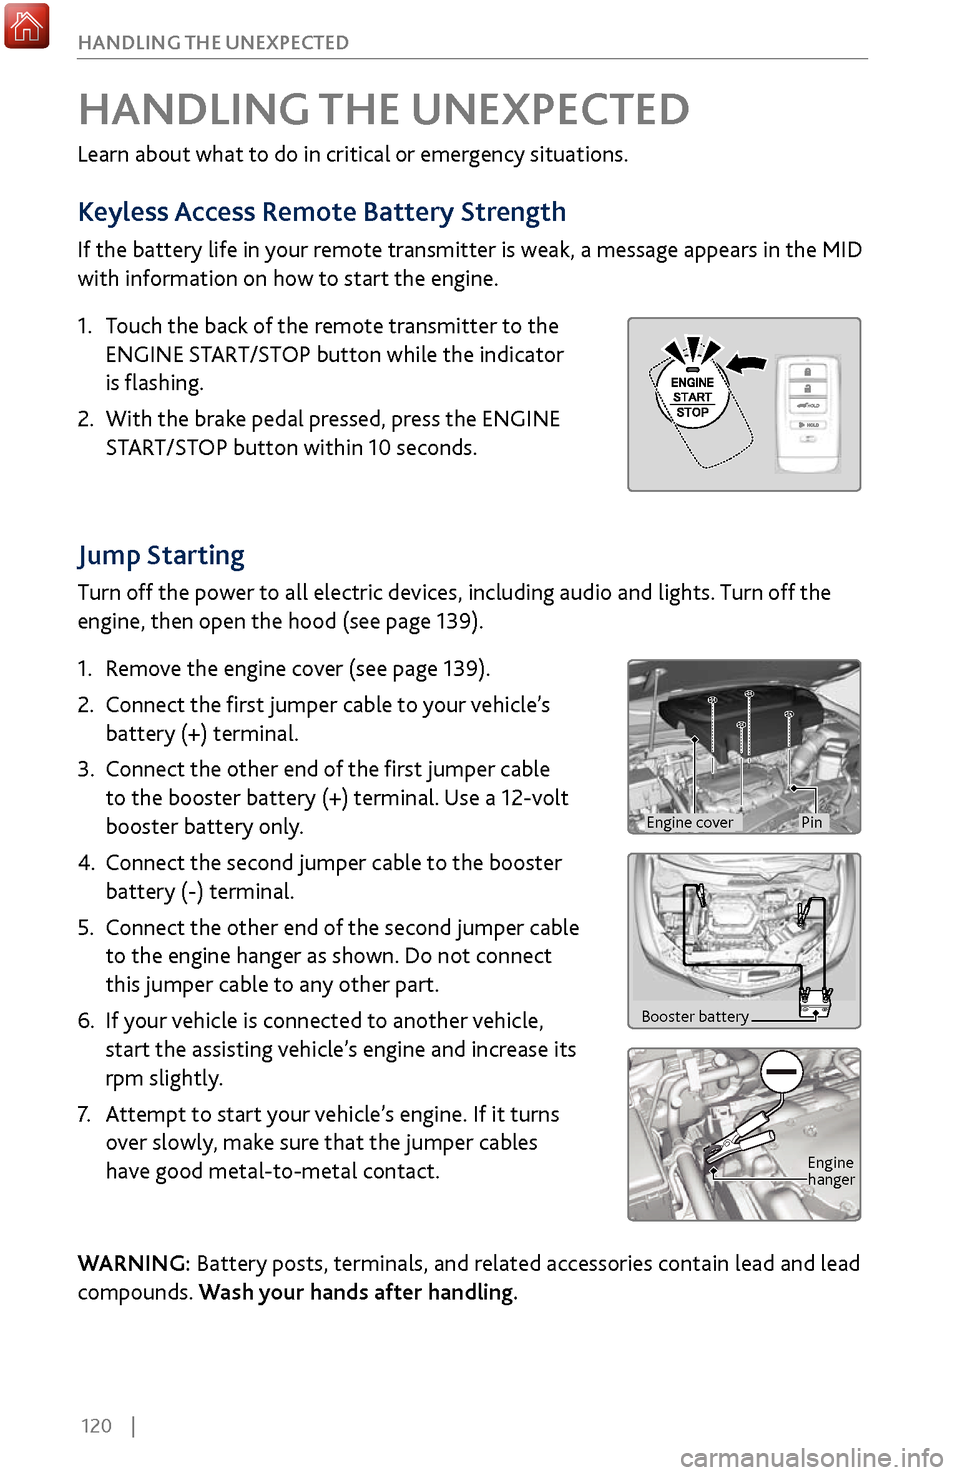
Turn off the power to all electric devices, including audio and lights. Turn off the
engine, then open the hood (see page 139).
1.
Remov
e the engine cover (see page 139).
2.
Connect the first
jumper cable to your vehicle’s
battery (+) terminal.
3.
Connect the other end of the
first jumper cable
to the booster battery (+) terminal. Use a 12-volt
booster battery only.
4.
Connect the second jumper cable
to the booster
battery (-) terminal.
5.
Connect the other end of the
second jumper cable
to the engine hanger as shown. Do not connect
this jumper cable to any other part.
6.
If your
vehicle is connected to another vehicle,
start the assisting vehicle’s engine and increase its
rpm slightly.
7.
Attempt to start
your vehicle’s engine. If it turns
over slowly, make sure that the jumper cables
have good metal-to-metal contact.
WARNING: Battery posts, terminals, and related accessories contain lead and lead
compounds. Wash your hands after handling.
HANDLING THE UNEXPECTED
Learn about what to do in critical or emergency situations.
Keyless Access Remote Battery Strength
If the battery life in your remote transmitter is weak, a message appears in the MID
with information on how to start the engine.
1.
Touch the back of the
remote transmitter to the
ENGINE START/STOP button while the indicator
is flashing.
2.
With the brake pedal pr
essed, press the ENGINE
START/STOP button within 10 seconds.
Booster battery
Engine
hanger
Engine coverPin
Page 128 of 170
| 121
HANDLING THE UNEXPECTED
After the Engine Starts
Once your vehicle’s engine has started, remove the jumper cables in the following
order:
1.
Disconnect the jumper cable fr
om your vehicle’s ground.
2.
Disconnect the other end
of the jumper cable from the booster battery (-)
terminal.
3.
Disconnect the jumper cable fr
om your vehicle’s battery (+) terminal.
4.
Disconnect the other end
of the jumper cable from the booster battery (+)
terminal.
5.
Have y
our vehicle inspected by a nearby service station or a dealer.
A battery can explode if you do not follow the correct procedure, seriously
injuring anyone nearby.
Keep all sparks, open flames, and smoking materials away from the battery.
WARNING
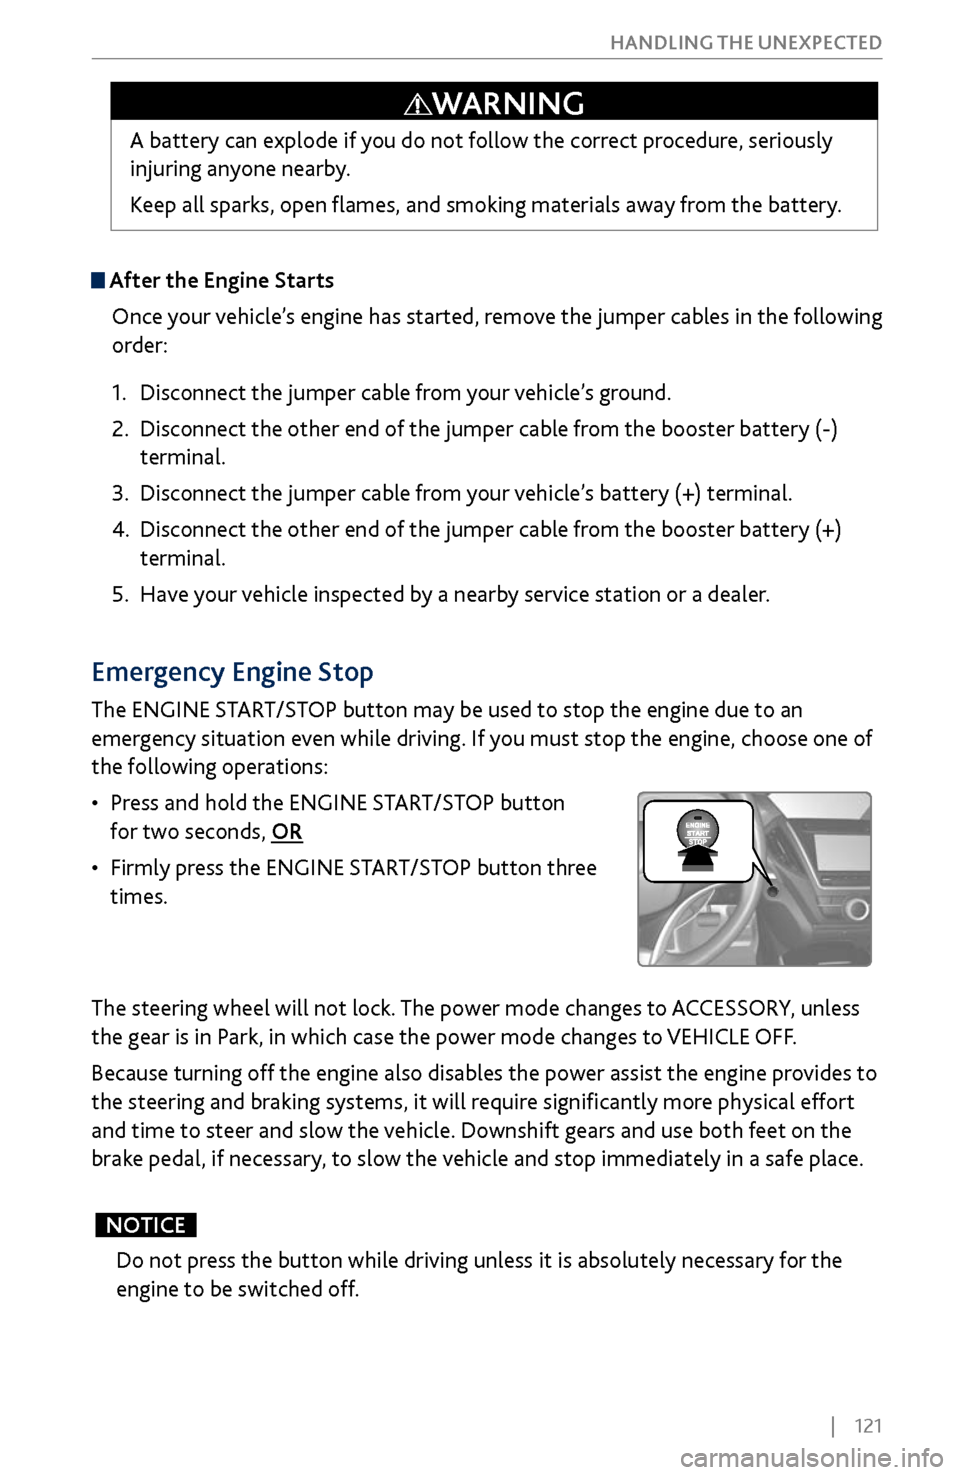
Emergency Engine Stop
The ENGINE START/STOP button may be used to stop the engine due to an
emergency situation even while driving. If you must stop the engine, choose one of
the following operations:
•
Press and hold the ENGINE
START/STOP button
for two seconds, OR
•
Firmly press
the ENGINE START/STOP button three
times.
The steering wheel will not lock. The power mode changes to ACCESSORY, unless
the gear is in Park, in which case the power mode changes to VEHICLE OFF.
Because turning off the engine also disables the power assist the engine provides to
the steering and braking systems, it will require significantly more physical effort
and time to steer and slow the vehicle. Downshift gears and use both feet on the
brake pedal, if necessary, to slow the vehicle and stop immediately in a safe place.
Do not press the button while driving unless it is absolutely necessary for the
engine to be switched off.
NOTICE