camera Acura MDX 2020 User Guide
[x] Cancel search | Manufacturer: ACURA, Model Year: 2020, Model line: MDX, Model: Acura MDX 2020Pages: 701, PDF Size: 38.91 MB
Page 116 of 701

115
uuIndicators uMulti-Information Display (MID) Warning and Information Messages
Continued
Instrument Panel
MessageConditionExplanation
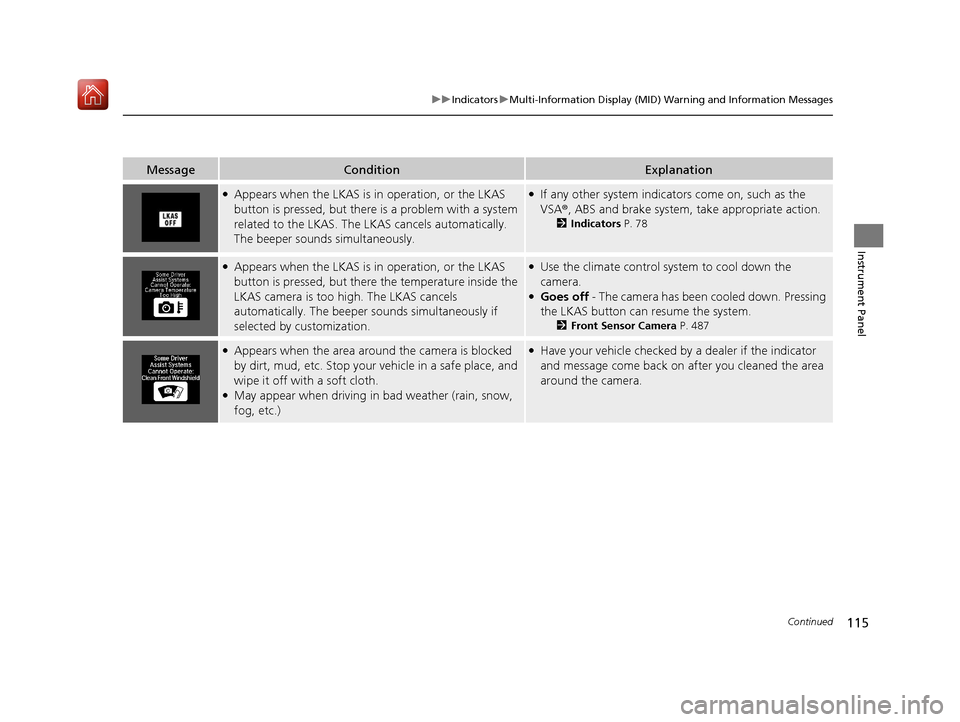
●Appears when the LKAS is in operation, or the LKAS
button is pressed, but there is a problem with a system
related to the LKAS. The LKAS cancels automatically.
The beeper sounds simultaneously.●If any other system indicators come on, such as the
VSA ®, ABS and brake system, take appropriate action.
2Indicators P. 78
●Appears when the LKAS is in operation, or the LKAS
button is pressed, but there the temperature inside the
LKAS camera is too high. The LKAS cancels
automatically. The beeper sounds simultaneously if
selected by customization.●Use the climate control system to cool down the
camera.
●Goes off - The camera has been cooled down. Pressing
the LKAS button can resume the system.
2 Front Sensor Camera P. 487
●Appears when the area around the camera is blocked
by dirt, mud, etc. Stop your vehicle in a safe place, and
wipe it off with a soft cloth.
●May appear when driving in bad weather (rain, snow,
fog, etc.)
●Have your vehicle checked by a dealer if the indicator
and message come back on after you cleaned the area
around the camera.
20 ACURA MDX-31TZ56600.book 115 ページ 2019年4月24日 水曜日 午後5時44分
Page 177 of 701

176
uuOperating the Switches Around the Steering Wheel uAuto High-Beam
Controls
Auto High-Beam
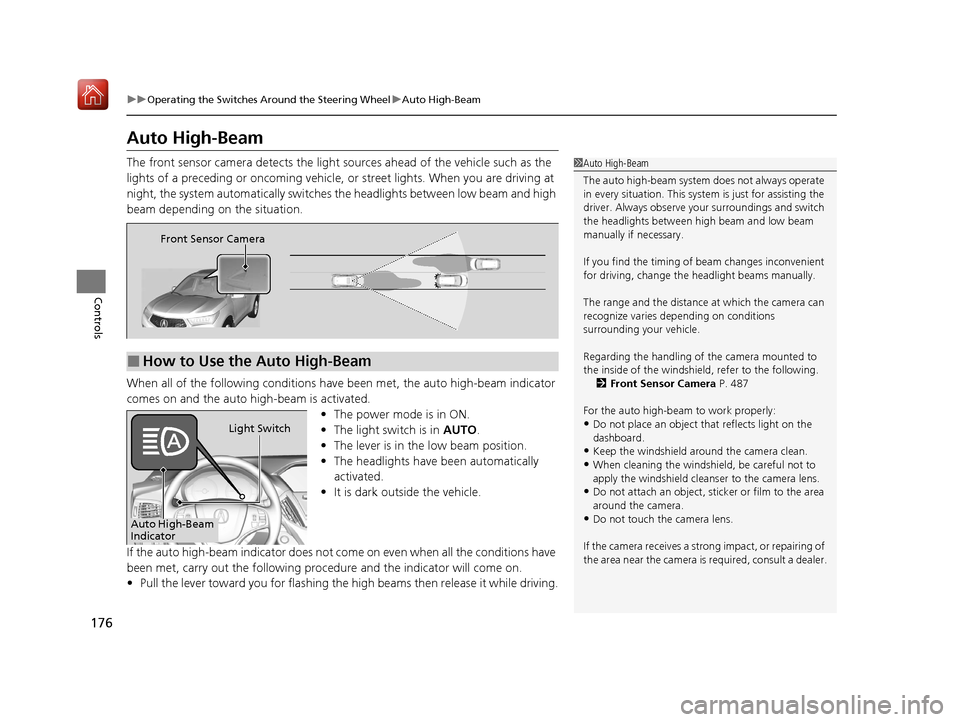
The front sensor camera detects the light sources ahead of the vehicle such as the
lights of a preceding or oncoming vehicle, or street lights. When you are driving at
night, the system automatically switches the headlights between low beam and high
beam depending on the situation.
When all of the following conditions have been met, the auto high-beam indicator
comes on and the auto high-beam is activated. •The power mode is in ON.
• The light switch is in AUTO.
• The lever is in the low beam position.
• The headlights have been automatically
activated.
• It is dark outside the vehicle.
If the auto high-beam indicator does not co me on even when all the conditions have
been met, carry out the following procedure and the indicator will come on.
• Pull the lever toward you for flashing the high beams then release it while driving.1Auto High-Beam
The auto high-beam system does not always operate
in every situation. This syst em is just for assisting the
driver. Always observe your surroundings and switch
the headlights between high beam and low beam
manually if necessary.
If you find the timing of beam changes inconvenient
for driving, change the headlight beams manually.
The range and the distance at which the camera can
recognize varies de pending on conditions
surrounding your vehicle.
Regarding the handling of the camera mounted to
the inside of the windshiel d, refer to the following.
2 Front Sensor Camera P. 487
For the auto high-beam to work properly:
•Do not place an object that reflects light on the
dashboard.
•Keep the windshield around the camera clean.
•When cleaning the windshield, be careful not to
apply the windshield cleans er to the camera lens.
•Do not attach an object, sticker or film to the area
around the camera.
•Do not touch the camera lens.
If the camera receives a st rong impact, or repairing of
the area near the camera is required, consult a dealer.
■How to Use the Auto High-Beam
Front Sensor Camera
Auto High-Beam
IndicatorLight Switch
20 ACURA MDX-31TZ56600.book 176 ページ 2019年4月24日 水曜日 午後5時44分
Page 178 of 701

Continued177
uuOperating the Switches Around the Steering Wheel uAuto High-Beam
Controls
■Automatic switching between high-beam and low-beam
When auto-high beam is active, the head lights switch between high beam and low
beam based on the following conditions.
■Manual switching between high-beam and low-beam
If you want to manually switch the h eadlights between high beam and low beam,
follow either of the procedur es below. Note that when you do this, the auto high-
beam indicator will turn off and the auto high-beam will be deactivated.
Using the lever:
Pull the lever toward you for flashing the hi gh beams then release it within about
one second while driving. u To reactivate the auto hi gh-beam, pull the lever toward you for flashing the
high beams then release it while driv ing. The auto high-beam indicator will
come on.
Using the light switch:
Turn the light switch to . u To reactivate the au to high-beam, turn the light switch to AUTO when the
lever is in the low beam position, the auto high-beam indicator will come on.
Switching to high beam:Switching to low beam:
All of the following conditions must
be met before the high beams turn
on.
●Your vehicle speed is 45mph (72
km/h) or more.
●There are no preceding or
oncoming vehicle with headlights
or taillights turned on.
●There are few street lights on the
road ahead.
One of the following conditions
must be met before the low beams
turn on.
●Your vehicle speed is 30 mph (48
km/h) or less.
●There is a preceding or oncoming
vehicle with headlights or
taillights turned on.
●There are many street lights on
the road ahead.
1How to Use the Auto High-Beam
In the following cases, th e auto high-beam system
may not switch the head lights properly or the
switching timing may be ch anged. In case of the
automatic switching operation does not fit for your
driving habits, please swit ch the headlights manually.
•The brightness of the lights from the preceding or
oncoming vehicle is intense or poor.
•Visibility is poor due to the weather (rain, snow,
fog, windshield frost, etc.).
•Surrounding light sources, such as street lights,
electric billboards and traf fic lights are illuminating
the road ahead.
•The brightness level of th e road ahead constantly
changes.
•The road is bumpy or has many curves.•A vehicle suddenly appears in front of you, or a
vehicle in front of you is not in the preceding or
oncoming direction.
•Your vehicle is tilted with a heavy load in the rear.•A traffic sign, mirror, or other reflective object
ahead is reflecting strong light toward the vehicle.
•The oncoming vehicle freq uently disappears under
roadside trees or be hind median barriers.
•The preceding or oncoming vehicle is a motorcycle,
bicycle, mobility scooter, or other small vehicle.
The auto high-beam system keeps the headlight low
beam when:
•Windshield wipers are operating.
•The camera has been detected a dense fog.
20 ACURA MDX-31TZ56600.book 177 ページ 2019年4月24日 水曜日 午後5時44分
Page 179 of 701

uuOperating the Switches Around the Steering Wheel uAuto High-Beam
178
Controls
You can turn the auto high-beam system off. If you want to turn the system off or
on, set the power mode to ON, then carry out the following procedures while the
vehicle is stationary.
To turn the system off:
With the light switch is in AUTO, pull the lever
toward you and hold it for at least 40 seconds.
After the auto high-beam indicator light blinks
twice, release the lever.
To turn the system on:
With the light switch is in AUTO, pull the lever
toward you and hold it for at least 30 seconds.
After the auto high-beam indicator light blinks
once, release the lever.
■How to Turn Off the Auto High-Beam1 How to Use the Auto High-Beam
If the Some Driver Assist Systems Cannot
Operate: Camera Temperature Too High message
appears:
•Use the climate control system to cool down the
interior and, if necessary, also use defroster mode
with the airflow directed toward the camera.
•Start driving the vehicle to lower the windshield
temperature, which cool s down the area around
the camera.
If the Some Driver Assist Systems Cannot
Operate: Clean Front Windshield message
appears:
•Park your vehicle in a sa fe place, and clean the
windshield. If the message does not disappear after
you have cleaned the winds hield and driven for a
while, have your vehicle checked by a dealer.
1 How to Turn Off the Auto High-Beam
If you turn the au to high-beam system off, the system
does not operate until you turn the system on.
Park in a safe place before turning the system off or
on.
AUTO Position
20 ACURA MDX-31TZ56600.book 178 ページ 2019年4月24日 水曜日 午後5時44分
Page 345 of 701

344
uuRear Entertainment System (RES)*uRear Control Panel Operation
Features
■Setting the play mode
1.Press the MENU button (in DVD mode).
2. Select Play Mode . Press the ENTER button.
3. Select an item. Press the ENTER button.
4. Select an option. Press the ENTER button.
The following items are available:
• Audio: Selects the language of the DVD audio.
• Subtitle : Selects the language of the DVD subtitle.
• Angle : Selects the angle of a scene shot with multiple cameras.
20 ACURA MDX-31TZ56600.book 344 ページ 2019年4月24日 水曜日 午後5時44分
Page 356 of 701

355
uuRear Entertainment System (RES)*uFront Control Panel Operation
Continued
Features
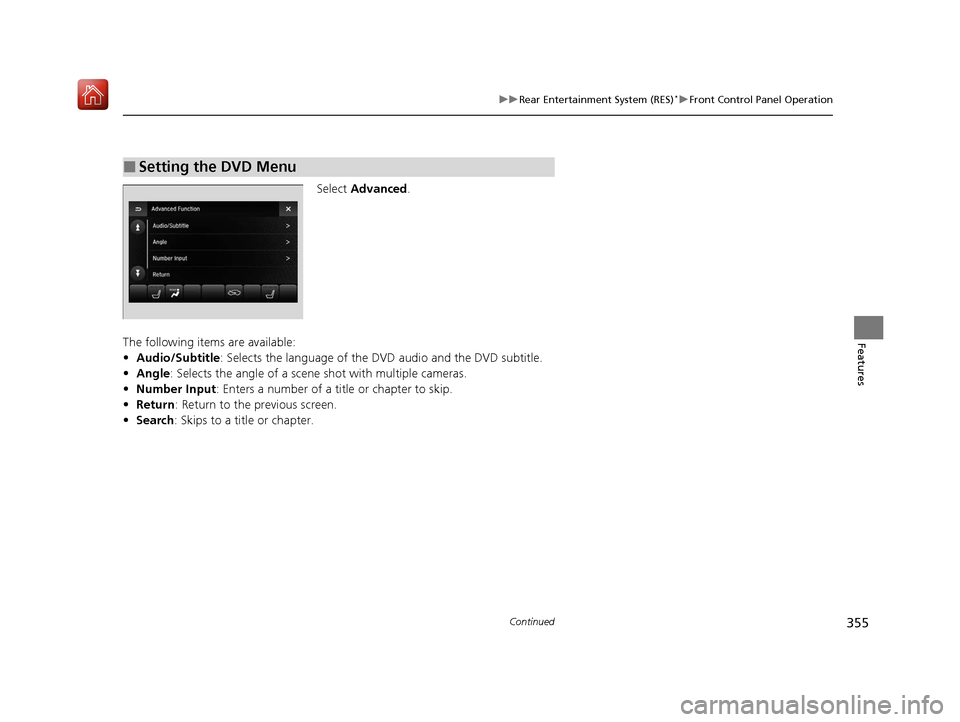
Select Advanced .
The following items are available:
• Audio/Subtitle: Selects the language of the DVD audio and the DVD subtitle.
• Angle : Selects the angle of a scene shot with multiple cameras.
• Number Input : Enters a number of a title or chapter to skip.
• Return : Return to the previous screen.
• Search : Skips to a title or chapter.
■Setting the DVD Menu
20 ACURA MDX-31TZ56600.book 355 ページ 2019年4月24日 水曜日 午後5時44分
Page 361 of 701

360
uuCustomized Features u
Features
Camera
SettingsFixed Guideline
Dynamic Guideline
Fixed Guideline
Dynamic Guideline
Camera
Settings*1Default
*1 : Models without cross traffic monitor
*2 : Models with cross traffic monitor and multi-view rear camera
*3 : Models with surround view camera system
Default Camera
Settings*2
Surround View
Camera
Auto Show Camera after Reverse
Default Camera Mode in Forward
Default Camera
Settings*3
Default Camera Mode in Reverse
Show Camera When Decelerating
Clear Parking Guidance Automatically
Fixed Guideline
Dynamic Guideline
Cross Traffic Monitor
Cross Traffic MonitorCross Traffic Monitor
Cross Traffic Monitor
20 ACURA MDX-31TZ56600.book 360 ページ 2019年4月24日 水曜日 午後5時44分
Page 368 of 701

367
uuCustomized Features u
Continued
Features
*1:Default SettingSetup
Group Customizable Features Desc
ription Selectable Settings
Camera
Settings Default
Cancels/Resets all customized items in the
Camera Settings
group as default. Yes
/No
Fixed Guideline Selects whether the fixed
guidelines come on the
rear camera monitor. On
*1/
Off
Dynamic Guideline Selects whether the dynamic guidelines come on
the rear camera monitor. On*1/
Off
Camera
Settings
DefaultCancels/Resets all customized items in the
Camera Settings group as default.Yes/No
Rear
CameraFixed GuidelineSelects whether the fixed guidelines come on the
rear camera monitor.On*1/ Off
Dynamic GuidelineSelects whether the dynamic guidelines come on
the rear camera monitor.On*1/Off
Cross
Traffic
Monitor
Cross Traffic MonitorTurns the cross traffic m onitor feature on and off.On*1/Off
Models
without
cross traffic
monitor
Models with
cross traffic
monitor and
multi-view
rear camera
20 ACURA MDX-31TZ56600.book 367 ページ 2019年4月24日 水曜日 午後5時44分
Page 369 of 701

368
uuCustomized Features u
Features
*1:Default SettingSetup
Group Customizable Features Desc
ription Selectable Settings
Camera
Settings Default
Cancels/Resets all customized items in the
Camera Settings group as default. Yes
/No
Surround
View
Camera Fixed Guideline
Sets whether to turn on the reference line
display.
On
*1/
Off
Dynamic Guideline Sets whether to turn on the projection line
display. On
*1/
Off
Auto Show Camera
after Reverse Sets the rear view to be
automatically switched to
the front view when the transmission is out of
(R. On
/Off
*1
Default Camera Mode in
Forward Sets which screen to display when the surround
view camera system is
turned on while the
vehicle is moving forward. (Front Ground
View)*1/ Last Used /
(Front Wide View)/
(Side View)
Default Camera Mode in
Reverse Sets which screen to display when the surround
view camera system is
turned on while the
vehicle is reversing. (Rear Ground
View)
*1/ Last Used /
(Rear Normal View)/ (Rear Wide View)
Show Camera When
Decelerating Sets the screen to automa
tically return to the
camera view at vehicle speeds of 7 mph (12
km/h) or lower. On
/Off
*1
Models with
surround
view camera
system
20 ACURA MDX-31TZ56600.book 368 ページ 2019年4月24日 水曜日 午後5時44分
Page 370 of 701

369
uuCustomized Features u
Continued
Features
*1:Default SettingSetup
Group Customizable Features Desc
ription Selectable Settings
Camera
Settings Surround
View
Camera
Clear Parking Guidance
Automatically
Turns the parking guide lines on and off.
On
*1/Off
Cross
Traffic
Monitor Cross Traffic Monitor
Turns the cross traffic monitor feature on and off. On
*1/Off
Models with
surround
view camera
system
20 ACURA MDX-31TZ56600.book 369 ページ 2019年4月24日 水曜日 午後5時44分