display Acura RDX 2014 Navigation Manual
[x] Cancel search | Manufacturer: ACURA, Model Year: 2014, Model line: RDX, Model: Acura RDX 2014Pages: 260, PDF Size: 10.9 MB
Page 149 of 260
148
Playing a DiscAudio Menu
Audio
Audio Menu
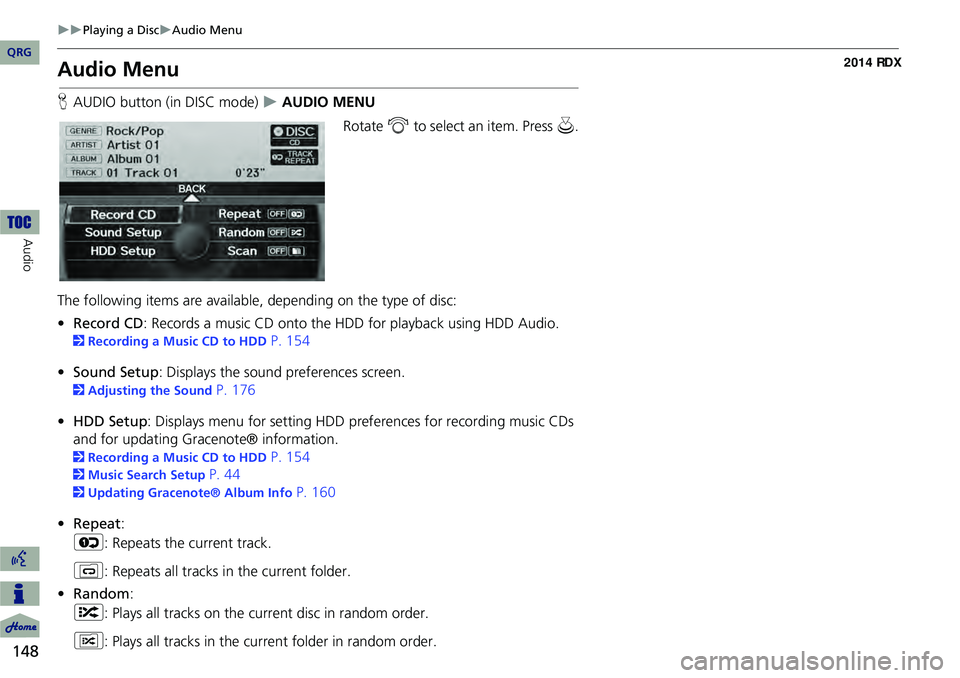
HAUDIO button (in DISC mode) AUDIO MENU
Rotate i to select an item. Press u .
The following items are available, depending on the type of disc:
• Record CD : Records a music CD onto the HDD for playback using HDD Audio.
2Recording a Music CD to HDD P. 154
• Sound Setup: Displays the sound preferences screen.
2 Adjusting the Sound P. 176
• HDD Setup : Displays menu for setting HDD pref erences for recording music CDs
and for updating Gracenote® information.
2 Recording a Music CD to HDD P. 154
2Music Search Setup P. 44
2Updating Gracenote® Album Info P. 160
• Repeat :
6 : Repeats the current track.
7 : Repeats all tracks in the current folder.
• Random :
F : Plays all tracks on the curre nt disc in random order.
I : Plays all tracks in the curr ent folder in random order.
QRG
Page 150 of 260
149
Playing a DiscPlaying MP3/WMA/AAC Discs
•Scan :
1 : Scans all tracks on the disc (or in the se lected folder) in the order they were
recorded (stored) and plays a 10-second sample. Select OFF to stop scanning and
play the current selection.
2 : Scans the first track in each folder on the disc and plays a 10-second
sample. Select OFF to stop scanning and play the current selection.
Playing MP3/WMA/AAC Discs
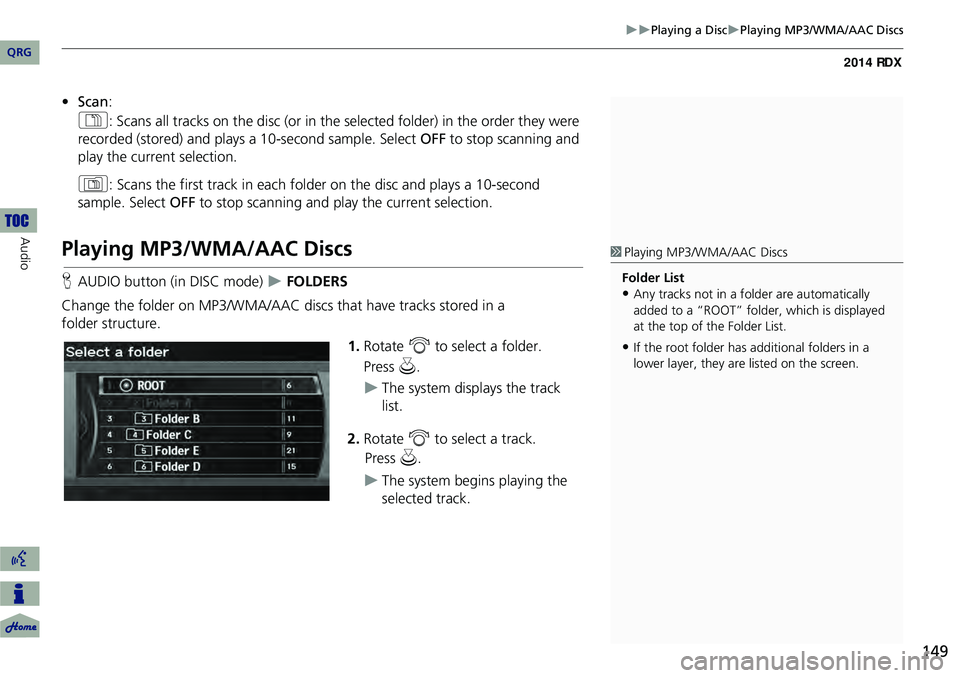
HAUDIO button (in DISC mode) FOLDERS
Change the folder on MP3/WMA/AAC discs that have tracks stored in a
folder structure. 1.Rotate i to select a folder.
The system displays the track
list.
2. Rotate i to select a track.
The system begins playing the
selected track.
1Playing MP3/WMA/AAC Discs
Folder List
•Any tracks not in a folder are automatically
added to a “ROOT” folder, which is displayed
at the top of the Folder List.
•If the root folder has additional folders in a
lower layer, they are listed on the screen.
QRG
Au dio
Pr ess u .
Pr ess u .
Page 151 of 260
150
Playing a DiscRecommended Discs
Audio
Recommended Discs
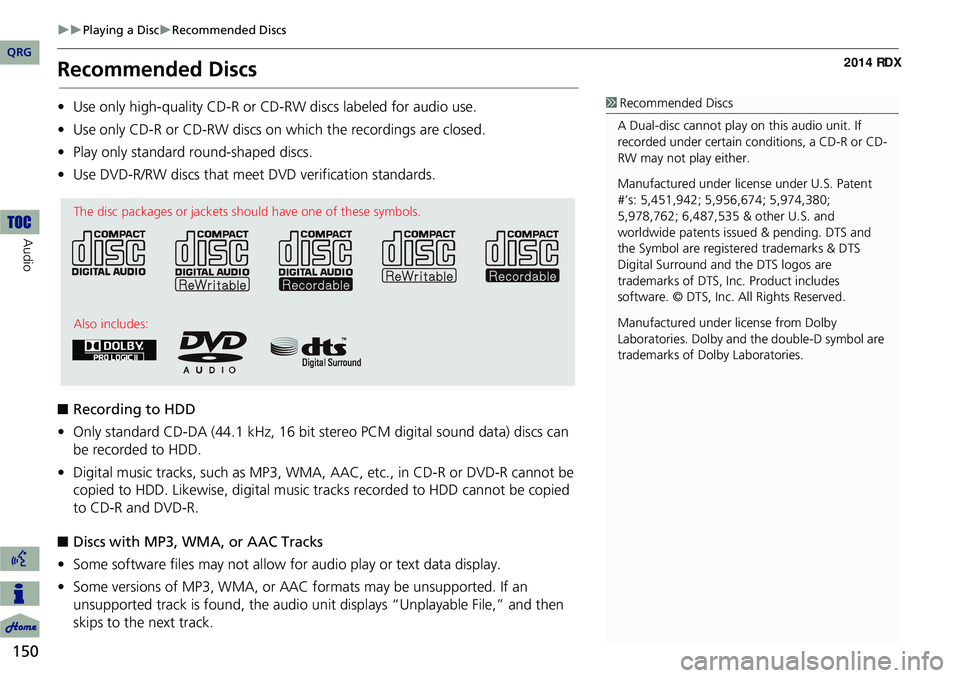
•Use only high-quality CD-R or CD-RW discs labeled for audio use.
• Use only CD-R or CD-RW discs on which the recordings are closed.
• Play only standard round-shaped discs.
• Use DVD-R/RW discs that meet DVD verification standards.
■ Recording to HDD
• Only standard CD-DA (44.1 kHz, 16 bit stereo PCM digital sound data) discs can
be recorded to HDD.
• Digital music tracks, such as MP3, WMA, AAC, etc., in CD-R or DVD-R cannot be
copied to HDD. Likewise, digital music tracks recorded to HDD cannot be copied
to CD-R and DVD-R.
■ Discs with MP3, WMA, or AAC Tracks
• Some software files may not allow for audio play or text data display.
• Some versions of MP3, WMA, or AAC formats may be unsupported. If an
unsupported track is found, the audio unit displays “Unplayable File,” and then
skips to the next track.1 Recommended Discs
A Dual-disc cannot play on this audio unit. If
recorded under certain conditions, a CD-R or CD-
RW may not play either.
Manufactured under licens e under U.S. Patent
#’s: 5,451,942; 5,956,674; 5,974,380;
5,978,762; 6,487,535 & other U.S. and
worldwide patents issu ed & pending. DTS and
the Symbol are registered trademarks & DTS
Digital Surround and the DTS logos are
trademarks of DTS, Inc. Product includes
software. © DTS, Inc. All Rights Reserved.
Manufactured under license from Dolby
Laboratories. Dolby and the double-D symbol are
trademarks of Dolby Laboratories.
The disc packages or jackets should have one of these symbols.
Also includes:
QRG
Page 152 of 260
151
Playing Hard Disc Drive (HDD) Audio
The Hard Disc Drive (HDD) Audio function plays tracks from music CDs that have
been recorded onto the built-in HDD. You ca n arrange the tracks in playlists or play
the tracks using various search methods.
Selecting HDD Mode
1. Press the HDD/AUX button to play tracks stored on the HDD.
2. Select a track by genre, artist, album, recording date, playlist, or track list.
The track number and elapsed time ar e displayed on the display. Title
information is displayed if found in the Gracenote® Album Info (Gracenote®
Media Database) stored on the HDD.
The HDD has two types of playlists: original playlists and user playlists. An
original playlist is automatically created for each album when a music CD is
recorded. You can customize up to six us er playlists provided on the HDD by
adding tracks from your original playlists.
1 Playing Hard Disc Drive (HDD) Audio
d “Display audio screen”
You can control the HDD audio using voice
commands.
2 HDD Commands P. 248
A visual guide helps you operate the audio
system.
2 System Controls P. 4
2 Basic Operation P. 6
Music tracks recorded on HDD cannot be
recorded onto CDs or other devices.
Tracks are recorded at four times the playback
speed using ultra-eff icient compression
technology; therefore, sound quality may vary
slightly from the original.
If the HDD is ever replaced, all music data is lost
and cannot be recovered.
If there is a problem, you may see an error
message on the display.
2 Error Messages P. 225
QRG
Au dio
Page 153 of 260
152
Playing Hard Disc Drive (HDD) AudioAudio Screen Control
Audio
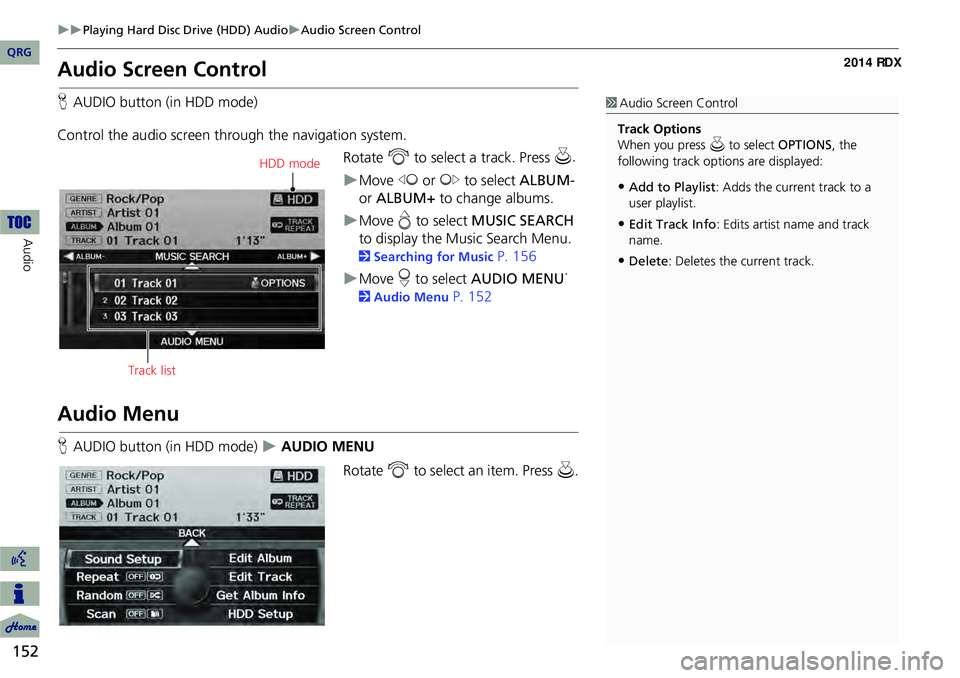
Audio Screen Control
HAUDIO button (in HDD mode)
Control the audio screen through the navigation system. Rotate i to select a track. Press u
.
Move w or y to select ALBUM-
or ALBUM+ to change albums.
Move e to select MUSIC SEARCH
to display the Music Search Menu.
2 Searching for Music P. 156
Move r to select AUDIO MENU .
2
Audio Menu P. 152
Audio Menu
HAUDIO button (in HDD mode) AUDIO MENU
Rotate i to select an item. Press u .
1Audio Screen Control
Track Options
When you press u to select OPTIONS , the
following track options are displayed:
•Add to Playlist : Adds the current track to a
user playlist.
•Edit Track Info : Edits artist name and track
name.
•Delete : Deletes the current track.
HDD mode
Track list
QRG
Page 154 of 260
153
Playing Hard Disc Drive (HDD) AudioAudio Menu
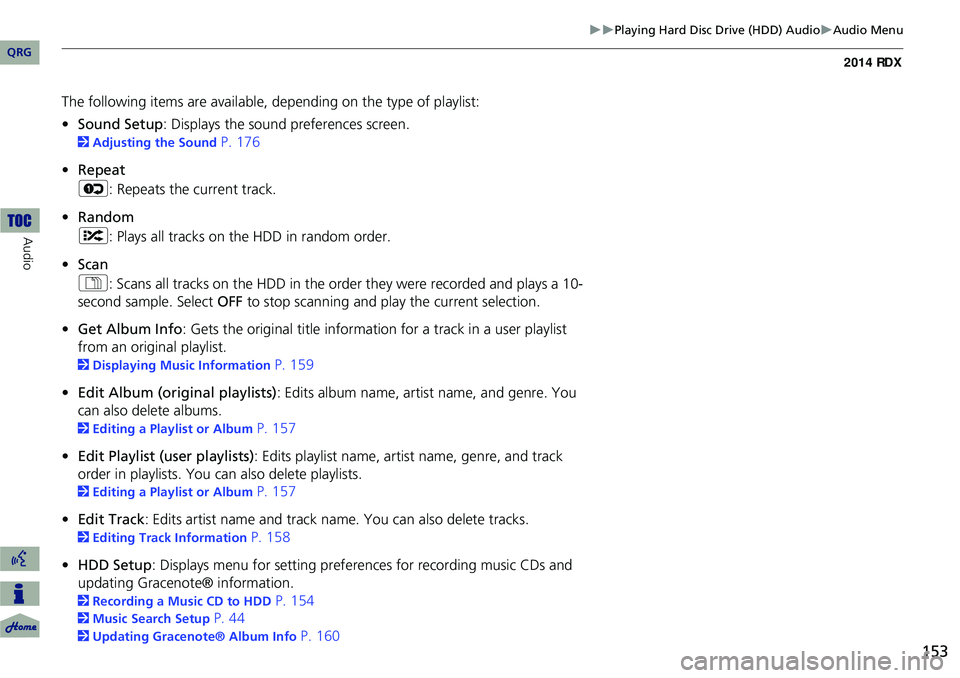
The following items are available, depending on the type of playlist:
• Sound Setup : Displays the sound preferences screen.
2Adjusting the Sound P. 176
• Repeat
6 : Repeats the current track.
• Random
F : Plays all tracks on the HDD in random order.
• Scan
1 : Scans all tracks on the HDD in the orde r they were recorded and plays a 10-
second sample. Select OFF to stop scanning and play the current selection.
• Get Album Info : Gets the original title informati on for a track in a user playlist
from an original playlist.
2 Displaying Music Information P. 159
• Edit Album (original playlists) : Edits album name, artist name, and genre. You
can also delete albums.
2 Editing a Playlist or Album P. 157
• Edit Playlist (user playlists) : Edits playlist name, artist name, genre, and track
order in playlists. You can also delete playlists.
2 Editing a Playlist or Album P. 157
• Edit Track : Edits artist name and track name. You can also delete tracks.
2Editing Track Information P. 158
• HDD Setup : Displays menu for setting preferences for recording music CDs and
updating Gracenote® information.
2 Recording a Music CD to HDD P. 154
2Music Search Setup P. 44
2Updating Gracenote® Album Info P. 160
QRG
Au dio
Page 157 of 260
156
Playing Hard Disc Drive (HDD) AudioSearching for Music
Audio
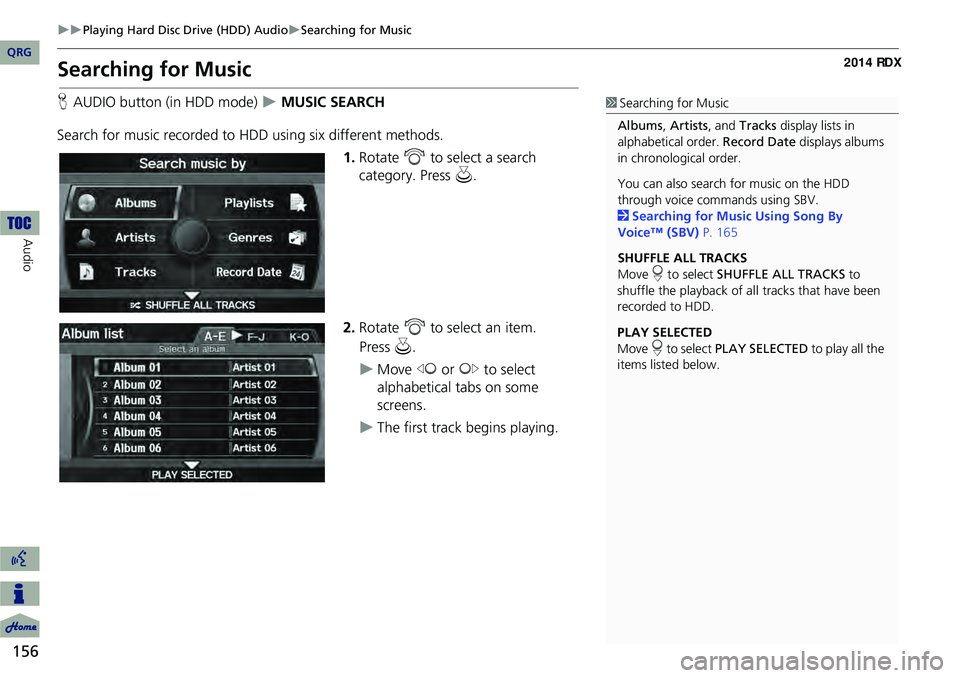
Searching for Music
HAUDIO button (in HDD mode) MUSIC SEARCH
Search for music recorded to HDD using six different methods. 1.Rotate i to select a search
category. Press u.
2. Rotate i to select an item.
Move w or y to select
alphabetical tabs on some
screens.
The first track begins playing.
1 Searching for Music
Albums , Artists, and Tracks display lists in
alphabetical order. Record Date displays albums
in chronological order.
You can also search for music on the HDD
through voice commands using SBV.
2 Searching for Music Using Song By
Voice™ (SBV) P. 165
SHUFFLE ALL TRACKS
Move r to select SHUFFLE ALL TRACKS to
shuffle the playback of al l tracks that have been
recorded to HDD.
PLAY SELECTED
Move r to select PLAY SELECTED to play all the
items listed below.
QRG
Pre ss u .
Page 160 of 260
159
Playing Hard Disc Drive (HDD) AudioDisplaying Music Information
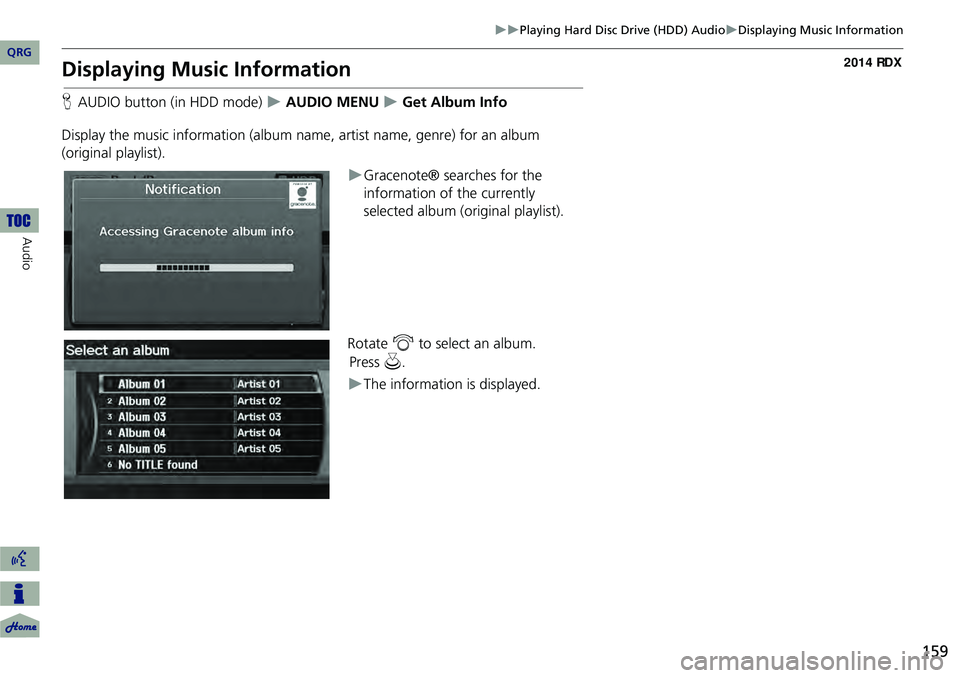
Displaying Music Information
HAUDIO button (in HDD mode) AUDIO MENU Get Album Info
Display the music information (album name, artist name, genre) for an album
(original playlist).
Gracenote® searches for the
information of the currently
selected album (original playlist).
Rotate i to select an album.
The information is displayed.
QRG
Audio
Pre ss u .
Page 162 of 260
161
Playing an iPod®
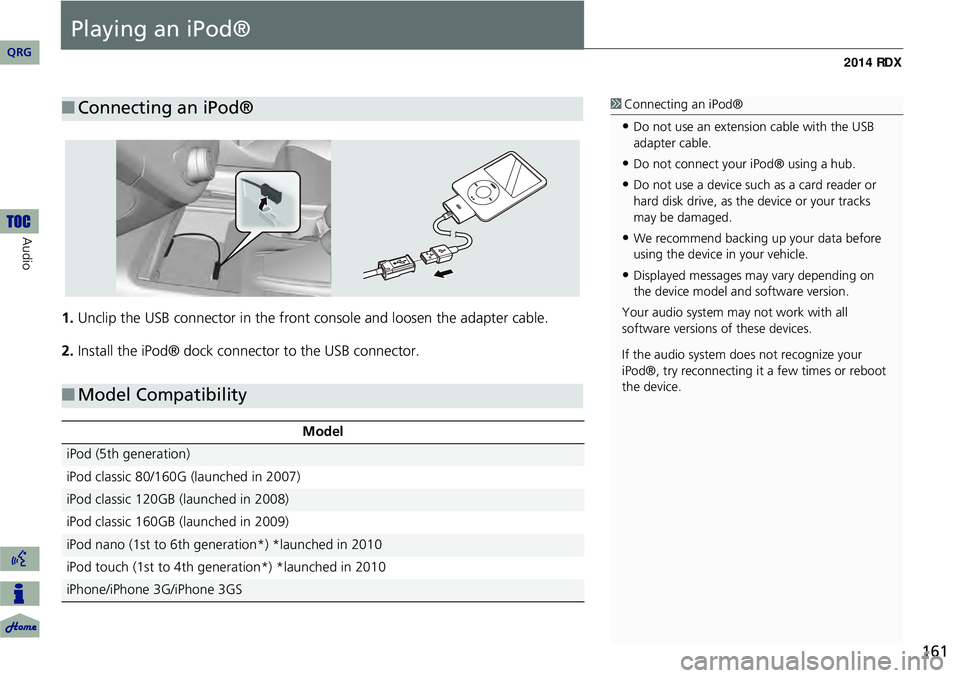
1.Unclip the USB connector in the front console and loosen the adapter cable.
2. Install the iPod® dock connector to the USB connector.
■Connecting an iPod®1 Connecting an iPod®
•Do not use an extension cable with the USB
adapter cable.
•Do not connect your iPod® using a hub.
•Do not use a device such as a card reader or
hard disk drive, as th e device or your tracks
may be damaged.
•We recommend backing up your data before
using the device in your vehicle.
•Displayed messages ma y vary depending on
the device model and software version.
Your audio system ma y not work with all
software versions of these devices.
If the audio system do es not recognize your
iPod®, try reconne cting it a few times or reboot
the device.
■ Model Compatibility
Model
iPod (5th generation)
iPod classic 80/160G (launched in 2007)
iPod classic 120GB (launched in 2008)
iPod classic 160GB (launched in 2009)
iPod nano (1st to 6th generation*) *launched in 2010
iPod touch (1st to 4th generation*) *launched in 2010
iPhone/iPhone 3G/iPhone 3GS
QRG
Au dio
Page 163 of 260
162
Playing an iPod®Selecting iPod® Mode
Audio
Selecting iPod® Mode
1.Connect the iPod® to the USB adapter cable in the console compartment.
2. Press the HDD/AUX button until you get to iPod® mode.
3. Select a track using the iPod® menu on the screen.
The current track number and total number of tracks are displayed.
Audio Screen Control
HAUDIO button (in iPod® mode)
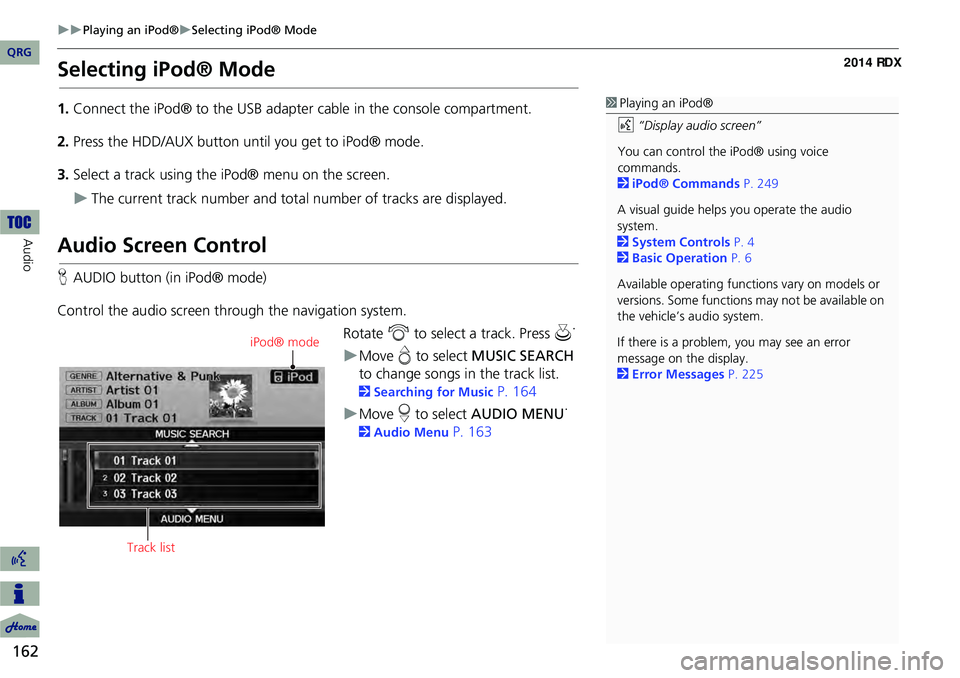
Control the audio screen through the navigation system. Rotate i to select a track. Press u.
Move
e to select MUSIC SEARCH
to change songs in the track list.
2Searching for Music P. 164
Move r to select AUDIO MENU .
2
Audio Menu P. 163
1Playing an iPod®
d “Display audio screen”
You can control the iPod® using voice
commands.
2 iPod® Commands P. 249
A visual guide helps you operate the audio
system.
2 System Controls P. 4
2 Basic Operation P. 6
Available operating functi ons vary on models or
versions. Some functions may not be available on
the vehicle’s audio system.
If there is a problem, you may see an error
message on the display.
2 Error Messages P. 225
iPod® mode
Track list
QRG