ECO mode Acura RDX 2014 Navigation Manual
[x] Cancel search | Manufacturer: ACURA, Model Year: 2014, Model line: RDX, Model: Acura RDX 2014Pages: 260, PDF Size: 10.9 MB
Page 175 of 260
174
Audio
Playing Bluetooth ® Audio
Your audio system allows you to listen to music tracks stored on your Bluetooth-
compatible phone.
This function is available when the phone is linked to the vehicle’s Bluetooth®
HandsFreeLink® (HFL) system.
2 Bluetooth® HandsFreeLink® P. 179
Selecting Bluetooth ® Audio Mode
1.Make sure that your phone is on, paired, and linked to HFL.
2Pairing a Phone P. 182
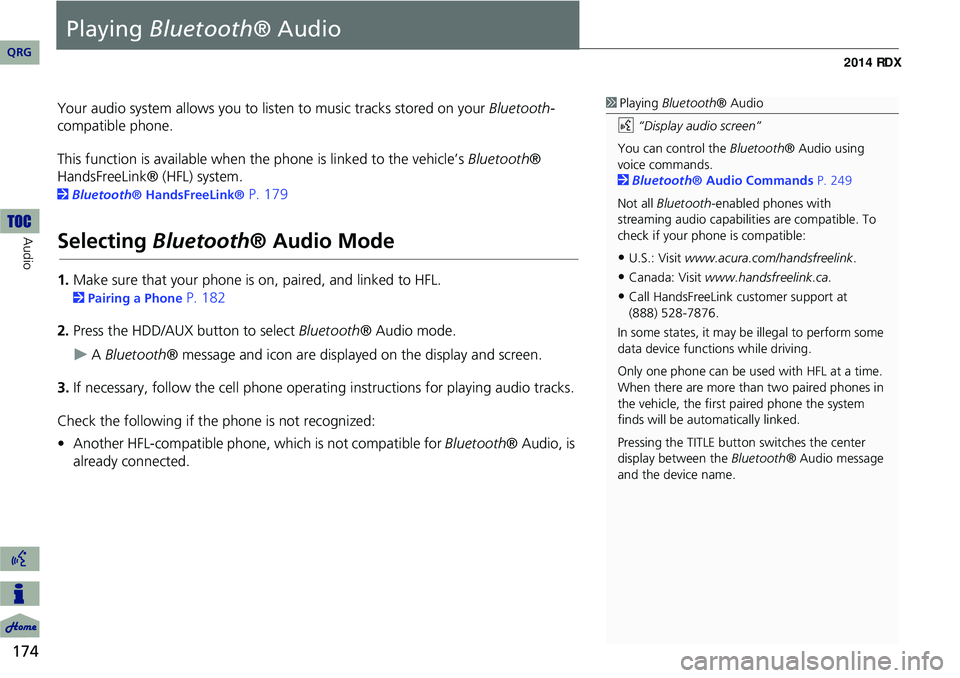
2. Press the HDD/AUX button to select Bluetooth® Audio mode.
A Bluetooth ® message and icon are displaye d on the display and screen.
3. If necessary, follow the cell phone operating instructions for playing audio tracks.
Check the following if the phone is not recognized:
• Another HFL-compatible phone, which is not compatible for Bluetooth® Audio, is
already connected.
1 Playing Bluetooth ® Audio
d “Display audio screen”
You can control the Bluetooth® Audio using
voice commands.
2 Bluetooth ® Audio Commands P. 249
Not all Bluetooth -enabled phones with
streaming audio capabilities are compatible. To
check if your phone is compatible:
•U.S.: Visit www.acura.com/handsfreelink .
•Canada: Visit www.handsfreelink.ca .
•Call HandsFreeLink customer support at
(888) 528-7876.
In some states, it may be illegal to perform some
data device functions while driving.
Only one phone can be used with HFL at a time.
When there are more than two paired phones in
the vehicle, the first paired phone the system
finds will be automatically linked.
Pressing the TITLE button switches the center
display between the Bluetooth® Audio message
and the device name.
QRG
Page 177 of 260
176
Audio
Adjusting the Sound
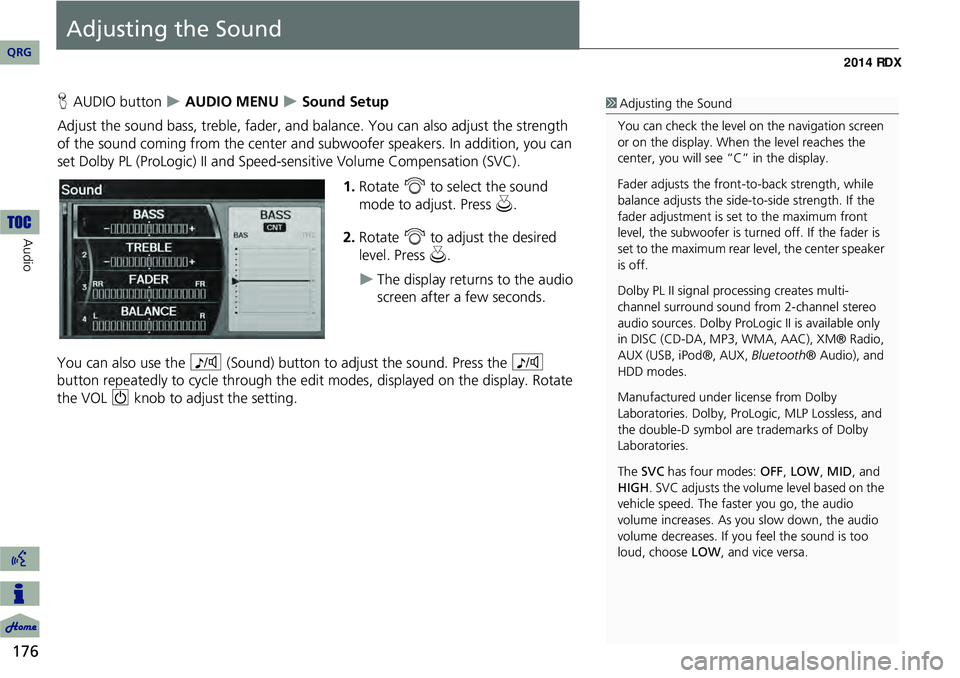
HAUDIO button AUDIO MENU Sound Setup
Adjust the sound bass, treble, fader, and ba lance. You can also adjust the strength
of the sound coming from the center and subwoofer speakers. In addition, you can
set Dolby PL (ProLogic) II and Speed-s ensitive Volume Compensation (SVC).
1.Rotate i to select the sound
mode to adjust. Press u.
2. Rotate i to adjust the desired
level. Press u.
The display returns to the audio
screen after a few seconds.
You can also use the 8 (Sound) button to adjust the sound. Press the 8
button repeatedly to cycle through the edit modes, displayed on the display. Rotate
the VOL 9 knob to adjust the setting.
1Adjusting the Sound
You can check the level on the navigation screen
or on the display. When the level reaches the
center, you will see “C” in the display.
Fader adjusts the front-t o-back strength, while
balance adjusts the side-to-side strength. If the
fader adjustment is set to the maximum front
level, the subwoofer is turned off. If the fader is
set to the maximum rear level, the center speaker
is off.
Dolby PL II signal proc essing creates multi-
channel surround sound fro m 2-channel stereo
audio sources. Dolby ProL ogic II is available only
in DISC (CD-DA, MP3, WMA, AAC), XM® Radio,
AUX (USB, iPod®, AUX, Bluetooth® Audio), and
HDD modes.
Manufactured under license from Dolby
Laboratories. Dolby, ProL ogic, MLP Lossless, and
the double-D symbol are trademarks of Dolby
Laboratories.
The SVC has four modes: OFF, LOW , MID, and
HIGH. SVC adjusts the volume level based on the
vehicle speed. The faster you go, the audio
volume increases. As you slow down, the audio
volume decreases. If you feel the sound is too
loud, choose LOW , and vice versa.
QRG
Page 215 of 260
214
Information FunctionsKey to ZAGAT Ratings
Other Features
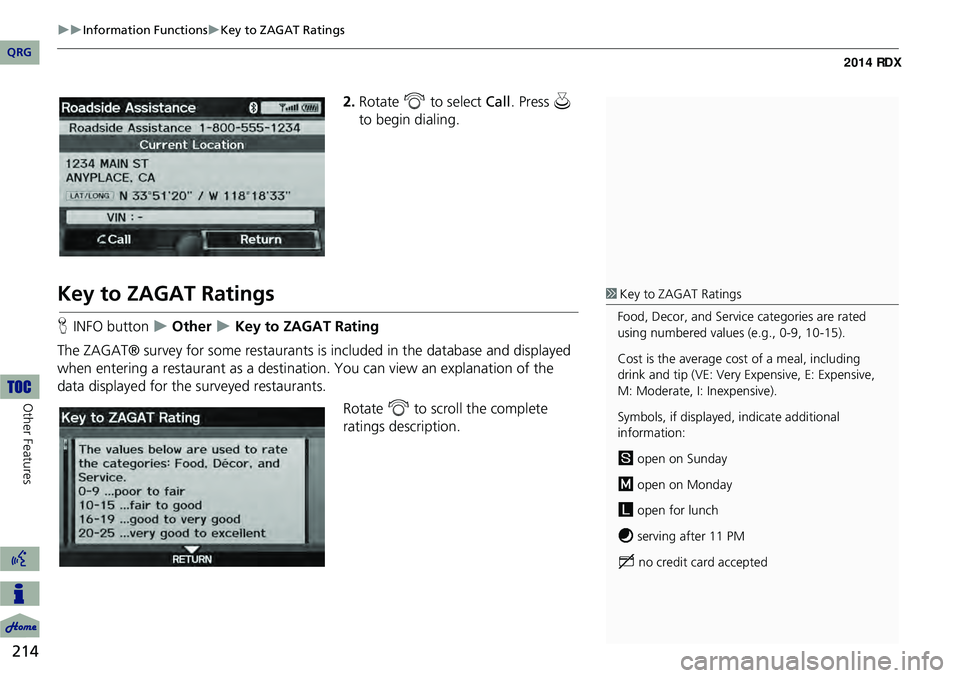
2.Rotate i to select Call . Press u
to begin dialing.
Key to ZAGAT Ratings
H INFO button Other Key to ZAGAT Rating
The ZAGAT® survey for some restaurants is included in the database and displayed
when entering a restaurant as a destinat ion. You can view an explanation of the
data displayed for the surveyed restaurants.
Rotate i to scroll the complete
ratings description.
1 Key to ZAGAT Ratings
Food, Decor, and Service categories are rated
using numbered values (e.g., 0-9, 10-15).
Cost is the average cost of a meal, including
drink and tip (VE: Very Expensive, E: Expensive,
M: Moderate, I: Inexpensive).
Symbols, if displayed, indicate additional
information:
s open on Sunday
m open on Monday
l open for lunch
f serving after 11 PM
g no credit card accepted
QRG
Page 217 of 260
216
Other Features
Multi-View Rear Camera
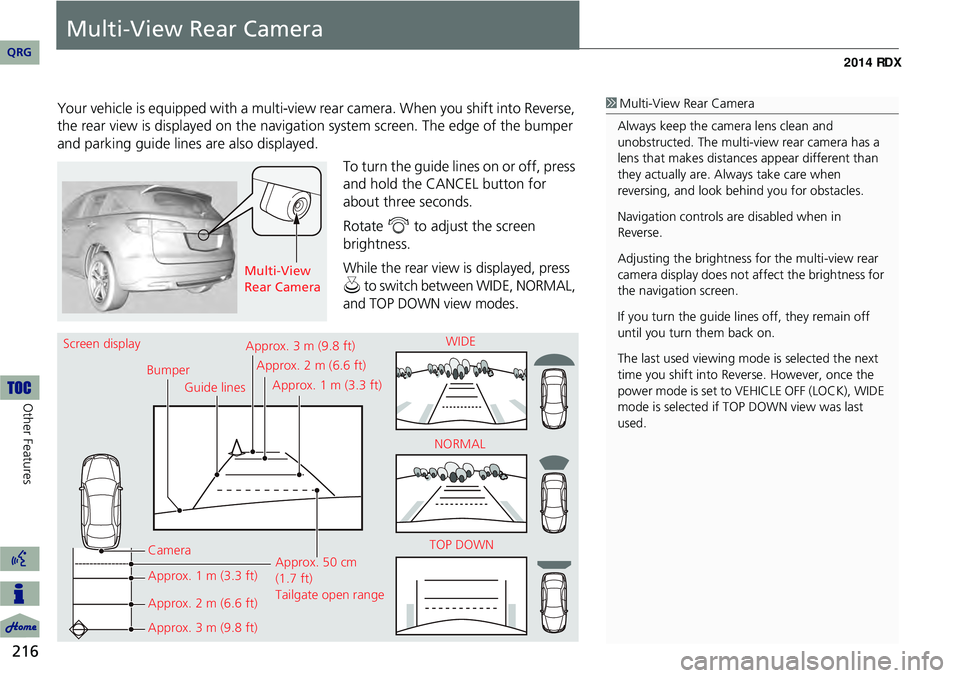
Your vehicle is equipped with a multi-view rear camera. When you shift into Reverse,
the rear view is displayed on the navigati on system screen. The edge of the bumper
and parking guide lines are also displayed.
To turn the guide lines on or off, press
and hold the CANCEL button for
about three seconds.
Rotate i to adjust the screen
brightness.
While the rear view is displayed, press
u to switch between WIDE, NORMAL,
and TOP DOWN view modes.
1 Multi-View Rear Camera
Always keep the camera lens clean and
unobstructed. The multi-view rear camera has a
lens that makes distances appear different than
they actually are. Always take care when
reversing, and look be hind you for obstacles.
Navigation controls ar e disabled when in
Reverse.
Adjusting the brightness fo r the multi-view rear
camera display does not af fect the brightness for
the navigation screen.
If you turn the guide lines off, they remain off
until you turn them back on.
The last used viewing mode is selected the next
time you shift into Reverse. However, once the
power mode is set to VE HICLE OFF (LOCK), WIDE
mode is selected if TOP DOWN view was last
used.
Multi-View
Rear Camera
Screen display
BumperGuide lines
Camera
Approx. 1 m (3.3 ft)
Approx. 2 m (6.6 ft)
Approx. 3 m (9.8 ft) Approx. 50 cm
(1.7 ft)
Tailgate open range
Approx. 3 m (9.8 ft)
Approx. 2 m (6.6 ft)
Approx. 1 m (3.3 ft) WIDE
NORMAL
TOP DOWN
QRG
Page 220 of 260
219
TroubleshootingMap, Voice, Entering Destinations
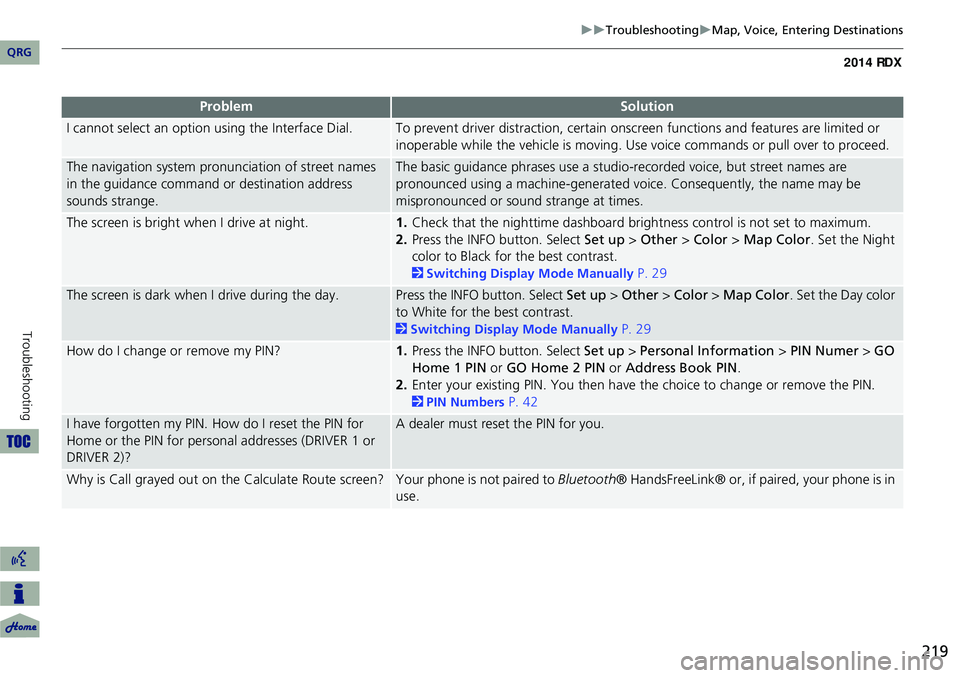
I cannot select an option using the Interface Dial.To prevent driver distraction, certain onscr een functions and features are limited or
inoperable while the vehicle is moving. Use voice commands or pull over to proceed.
The navigation system pronunciation of street names
in the guidance command or destination address
sounds strange.The basic guidance phrases use a studio- recorded voice, but street names are
pronounced using a machine-generated voice. Consequently, the name may be
mispronounced or sound strange at times.
The screen is bright when I drive at night.1. Check that the nighttime dashboard brig htness control is not set to maximum.
2. Press the INFO button. Select Set up > Other > Color > Map Color . Set the Night
color to Black for the best contrast.
2 Switching Display Mode Manually P. 29
The screen is dark when I drive during the day.Press the INFO button. Select Set up > Other > Color > Map Color . Set the Day color
to White for the best contrast.
2 Switching Display Mode Manually P. 29
How do I change or remove my PIN?1. Press the INFO button. Select Set up > Personal Information > PIN Numer > GO
Home 1 PIN or GO Home 2 PIN or Address Book PIN .
2. Enter your existing PIN. You then have the choice to change or remove the PIN.
2PIN Numbers P. 42
I have forgotten my PIN. How do I reset the PIN for
Home or the PIN for personal addresses (DRIVER 1 or
DRIVER 2)?A dealer must reset the PIN for you.
Why is Call grayed out on the Calculate Route screen?Your phone is not paired to Bluetooth® HandsFreeLink® or, if paired, your phone is in
use.
ProblemSolution
QRG
Troubleshooting
Page 231 of 260
230
Reference Information
System Initialization
The navigation system must be initialized if
power to the navigation system is
interrupted for any reason (e.g., the
battery was disconnected).
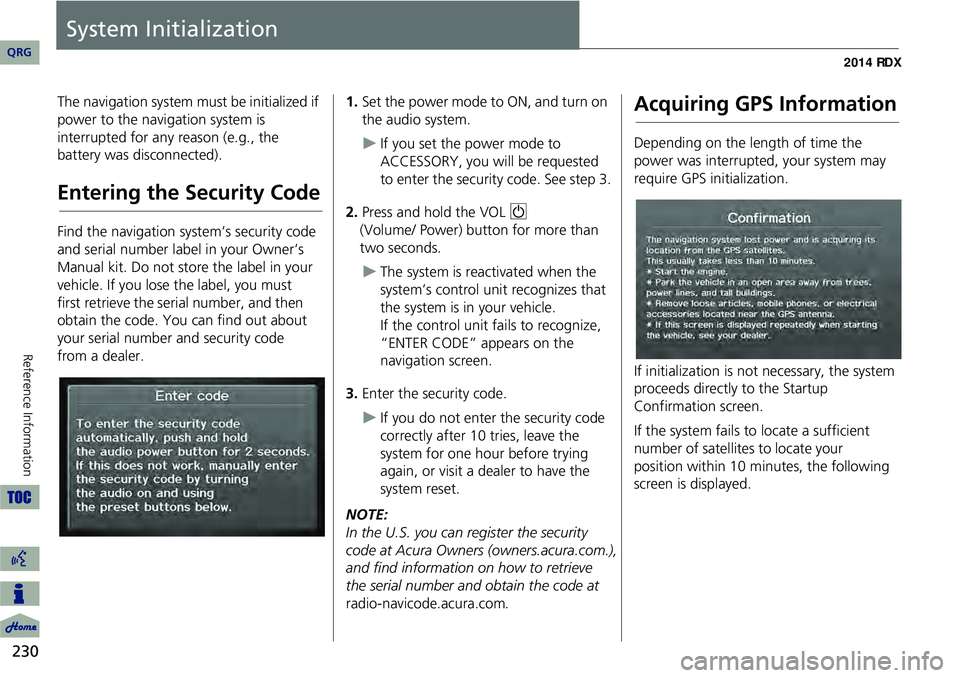
Entering the Security Code
Find the navigation system’s security code
and serial number label in your Owner’s
Manual kit. Do not store the label in your
vehicle. If you lose the label, you must
first retrieve the serial number, and then
obtain the code. You can find out about
your serial number and security code
from a dealer.
1.Set the power mode to ON, and turn on
the audio system.
If you set the power mode to
ACCESSORY, you will be requested
to enter the security code. See step 3.
2. Press and hold the VOL 9
(Volume/ Power) button for more than
two seconds.
The system is reac tivated when the
system’s control unit recognizes that
the system is in your vehicle.
If the control unit fails to recognize,
“ENTER CODE” appears on the
navigation screen.
3. Enter the security code.
If you do not enter the security code
correctly after 10 tries, leave the
system for one hour before trying
again, or visit a dealer to have the
system reset.
NOTE:
In the U.S. you can register the security
code at Acura Owners (owners.acura.com.),
and find information on how to retrieve
the serial number and obtain the code at
radio-navicode.acura.com .
Acquiring GPS Information
Depending on the length of time the
power was interrupted, your system may
require GPS initialization.
If initialization is not necessary, the system
proceeds directly to the Startup
Confirmation screen.
If the system fails to locate a sufficient
number of satellites to locate your
position within 10 minutes, the following
screen is displayed.
QRG