sensor Acura RDX 2014 User Guide
[x] Cancel search | Manufacturer: ACURA, Model Year: 2014, Model line: RDX, Model: Acura RDX 2014Pages: 363, PDF Size: 13.7 MB
Page 52 of 363
51
uuAirbags uAirbag Care
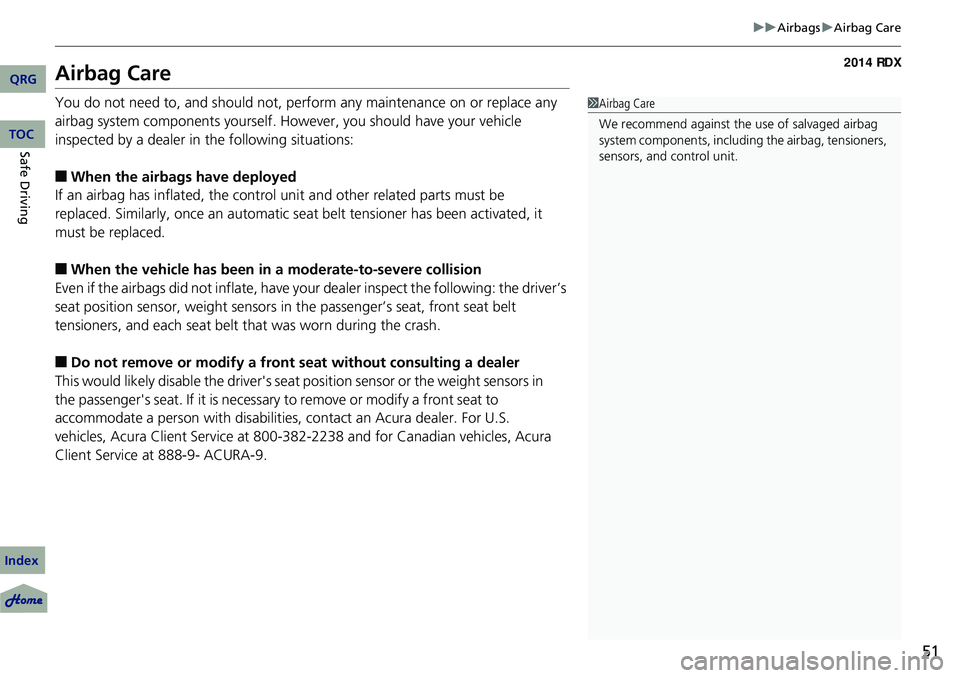
Airbag Care
You do not need to, and should not, perform any maintenance on or replace any
airbag system components yourself. However, you should have your vehicle
inspected by a dealer in the following situations:
■When the airbags have deployed
If an airbag has inflated, the control unit and other related parts must be
replaced. Similarly, once an automatic seat belt tensioner has been activated, it
must be replaced.
■When the vehicle has been in a moderate-to-severe collision
Even if the airbags did not infl ate, have your dealer inspect the following: the driver’s
seat position sensor, weight sensors in the passenger’s seat, front seat belt
tensioners, and each seat belt that was worn during the crash.
■Do not remove or modi fy a front seat without consulting a dealer
This would likely disable the driver's seat position sensor or the weight sensors in
the passenger's seat. If it is necessary to remove or modify a front seat to
accommodate a person with disabilities, contact an Acura dealer. For U.S.
vehicles, Acura Client Service at 800-382-2238 and for Canadian vehicles, Acura
Client Service at 888-9- ACURA-9.
1 Airbag Care
We recommend against the use of salvaged airbag
system components, including the airbag, tensioners,
sensors, and control unit.
QRG
Index
Safe DrivingTOC
Page 72 of 363
71
uuIndicators u
Continued
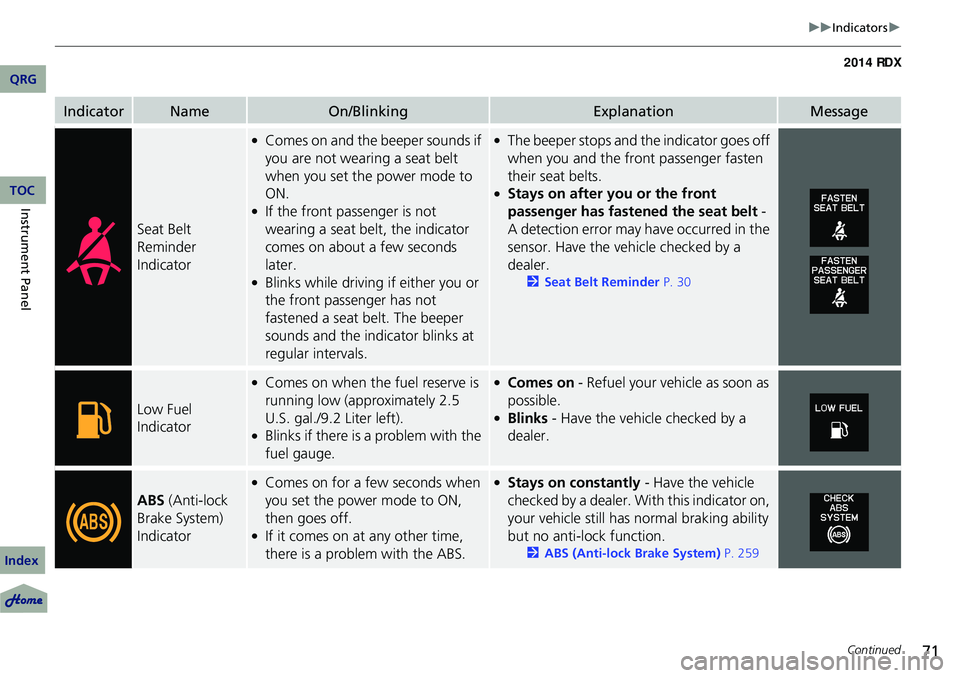
IndicatorNameOn/BlinkingExplanationMessage
Seat Belt
Reminder
Indicator
●Comes on and the beeper sounds if
you are not wearing a seat belt
when you set the power mode to
ON.
●If the front passenger is not
wearing a seat belt, the indicator
comes on about a few seconds
later.
●Blinks while driving if either you or
the front passenger has not
fastened a seat belt. The beeper
sounds and the indicator blinks at
regular intervals.
●The beeper stops and th e indicator goes off
when you and the front passenger fasten
their seat belts.
●Stays on after you or the front
passenger has fastened the seat belt -
A detection error may have occurred in the
sensor. Have the ve hicle checked by a
dealer.
2 Seat Belt Reminder P. 30
Low Fuel
Indicator
●Comes on when the fuel reserve is
running low (approximately 2.5
U.S. gal./9.2 Liter left).
●Blinks if there is a problem with the
fuel gauge.
●Comes on - Refuel your vehicle as soon as
possible.
●Blinks - Have the vehicle checked by a
dealer.
ABS (Anti-lock
Brake System)
Indicator
●Comes on for a few seconds when
you set the power mode to ON,
then goes off.
●If it comes on at any other time,
there is a problem with the ABS.
●Stays on constantly - Have the vehicle
checked by a dealer. Wi th this indicator on,
your vehicle still has normal braking ability
but no anti-lock function.
2 ABS (Anti-lock Brake System) P. 259
QRG
Index
Instrument PanelTOC
Page 86 of 363
Continued85
uuGauges and Multi-Information Display uMulti-Information Display
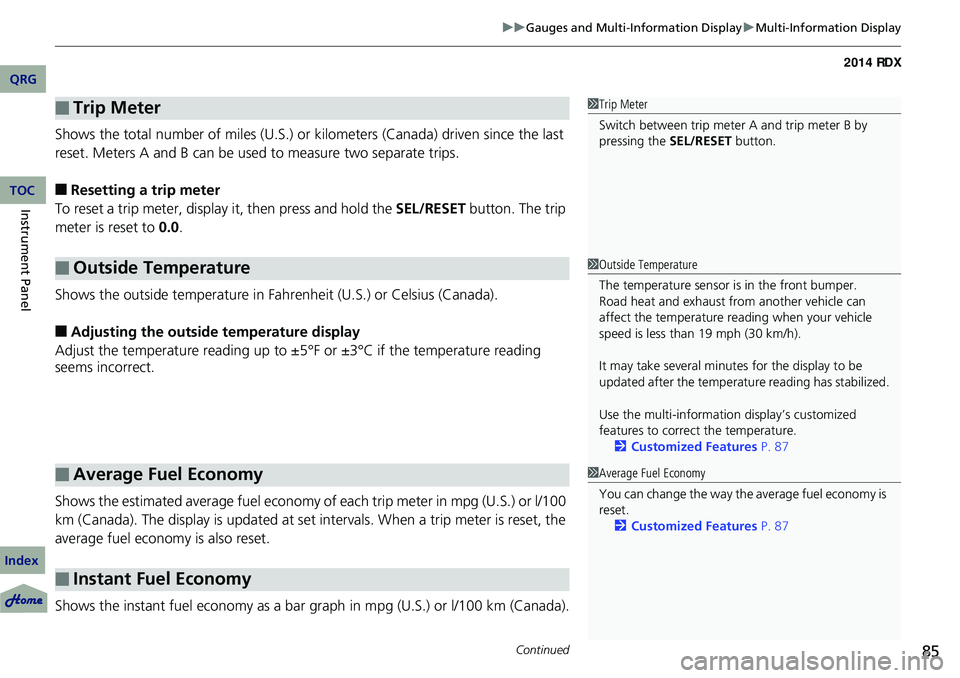
Shows the total number of miles (U.S.) or k ilometers (Canada) driven since the last
reset. Meters A and B can be used to measure two separate trips.
■Resetting a trip meter
To reset a trip meter, display it, then press and hold the SEL/RESET button. The trip
meter is reset to 0.0.
Shows the outside temperature in Fahr enheit (U.S.) or Celsius (Canada).
■Adjusting the outside temperature display
Adjust the temperature reading up to ±5°F or ±3°C if the temperature reading
seems incorrect.
Shows the estimated average fuel economy of each trip meter in mpg (U.S.) or l/100
km (Canada). The display is updated at set intervals. When a trip meter is reset, the
average fuel economy is also reset.
Shows the instant fuel economy as a bar gr aph in mpg (U.S.) or l/100 km (Canada).
■Trip Meter
■Outside Temperature
■Average Fuel Economy
■Instant Fuel Economy
1Trip Meter
Switch between trip meter A and trip meter B by
pressing the SEL/RESET button.
1Outside Temperature
The temperature sensor is in the front bumper.
Road heat and exhaust from another vehicle can
affect the temperature reading when your vehicle
speed is less than 19 mph (30 km/h).
It may take several minutes for the display to be
updated after the temperature reading has stabilized.
Use the multi-information display’s customized
features to correct the temperature.
2 Customized Features P. 87
1Average Fuel Economy
You can change the way the average fuel economy is
reset.
2 Customized Features P. 87
QRG
Index
Instrument PanelTOC
Page 96 of 363
95
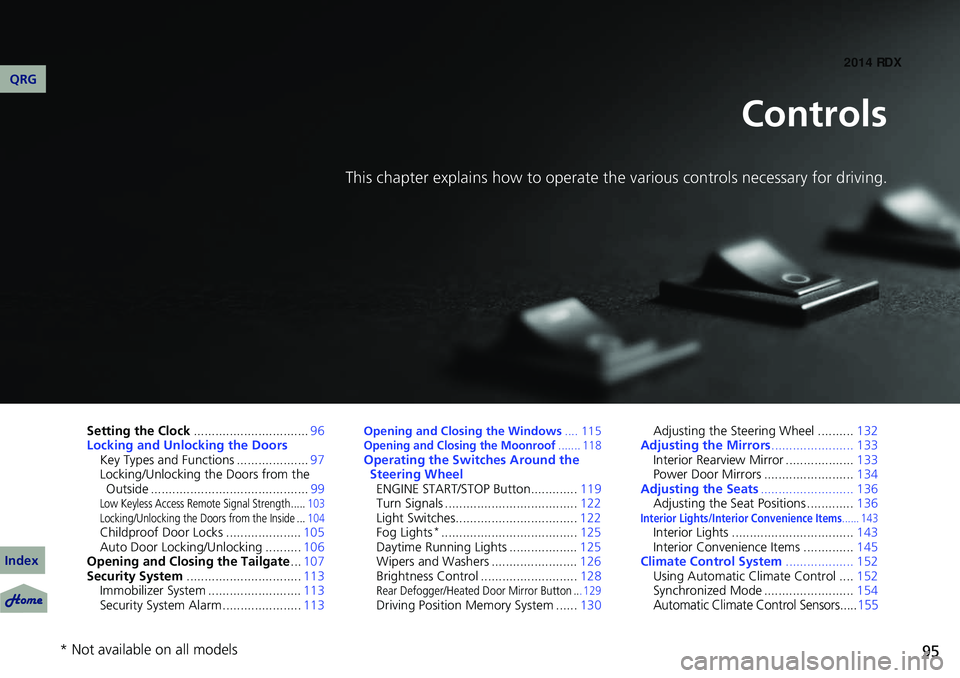
Controls
This chapter explains how to operate the various controls necessary for driving.
Setting the Clock................................ 96
Locking and Unlocking the Doors Key Types and Functions .................... 97
Locking/Unlocking the Doors from the Outside ............................................ 99
Low Keyless Access Remote Signal Strength ..... 103
Locking/Unlocking the Doors from the Inside ... 104
Childproof Door Locks .....................105
Auto Door Locking/Unlocking .......... 106
Opening and Closing the Tailgate ...107
Security System ................................ 113
Immobilizer System .......................... 113
Security System Alarm ...................... 113
Opening and Closing the Windows .... 115Opening and Closing the Moonroof....... 118Operating the Switches Around the
Steering Wheel ENGINE START/STOP Button............. 119
Turn Signals ..................................... 122
Light Switches.................................. 122
Fog Lights
*...................................... 125
Daytime Running Lights ................... 125
Wipers and Washers ........................ 126
Brightness Control ........................... 128
Rear Defogger/Heated Door Mirror Button ... 129Driving Position Memory System ......130Adjusting the Steering Wheel ..........
132
Adjusting the Mirrors ....................... 133
Interior Rearview Mirror ................... 133
Power Door Mirrors ......................... 134
Adjusting the Seats .......................... 136
Adjusting the Seat Positions ............. 136
Interior Lights/Interior Convenience Items...... 143Interior Lights .................................. 143
Interior Convenience Items .............. 145
Climate Control System ................... 152
Using Automatic Climate Control .... 152
Synchronized Mode ......................... 154
Automatic Climate Control Sensors.....155
* Not available on all models
QRG
Index
Page 102 of 363
Continued101
uuLocking and Unlocking the Doors uLocking/Unlocking the Doors from the Outside
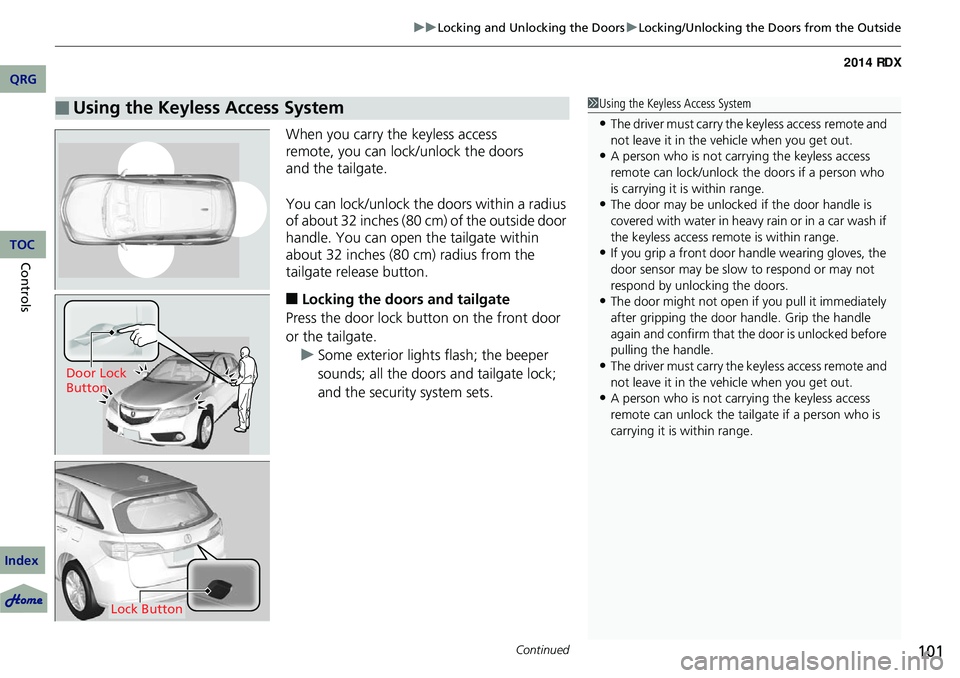
When you carry the keyless access
remote, you can lock/unlock the doors
and the tailgate.
You can lock/unlock the doors within a radius
of about 32 inches (80 cm) of the outside door
handle. You can open the tailgate within
about 32 inches (80 cm) radius from the
tailgate release button.
■Locking the doors and tailgate
Press the door lock button on the front door
or the tailgate. u Some exterior lights flash; the beeper
sounds; all the doors and tailgate lock;
and the security system sets.
■Using the Keyless Access System1Using the Keyless Access System
•The driver must carry the keyless access remote and
not leave it in the ve hicle when you get out.
•A person who is not carryi ng the keyless access
remote can lock/unlock the doors if a person who
is carrying it is within range.
•The door may be unlocked if the door handle is
covered with water in heavy rain or in a car wash if
the keyless access remote is within range.
•If you grip a front door handle wearing gloves, the
door sensor may be slow to respond or may not
respond by unlocking the doors.
•The door might not open if you pull it immediately
after gripping the door handle. Grip the handle
again and confirm that th e door is unlocked before
pulling the handle.
•The driver must carry the keyless access remote and
not leave it in the ve hicle when you get out.
•A person who is not carryi ng the keyless access
remote can unlock the tail gate if a person who is
carrying it is within range.
Door Lock
Button
Lock Button
QRG
Index
ControlsTOC
Page 111 of 363
uuOpening and Closing the Tailgate uOpening/Closing the Power Tailgate*
110
Controls
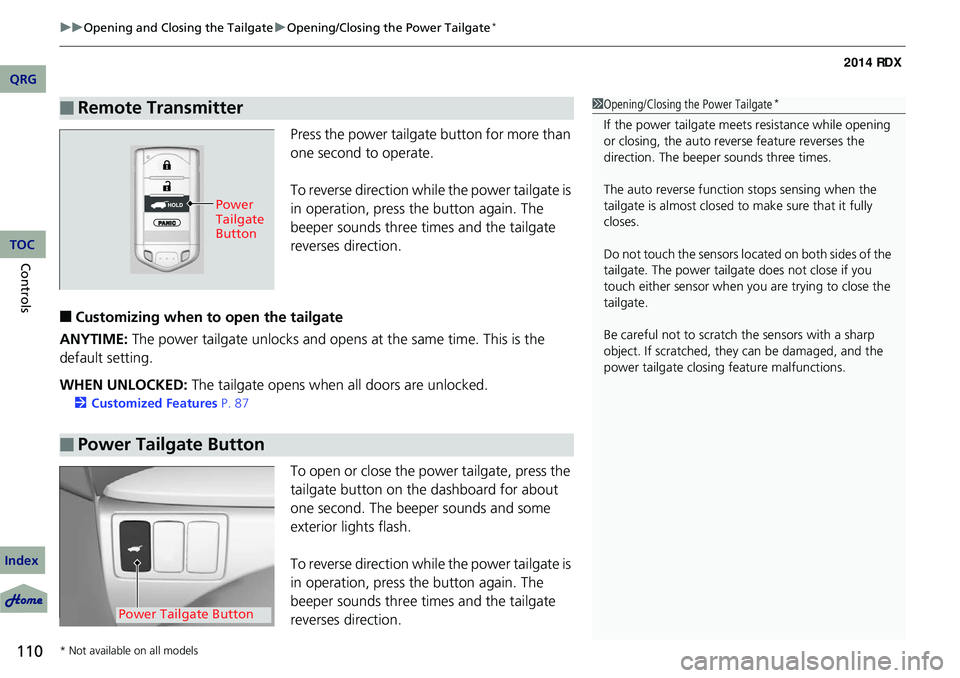
Press the power tailgate button for more than
one second to operate.
To reverse direction whil e the power tailgate is
in operation, press the button again. The
beeper sounds three times and the tailgate
reverses direction.
■Customizing when to open the tailgate
ANYTIME: The power tailgate unlocks and opens at the same time. This is the
default setting.
WHEN UNLOCKED: The tailgate opens when all doors are unlocked.
2Customized Features P. 87
To open or close the pow er tailgate, press the
tailgate button on the dashboard for about
one second. The beeper sounds and some
exterior lights flash.
To reverse direction whil e the power tailgate is
in operation, press the button again. The
beeper sounds three times and the tailgate
reverses direction.
■Remote Transmitter1 Opening/Closing the Power Tailgate*
If the power tailgate meet s resistance while opening
or closing, the auto reverse feature reverses the
direction. The beeper sounds three times.
The auto reverse function stops sensing when the
tailgate is almost closed to make sure that it fully
closes.
Do not touch the sensors lo cated on both sides of the
tailgate. The power tailga te does not close if you
touch either sensor when you are trying to close the
tailgate.
Be careful not to scratch the sensors with a sharp
object. If scratched, they can be damaged, and the
power tailgate closing feature malfunctions.
Power
Tailgate
Button
■Power Tailgate Button
Power Tailgate Button
* Not available on all models
QRG
Index
TOC
Page 124 of 363
Continued123
uuOperating the Switches Around the Steering Wheel uLight Switches
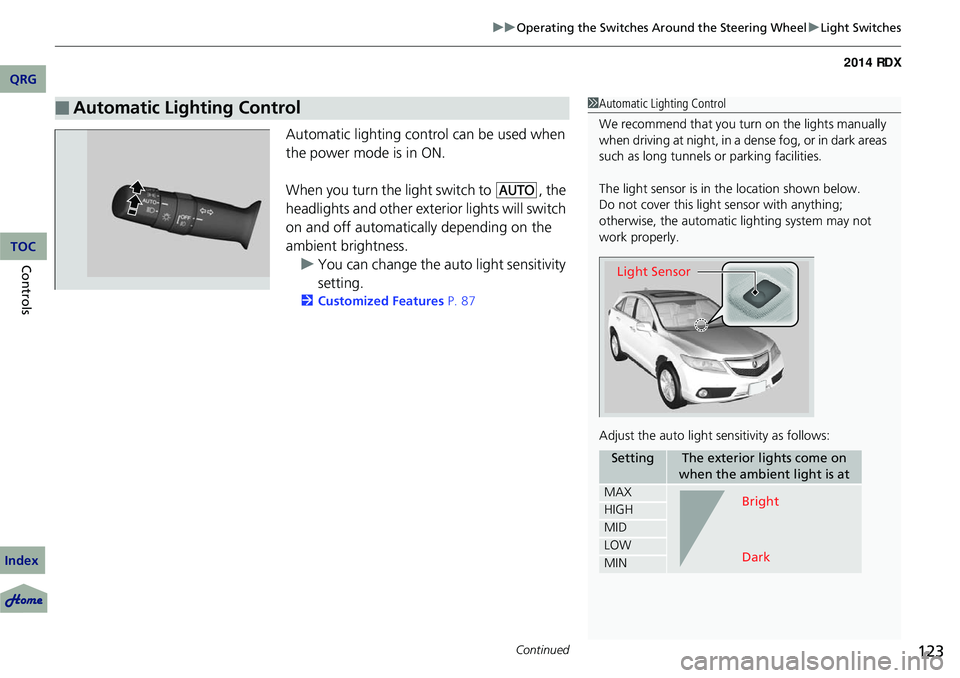
Automatic lighting control can be used when
the power mode is in ON.
When you turn the light switch to
#Y, the
headlights and other exterior lights will switch
on and off automatically depending on the
ambient brightness. u You can change the auto light sensitivity
setting.
2 Customized Features P. 87
■Automatic Lighting Control1Automatic Lighting Control
We recommend that you turn on the lights manually
when driving at night, in a dense fog, or in dark areas
such as long tunnels or parking facilities.
The light sensor is in the location shown below.
Do not cover this light sensor with anything;
otherwise, the automatic lighting system may not
work properly.
Adjust the auto light sensitivity as follows:
SettingThe exterior lights come on
when the ambient light is at
MAX
HIGH
MID
LOW
MIN
Light Sensor
Bright
Dark
QRG
Index
ControlsTOC
Page 134 of 363
133
Adjusting the Mirrors
Interior Rearview Mirror
Adjust the angle of the rearview mirror when you are sitting in the correct
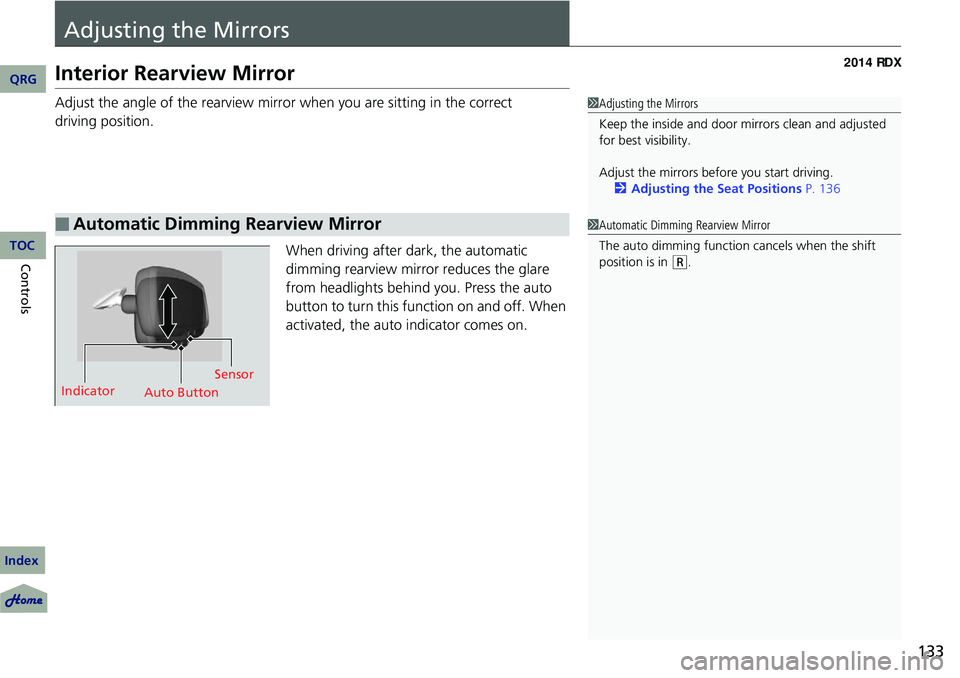
driving position.When driving after dark, the automatic
dimming rearview mirror reduces the glare
from headlights behind you. Press the auto
button to turn this function on and off. When
activated, the auto indicator comes on.
■Automatic Dimming Rearview Mirror
1Adjusting the Mirrors
Keep the inside and door mi rrors clean and adjusted
for best visibility.
Adjust the mirrors before you start driving. 2 Adjusting the Seat Positions P. 136
Indicator
Auto ButtonSensor
1
Automatic Dimming Rearview Mirror
The auto dimming function cancels when the shift
position is in
(R.
QRG
Index
ControlsTOC
Page 155 of 363
154
uuClimate Control System uSynchronized Mode
Controls
Synchronized Mode
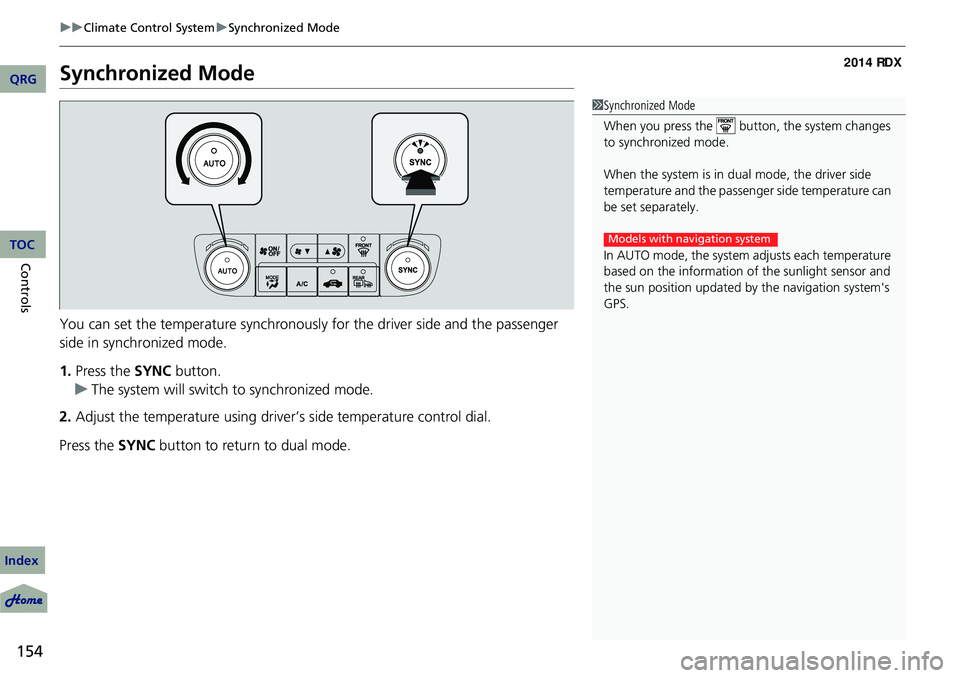
You can set the temperature synchronously for the driver side and the passenger
side in synchronized mode.
1. Press the SYNC button.
u The system will switch to synchronized mode.
2. Adjust the temperature using driver ’s side temperature control dial.
Press the SYNC button to return to dual mode.
1Synchronized Mode
When you press the button, the system changes
to synchronized mode.
When the system is in dua l mode, the driver side
temperature and the passenger side temperature can
be set separately.
In AUTO mode, the system adjusts each temperature
based on the information of the sunlight sensor and
the sun position updated by the navigation system's
GPS.
Models with navigation system
QRG
Index
TOC
Page 156 of 363
155
uuClimate Control System uAutomatic Climate Control Sensors
Automatic Climate Control Sensors
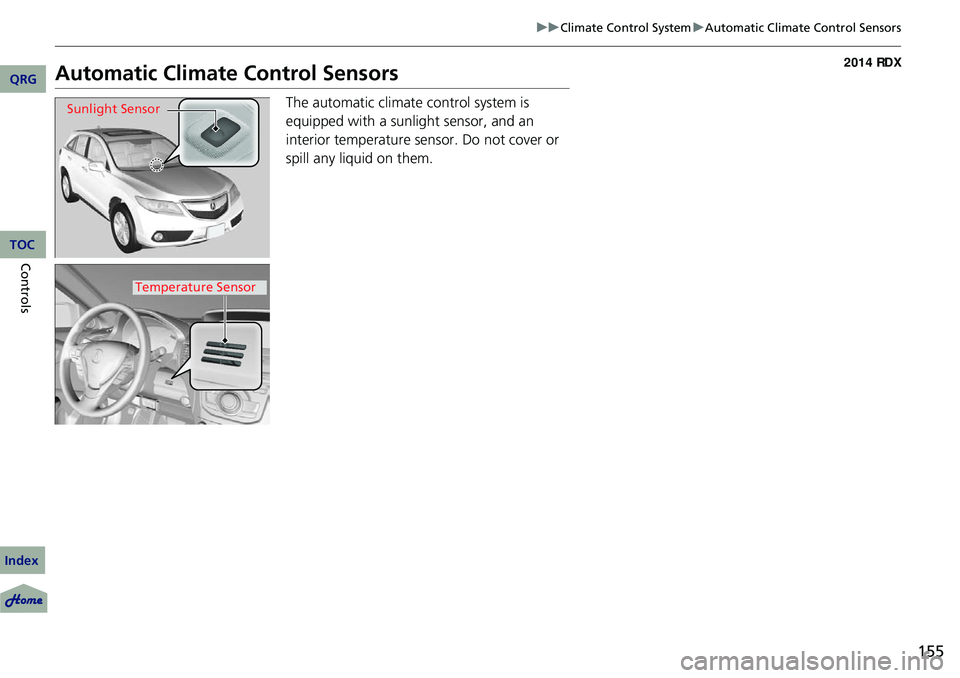
The automatic climate control system is
equipped with a sunlight sensor, and an
interior temperature sensor. Do not cover or
spill any liquid on them.Sunlight Sensor
Temperature Sensor
QRG
Index
ControlsTOC