Customize Acura RDX 2015 User Guide
[x] Cancel search | Manufacturer: ACURA, Model Year: 2015, Model line: RDX, Model: Acura RDX 2015Pages: 365, PDF Size: 12.56 MB
Page 103 of 365
uuLocking and Unlocking the Doors uLocking/Unlocking the Doors from the Outside
102
Controls
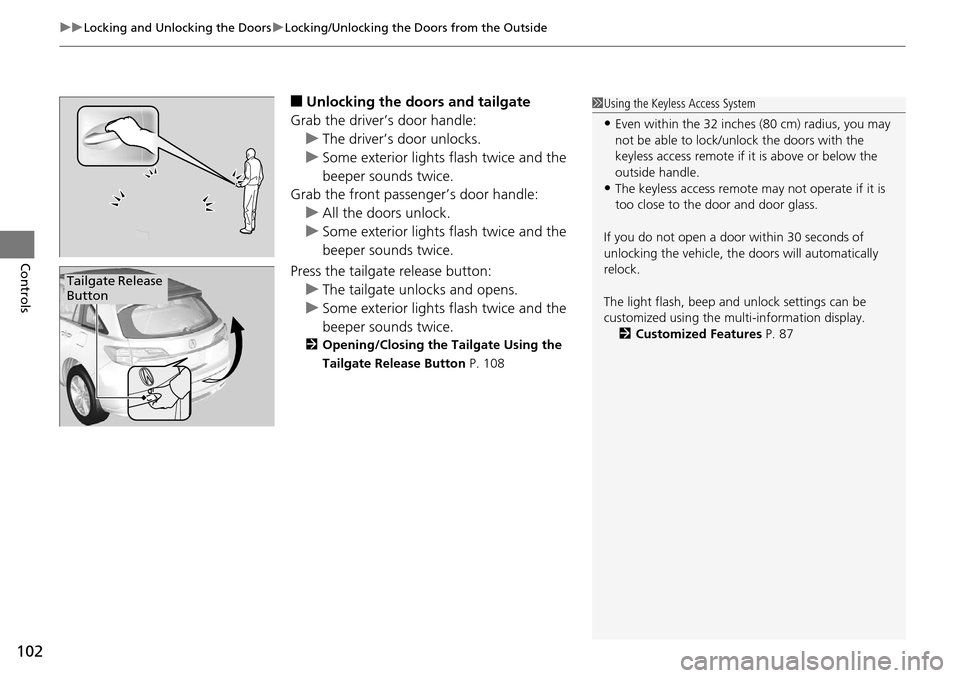
■Unlocking the doors and tailgate
Grab the driver’s door handle: u The driver’s door unlocks.
u Some exterior lights flash twice and the
beeper sounds twice.
Grab the front passenger’s door handle:
u All the doors unlock.
u Some exterior lights flash twice and the
beeper sounds twice.
Press the tailgate release button: u The tailgate unlocks and opens.
u Some exterior lights flash twice and the
beeper sounds twice.
2 Opening/Closing the Tailgate Using the
Tailgate Release Button P. 108
1Using the Keyless Access System
•Even within the 32 inches (80 cm) radius, you may
not be able to lock/unl ock the doors with the
keyless access remote if it is above or below the
outside handle.
•The keyless access remote may not operate if it is
too close to the door and door glass.
If you do not open a door within 30 seconds of
unlocking the vehicle, th e doors will automatically
relock.
The light flash, beep a nd unlock settings can be
customized using the mu lti-information display.
2 Customized Features P. 87
Tailgate Release
Button
Page 107 of 365

106
uuLocking and Unlocking the Doors uAuto Door Locking/Unlocking
Controls
Auto Door Locking/Unlocking
Your vehicle locks all doors and unlocks the driver’s door automatically when a
certain condition is met.
■Drive lock mode
All doors and tailgate lock when the vehicle’s speed reaches about 10 mph (15 km/h).
■Park unlock mode
The driver’s door unlocks when the shift lever is moved into
(P with the brake pedal
depressed.
■Auto Door Locking
■Auto Door Unlocking
1 Auto Door Locking/Unlocking
You can turn off or cha nge to another auto door
locking/unlocking setting us ing the multi-information
display. 2 Customized Features P. 87
Page 110 of 365
109
uuOpening and Closing the Tailgate uOpening/Closing the Power Tailgate*
Continued
Controls
Opening/Closing the Power Tailgate*
The power tailgate can be operated by pr essing the power tailgate button on the
remote transmitter, pressing the power ta ilgate switch on the dashboard, or
pressing the button on the tailgate.
■The power tailgate can be opened when:
• The tailgate is fully closed.
• The shift lever is in
(P.
• Press and hold the tailgate button on the remote transmitter for about one
second.
u If you have changed the POWER TAILGATE KEYLESS OPEN MODE setting to
WHEN UNLOCKED , you need to unlock the tailgate before you press the
tailgate button to open it.
2 Customized Features P. 87
■The power tailgate ca n be closed when:
• The tailgate is fully open.
• The shift lever is in
(P.
• Press and hold the tailgate button on the remote transmitter for about one
second.
1Opening/Closing the Power Tailgate*
The power tailgate may not open or close under the
following conditions:
•The vehicle is park ed on a steep hill.•The vehicle is swayed in a strong wind.•The tailgate or the roof is covered with snow or ice.
If you close the power tail gate when all the doors are
locked, the power tailgate locks automatically.
If you replace the battery or the power tailgate fuse
while the tailgate is open, the power tailgate may be
disabled. The power tail gate resumes once you
manually close the tailgate.
Installing aftermarket com ponents other than Acura
genuine accessories on the power tailgate may
prevent it from fully opening or closing.
Make sure the power tailgate is fully open before you
get your luggage in and out.
Make sure the power tailgate is fully closed before
you start the vehicle.
3WARNING
Closing a power tailga te while anyone is
in the path of the tailgate can cause
serious injury.
Make sure everyone is clear before
closing the power tailgate.
* Not available on all models
Page 111 of 365

uuOpening and Closing the Tailgate uOpening/Closing the Power Tailgate*
110
Controls
Press the power tailgate button for more than
one second to operate.
To reverse direction whil e the power tailgate is
in operation, press the button again. The
beeper sounds three times and the tailgate
reverses direction.
■Customizing when to open the tailgate
ANYTIME: The power tailgate unlocks and opens at the same time. This is the
default setting.
WHEN UNLOCKED: The tailgate opens when all doors are unlocked.
2Customized Features P. 87
To open or close the pow er tailgate, press the
tailgate button on the dashboard for about
one second. The beeper sounds and some
exterior lights flash.
To reverse direction whil e the power tailgate is
in operation, press the button again. The
beeper sounds three times and the tailgate
reverses direction.
■Remote Transmitter1 Opening/Closing the Power Tailgate*
If the power tailgate meet s resistance while opening
or closing, the auto reverse feature reverses the
direction. The beeper sounds three times.
The auto reverse function stops sensing when the
tailgate is almost closed to make sure that it fully
closes.
Do not touch the sensors lo cated on both sides of the
tailgate. The power tailga te does not close if you
touch either sensor when you are trying to close the
tailgate.
Be careful not to scratch the sensors with a sharp
object. If scratched, they can be damaged, and the
power tailgate closing feature malfunctions.
Power
Tailgate
Button
■Power Tailgate Button
Power Tailgate Button
* Not available on all models
Page 124 of 365
Continued123
uuOperating the Switches Around the Steering Wheel uLight Switches
Controls
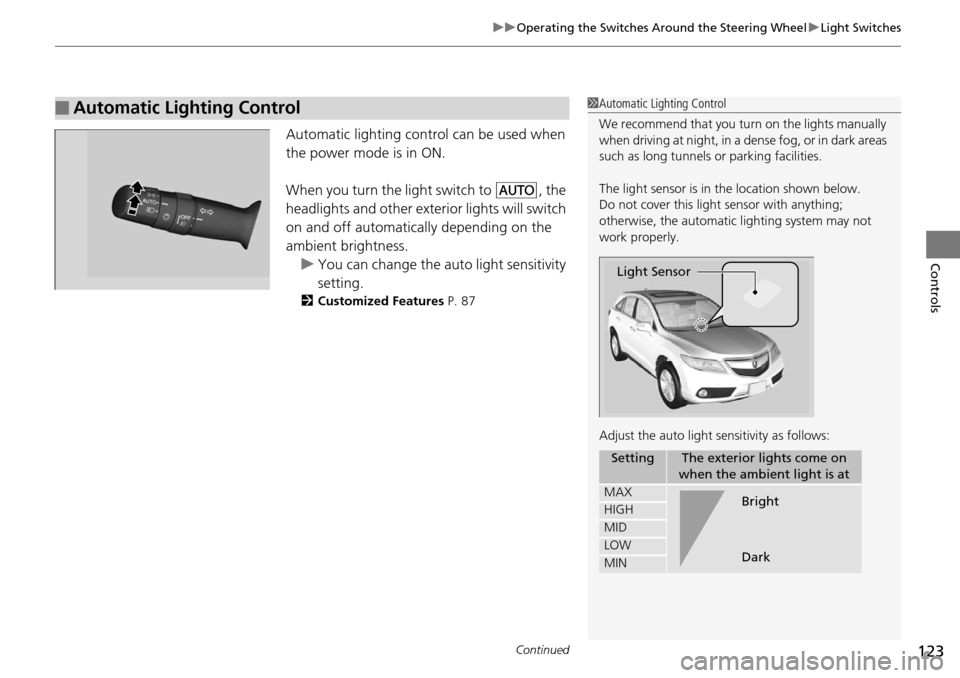
Automatic lighting control can be used when
the power mode is in ON.
When you turn the light switch to
#Y, the
headlights and other exterior lights will switch
on and off automatically depending on the
ambient brightness. u You can change the auto light sensitivity
setting.
2 Customized Features P. 87
■Automatic Lighting Control1Automatic Lighting Control
We recommend that you turn on the lights manually
when driving at night, in a dense fog, or in dark areas
such as long tunnels or parking facilities.
The light sensor is in the location shown below.
Do not cover this light sensor with anything;
otherwise, the automatic lighting system may not
work properly.
Adjust the auto light sensitivity as follows:
SettingThe exterior lights come on
when the ambient light is at
MAX
HIGH
MID
LOW
MIN
Light Sensor
Bright
Dark
Page 125 of 365

uuOperating the Switches Around the Steering Wheel uLight Switches
124
Controls
The headlights automatically co me on when the wipers are used several times within
certain number of intervals while the headlight switch is in
#Y.The headlights
automatically go off a few minutes after the wipers are stopped.
The headlights, all other exterior lights, an d the instrument panel lights turn off 15
seconds after you set the power mode to VEHICLE OFF(LOCK), take the remote with
you, and close the driver's door.
If you set the power mode to VEHICLE OFF (LOCK) with the headlight switch on, but
do not open the door, the lights turn o ff after 10 minutes (three minutes, if the
switch is in the
#Y position).
The lights turn on again when you unlock or open the driver's door. If you unlock
the door, but do not open it within 15 seconds, the lights go off. If you open the
driver's door, you will hear a lights on reminder chime.
■Headlight Integration with Wiper
■Automatic Lighting Off Feature
1Headlight Integration with Wiper*
This feature activates while the headlights are in
#Y. The instrument pane l brightness does not
change when the headlights come on.
If the ambient light is da rk, the automatic lighting
control overrides this feat ure, and the headlights
come on whether or not the wipers cycle several
times.
1 Automatic Lighting Off Feature
You can change the headlight auto off timer setting.
2 Customized Features P. 87
* Not available on all models
Page 131 of 365
130
uuOperating the Switches Around the Steering Wheel uDriving Position Memory System
Controls
Driving Position Memory System
You can store two driver’s seat and door mirror positions with the driving position
memory system.
When you unlock and open the driver’s door with a remote transmitter, the seat and
door mirrors adjust automatically to one of the two preset positions.
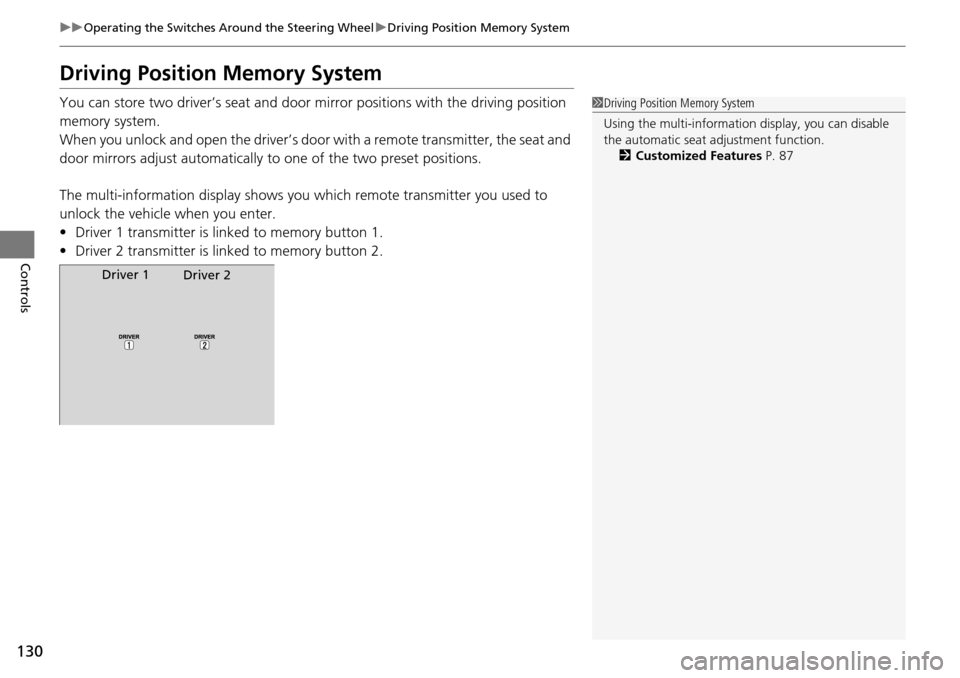
The multi-information display shows you which remote transmitter you used to
unlock the vehicle when you enter.
• Driver 1 transmitter is linked to memory button 1.
• Driver 2 transmitter is linked to memory button 2.1Driving Position Memory System
Using the multi-information display, you can disable
the automatic seat adjustment function. 2 Customized Features P. 87
Driver 1
Driver 2
Page 144 of 365

143Continued
Controls
Interior Lights/Interior Convenience Items
Interior Lights
■ON
The interior lights come on regardless of
whether the doors are open or closed.
■Door activated
The interior lights come on in the following
situations:
• When any of the doors are opened.
• You unlock the driver's door.
• When the power mode is set to VEHICLE
OFF (LOCK).
■OFF
The interior lights remain off regardless of
whether the doors are open or closed.
The map lights can be turned on and off by
pressing the button.
■Interior Light Switches1 Interior Light Switches
In the door activated position, the interior lights fade
out and go off about 30 se conds after the doors are
closed.
The lights go off after 30 seconds in the following
situations:
•When you unlock the driver's door but do not open
it.
•When you set the power mode to VEHICLE OFF
(LOCK) but do not open a door.
You can change the interi or lights dimming time.
2 Customized Features P. 87
The interior lights go off i mmediately in the following
situations:
•When you lock the driver's door.
•When you close the driver's door in ACCESSORY
mode.
•When you set the power mode to ON.
If you leave any of the doors open in VEHICLE OFF
(LOCK) mode, the interior lights go off after about 15
minutes.
Door Activated
Position
Off
Front
Door Activated Position
On
Off
Rear
On
■Map Lights
1
Map Lights
When the interior light swit ch is in the door activated
position and any door is open, the map light will not
go off when you press the button.
Page 275 of 365
uuMaintenance MinderTMuTo Use Maintenance MinderTM
274
Maintenance
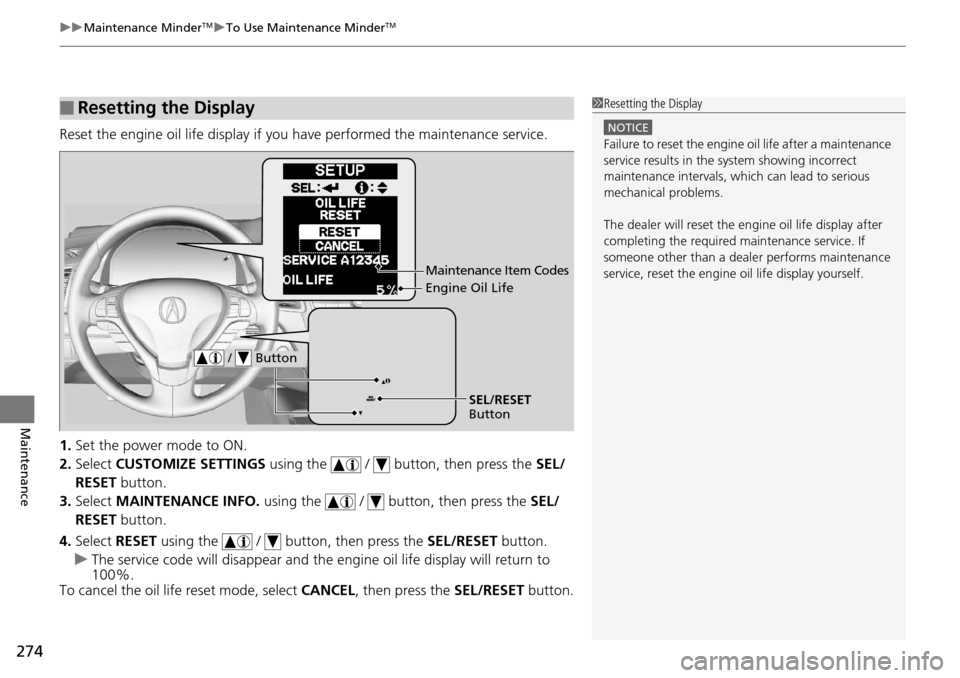
Reset the engine oil life display if yo u have performed the maintenance service.
1. Set the power mode to ON.
2. Select CUSTOMIZE SETTINGS using the / button, then press the SEL/
RESET button.
3. Select MAINTENANCE INFO. using the / button, then press the SEL/
RESET button.
4. Select RESET using the / button, then press the SEL/RESET button.
u The service code will disappear and the en gine oil life display will return to
100%.
To cancel the oil life reset mode, select CANCEL, then press the SEL/RESET button.
■Resetting the Display1Resetting the Display
NOTICE
Failure to reset the engine oil life after a maintenance
service results in the sy stem showing incorrect
maintenance intervals, which can lead to serious
mechanical problems.
The dealer will reset the en gine oil life display after
completing the required ma intenance service. If
someone other than a deal er performs maintenance
service, reset the engine oil life display yourself.
Engine Oil Life
SEL/RESET
Button
/ Button
Maintenance Item Codes
Page 358 of 365
Index
357
Index
Index
Numbers
4WD.......................................................... 253
A
ABS (Anti-lock Brake System) .................. 259
Accessories and Modifications ................ 266
Accessory Power Sockets ......................... 148
Additives Coolant .................................................. 282
Engine Oil ............................................... 277
Washer ................................................... 286
Additives, Engine Oil ............................... 277
Adjusting Armrest .................................................. 142
Front Seats.............................................. 136
Head Restraints ....................................... 138
Mirrors.................................................... 133
Rear Seats ............................................... 141
Steering Wheel ....................................... 132
Temperature ............................................. 85
Air Conditioning System (Climate Control System) ....................... 152
Changing the Mode................................ 152
Defrosting the Windshield and Windows .............................................. 153
Dust and Pollen Filter .............................. 312
Recirculation/Fresh Air Mode................... 152
Sensors ................................................... 155
Synchronized Mode ................................ 154
Using Automatic Climate Control............ 152 Air Conditioning System
(Heating and Cooling System)
Dust and Pollen Filter ............................... 312
Air Pressure ....................................... 302, 347
Airbags ........................................................ 37
Advanced Airbags ..................................... 43
After a Collision ......................................... 40
Airbag Care ............................................... 51
Front Airbags (SRS) .................................... 40
Indicator ........................................ 48, 72, 75
Passenger Airbag Off Indicator .................. 49
Sensors ...................................................... 37
Side Airbag Cutoff System ......................... 46
Side Airbag Off Indicator ........................... 50
Side Airbags .............................................. 44
Side Curtain Airbags .................................. 47
AM/FM Radio ............................................ 167
Anti-lock Brake System (ABS) .................. 259
Indicator .................................................... 71
Armrest ..................................................... 142
Audio Remote Controls ............................ 165
Audio System ............................................ 158
Adjusting the Sound ................................ 166
Auxiliary Input Jack .................................. 159
Error Messages ........................................ 187
General Information ................................ 190
iPod ®....................................................... 174
MP3/WMA/AAC ...................................... 179
Pandora ®................................................. 177
Reactivating ............................................. 160
Recommended CDs ................................. 191 Recommended Devices............................ 193
Security Code .......................................... 160
Theft Protection ...................................... 160
USB Adapter Cable.................................. 159
USB Flash Drives ...................................... 193
Audio/Information Display ...................... 162
Authorized Manuals ................................ 355
Auto Door Locking/Unlocking ................. 106
Customize ................................................. 92
Automatic Lighting .................................. 123
Automatic Transmission ........................... 243
Creeping ................................................. 243
Fluid ........................................................ 284
Kickdown ................................................ 243
Operating the Shift Lever................... 16, 245
Sequential Shift Mode ............................. 246
Shift Lever Does Not Move ...................... 332
Shifting ................................................... 244
Auxiliary Input Jack .................................. 159
Average Fuel Economy .............................. 85
Average Speed ........................................... 86
AWD .......................................................... 253
B
Battery ...................................................... 310
Charging System Indicator................. 69, 335
Jump Starting .......................................... 330
Maintenance (Checki ng the Battery) ........ 310
Belts (Seat) .................................................. 29
Beverage Holders ..................................... 147