Button Acura RDX 2016 Owner's Manual
[x] Cancel search | Manufacturer: ACURA, Model Year: 2016, Model line: RDX, Model: Acura RDX 2016Pages: 445, PDF Size: 15.25 MB
Page 312 of 445
311
uuWhen Driving uTire Pressure Monitoring System (TPMS)
Driving
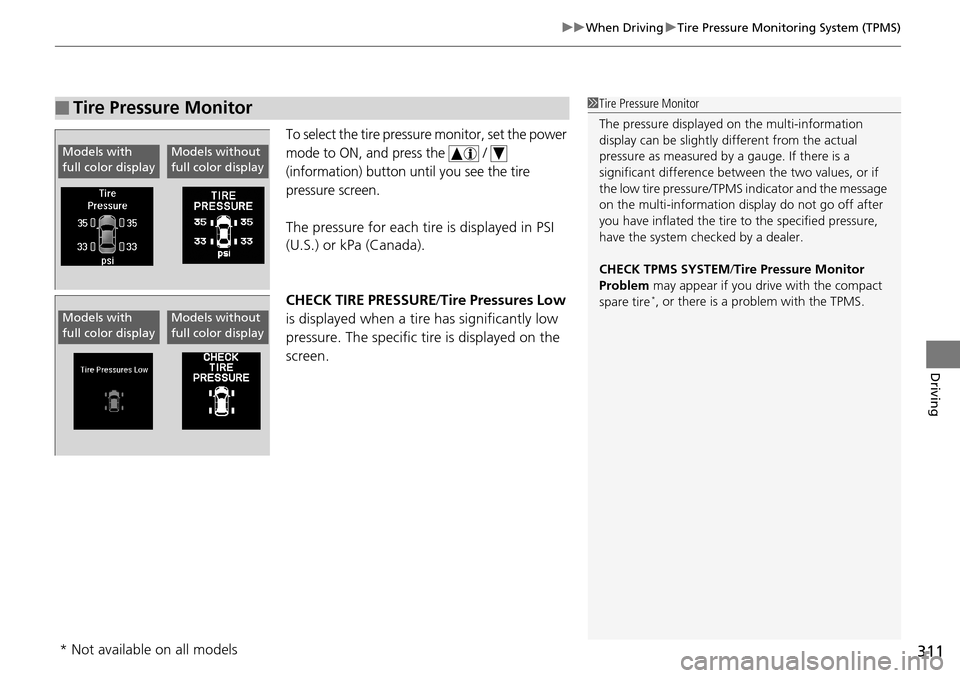
To select the tire pressure monitor, set the power
mode to ON, and press the /
(information) button until you see the tire
pressure screen.
The pressure for each tire is displayed in PSI
(U.S.) or kPa (Canada).
CHECK TIRE PRESSURE /Tire Pressures Low
is displayed when a tire has significantly low
pressure. The specific tire is displayed on the
screen.
■Tire Pressure Monitor1 Tire Pressure Monitor
The pressure displayed on the multi-information
display can be slightly different from the actual
pressure as measured by a gauge. If there is a
significant di fference between the two values, or if
the low tire pressure/TPMS indicator and the message
on the multi-information di splay do not go off after
you have inflated the tire to the specified pressure,
have the system checked by a dealer.
CHECK TPMS SYSTEM /Tire Pressure Monitor
Problem may appear if you drive with the compact
spare tire
*, or there is a problem with the TPMS.
Models with
full color displayModels without
full color display
Models with
full color displayModels without
full color display
* Not available on all models
Page 322 of 445
Continued321
uuBraking uCollision Mitigation Braking SystemTM (CMBSTM)*
Driving
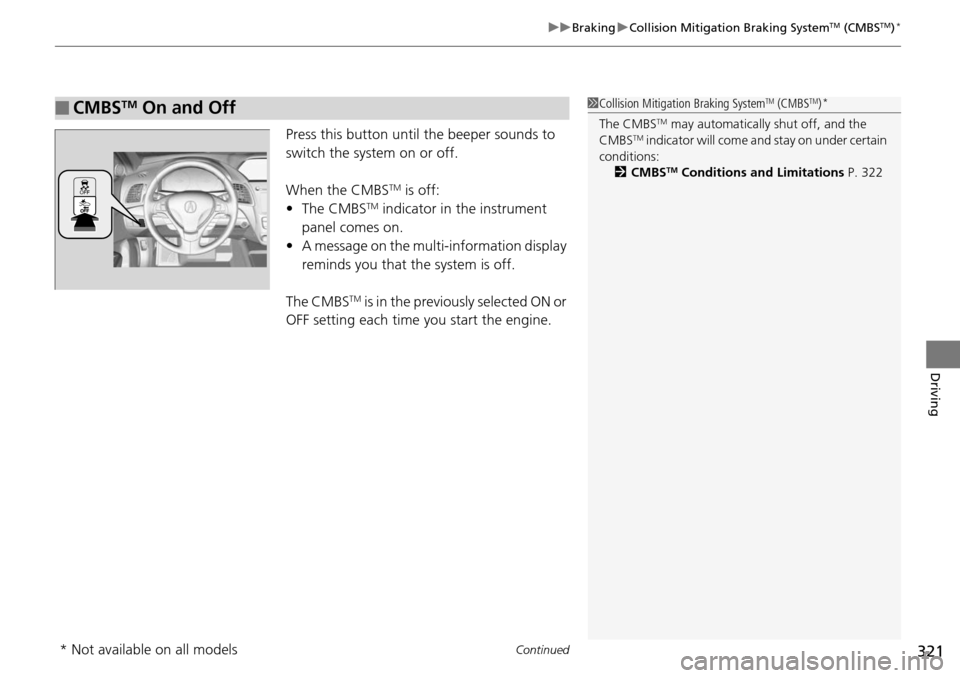
Press this button until the beeper sounds to
switch the system on or off.
When the CMBS
TM is off:
• The CMBSTM indicator in the instrument
panel comes on.
• A message on the multi-information display
reminds you that the system is off.
The CMBS
TM is in the previously selected ON or
OFF setting each time you start the engine.
■CMBSTM On and Off1 Collision Mitigation Braking SystemTM (CMBSTM)*
The CMBSTM may automatically shut off, and the
CMBSTM indicator will come and stay on under certain
conditions:
2 CMBS
TM Conditions and Limitations P. 322
* Not available on all models
Page 326 of 445

325
uuBraking uCollision Mitigation Braking SystemTM (CMBSTM)*
Driving
The CMBSTM may activate even when you are aware of a vehicle ahead of you, or
when there is no vehicle ahead. Some examples of this are:
■When Passing
Your vehicle approaches another vehicle ah ead of you and you change lanes to pass.
■At an intersection
Your vehicle approaches or passes another ve hicle that is making a left or right turn.
■On a curve
When driving through curves, your vehicle comes to a point where an oncoming
vehicle is right in front of you.
■Through a low bridge at high speed
You drive under a low or na rrow bridge at high speed.
■Speed bumps, road work sites, train tracks, roadside objects, etc.
You drive over speed bumps, st eel road plates, etc., or your vehicle approaches train
tracks or roadside objects [such as a traffi c sign and guard rail] on a curve or, when
parking, stationary vehicles and walls.
■With Little Chance of a Collision1 Collision Mitigation Braking SystemTM (CMBSTM)*
For the CMBSTM to work properly:
Always keep the radar sensor cover clean.
Never use chemical solvents or polishing powder for
cleaning the sensor cover. Clean it with water or a
mild detergent.
Do not paint, or apply any coverings or paint to radar
sensor area. This can impact CMBS
TM operation.
If you need the radar sensor to be repaired, or
removed, or the radar se nsor cover is strongly
impacted, turn off the system by pressing the
CMBS
TM off button and take your vehicle to a dealer.
* Not available on all models
Page 329 of 445

328
uuParking Your Vehicle uParking Sensor System*
Driving
■Parking sensor system on and off
With the power mode in ON, press the
parking sensor system button to turn on or off
the system. The indicator in the button comes
on when the system is on.
The front center and front corner sensors start
to detect an obstacle when the shift lever is in
any position other than
(Por (R, and the
vehicle speed is less than 5 mph (8 km/h).
The front corner, rear center and rear corner
sensors start to detect an obstacle when the
shift lever is in
(R, and the vehicle speed is less
than 5 mph (8 km/h).
Page 331 of 445
uuParking Your Vehicle uParking Sensor System*
330
Driving
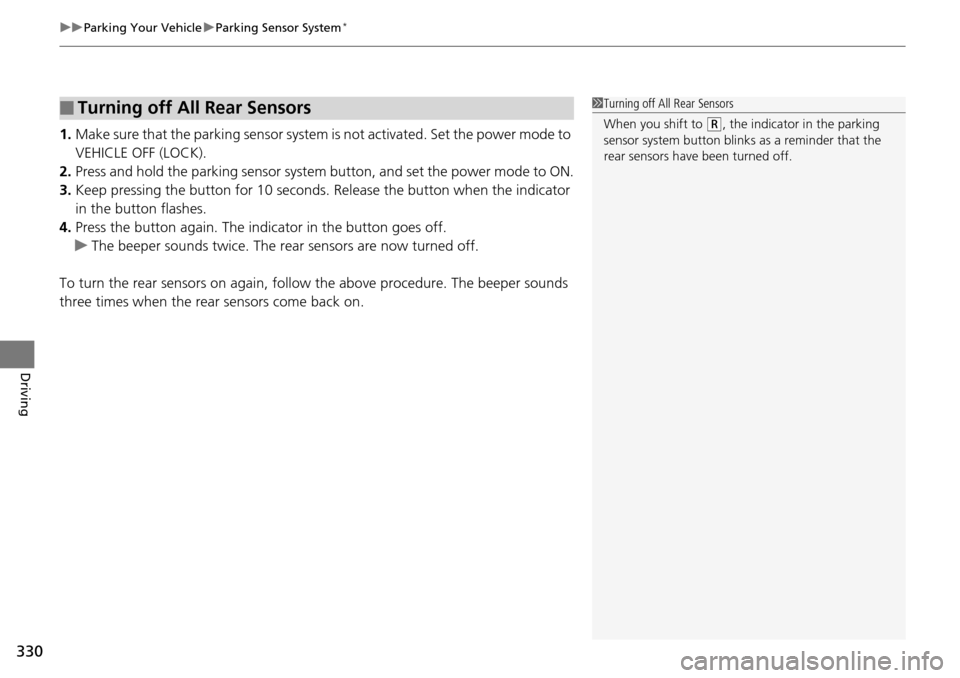
1. Make sure that the parking sensor system is not activated. Set the power mode to
VEHICLE OFF (LOCK).
2. Press and hold the parking sensor system button, and set the power mode to ON.
3. Keep pressing the button for 10 seconds. Release the button when the indicator
in the button flashes.
4. Press the button again. The indi cator in the button goes off.
u The beeper sounds twice. The re ar sensors are now turned off.
To turn the rear sensors on again, follo w the above procedure. The beeper sounds
three times when the rear sensors come back on.
■Turning off All Rear Sensors1 Turning off All Rear Sensors
When you shift to
(R, the indicator in the parking
sensor system button blinks as a reminder that the
rear sensors have been turned off.
Page 340 of 445
339
Maintenance
This chapter discusses basic maintenance.
Before Performing MaintenanceInspection and Maintenance ............ 340
Safety When Performing Maintenance..... 341Parts and Fluids Used in Maintenance Service ........................................... 342
Maintenance Minder
TM..................... 343
Maintenance Under the Hood
Maintenance Items Under the Hood ..... 347Opening the Hood ........................... 348
Recommended Engine Oil ................ 349
Oil Check ......................................... 350
Adding Engine Oil ............................ 351
Changing the Engine Oil and Oil Filter ..... 352
Engine Coolant ................................ 354
Transmission Fluid ............................ 356
Brake Fluid ....................................... 357
Refilling Window Washer Fluid......... 358
Replacing Light Bulbs ....................... 359
Checking and Maintaining Wiper Blades.... 366Checking and Maintaining Tires
Checking Tires ................................. 370
Tire and Loading Information Label ...... 371Tire Labeling .................................... 371DOT Tire Quality Grading (U.S. Vehicles)....... 373Wear Indicators................................ 375
Tire Service Life ................................ 375 Tire and Wheel Replacement ........... 376
Tire Rotation .................................... 377
Winter Tires ..................................... 378
Battery ............................................... 379
Remote Transmitter Care Replacing the Button Battery ........... 380
Climate Control System Maintenance..... 382Cleaning
Interior Care .................................... 383
Exterior Care.................................... 385
Page 344 of 445
343Continued
Maintenance
Maintenance MinderTM
If the engine oil life is less than 15%, you will see the Maintenance Minder messages
appear on the multi-information display ev ery time you set the power mode to ON.
The messages notify you when to change th e engine oil, or when to bring your
vehicle to a dealer for indicated maintenance services.
To Use Maintenance MinderTM
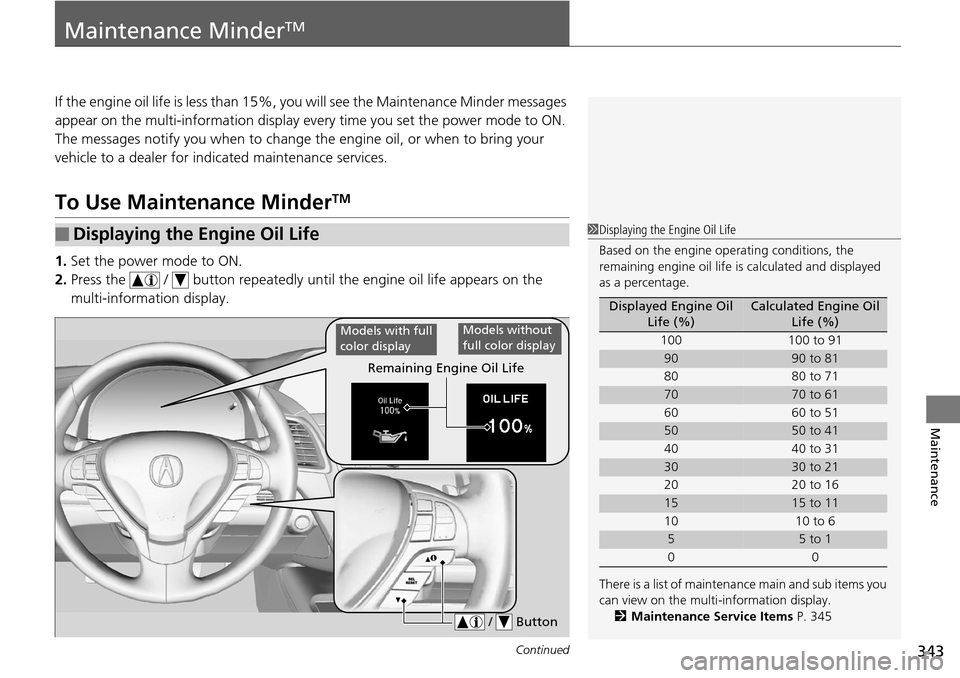
1. Set the power mode to ON.
2. Press the / button repeatedly until the engine oil life appears on the
multi-information display.
■Displaying the Engine Oil Life1 Displaying the Engine Oil Life
Based on the engine ope rating conditions, the
remaining engine oi l life is calculated and displayed
as a percentage.
There is a list of maintena nce main and sub items you
can view on the multi-information display. 2 Maintenance Service Items P. 345
Displayed Engine Oil
Life (%)Calculated Engine Oil Life (%)
100 100 to 91
9090 to 81
80 80 to 71
7070 to 61
60 60 to 51
5050 to 41
40 40 to 31
3030 to 21
20 20 to 16
1515 to 11
10 10 to 6
55 to 1
00
Remaining Engine Oil Life
/ Button
Models with full
color displayModels without
full color display
Page 345 of 445
344
uuMaintenance MinderTMuTo Use Maintenance MinderTM
Maintenance
*1 : On the left: Models with full color display
On the right: Models without full color display
The system message indicator ( ) comes on along with the Maintenance Minder message.
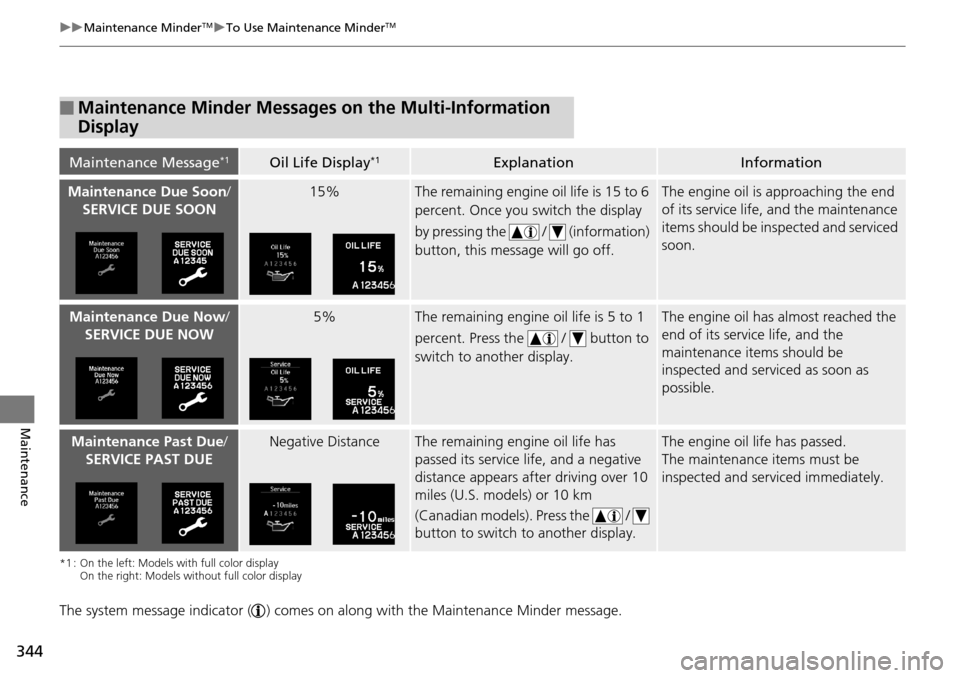
■Maintenance Minder Messages on the Multi-Information
Display
Maintenance Message*1Oil Life Display*1ExplanationInformation
Maintenance Due Soon/
SERVICE DUE SOON15%The remaining engine oil life is 15 to 6
percent. Once you switch the display
by pressing the / (information)
button, this mess age will go off.The engine oil is approaching the end
of its service life, and the maintenance
items should be inspected and serviced
soon.
Maintenance Due Now /
SERVICE DUE NOW5%The remaining engine oil life is 5 to 1
percent. Press the / button to
switch to another display.The engine oil has almost reached the
end of its service life, and the
maintenance items should be
inspected and servic ed as soon as
possible.
Maintenance Past Due /
SERVICE PAST DUENegative DistanceThe remaining engine oil life has
passed its service life, and a negative
distance appears after driving over 10
miles (U.S. models) or 10 km
(Canadian models). Press the /
button to switch to another display.The engine oil life has passed.
The maintenance items must be
inspected and serviced immediately.
A
Page 347 of 445
uuMaintenance MinderTMuTo Use Maintenance MinderTM
346
Maintenance
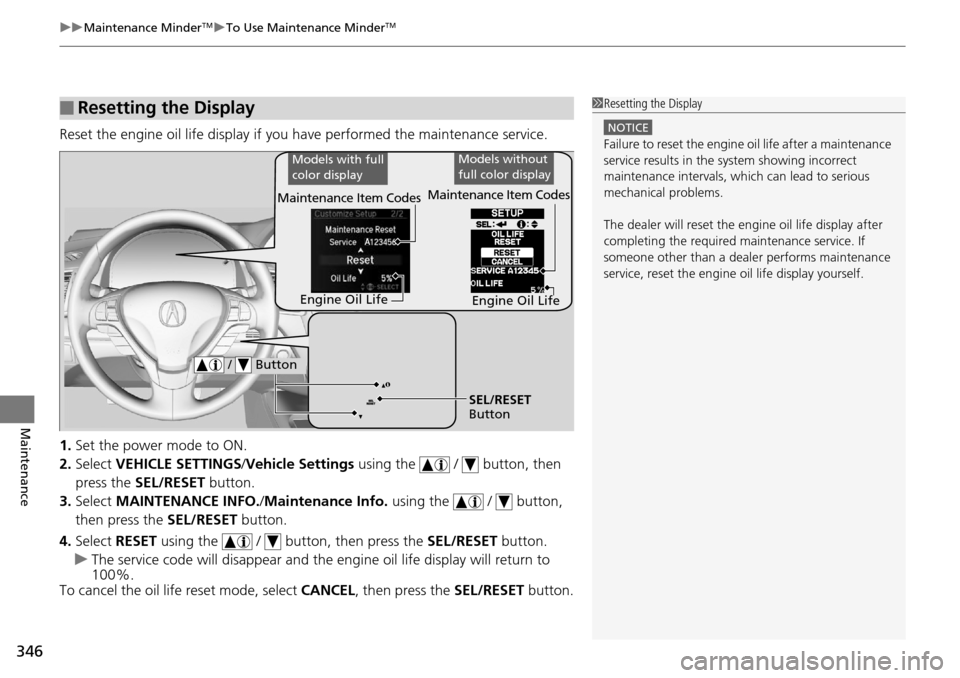
Reset the engine oil life display if you have performed the maintenance service.
1. Set the power mode to ON.
2. Select VEHICLE SETTINGS /Vehicle Settings using the / button, then
press the SEL/RESET button.
3. Select MAINTENANCE INFO. /Maintenance Info. using the / button,
then press the SEL/RESET button.
4. Select RESET using the / button, then press the SEL/RESET button.
u The service code will disappear and the en gine oil life display will return to
100%.
To cancel the oil life reset mode, select CANCEL, then press the SEL/RESET button.
■Resetting the Display1Resetting the Display
NOTICE
Failure to reset the engine oil life after a maintenance
service results in the sy stem showing incorrect
maintenance intervals, which can lead to serious
mechanical problems.
The dealer will reset the en gine oil life display after
completing the required ma intenance service. If
someone other than a deal er performs maintenance
service, reset the engine oil life display yourself.
Engine Oil Life
SEL/RESET
Button
/ Button
Maintenance Item Codes
Models with full
color displayModels without
full color display
Engine Oil Life
Maintenance Item Codes
Page 381 of 445
380
Maintenance
Remote Transmitter Care
Replacing the Button Battery
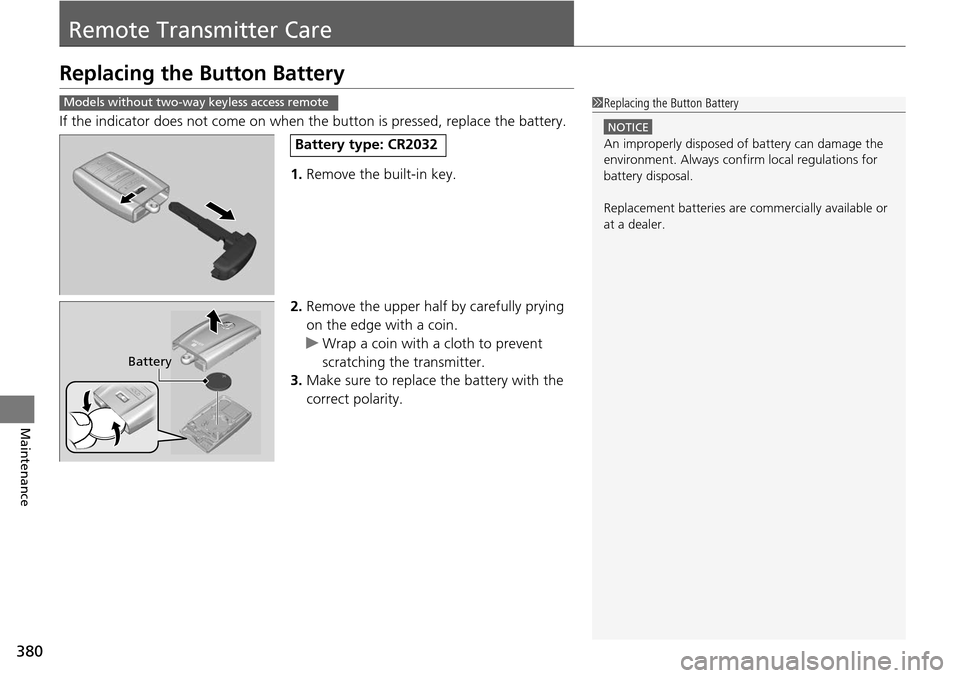
If the indicator does not come on when th e button is pressed, replace the battery.
1. Remove the built-in key.
2. Remove the upper half by carefully prying
on the edge with a coin.
u Wrap a coin with a cloth to prevent
scratching the transmitter.
3. Make sure to replace the battery with the
correct polarity.
1 Replacing the Button Battery
NOTICE
An improperly disposed of battery can damage the
environment. Always conf irm local regulations for
battery disposal.
Replacement batteries are commercially available or
at a dealer.
Models without two-way keyless access remote
Battery type: CR2032
Battery