stop start Acura RDX 2016 Owner's Guide
[x] Cancel search | Manufacturer: ACURA, Model Year: 2016, Model line: RDX, Model: Acura RDX 2016Pages: 445, PDF Size: 15.25 MB
Page 270 of 445
Continued269
uuWhen Driving uStarting the Engine
Driving
You can turn the engine off when the vehicle is completely stopped.
1. Shift to
(P.
2. Press the ENGINE START/STOP button with your foot on the brake pedal.
■Stopping the Engine1Starting the Engine
The immobilizer system pr otects your vehicle from
theft. If an improperly code d key (or other device) is
used, the engine’s fuel system is disabled.
2 Immobilizer System P. 137
Page 272 of 445
Continued271
uuWhen Driving uStarting the Engine
Driving
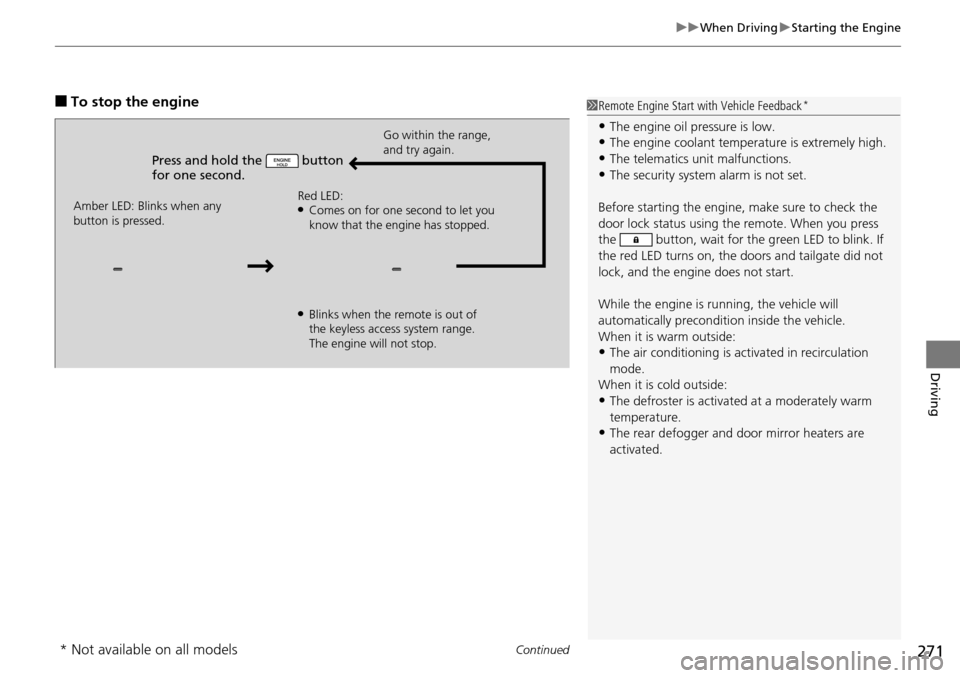
■To stop the engine
Press and hold the button
for one second.
Go within the range,
and try again.
Amber LED: Blinks when any
button is pressed. Red LED:
●Comes on for one second to let you
know that the engine has stopped.
●Blinks when the remote is out of
the keyless access system range.
The engine will not stop.
1
Remote Engine Start with Vehicle Feedback*
•The engine oil pressure is low.•The engine coolant temper ature is extremely high.
•The telematics unit malfunctions.
•The security system alarm is not set.
Before starting the engine, make sure to check the
door lock status using the remote. When you press
the button, wait for the green LED to blink. If
the red LED turns on, the doors and tailgate did not
lock, and the engine does not start.
While the engine is running, the vehicle will
automatically preconditi on inside the vehicle.
When it is warm outside:
•The air conditioning is acti vated in recirculation
mode.
When it is cold outside:
•The defroster is activated at a moderately warm
temperature.
•The rear defogger and door mirror heaters are
activated.
* Not available on all models
Page 273 of 445
uuWhen Driving uStarting the Engine
272
Driving
1. Depress the brake pedal and press the ENGINE START/STOP button
simultaneously.
2. Keeping your right foot on the brake peda l, release the parking brake. Check that
the parking brake indicator has gone off.
2 Parking Brake P. 314
3.Put the shift lever in (D. Select (R when reversing.
4. Gradually release the brake pedal and gently depress the accelerator pedal to pull
away.
■Hill start assist system
Hill start assist keeps the brake engaged br iefly to help prevent the vehicle from
rolling on inclines as you move your fo ot from the brake pedal to the accelerator.
Move the shift lever to
(D or (S when facing uphill, or (R when facing downhill,
then release the brake pedal.
■Starting to Drive1 Starting to Drive
The engine stops when the sh ift lever is moved out of
(P before the ENGINE START/STOP button is
pressed. Follow the step 1 when starting to drive.
When the engine was started using the two-way keyless
access remote*When the engine was started using the two-way keyless access remote*
When the engine was started in any case
1 Hill start assist system
Hill start assist may not prevent the vehicle from
rolling downhill on a very steep or slippe ry slope, and
will not operate on small inclines.
Hill start assist is not a replacement for the parking
brake.
* Not available on all models
Page 301 of 445
uuWhen Driving uLane Keeping Assist System (LKAS)*
300
Driving
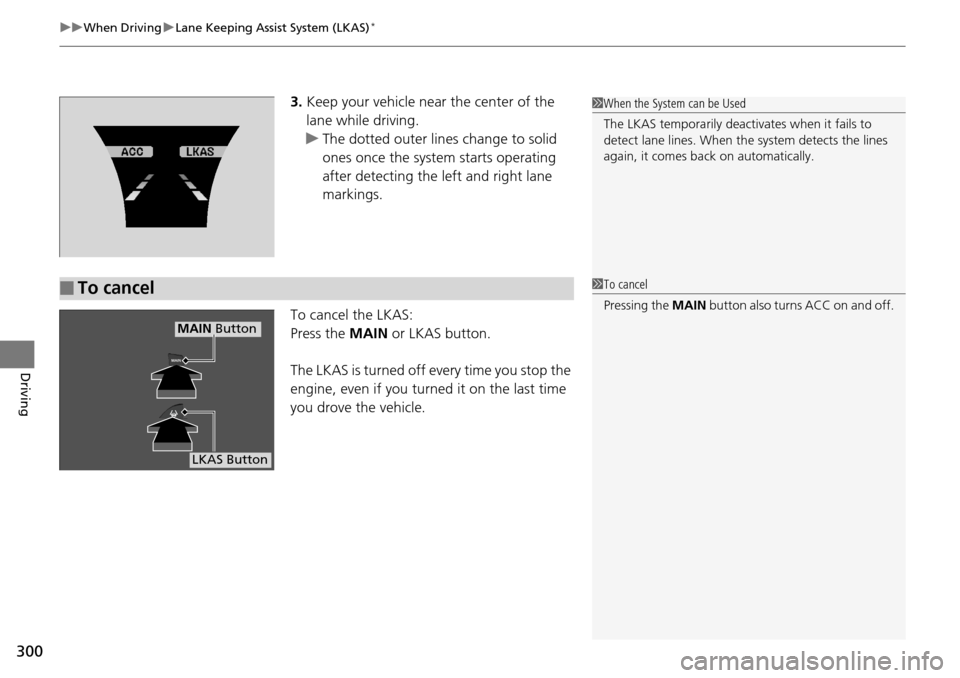
3. Keep your vehicle near the center of the
lane while driving.
u The dotted outer lines change to solid
ones once the system starts operating
after detecting the left and right lane
markings.
To cancel the LKAS:
Press the MAIN or LKAS button.
The LKAS is turned off every time you stop the
engine, even if you turned it on the last time
you drove the vehicle.
■To cancel
1 When the System can be Used
The LKAS temporarily deactivates when it fails to
detect lane lines. When the system detects the lines
again, it comes back on automatically.
1To cancel
Pressing the MAIN button also turns ACC on and off.
MAIN Button
LKAS Button
Page 302 of 445
301
uuWhen Driving uLane Keeping Assist System (LKAS)*
Continued
Driving
■The system operation is suspended if
you:
• Set the wipers to continuous operation.
u Turning the wipers off resumes the
LKAS.
• Decrease the vehicle speed to about 40
mph (64 km/h) or less.
u Increasing the vehicle speed to about 45
mph (72 km/h) or more resumes the
LKAS.
• Depress the brake pedal.
u The LKAS resumes and starts detecting
the lane lines again once you release the
brake pedal.
• Set the wiper switch to AUTO and the
wipers operate continuously.
u The LKAS resumes when the wipers stop
or operate intermittently.
■The LKAS may automatically be suspended when:
• The system fails to detect lane lines.
• The steering wheel is quickly turned.
• You fail to steer the vehicle.
• The vehicle runs on a curved road over the speed limit.
Once these conditions no longer exist, the LKAS automatically resumes.
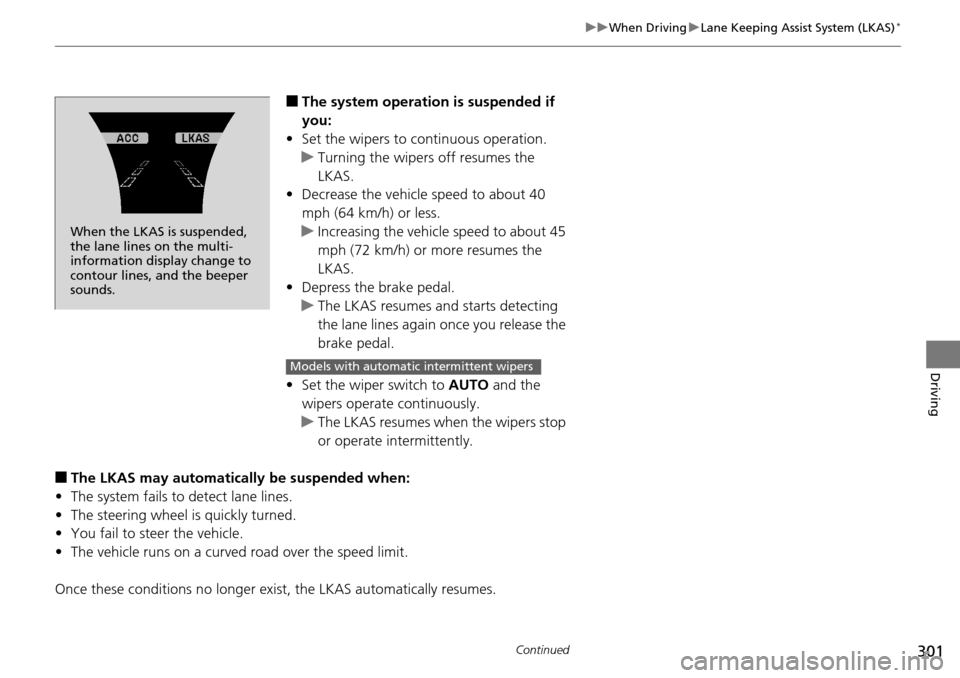
When the LKAS is suspended,
the lane lines on the multi-
information disp lay change to
contour lines, and the beeper
sounds.
Models with automatic intermittent wipers
Page 307 of 445
uuWhen Driving uVehicle Stability Assist (VSA® ), aka Electronic Stability Control (ESC), System
306
Driving
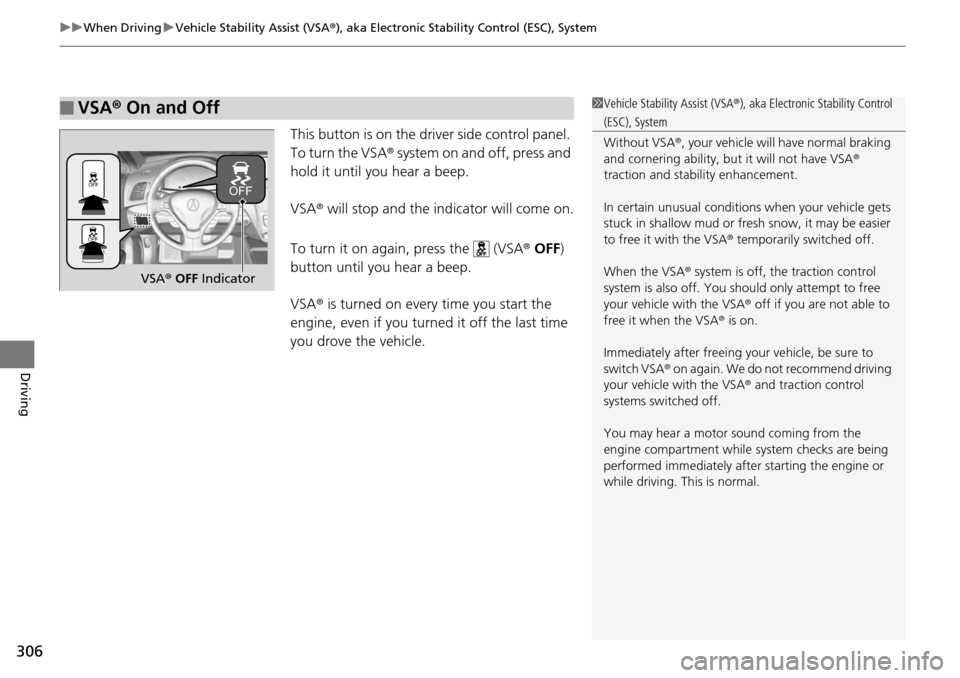
This button is on the driver side control panel.
To turn the VSA® system on and off, press and
hold it until you hear a beep.
VSA® will stop and the indicator will come on.
To turn it on again, press the (VSA ® OFF )
button until you hear a beep.
VSA ® is turned on every time you start the
engine, even if you turned it off the last time
you drove the vehicle.
■VSA ® On and Off1 Vehicle Stability Assist (VSA ®), aka Electronic Stability Control
(ESC), System
Without VSA ®, your vehicle will have normal braking
and cornering ability, bu t it will not have VSA®
traction and stability enhancement.
In certain unusual conditions when your vehicle gets
stuck in shallow mud or fr esh snow, it may be easier
to free it with the VSA ® temporarily switched off.
When the VSA ® system is off, the traction control
system is also off. You should only atte mpt to free
your vehicle with the VSA ® off if you ar e not able to
free it when the VSA ® is on.
Immediately after freeing your vehicle, be sure to
switch VSA ® on again. We do not recommend driving
your vehicle with the VSA ® and traction control
systems switched off.
You may hear a motor sound coming from the
engine compartment while system checks are being
performed immediately after starting the engine or
while driving. This is normal.
VSA ® OFF Indicator
Page 317 of 445
316
uuBraking uAnti-lock Brake System (ABS)
Driving
Anti-lock Brake System (ABS)
Helps prevent the wheels from locking up, and helps you retain steering control by
pumping the brakes rapidly, much faster than you.
The electronic brake distribution (EBD) system, which is part of the ABS, also
balances the front-to-rear braking distri bution according to vehicle loading.
You should never pump the brake pedal. Let the ABS work for you by always
keeping firm, steady pressure on the brake pe dal. This is sometimes referred to as
“stomp and steer.”
■ABS operation
The brake pedal may pulsate slightly when the ABS is working. Keep holding the
pedal firmly down. On dry pavement, you w ill need to press on the brake pedal very
hard before the ABS activates. However, you may feel the ABS activate immediately
if you are trying to stop on snow or ice.
When the vehicle speed goes unde r 6 mph (10 km/h), the ABS stops.
■ABS1Anti-lock Brake System (ABS)
NOTICE
The ABS may not function correctly if you use an
incorrect tire type and size.
When the ABS indicator comes on while driving,
there may be a problem with the system.
While normal braking is not affected, there is a
possibility of the ABS not operating. Have the vehicle
checked by a dealer immediately.
The ABS does not reduce the ti me or distance it takes
to stop the vehicle. It only helps with steering control
during hard braking.
In the following cases, yo ur vehicle may need more
stopping distance than a vehicle without the ABS:
•When driving on rough road surfaces, including
when driving on uneven surf aces, such as gravel or
snow.
•When tire chains are installed.
You may hear a motor sound coming from the
engine compartment while system checks are being
performed immediately after starting the engine or
while driving. This is normal.
Page 319 of 445
318
uuBraking uCollision Mitigation Braking SystemTM (CMBSTM)*
Driving
Collision Mitigati on Braking SystemTM (CMBSTM)*
Can assist you when there is a possibility of your vehicle colliding with a vehicle or a
pedestrian detected in front of yours. The CMBSTM is designed to alert you when a
potential collision is determined, as well as to reduce your vehicle speed to help
minimize collision severity when a collision is deemed unavoidable.
■How the system works
1 Collision Mitigation Braking SystemTM (CMBSTM)*
Important Safety Reminder
The CMBSTM is designed to reduce the severity of an
unavoidable collision. It does not prevent collision nor
stop the vehicle automatically. It is still your
responsibility to operate the brake pedal and steering
wheel appropriately acco rding to the driving
conditions.
The CMBS
TM may not activate or may not detect a
vehicle in front of y our vehicle under certain
conditions:
2 CMBS
TM Conditions and Limitations P. 322
You can read about handling information for the
camera equipped with this system. 2 Front Sensor Camera
* P. 282
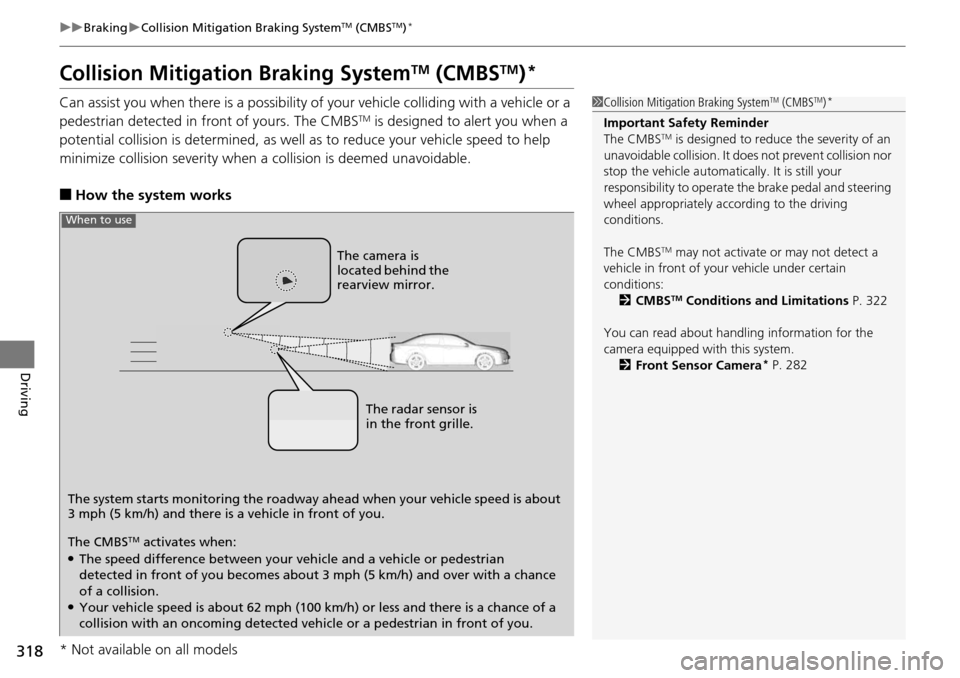
The system starts monitoring the roadway ah ead when your vehicle speed is about
3 mph (5 km/h) and there is a vehicle in front of you. The radar sensor is
in the front grille.
The CMBS
TM activates when:●The speed difference between your vehicle and a vehicle or pedestrian
detected in front of you becomes about 3 mph (5 km/h) and over with a chance
of a collision.
●Your vehicle speed is about 62 mph (100 km/h) or less and there is a chance of a
collision with an oncoming detected vehicle or a pedestrian in front of you. The camera is
located behind the
rearview mirror.
When to use
* Not available on all models
Page 354 of 445
353
uuMaintenance Under the Hood uChanging the Engine Oil and Oil Filter
Maintenance
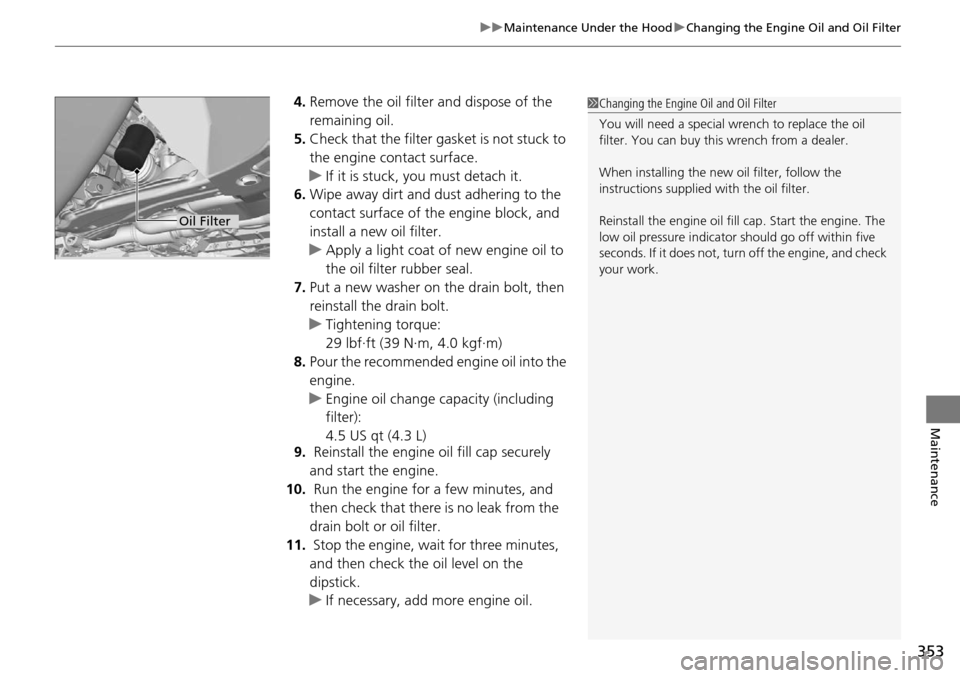
4. Remove the oil filter and dispose of the
remaining oil.
5. Check that the filter gasket is not stuck to
the engine contact surface.
u If it is stuck, you must detach it.
6. Wipe away dirt and dust adhering to the
contact surface of the engine block, and
install a new oil filter.
u Apply a light coat of new engine oil to
the oil filter rubber seal.
7. Put a new washer on the drain bolt, then
reinstall the drain bolt.
u Tightening torque:
29 lbf∙ft (39 N∙m, 4.0 kgf∙m)
8. Pour the recommended engine oil into the
engine.
u Engine oil change capacity (including
filter):
4.5 US qt (4.3 L)
9. Reinstall the engine oil fill cap securely
and start the engine.
10. Run the engine for a few minutes, and
then check that there is no leak from the
drain bolt or oil filter.
11. Stop the engine, wait for three minutes,
and then check the oil level on the
dipstick.
u If necessary, add more engine oil.1Changing the Engine Oil and Oil Filter
You will need a special wrench to replace the oil
filter. You can buy this wrench from a dealer.
When installing the new oil filter, follow the
instructions supplied with the oil filter.
Reinstall the engine oil fill cap. Start the engine. The
low oil pressure indicator should go off within five
seconds. If it does not, turn off the engine, and check
your work.
Oil Filter
Page 390 of 445
389
Handling the Unexpected
This chapter explains how to handle unexpected troubles.
ToolsTypes of Tools .................................. 390
If a Tire Goes Flat Changing a Flat Tire
*....................... 391
Temporarily Repair ing a Flat Tire*..... 397
Engine Does Not Start Checking the Engine ........................ 408
If the Keyless Access Remote Battery is Weak ............................................. 409
Emergency Engine Stop ................... 410
Jump Starting .................................... 411
Shift Lever Does Not Move .............. 413Overheating
How to Handle Overheating............. 414
Indicator, Coming On/Blinking
If the Low Oil Pressure Indicator Comes On ............................................. 416
If the Charging System Indicator Comes
On ................................................. 416
If the Malfunction Indicator Lamp Comes On or Blinks ................................... 417
If the Brake System Indicator (Red) Comes On .................................................... 418
If the Electric Power Steering (EPS) System
Indicator Comes On ............................... 418
If the Low Tire Pressure/TPMS Indicator Comes On or Blinks ....................... 419
Fuses Fuse Locations ................................. 420
Inspecting and Changing Fuses ........ 422
Emergency Towing ........................... 423
When You Cannot Open the Tailgate..... 424
* Not available on all models