Acura RDX 2016 Owner's Manual
Manufacturer: ACURA, Model Year: 2016, Model line: RDX, Model: Acura RDX 2016Pages: 445, PDF Size: 15.25 MB
Page 401 of 445
uuIf a Tire Goes Flat uTemporarily Repairing a Flat Tire*
400
Handling the Unexpected
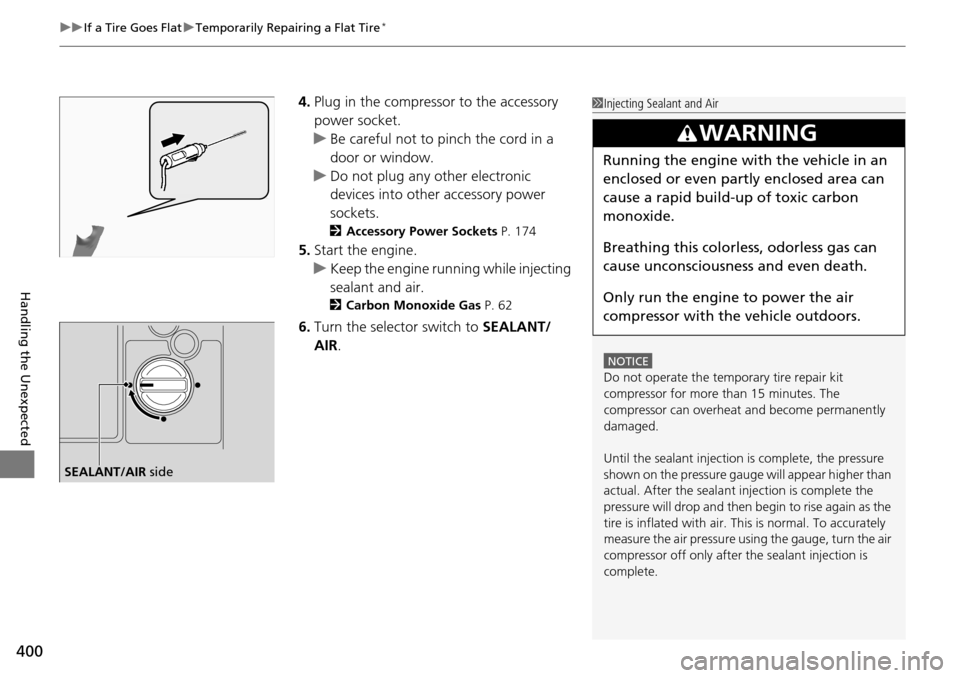
4. Plug in the compressor to the accessory
power socket.
u Be careful not to pinch the cord in a
door or window.
u Do not plug any other electronic
devices into other accessory power
sockets.
2 Accessory Power Sockets P. 174
5.Start the engine.
u Keep the engine running while injecting
sealant and air.
2 Carbon Monoxide Gas P. 62
6.Turn the selector switch to SEALANT/
AIR .
1Injecting Sealant and Air
NOTICE
Do not operate the temporary tire repair kit
compressor for more than 15 minutes. The
compressor can overheat and become permanently
damaged.
Until the sealant injection is complete, the pressure
shown on the pressure gauge will appear higher than
actual. After the sealant injection is complete the
pressure will drop and then begin to rise again as the
tire is inflated with air. This is normal. To accurately
measure the air pressure usi ng the gauge, turn the air
compressor off only after the sealant injection is
complete.
3WARNING
Running the engine with the vehicle in an
enclosed or even partly enclosed area can
cause a rapid build-up of toxic carbon
monoxide.
Breathing this colorless, odorless gas can
cause unconsciousness and even death.
Only run the engine to power the air
compressor with th e vehicle outdoors.
SEALANT/AIR side
Page 402 of 445
Continued401
uuIf a Tire Goes Flat uTemporarily Repairing a Flat Tire*
Handling the Unexpected
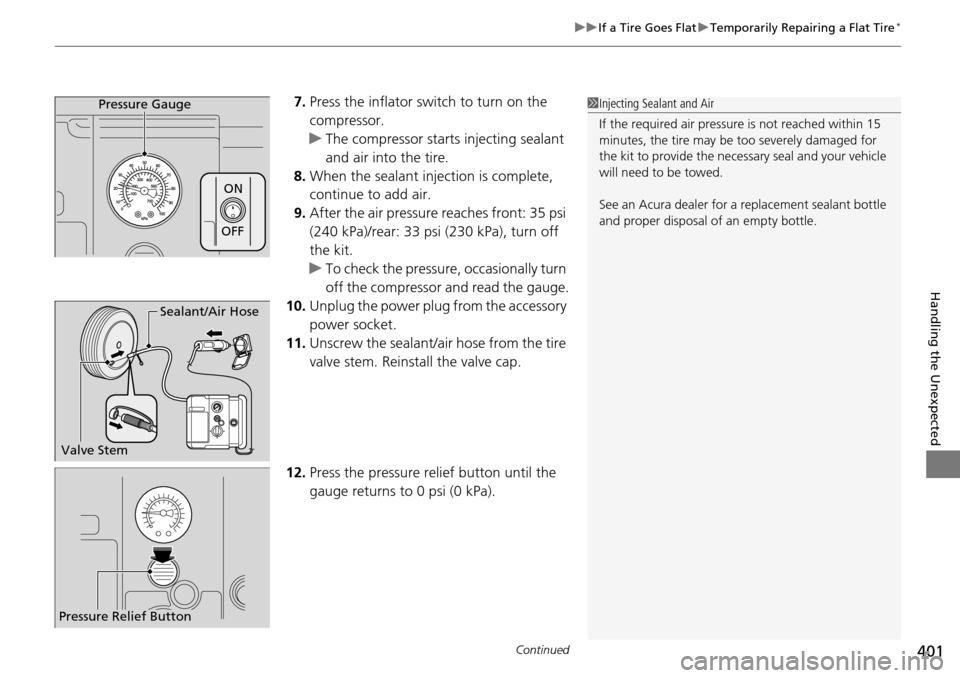
7. Press the inflator switch to turn on the
compressor.
u The compressor starts injecting sealant
and air into the tire.
8. When the sealant injection is complete,
continue to add air.
9. After the air pressure reaches front: 35 psi
(240 kPa)/rear: 33 psi (230 kPa), turn off
the kit.
u To check the pressure, occasionally turn
off the compressor and read the gauge.
10. Unplug the power plug from the accessory
power socket.
11. Unscrew the sealant/ai r hose from the tire
valve stem. Reinstall the valve cap.
12. Press the pressure relief button until the
gauge returns to 0 psi (0 kPa).Pressure Gauge
ON
OFF
1Injecting Sealant and Air
If the required air pressure is not reached within 15
minutes, the tire may be too severely damaged for
the kit to provide the necessa ry seal and your vehicle
will need to be towed.
See an Acura dealer for a replacement sealant bottle
and proper disposal of an empty bottle.
Sealant/Air Hose
Valve Stem
Pressure Relief Button
Page 403 of 445
402
uuIf a Tire Goes Flat uTemporarily Repairing a Flat Tire*
Handling the Unexpected
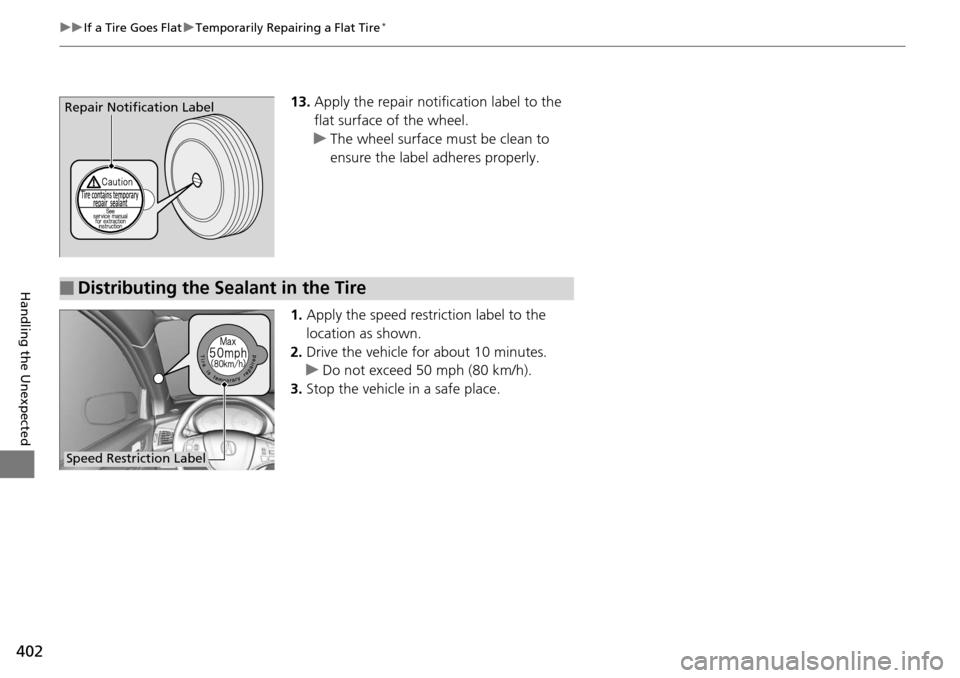
13. Apply the repair notification label to the
flat surface of the wheel.
u The wheel surface must be clean to
ensure the label adheres properly.
1. Apply the speed restriction label to the
location as shown.
2. Drive the vehicle for about 10 minutes.
u Do not exceed 50 mph (80 km/h).
3. Stop the vehicle in a safe place.Repair Notification Label
■Distributing the Sealant in the Tire
Speed Restriction Label
Page 404 of 445
403
uuIf a Tire Goes Flat uTemporarily Repairing a Flat Tire*
Continued
Handling the Unexpected
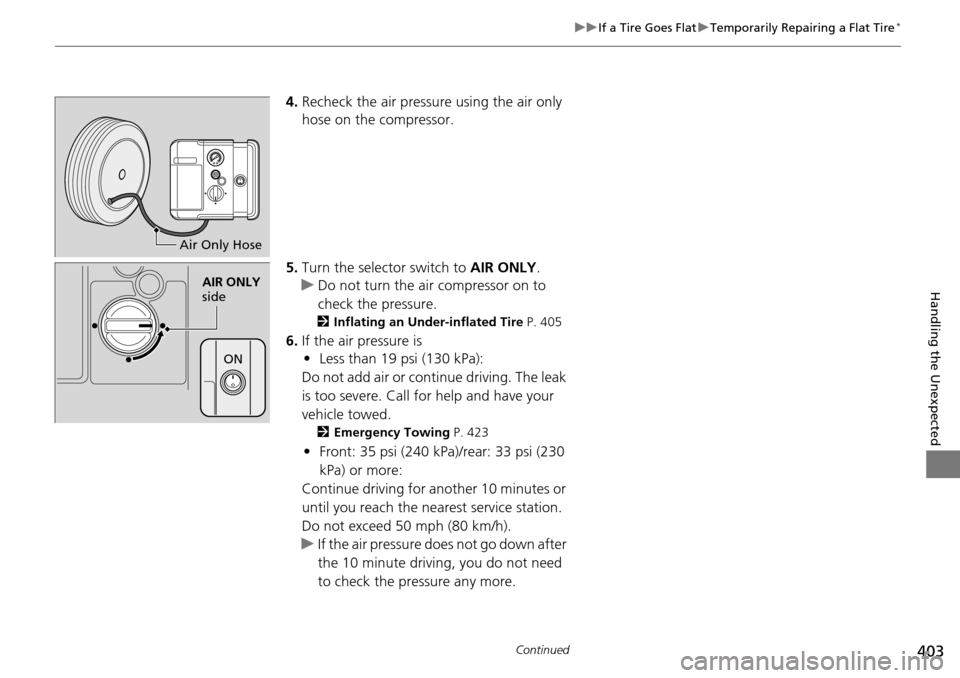
4. Recheck the air pressure using the air only
hose on the compressor.
5. Turn the selector switch to AIR ONLY.
u Do not turn the air compressor on to
check the pressure.
2 Inflating an Under-inflated Tire P. 405
6.If the air pressure is
• Less than 19 psi (130 kPa):
Do not add air or continue driving. The leak
is too severe. Call for help and have your
vehicle towed.
2 Emergency Towing P. 423
•Front: 35 psi (240 kPa) /rear: 33 psi (230
kPa) or more:
Continue driving for another 10 minutes or
until you reach the nearest service station.
Do not exceed 50 mph (80 km/h).
u If the air pressure does not go down after
the 10 minute driving, you do not need
to check the pressure any more.
Air Only Hose
AIR ONLY
side
ON
Page 405 of 445
uuIf a Tire Goes Flat uTemporarily Repairing a Flat Tire*
404
Handling the Unexpected
• Greater than 19 psi (130 kPa), but less
than front: 35 psi (240 kPa)/rear: 33 psi
(230 kPa):
Turn the air compressor on to inflate the
tire until the tire pressure reaches front: 35
psi (240 kPa)/rear: 33 psi (230 kPa).
2 Inflating an Under-inflated Tire P. 405
Then drive carefully for 10 more minutes or
until you reach the nearest service station.
Do not exceed 50 mph (80 km/h).
u You should repeat this procedure as long
as the air pressure is within this range.
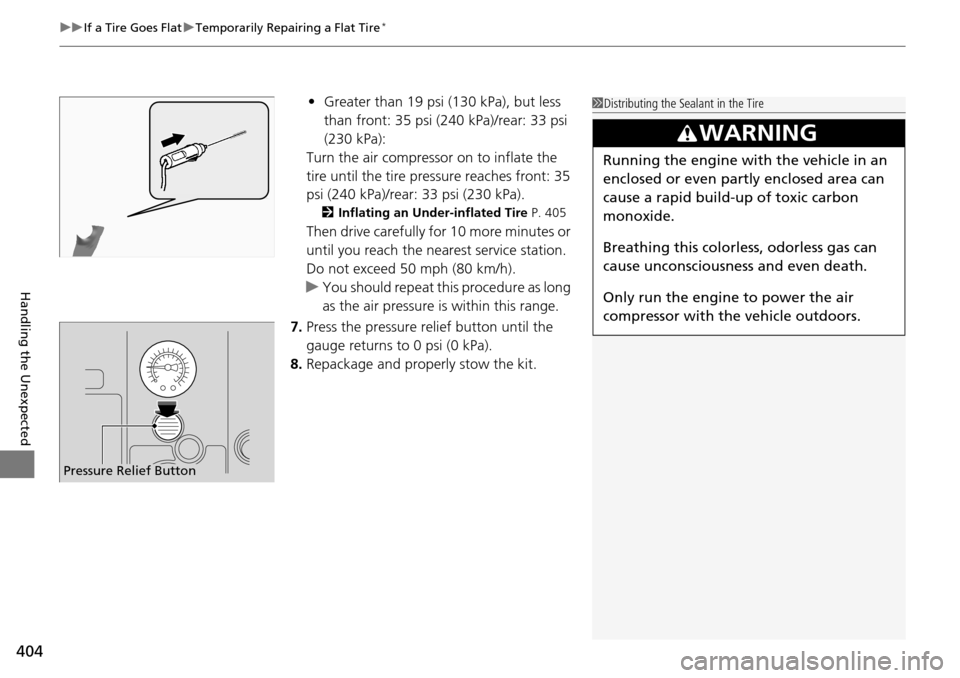
7. Press the pressure relief button until the
gauge returns to 0 psi (0 kPa).
8. Repackage and properly stow the kit.
Pressure Relief Button
1Distributing the Sealant in the Tire
3WARNING
Running the engine with the vehicle in an
enclosed or even partly enclosed area can
cause a rapid build-up of toxic carbon
monoxide.
Breathing this colorless, odorless gas can
cause unconsciousness and even death.
Only run the engine to power the air
compressor with th e vehicle outdoors.
Page 406 of 445
Continued405
uuIf a Tire Goes Flat uTemporarily Repairing a Flat Tire*
Handling the Unexpected
You can use the kit to inflate a non-punctured under-inflated tire.
1.Open the cargo area floor lid.
2 Getting Ready to Temporarily Repair
the Flat Tire P. 398
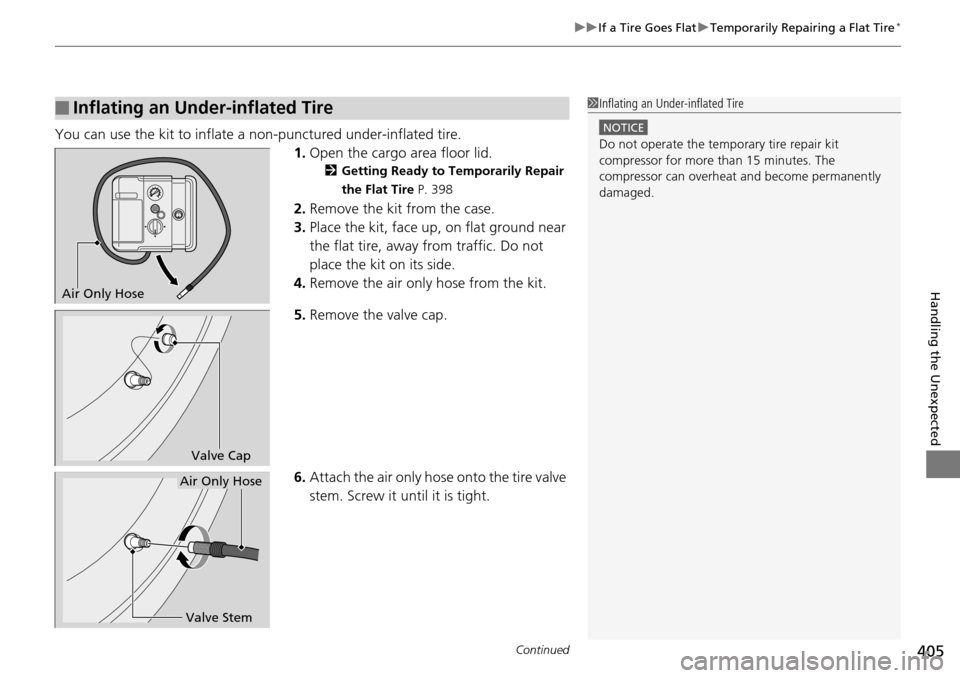
2.Remove the kit from the case.
3. Place the kit, face up, on flat ground near
the flat tire, away from traffic. Do not
place the kit on its side.
4. Remove the air only hose from the kit.
5. Remove the valve cap.
6. Attach the air only hose onto the tire valve
stem. Screw it until it is tight.
■Inflating an Under-inflated Tire1Inflating an Under-inflated Tire
NOTICE
Do not operate the temporary tire repair kit
compressor for more than 15 minutes. The
compressor can overheat and become permanently
damaged.
Air Only Hose
Valve Cap
Valve Stem
Air Only Hose
Page 407 of 445
uuIf a Tire Goes Flat uTemporarily Repairing a Flat Tire*
406
Handling the Unexpected
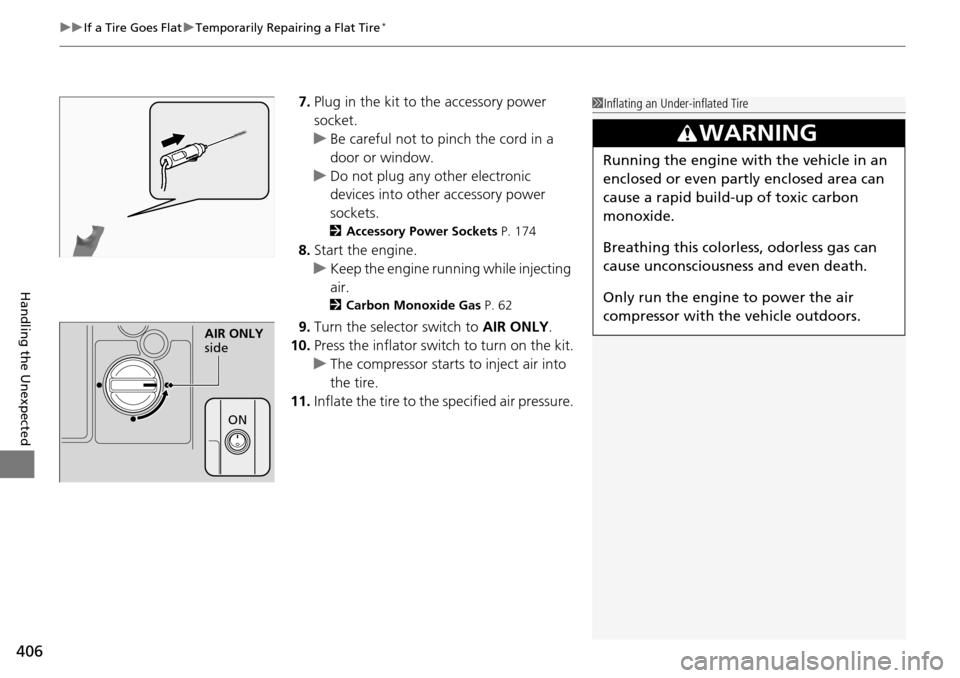
7. Plug in the kit to the accessory power
socket.
u Be careful not to pinch the cord in a
door or window.
u Do not plug any other electronic
devices into other accessory power
sockets.
2 Accessory Power Sockets P. 174
8.Start the engine.
u Keep the engine running while injecting
air.
2 Carbon Monoxide Gas P. 62
9.Turn the selector switch to AIR ONLY.
10. Press the inflator swit ch to turn on the kit.
u The compressor starts to inject air into
the tire.
11. Inflate the tire to the specified air pressure.
1Inflating an Under-inflated Tire
3WARNING
Running the engine with the vehicle in an
enclosed or even partly enclosed area can
cause a rapid build-up of toxic carbon
monoxide.
Breathing this colorless, odorless gas can
cause unconsciousness and even death.
Only run the engine to power the air
compressor with th e vehicle outdoors.
AIR ONLY
side
ON
Page 408 of 445
407
uuIf a Tire Goes Flat uTemporarily Repairing a Flat Tire*
Handling the Unexpected
12. Turn off the kit.
u Check the pressure gauge on the air
compressor.
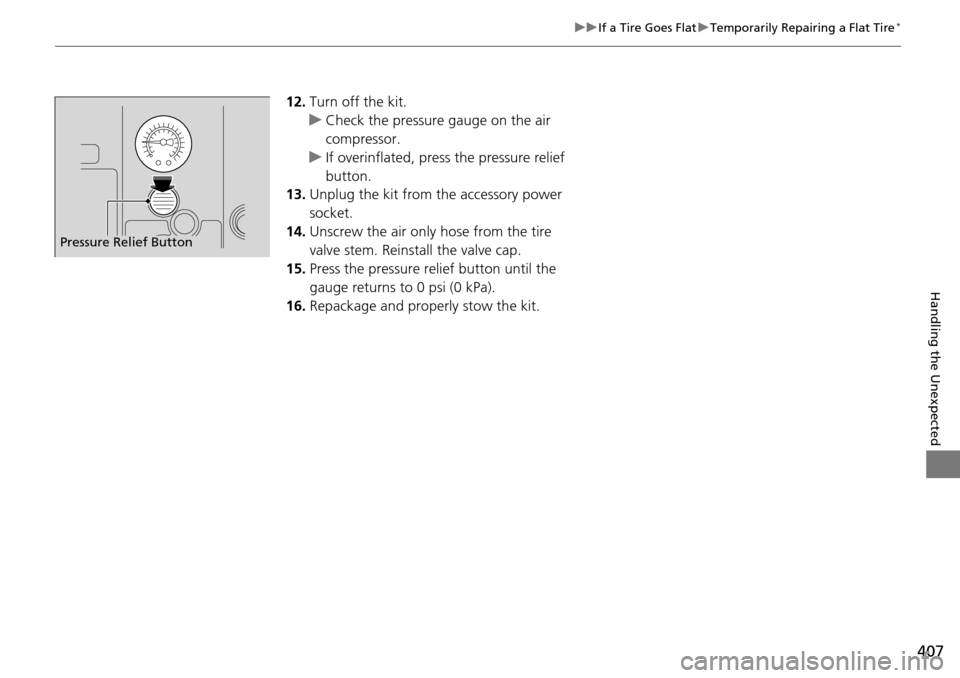
u If overinflated, press the pressure relief
button.
13. Unplug the kit from the accessory power
socket.
14. Unscrew the air only hose from the tire
valve stem. Reinstall the valve cap.
15. Press the pressure relief button until the
gauge returns to 0 psi (0 kPa).
16. Repackage and properly stow the kit.
Pressure Relief Button
Page 409 of 445
408
Handling the Unexpected
Engine Does Not Start
Checking the Engine
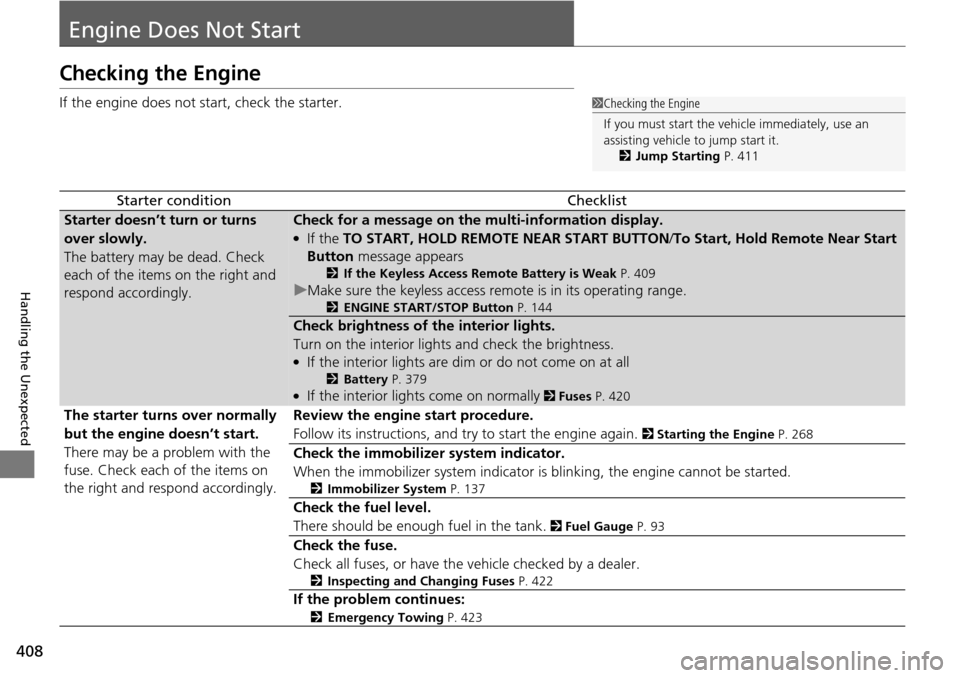
If the engine does not start, check the starter.
Starter conditionChecklist
Starter doesn’t turn or turns
over slowly.
The battery may be dead. Check
each of the items on the right and
respond accordingly.Check for a message on the multi-information display.
●If the TO START, HOLD REMOTE NEAR START BUTTON /To Start, Hold Remote Near Start
Button message appears
2If the Keyless Access Remote Battery is Weak P. 409
uMake sure the keyless access remo te is in its operating range.
2ENGINE START/STOP Button P. 144
Check brightness of the interior lights.
Turn on the interior lights and check the brightness.
●If the interior lights are dim or do not come on at all
2Battery P. 379●If the interior lights come on normally 2 Fuses P. 420
The starter turns over normally
but the engine doesn’t start.
There may be a problem with the
fuse. Check each of the items on
the right and respond accordingly. Review the engine start procedure.
Follow its instructions, and try to start the engine again.
2
Starting the Engine P. 268
Check the immobilizer system indicator.
When the immobilizer system indicator is blinking, the engine cannot be started.
2Immobilizer System P. 137
Check the fuel level.
There should be enough fuel in the tank.
2 Fuel Gauge P. 93
Check the fuse.
Check all fuses, or have the vehicle checked by a dealer.
2Inspecting and Changing Fuses P. 422
If the problem continues:
2Emergency Towing P. 423
1Checking the Engine
If you must start the vehi cle immediately, use an
assisting vehicle to jump start it.
2 Jump Starting P. 411
Page 410 of 445
409
uuEngine Does Not Start uIf the Keyless Access Remote Battery is Weak
Handling the Unexpected
If the Keyless Access Re mote Battery is Weak
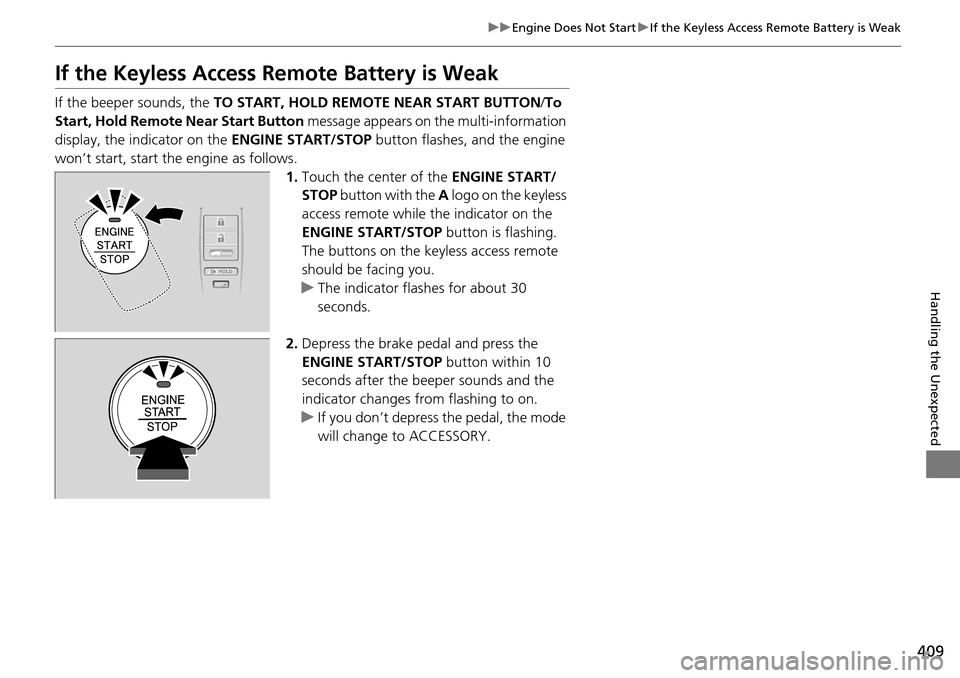
If the beeper sounds, the TO START, HOLD REMOTE NEAR START BUTTON /To
Start, Hold Remote Near Start Button message appears on the multi-information
display, the indicator on the ENGINE START/STOP button flashes, and the engine
won’t start, start the engine as follows. 1.Touch the center of the ENGINE START/
STOP button with the A logo on the keyless
access remote while the indicator on the
ENGINE START/STOP button is flashing.
The buttons on the keyless access remote
should be facing you.
u The indicator flashes for about 30
seconds.
2. Depress the brake pedal and press the
ENGINE START/STOP button within 10
seconds after the beeper sounds and the
indicator changes from flashing to on.
u If you don’t depress the pedal, the mode
will change to ACCESSORY.
HOLD