Power seat Acura RDX 2017 User Guide
[x] Cancel search | Manufacturer: ACURA, Model Year: 2017, Model line: RDX, Model: Acura RDX 2017Pages: 449, PDF Size: 10.88 MB
Page 71 of 449
70
uuIndicators u
Instrument Panel
*1:On the left: Models without full color display
On the right: Models with full color display
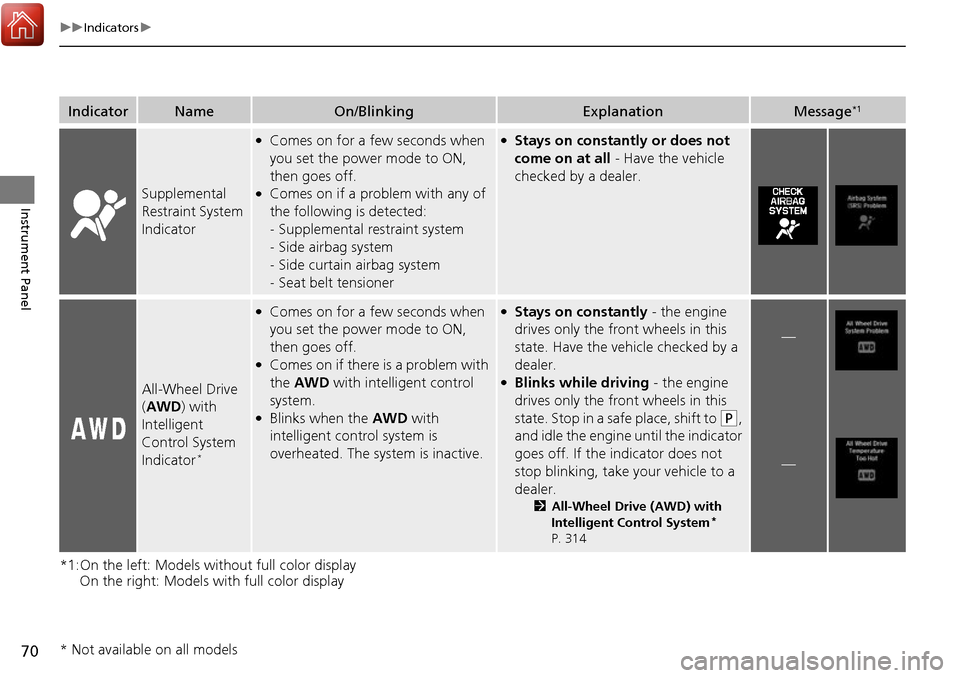
IndicatorNameOn/BlinkingExplanationMessage*1
Supplemental
Restraint System
Indicator
●Comes on for a few seconds when
you set the power mode to ON,
then goes off.
●Comes on if a problem with any of
the following is detected:
-Supplemental restraint system
- Side airbag system
- Side curtain airbag system
- Seat belt tensioner
●Stays on constantly or does not
come on at all - Have the vehicle
checked by a dealer.
All-Wheel Drive
( AWD ) with
Intelligent
Control System
Indicator
*
●Comes on for a few seconds when
you set the power mode to ON,
then goes off.
●Comes on if there is a problem with
the AWD with intelligent control
system.
●Blinks when the AWD with
intelligent control system is
overheated. The system is inactive.
●Stays on constantly - the engine
drives only the front wheels in this
state. Have the vehicle checked by a
dealer.
●Blinks while driving - the engine
drives only the front wheels in this
state. Stop in a safe place, shift to
(P,
and idle the engine until the indicator
goes off. If the indicator does not
stop blinking, take your vehicle to a
dealer.
2 All-Wheel Drive (AWD) with
Intelligent Control System*
P. 314
—
—
* Not available on all models
Page 118 of 449
117
Controls
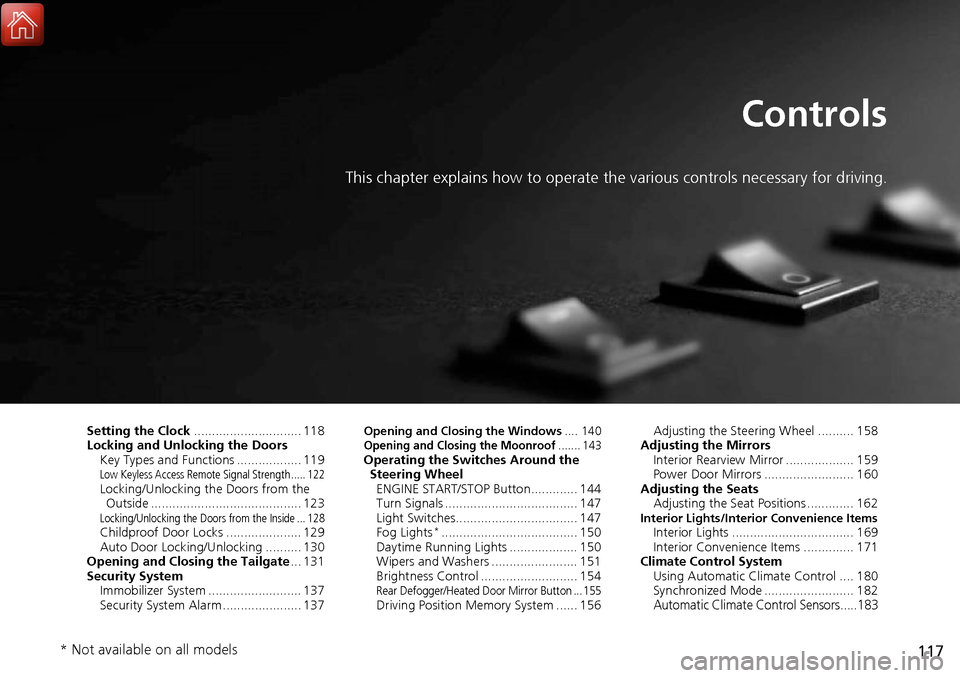
This chapter explains how to operate the various controls necessary for driving.
Setting the Clock.............................. 118
Locking and Unlocking the Doors Key Types and Functions .................. 119
Low Keyless Access Remote Signal Strength ..... 122Locking/Unlocking the Doors from the Outside .......................................... 123
Locking/Unlocking the Doors from the Inside ... 128Childproof Door Locks ..................... 129
Auto Door Locking/Unlocking .......... 130
Opening and Closing the Tailgate ... 131
Security System Immobilizer System .......................... 137
Security System Alarm ...................... 137
Opening and Closing the Windows .... 140Opening and Closing the Moonroof....... 143Operating the Switches Around the
Steering Wheel ENGINE START/STOP Button............. 144
Turn Signals ..................................... 147
Light Switches.................................. 147
Fog Lights
*...................................... 150
Daytime Running Lights ................... 150
Wipers and Washers ........................ 151
Brightness Control ........................... 154
Rear Defogger/Heated Door Mirror Button ... 155Driving Position Memory System ...... 156 Adjusting the Steering Wheel .......... 158
Adjusting the Mirrors Interior Rearview Mirror ................... 159
Power Door Mirrors ......................... 160
Adjusting the Seats Adjusting the Seat Positions ............. 162
Interior Lights/Interior Convenience ItemsInterior Lights .................................. 169
Interior Convenience Items .............. 171
Climate Control System Using Automatic Climate Control .... 180
Synchronized Mode ......................... 182
Automatic Climate Control Sensors.....183
* Not available on all models
Page 141 of 449
140
Controls
Opening and Closing the Windows
Opening/Closing the Power Windows
The power windows can be opened and closed when the power mode is in ON,
using the switches on the do ors. The driver side switches can be used to open and
close all of the windows.
The power window lock button on the driver side must be switched off (not pushed
in, indicator off) to open and close th e windows from anywhere other than the
driver’s seat.
When the power window lock button is pu shed in, the indicator comes on and you
can only operate the driver’s window. Turn the power window lock button on when
children are in the vehicle.
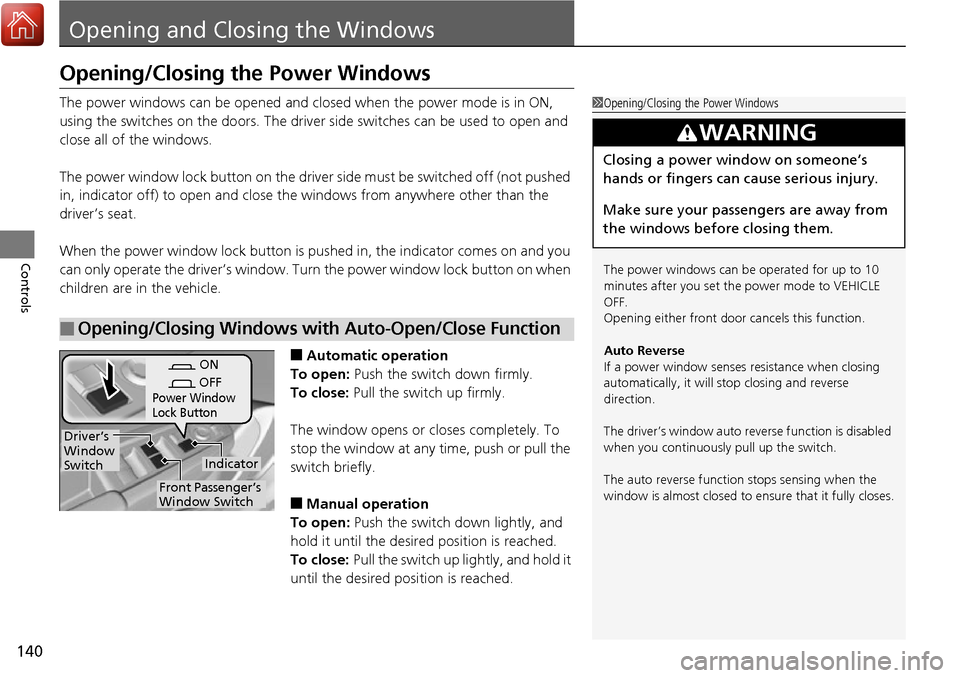
■Automatic operation
To open: Push the switch down firmly.
To close: Pull the switch up firmly.
The window opens or closes completely. To
stop the window at any time, push or pull the
switch briefly.
■Manual operation
To open: Push the switch down lightly, and
hold it until the desired position is reached.
To close: Pull the switch up lightly, and hold it
until the desired position is reached.
■Opening/Closing Windows with Auto-Open/Close Function
1 Opening/Closing the Power Windows
The power windows can be operated for up to 10
minutes after you set the power mode to VEHICLE
OFF.
Opening either front door cancels this function.
Auto Reverse
If a power window senses resistance when closing
automatically, it will stop closing and reverse
direction.
The driver’s window auto re verse function is disabled
when you continuously pull up the switch.
The auto reverse function stops sensing when the
window is almost closed to en sure that it fully closes.
3WARNING
Closing a power window on someone’s
hands or fingers can cause serious injury.
Make sure your passengers are away from
the windows before closing them.
ON
OFF
Power Window
Lock Button
Indicator
Driver’s
Window
Switch
Front Passenger’s
Window Switch
Page 158 of 449
157
uuOperating the Switches Around the Steering Wheel uDriving Position Memory System
Controls
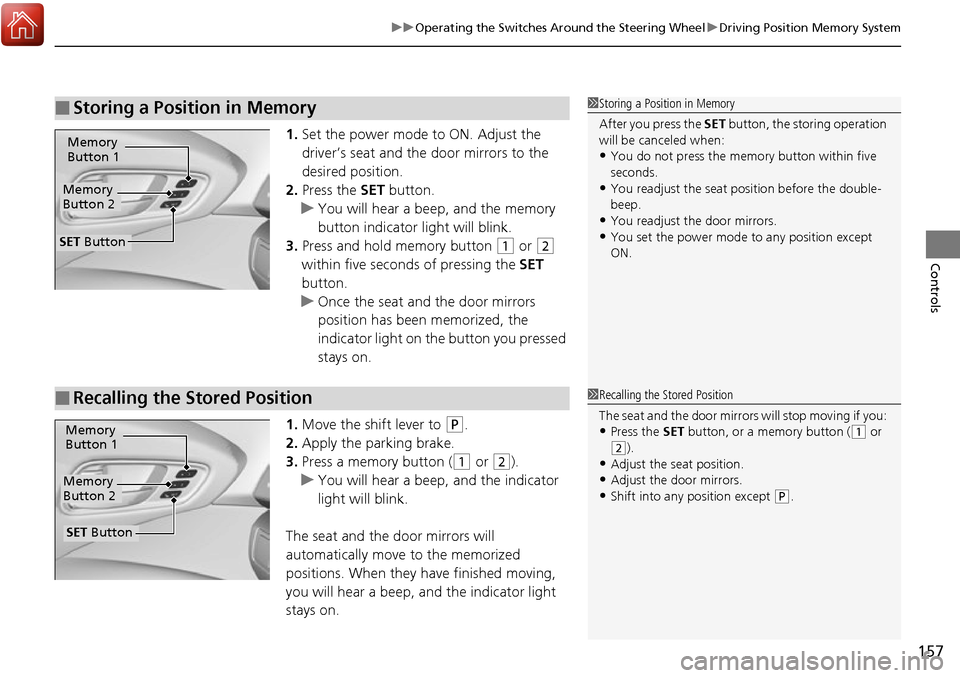
1. Set the power mode to ON. Adjust the
driver’s seat and the door mirrors to the
desired position.
2. Press the SET button.
u You will hear a beep, and the memory
button indicator light will blink.
3. Press and hold memory button
(1 or (2
within five seconds of pressing the SET
button.
u Once the seat and the door mirrors
position has been memorized, the
indicator light on the button you pressed
stays on.
1. Move the shift lever to
(P.
2. Apply the parking brake.
3. Press a memory button (
(1 or (2).
u You will hear a beep, and the indicator
light will blink.
The seat and the door mirrors will
automatically move to the memorized
positions. When they have finished moving,
you will hear a beep, and the indicator light
stays on.
■Storing a Position in Memory1 Storing a Position in Memory
After you press the SET button, the storing operation
will be canceled when:
•You do not press the memory button within five
seconds.
•You readjust the seat position before the double-
beep.
•You readjust the door mirrors.•You set the power mode to any position except
ON.
Memory
Button 1
Memory
Button 2
SET Button
■Recalling the Stored Position1 Recalling the Stored Position
The seat and the door mirror s will stop moving if you:
•Press the SET button, or a memory button ((1 or (2).
•Adjust the seat position.
•Adjust the door mirrors.•Shift into any position except (P.
Memory
Button 1
Memory
Button 2
SET Button
Page 160 of 449
159
Controls
Adjusting the Mirrors
Interior Rearview Mirror
Adjust the angle of the rearview mirror when you are sitting in the correct driving
position.
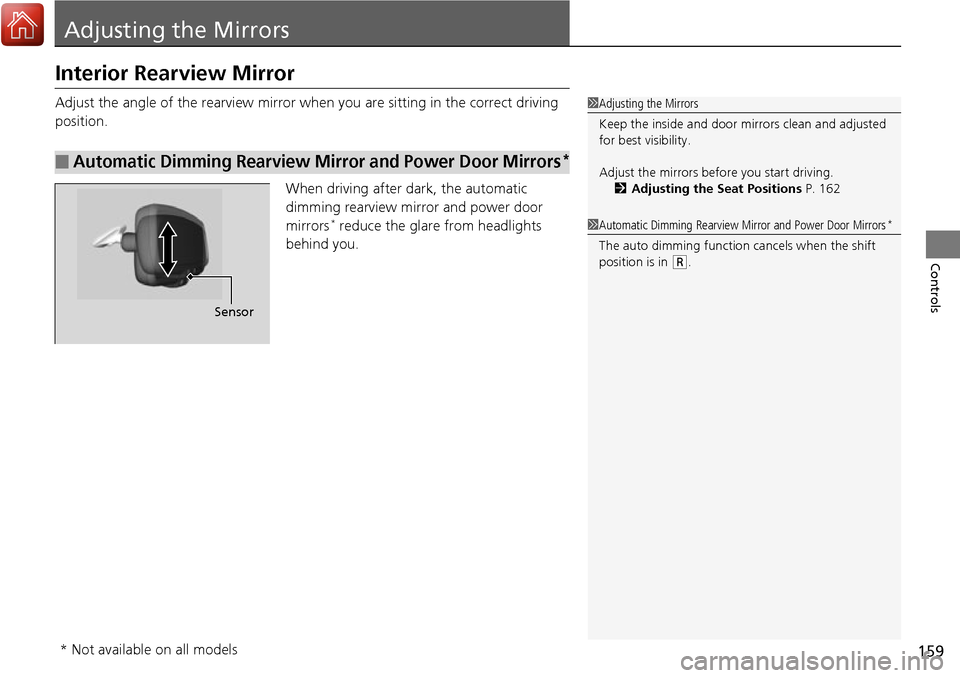
When driving after dark, the automatic
dimming rearview mirror and power door
mirrors
* reduce the glare from headlights
behind you.
■Automatic Dimming Rearview Mi rror and Power Door Mirrors*
1Adjusting the Mirrors
Keep the inside and door mi rrors clean and adjusted
for best visibility.
Adjust the mirrors befo re you start driving.
2 Adjusting the Seat Positions P. 162
Sensor
1Automatic Dimming Rearview Mirror and Power Door Mirrors*
The auto dimming function cancels when the shift
position is in (R.
* Not available on all models
Page 163 of 449
162
Controls
Adjusting the Seats
Adjusting the Seat Positions
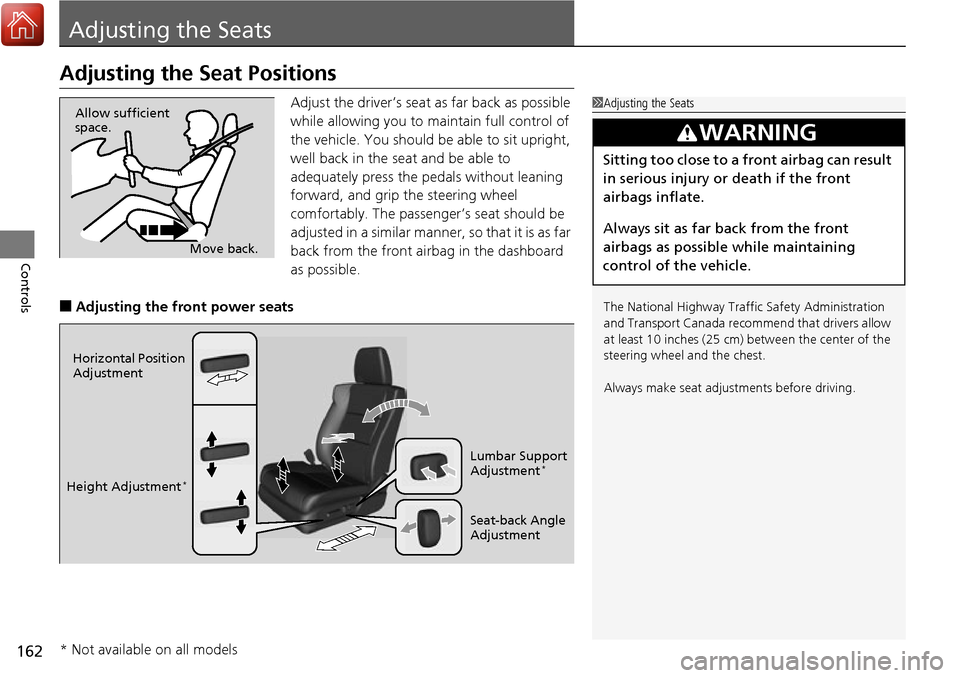
Adjust the driver’s seat as far back as possible
while allowing you to maintain full control of
the vehicle. You should be able to sit upright,
well back in the seat and be able to
adequately press the pedals without leaning
forward, and grip the steering wheel
comfortably. The passenger’s seat should be
adjusted in a similar manner, so that it is as far
back from the front airbag in the dashboard
as possible.
■Adjusting the front power seats
1Adjusting the Seats
The National Highway Traffic Safety Administration
and Transport Cana da recommend that drivers allow
at least 10 inches (25 cm) between the center of the
steering wheel and the chest.
Always make seat adjustments before driving.
3WARNING
Sitting too close to a front airbag can result
in serious injury or death if the front
airbags inflate.
Always sit as far back from the front
airbags as possible while maintaining
control of the vehicle.
Move back.
Allow sufficient
space.
Horizontal Position
Adjustment
Height Adjustment
*
Seat-back Angle
Adjustment Lumbar Support
Adjustment
*
* Not available on all models
Page 178 of 449
Continued177
uuInterior Lights/Interior Convenience Items uInterior Convenience Items
Controls
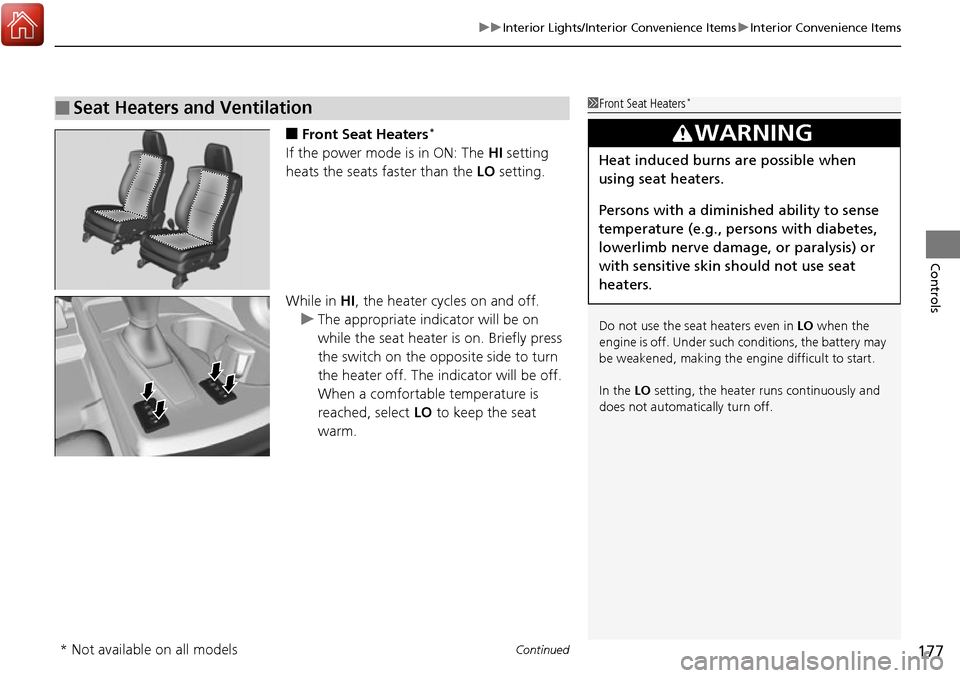
■Front Seat Heaters*
If the power mode is in ON: The HI setting
heats the seats faster than the LO setting.
While in HI , the heater cycles on and off.
u The appropriate indicator will be on
while the seat heater is on. Briefly press
the switch on the opposite side to turn
the heater off. The indicator will be off.
When a comfortable temperature is
reached, select LO to keep the seat
warm.
■Seat Heaters and Ventilation1 Front Seat Heaters*
Do not use the seat heaters even in LO when the
engine is off. Under such conditions, the battery may
be weakened, making the engine difficult to start.
In the LO setting, the heater runs continuously and
does not automatically turn off.
3WARNING
Heat induced burns are possible when
using seat heaters.
Persons with a diminished ability to sense
temperature (e.g., persons with diabetes,
lowerlimb nerve damage, or paralysis) or
with sensitive skin should not use seat
heaters.
* Not available on all models
Page 179 of 449
uuInterior Lights/Interior Convenience Items uInterior Convenience Items
178
Controls
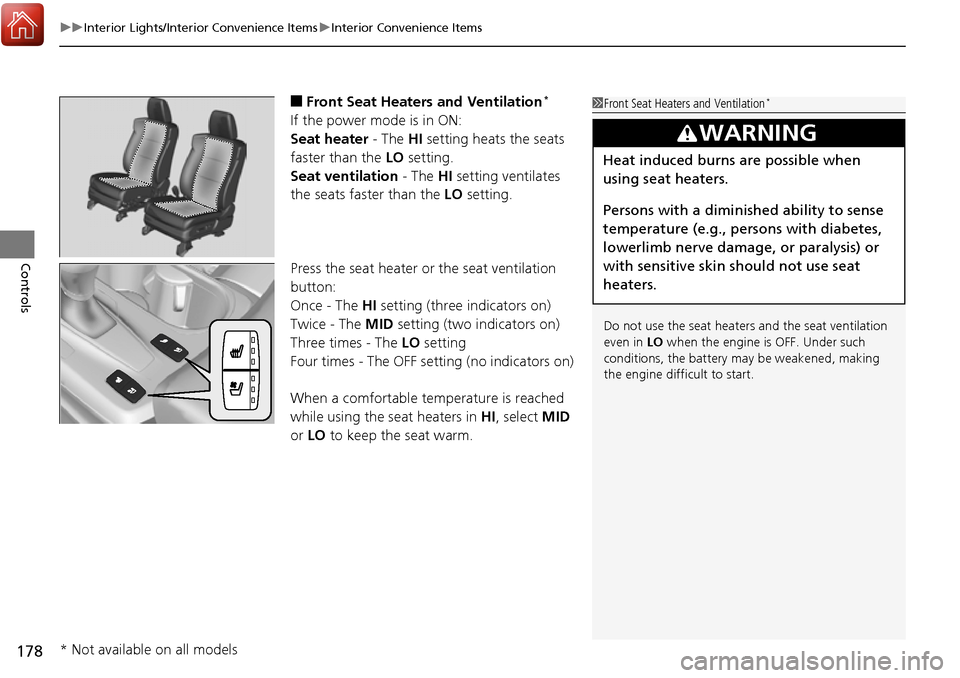
■Front Seat Heaters and Ventilation*
If the power mode is in ON:
Seat heater - The HI setting heats the seats
faster than the LO setting.
Seat ventilation - The HI setting ventilates
the seats faster than the LO setting.
Press the seat heater or the seat ventilation
button:
Once - The HI setting (three indicators on)
Twice - The MID setting (two indicators on)
Three times - The LO setting
Four times - The OFF se tting (no indicators on)
When a comfortable temperature is reached
while using the s eat heaters in HI, select MID
or LO to keep the seat warm.
1Front Seat Heaters and Ventilation*
Do not use the seat heater s and the seat ventilation
even in LO when the engine is OFF. Under such
conditions, the battery ma y be weakened, making
the engine difficult to start.
3WARNING
Heat induced burns are possible when
using seat heaters.
Persons with a diminished ability to sense
temperature (e.g., persons with diabetes,
lowerlimb nerve damage, or paralysis) or
with sensitive skin should not use seat
heaters.
* Not available on all models
Page 180 of 449
179
uuInterior Lights/Interior Convenience Items uInterior Convenience Items
Controls
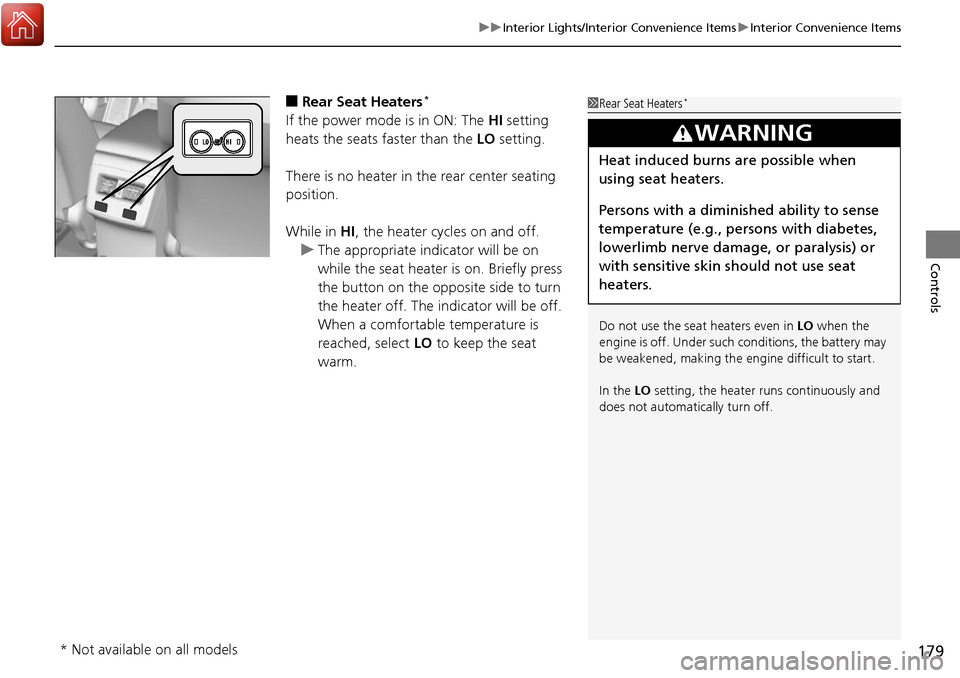
■Rear Seat Heaters*
If the power mode is in ON: The HI setting
heats the seats faster than the LO setting.
There is no heater in the rear center seating
position.
While in HI , the heater cycles on and off.
u The appropriate indicator will be on
while the seat heater is on. Briefly press
the button on the opposite side to turn
the heater off. The indicator will be off.
When a comfortable temperature is
reached, select LO to keep the seat
warm.
1 Rear Seat Heaters*
Do not use the seat heaters even in LO when the
engine is off. Under such conditions, the battery may
be weakened, making the engine difficult to start.
In the LO setting, the heater runs continuously and
does not automatically turn off.
3WARNING
Heat induced burns are possible when
using seat heaters.
Persons with a diminished ability to sense
temperature (e.g., persons with diabetes,
lowerlimb nerve damage, or paralysis) or
with sensitive skin should not use seat
heaters.
* Not available on all models
Page 402 of 449
401
uuIf a Tire Goes Flat uTemporarily Repairing a Flat Tire*
Continued
Handling the Unexpected
Temporarily Repairing a Flat Tire*
If the tire has a large cut or is otherwise severely damaged, you will need to have the
vehicle towed. If the tire only has a small puncture, from a nail for instance, you can
use the temporary tire repair kit so that you can drive to the nearest service station
for a more permanent repair.
If a tire goes flat while driving, grasp the steering wheel firmly, and brake gradually
to reduce speed. Then stop in a safe place.
1. Park the vehicle on a firm, level, and n on-slippery surface and apply the parking
brake.
2. Move the shift lever to
(P.
3. Turn on the hazard warning lights and set the power mode to VEHICLE OFF
(LOCK).
1Temporarily Repairing a Flat Tire*
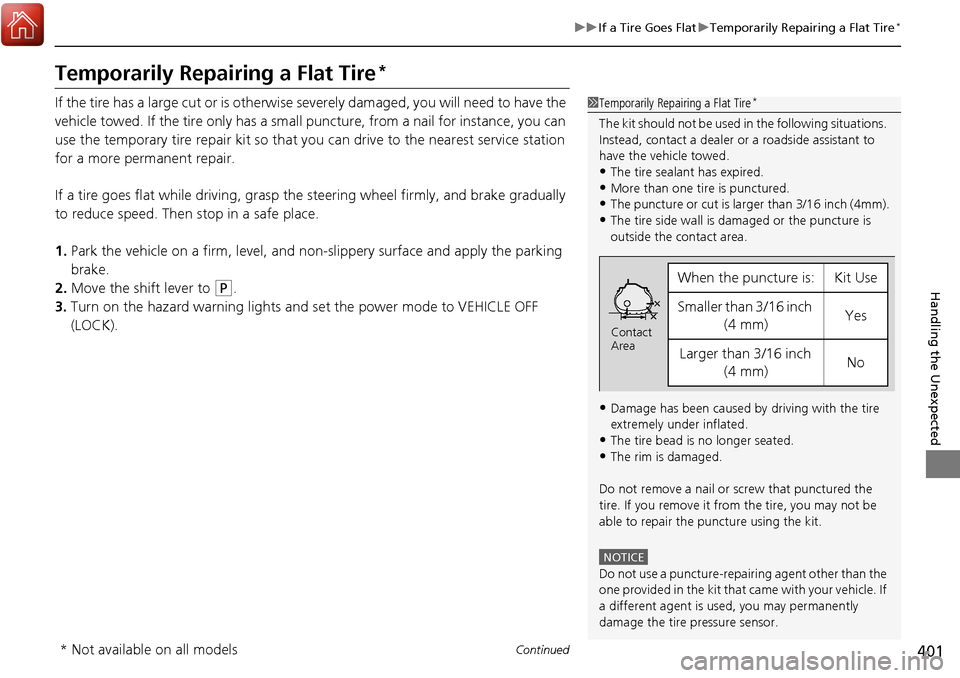
The kit should not be used in the following situations.
Instead, contact a dealer or a roadside assistant to
have the vehicle towed.
•The tire sealant has expired.
•More than one tire is punctured.•The puncture or cut is larger than 3/16 inch (4mm).
•The tire side wall is da maged or the puncture is
outside the contact area.
•Damage has been caused by driving with the tire
extremely under inflated.
•The tire bead is no longer seated.
•The rim is damaged.
Do not remove a nail or screw that punctured the
tire. If you remove it from the tire, you may not be
able to repair the puncture using the kit.
NOTICE
Do not use a puncture-repairing agent other than the
one provided in the kit that came with your vehicle. If
a different agent is used, you may permanently
damage the tire pressure sensor.
When the puncture is:Kit Use
Smaller than 3/16 inch (4 mm)Yes
Larger than 3/16 inch (4 mm)No
Contact
Area
* Not available on all models