transmission Acura RDX 2017 User Guide
[x] Cancel search | Manufacturer: ACURA, Model Year: 2017, Model line: RDX, Model: Acura RDX 2017Pages: 449, PDF Size: 10.88 MB
Page 277 of 449
uuWhen Driving uShifting
276
Driving
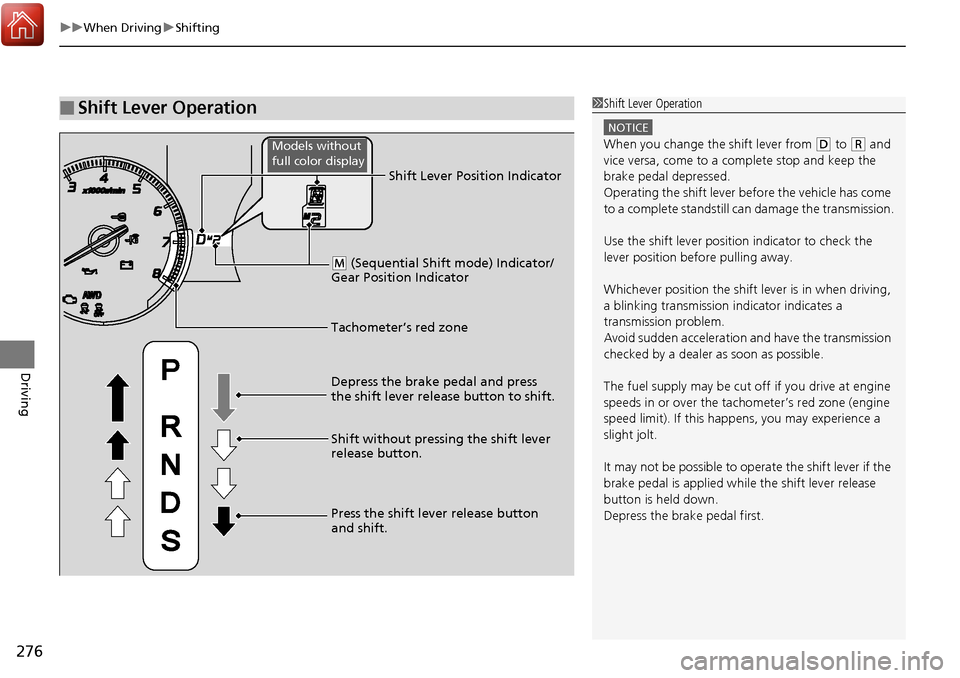
■Shift Lever Operation1Shift Lever Operation
NOTICE
When you change the shift lever from (D to (R and
vice versa, come to a complete stop and keep the
brake pedal depressed.
Operating the shift lever be fore the vehicle has come
to a complete standstill can damage the transmission.
Use the shift lever position indicator to check the
lever position befo re pulling away.
Whichever position the shift lever is in when driving,
a blinking transmission indicator indicates a
transmission problem.
Avoid sudden acceleration and have the transmission
checked by a dealer as soon as possible.
The fuel supply may be cut of f if you drive at engine
speeds in or over the tachometer’s red zone (engine
speed limit). If this happe ns, you may experience a
slight jolt.
It may not be possible to operate the shift lever if the
brake pedal is applied while the shift lever release
button is held down.
Depress the brake pedal first.
Tachometer’s red zone Shift Lever Position Indicator
Depress the brake pedal and press
the shift lever release button to shift.
Shift without pressing the shift lever
release button.
Press the shift lever release button
and shift.
( M (Sequential Shift mode) Indicator/
Gear Position Indicator
Models without
full color display
Page 315 of 449
314
uuWhen Driving uAll-Wheel Drive (AWD) with Intelligent Control System*
Driving
All-Wheel Drive (AWD) with Intelligent Control System*
Your vehicle is equipped with the AWD wi th intelligent control system. When the
system senses a loss of front wheel tracti on, it automatically transfers some power
to the rear wheels. This allows you to ut ilize all available traction and may increase
mobility.
You still need to exercise the same care when accelerating, steering, and braking
that you would in a two wheel drive vehicle.
If you excessively spin all four wheels and overheat the AWD with intelligent control
system, only the front wheels receive power. Stop until the system cools down.
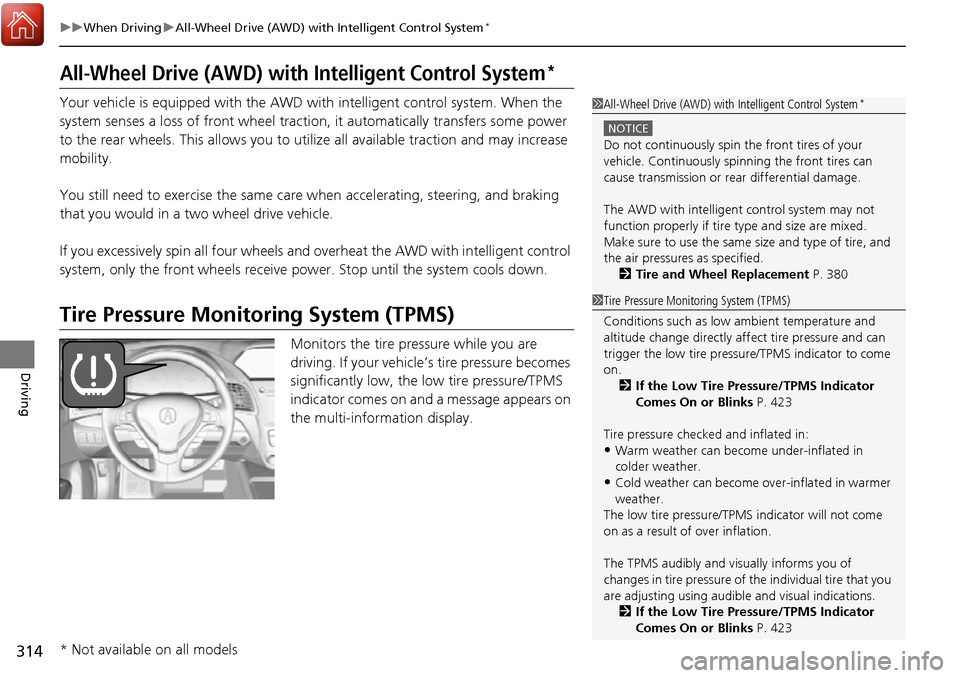
Tire Pressure Monitoring System (TPMS)
Monitors the tire pressure while you are
driving. If your vehicle’s tire pressure becomes
significantly low, the low tire pressure/TPMS
indicator comes on and a message appears on
the multi-information display.
1 All-Wheel Drive (AWD) with Intelligent Control System*
NOTICE
Do not continuously spin the front tires of your
vehicle. Continuously spinning the front tires can
cause transmission or re ar differential damage.
The AWD with intelligent control system may not
function properly if tire ty pe and size are mixed.
Make sure to use the same size and type of tire, and
the air pressures as specified.
2 Tire and Wheel Replacement P. 380
1Tire Pressure Monitoring System (TPMS)
Conditions such as low ambient temperature and
altitude change directly affect tire pressure and can
trigger the low tire pressure/TPMS indicator to come
on.
2 If the Low Tire Pressure/TPMS Indicator
Comes On or Blinks P. 423
Tire pressure checked and inflated in:
•Warm weather can beco me under-inflated in
colder weather.
•Cold weather can become over-inflated in warmer
weather.
The low tire pressure/TPMS indicator will not come
on as a result of over inflation.
The TPMS audibly and visually informs you of
changes in tire pressure of the individual ti re that you
are adjusting using audibl e and visual indications.
2 If the Low Tire Pressure/TPMS Indicator
Comes On or Blinks P. 423
* Not available on all models
Page 331 of 449

330
Driving
Parking Your Vehicle
When Stopped
1.Depress the brake pedal firmly with the shift lever in (D.
2. Firmly apply the parking brake.
3. Move the shift lever from
(D to (P.
4. Turn off the engine.
Always set the parking brake firmly, in part icular if you are parked on an incline.
1Parking Your Vehicle
Do not park your vehicle near flammable objects,
such as dry grass, oil, or timber.
Heat from the exhaust can cause a fire.
1 When Stopped
NOTICE
The following can dama ge the transmission:
•Depressing the accelerator and brake pedals
simultaneously.
•Holding the vehicle in place when facing uphill by
depressing the accelerator pedal.
•Moving the shift lever into ( P before the vehicle
stops completely.
In extremely cold temperatures, the parking brake
may freeze up if applied. If such temperatures are
expected, do not apply the parking brake but, if
parking on a slope, either turn the front wheels so
they will contact the curb if the vehicle rolls down the
slope or block the wheels to keep the vehicle from
moving. If you do not take either precaution, the
vehicle may roll unexpect edly, leading to a crash.
Page 337 of 449
uuParking Your Vehicle uCross Traffic Monitor*
336
Driving
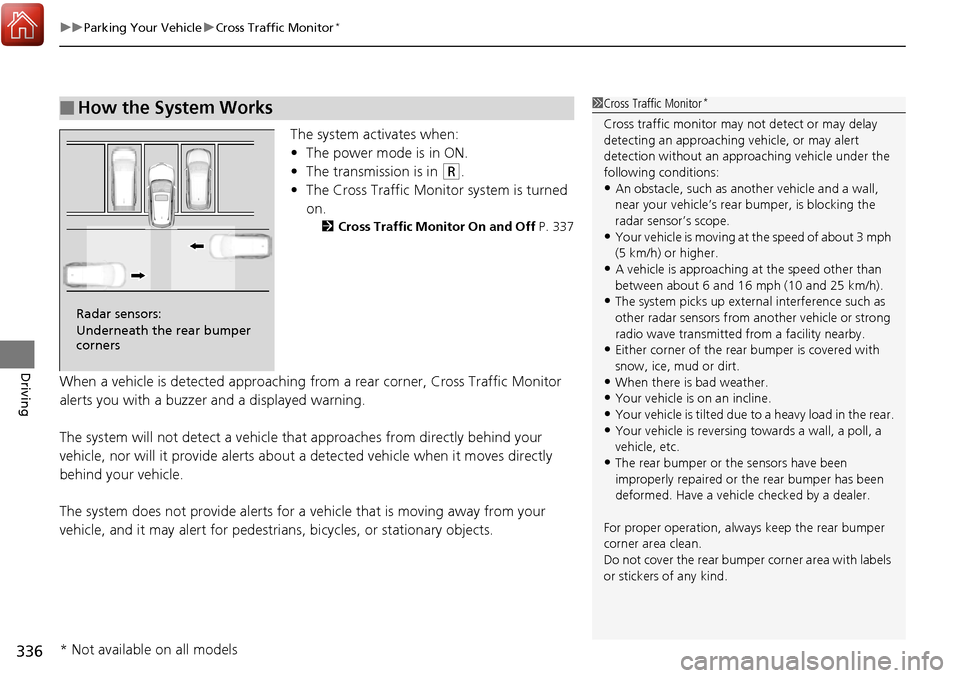
The system activates when:
• The power mode is in ON.
• The transmission is in
(R.
• The Cross Traffic Monitor system is turned
on.
2 Cross Traffic Monitor On and Off P. 337
When a vehicle is detected approaching from a rear corner, Cross Traffic Monitor
alerts you with a buzzer and a displayed warning.
The system will not detect a vehicle that approaches from directly behind your
vehicle, nor will it provide alerts about a detected vehicle when it moves directly
behind your vehicle.
The system does not provide alerts for a vehicle that is moving away from your
vehicle, and it may alert for pedestri ans, bicycles, or stationary objects.
■How the System Works1Cross Traffic Monitor*
Cross traffic monitor may not detect or may delay
detecting an approaching vehicle, or may alert
detection without an appr oaching vehicle under the
following conditions:
•An obstacle, such as a nother vehicle and a wall,
near your vehicle’s rear bumper, is blocking the
radar sensor’s scope.
•Your vehicle is moving at the speed of about 3 mph
(5 km/h) or higher.
•A vehicle is approaching at the speed other than
between about 6 and 16 mph (10 and 25 km/h).
•The system picks up external interference such as
other radar sensors from an other vehicle or strong
radio wave transmitted fr om a facility nearby.
•Either corner of the rear bumper is covered with
snow, ice, mud or dirt.
•When there is bad weather.
•Your vehicle is on an incline.
•Your vehicle is tilted due to a heavy load in the rear.
•Your vehicle is reversing towards a wall, a poll, a
vehicle, etc.
•The rear bumper or the sensors have been
improperly repaired or the rear bumper has been
deformed. Have a vehicle checked by a dealer.
For proper operation, always keep the rear bumper
corner area clean.
Do not cover the rear bumper corner area with labels
or stickers of any kind.
Radar sensors:
Underneath the rear bumper
corners
* Not available on all models
Page 344 of 449
343
Maintenance
This chapter discusses basic maintenance.
Before Performing MaintenanceInspection and Maintenance ............ 344
Safety When Performing Maintenance..... 345Parts and Fluids Used in Maintenance Service ........................................... 346
Maintenance Minder
TM..................... 347
Maintenance Under the Hood
Maintenance Items Under the Hood ..... 351Opening the Hood ........................... 352
Recommended Engine Oil ................ 353
Oil Check ......................................... 354
Adding Engine Oil ............................ 355
Changing the Engine Oil and Oil Filter ..... 356
Engine Coolant ................................ 358
Transmission Fluid ............................ 360
Brake Fluid ....................................... 361
Refilling Window Washer Fluid......... 362
Replacing Light Bulbs ....................... 363
Checking and Maintaining Wiper Blades.... 370Checking and Maintaining Tires
Checking Tires ................................. 374
Tire and Loading Information Label ...... 375Tire Labeling .................................... 375DOT Tire Quality Grading (U.S. Vehicles)....... 377Wear Indicators................................ 379
Tire Service Life ................................ 379 Tire and Wheel Replacement ........... 380
Tire Rotation .................................... 381
Winter Tires ..................................... 382
Battery ............................................... 383
Remote Transmitter Care Replacing the Button Battery ........... 384
Climate Control System Maintenance..... 386Cleaning
Interior Care .................................... 387
Exterior Care.................................... 389
Page 345 of 449
344
Maintenance
Before Performing Maintenance
Inspection and Maintenance
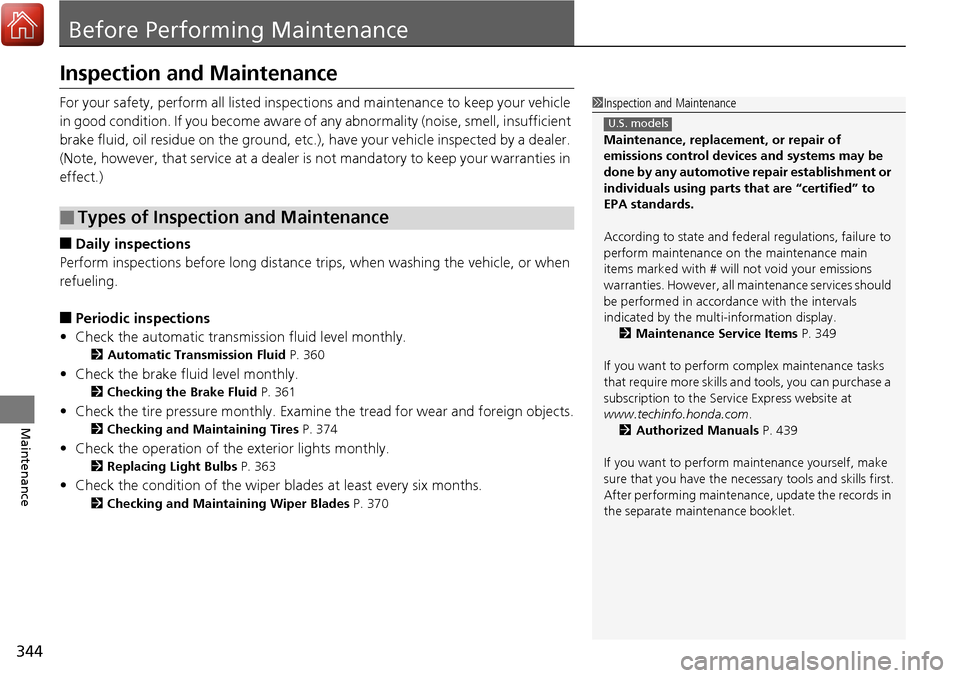
For your safety, perform all listed inspections and maintenance to keep your vehicle
in good condition. If you become aware of any abnormality (noise, smell, insufficient
brake fluid, oil residue on the ground, etc.), have your vehicle inspected by a dealer.
(Note, however, that service at a dealer is not mandatory to keep your warranties in
effect.)
■Daily inspections
Perform inspections before long distance trips, when washing the vehicle, or when
refueling.
■Periodic inspections
• Check the automatic transmission fluid level monthly.
2 Automatic Transmission Fluid P. 360
•Check the brake fluid level monthly.
2 Checking the Brake Fluid P. 361
•Check the tire pressure monthly. Examin e the tread for wear and foreign objects.
2Checking and Maintaining Tires P. 374
•Check the operation of the exterior lights monthly.
2Replacing Light Bulbs P. 363
•Check the condition of the wiper bl ades at least every six months.
2Checking and Maintaining Wiper Blades P. 370
■Types of Inspection and Maintenance
1Inspection and Maintenance
Maintenance, replacement, or repair of
emissions control devices and systems may be
done by any automotive repair establishment or
individuals using parts that are “certified” to
EPA standards.
According to state and fede ral regulations, failure to
perform maintenance on the maintenance main
items marked with # will not void your emissions
warranties. However, all maintenance services should
be performed in accordan ce with the intervals
indicated by the mult i-information display.
2 Maintenance Service Items P. 349
If you want to perform complex maintenance tasks
that require more skills a nd tools, you can purchase a
subscription to the Service Express website at
www.techinfo.honda.com .
2 Authorized Manuals P. 439
If you want to perform ma intenance yourself, make
sure that you have the necessary tools and skills first.
After performing ma intenance, update the records in
the separate maintenance booklet.
U.S. models
Page 350 of 449
349
uuMaintenance MinderTMuTo Use Maintenance MinderTM
Continued
Maintenance
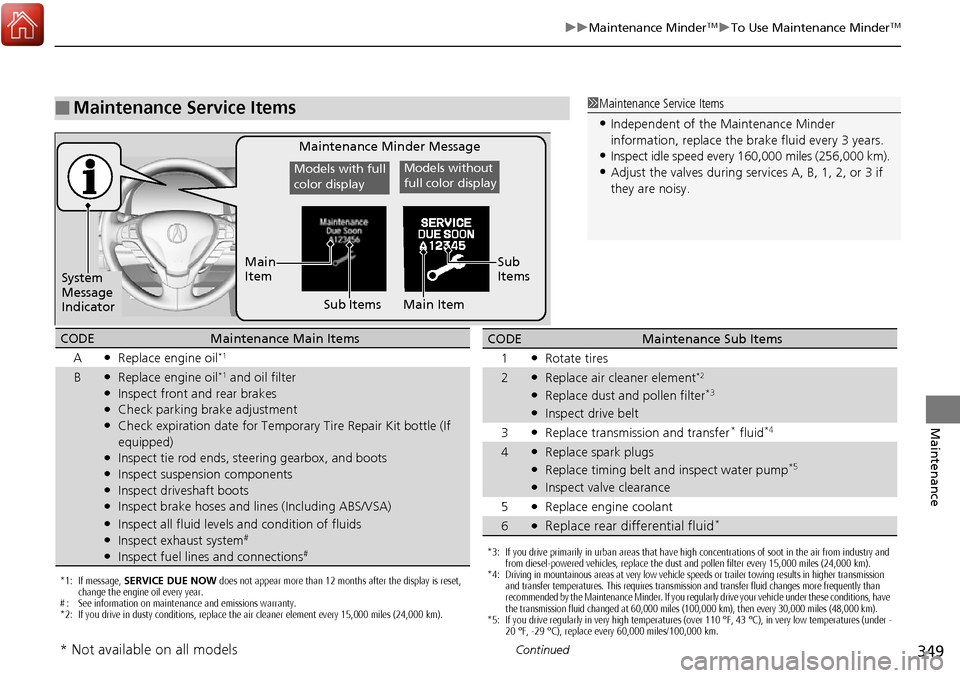
■Maintenance Service Items1Maintenance Service Items
•Independent of the Maintenance Minder
information, replace the brake fluid every 3 years.
•Inspect idle speed every 16 0,000 miles (256,000 km).
•Adjust the valves during services A, B, 1, 2, or 3 if
they are noisy.
Maintenance Minder Message
System
Message
Indicator Sub Items
Main
Item
*1: If message,
SERVICE DUE NOW does not appear more than 12 months after the display is reset,
change the engine oil every year.
# : See information on maintenance and emissions warranty.
*2: If you drive in dusty conditions, replace the air cleaner element every 15,000 miles (24,000 km).
CODEMaintenance Main Items
A
●Replace engine oil*1
B●Replace engine oil*1 and oil filter●Inspect front and rear brakes●Check parking brake adjustment●Check expiration date for Temporary Tire Repair Kit bottle (If
equipped)
●Inspect tie rod ends, steering gearbox, and boots●Inspect suspension components●Inspect driveshaft boots●Inspect brake hoses and lin es (Including ABS/VSA)●Inspect all fluid levels and condition of fluids●Inspect exhaust system#
●Inspect fuel lines and connections#*3: If you drive primarily in urban areas that have high concentrations of soot in the air from industry and
from diesel-powered vehicles, replace the dust and pollen filter every 15,000 miles (24,000 km).
*4: Driving in mountainous areas at very low vehicle speeds or trailer towing results in higher transmission and transfer temperatures. This requires transmission and transfer fluid changes more frequently than
recommended by the Maintenance Minder. If you regularly drive your vehicle under these conditions, have
the transmission fluid changed at 60,000 miles (100,000 km), then every 30,000 miles (48,000 km).
*5: If you drive regularly in very high temperatures (over 110 °F, 43 °C), in very low temperatures (under -
20 °F, -29 °C), replace every 60,000 miles/100,000 km.
CODEMaintenance Sub Items
1
●Rotate tires
2●Replace air cleaner element*2
●Replace dust and pollen filter*3
●Inspect drive belt
3
●Replace transmission and transfer* fluid*4
4●Replace spark plugs●Replace timing belt an d inspect water pump*5
●Inspect valve clearance
5
●Replace engine coolant
6●Replace rear differential fluid*
Models with full
color displayModels without
full color display
Sub
Items
Main Item
* Not available on all models
Page 352 of 449
351
Maintenance
Maintenance Under the Hood
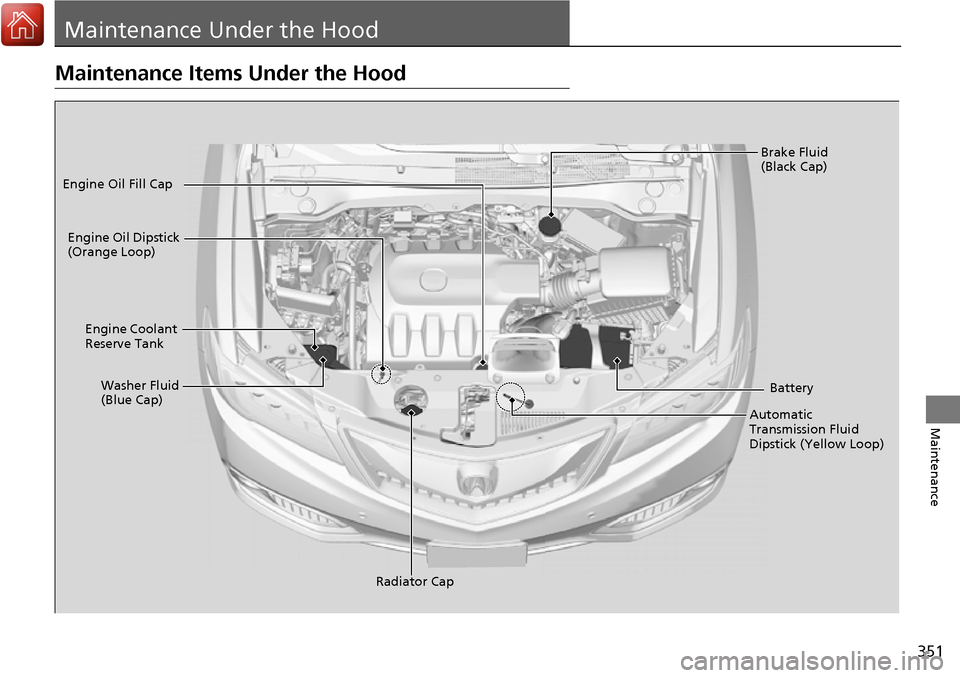
Maintenance Items Under the Hood
Brake Fluid
(Black Cap)
Engine Coolant
Reserve Tank
Radiator Cap
Washer Fluid
(Blue Cap)
Engine Oil Dipstick
(Orange Loop)
Engine Oil Fill Cap
Automatic
Transmission Fluid
Dipstick (Yellow Loop)Battery
Page 361 of 449

360
uuMaintenance Under the Hood uTransmission Fluid
Maintenance
Transmission Fluid
Check the fluid level when the engine is at normal operating temperature.
1. Park on level ground, and start the engine.
2. Wait until the radiator fan starts and then
turn off the engine.
u Perform step 3 after waiting for about 60
seconds (less than 90 seconds).
3. Remove the dipstick (yellow loop) from the
transmission and wipe it with a clean cloth.
4. Insert the dipstick all the way back into the
transmission securely, as shown in the
image.
5. Remove the dipstick and check the fluid
level.
u It should be between the upper and
lower marks in the HOT range.
6. If the level is below the lower mark, add
fluid into the dipstick ho le to bring it to the
level between the upper and lower marks,
and have your vehicle checked by a dealer
immediately.
■Automatic Transmission Fluid
Specified fluid: Acura Automa tic Transmission Fluid ATF DW-1
1Automatic Transmission Fluid
NOTICE
Do not mix Acura Automatic Transmission Fluid
ATF DW-1 with other transmission fluids.
Using a transmission fluid ot her than Acura ATF DW-
1 may adversely affect the operation and durability of
your vehicle’s transmission, and damage the
transmission.
Any damage caused by usi ng a transmission fluid that
is not equivalent to Acur a ATF DW-1 is not covered
by Acura’s new vehicle warranty.
NOTICE
Pour the fluid slowly and ca refully so you do not spill
any. Clean up any spills immediately; they can
damage components in the engine compartment.
Upper Mark
Lower Mark
HOT
Range
Page 423 of 449
422
uuIndicator, Coming On/Blinking uIf the Brake System Indicator (Red) Comes On
Handling the Unexpected
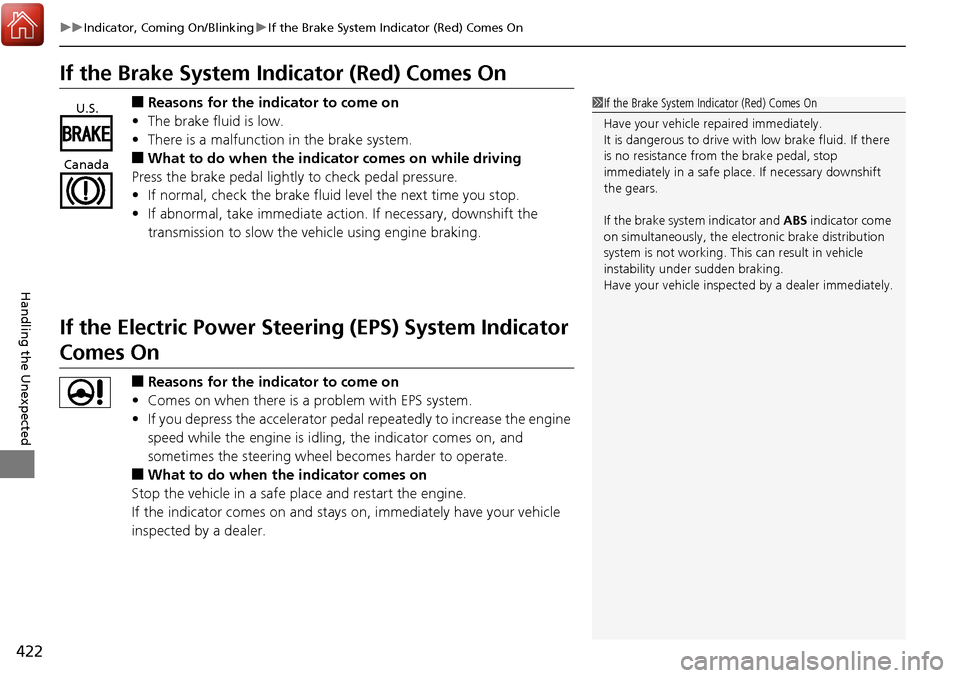
If the Brake System Indicator (Red) Comes On
■Reasons for the indicator to come on
• The brake fluid is low.
• There is a malfunction in the brake system.
■What to do when the indicator comes on while driving
Press the brake pedal lightly to check pedal pressure.
• If normal, check the brake fluid level the next time you stop.
• If abnormal, take immediate action . If necessary, downshift the
transmission to slow the vehicle using engine braking.
If the Electric Power Steeri ng (EPS) System Indicator
Comes On
■Reasons for the indicator to come on
• Comes on when there is a problem with EPS system.
• If you depress the accelerator pedal repeatedly to increase the engine
speed while the engine is idlin g, the indicator comes on, and
sometimes the steering wheel becomes harder to operate.
■What to do when the indicator comes on
Stop the vehicle in a safe place and restart the engine.
If the indicator comes on and stays on, immediately have your vehicle
inspected by a dealer.
1 If the Brake System Indicator (Red) Comes On
Have your vehicle re paired immediately.
It is dangerous to drive with low brake fluid. If there
is no resistance from the brake pedal, stop
immediately in a safe plac e. If necessary downshift
the gears.
If the brake system indicator and ABS indicator come
on simultaneously, the elec tronic brake distribution
system is not working. Th is can result in vehicle
instability under sudden braking.
Have your vehicle inspecte d by a dealer immediately.U.S.
Canada