Control Acura RDX 2018 Owner's Manual
[x] Cancel search | Manufacturer: ACURA, Model Year: 2018, Model line: RDX, Model: Acura RDX 2018Pages: 453, PDF Size: 20.13 MB
Page 185 of 453
184
uuClimate Control System uSynchronized Mode
Controls
Synchronized Mode
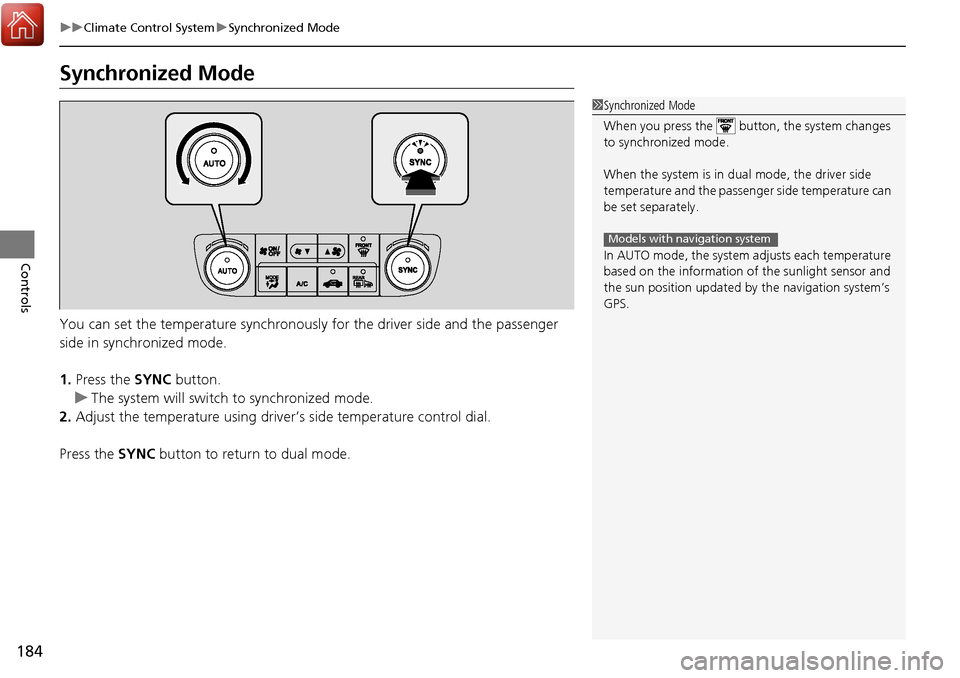
You can set the temperature synchronously for the driver side and the passenger
side in synchronized mode.
1. Press the SYNC button.
u The system will switch to synchronized mode.
2. Adjust the temperature using driver ’s side temperature control dial.
Press the SYNC button to return to dual mode.
1Synchronized Mode
When you press the button, the system changes
to synchronized mode.
When the system is in dua l mode, the driver side
temperature and the passenger side temperature can
be set separately.
In AUTO mode, the system adjusts each temperature
based on the information of the sunlight sensor and
the sun position updated by the navigation system’s
GPS.
Models with navigation system
Page 186 of 453
185
uuClimate Control System uAutomatic Climate Control Sensors
Controls
Automatic Climate Control Sensors
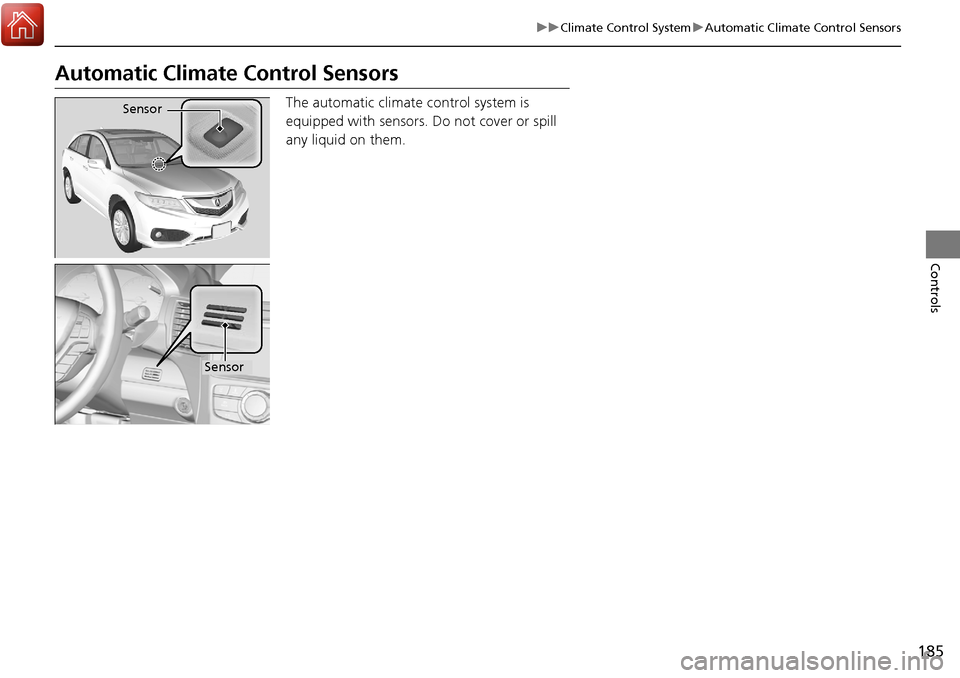
The automatic climate control system is
equipped with sensors. Do not cover or spill
any liquid on them.Sensor
Sensor
Page 188 of 453
187
Features
This chapter describes how to operate technology features.
Audio System*
About Your Audio System ................ 188
USB Port .......................................... 189
Auxiliary Input Jack .......................... 189
Audio System Theft Protection ......... 190
Audio Remote Controls .................... 191
Audio System Basic Operation
*....... 192
Audio/Information Screen ................ 193
Wallpaper Setup .............................. 196
Display Setup ................................... 198
Adjusting the Sound ........................ 199
Playing the AM/FM Radio ................. 200
Playing the SiriusXM ® Radio ............. 202 Playing a CD .................................... 204
Playing an iPod ................................ 207
Playing Pandora
®............................. 210
Playing a USB Flash Drive ................. 212
Playing Bluetooth ® Audio................. 215
Audio Error Messages
*..................... 217
General Information on the Audio System
*............................................ 220
HomeLink ® Universal Transceiver
Training HomeLink ........................... 224
Bluetooth® HandsFreeLink®
Using HFL ........................................ 226
HFL Menus....................................... 228 Compass
*.......................................... 255
* Not available on all models
Page 189 of 453
188
Features
Audio System*
About Your Audio System
On models with navigation system, see Navigation System Manual for operation of
the audio system, AcuraLink, Bluetooth ® HandsFreeLink ®, and voice commands for
these features.
The audio system features AM/FM radio and the SiriusXM ® Radio service. It can also
play audio CDs, WMA/MP3/AAC files, iPod, iPhone, USB flash drives, and
Bluetooth ® devices.
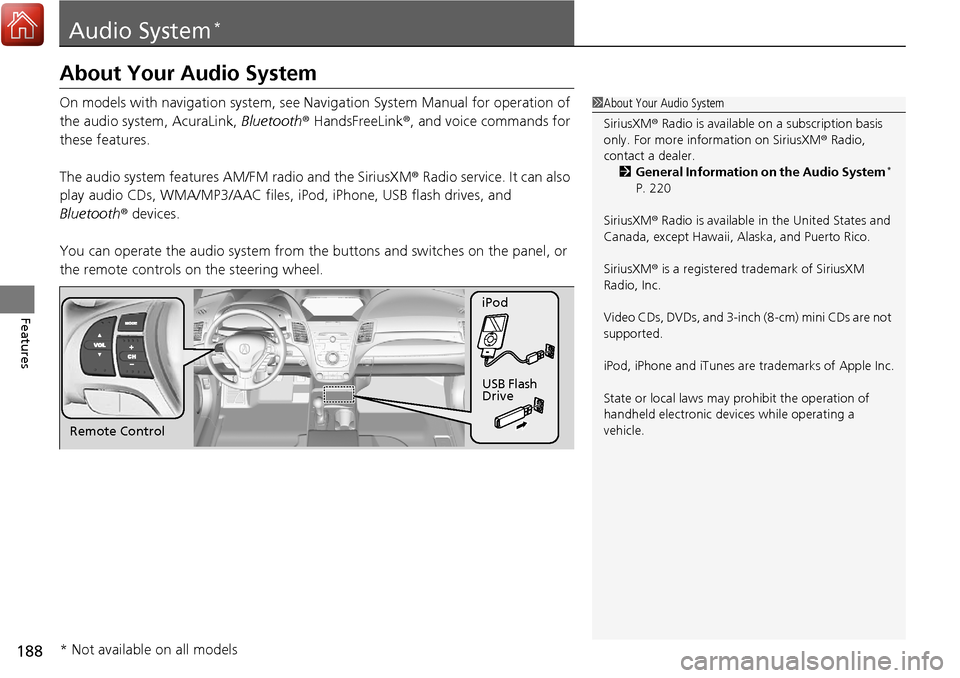
You can operate the audio sy stem from the buttons and sw itches on the panel, or
the remote controls on the steering wheel.1About Your Audio System
SiriusXM ® Radio is available on a subscription basis
only. For more information on SiriusXM ® Radio,
contact a dealer.
2 General Information on the Audio System
*
P. 220
SiriusXM ® Radio is available in the United States and
Canada, except Ha waii, Alaska, and Puerto Rico.
SiriusXM ® is a registered trademark of SiriusXM
Radio, Inc.
Video CDs, DVDs, and 3-inch (8-cm) mini CDs are not
supported.
iPod, iPhone and iTunes are trademarks of Apple Inc.
State or local laws may pr ohibit the operation of
handheld electronic devi ces while operating a
vehicle.
Remote Control iPod
USB Flash
Drive
* Not available on all models
Page 191 of 453
190
uuAudio System*uAudio System Theft Protection
Features
Audio System Theft Protection
The audio system is disabled when it is disconnected from the power source, such as
when the battery is disconnected or goes dead.
■Reactivating th e audio system
1. Set the power mode to ON, and turn on the audio system.
u If you set the power mode to ACCESSORY, you will be requested to enter the
audio security code. See step 3.
2. Press and hold the power button ag ain for more than two seconds.
u The audio system is reactivated when the system’s control unit recognizes that
the system is in your vehicle.
If the control unit fails to recognize, ENTER CODE appears on the audio/
information screen.
3. Enter the audio security code using the pr eset buttons. If you enter an incorrect
digit, continue to the last digit, then try again. If you do not enter the code
correctly after 10 tries, leave the system for one hour before trying again, or visit
a dealer to have the system reset.
1 Audio System Theft Protection
Find the audio system’s se curity code and serial
number label in your owner’s manual kit.
We recommend that you write down the serial
number in this owner’s manual.
Do not store the label in your vehicle. If you lose the
label, you must first retrie ve the serial number, and
then obtain the code.
You can find out about your serial number and
security code from a dealer.
You can register the securi ty code at Acura Owners
(owners.acura.com.), and find information on how to
retrieve the serial numbe r and obtain the code at
radio-navicode.acura.com.
U.S. models
Page 192 of 453
191
uuAudio System*uAudio Remote Controls
Features
Audio Remote Controls
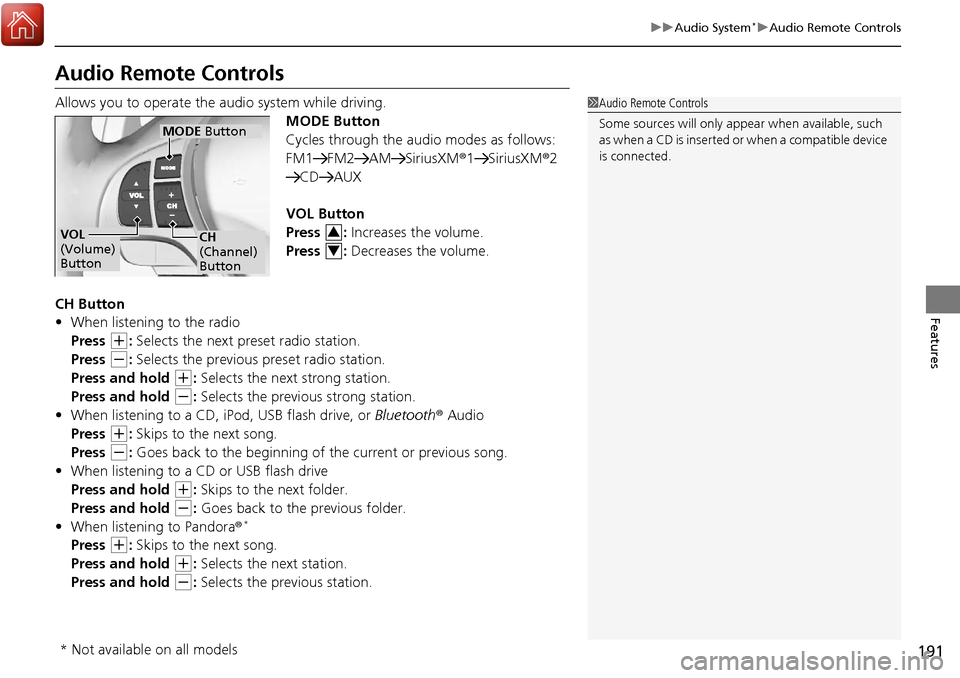
Allows you to operate the audio system while driving.
MODE Button
Cycles through the audio modes as follows:
FM1 FM2 AM SiriusXM®1 SiriusXM®2
CD AUX
VOL Button
Press : Increases the volume.
Press : Decreases the volume.
CH Button
• When listening to the radio
Press
(+: Selects the next preset radio station.
Press
(-: Selects the previous preset radio station.
Press and hold
(+: Selects the next strong station.
Press and hold
(-: Selects the previous strong station.
• When listening to a CD, iPod, USB flash drive, or Bluetooth® Audio
Press
(+: Skips to the next song.
Press
(-: Goes back to the beginning of the current or previous song.
• When listening to a CD or USB flash drive
Press and hold
(+: Skips to the next folder.
Press and hold
(-: Goes back to the previous folder.
• When listening to Pandora®*
Press (+: Skips to the next song.
Press and hold
(+: Selects the next station.
Press and hold
(-: Selects the previous station.
1 Audio Remote Controls
Some sources will only appe ar when available, such
as when a CD is inserted or when a compatible device
is connected.
VOL
(Volume)
Button
MODE Button
CH
(Channel)
Button3
4
* Not available on all models
Page 193 of 453
192
Features
Audio System Basic Operation*
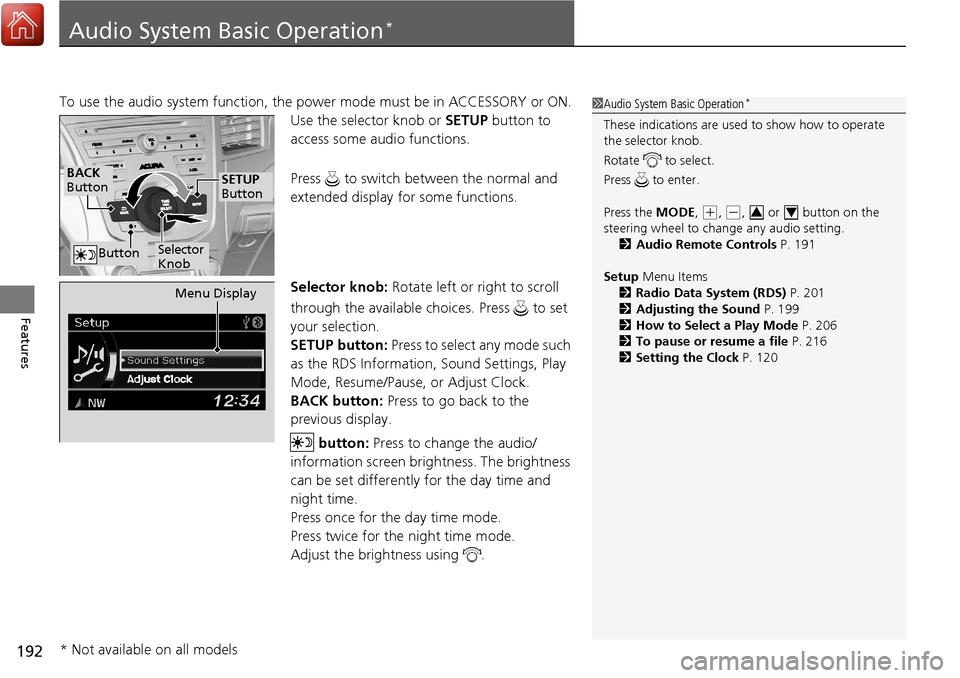
To use the audio system function, the power mode must be in ACCESSORY or ON.
Use the selector knob or SETUP button to
access some audio functions.
Press to switch between the normal and
extended display fo r some functions.
Selector knob: Rotate left or right to scroll
through the available choices. Press to set
your selection.
SETUP button: Press to select any mode such
as the RDS Information, Sound Settings, Play
Mode, Resume/Pause, or Adjust Clock.
BACK button: Press to go back to the
previous display.
button: Press to change the audio/
information screen brightness. The brightness
can be set differently for the day time and
night time.
Press once for the day time mode.
Press twice for the night time mode.
Adjust the brightness using . 1 Audio System Basic Operation*
These indications are used to show how to operate
the selector knob.
Rotate to select.
Press to enter.
Press the MODE,
(+, (-, or button on the
steering wheel to cha nge any audio setting.
2 Audio Remote Controls P. 191
Setup Menu Items
2 Radio Data System (RDS) P. 201
2 Adjusting the Sound P. 199
2 How to Select a Play Mode P. 206
2 To pause or resume a file P. 216
2 Setting the Clock P. 12034
BACK
Button
Selector
Knob
SETUP
Button
Button
Menu Display
* Not available on all models
Page 202 of 453
201
uuAudio System Basic Operation*uPlaying the AM/FM Radio
Features
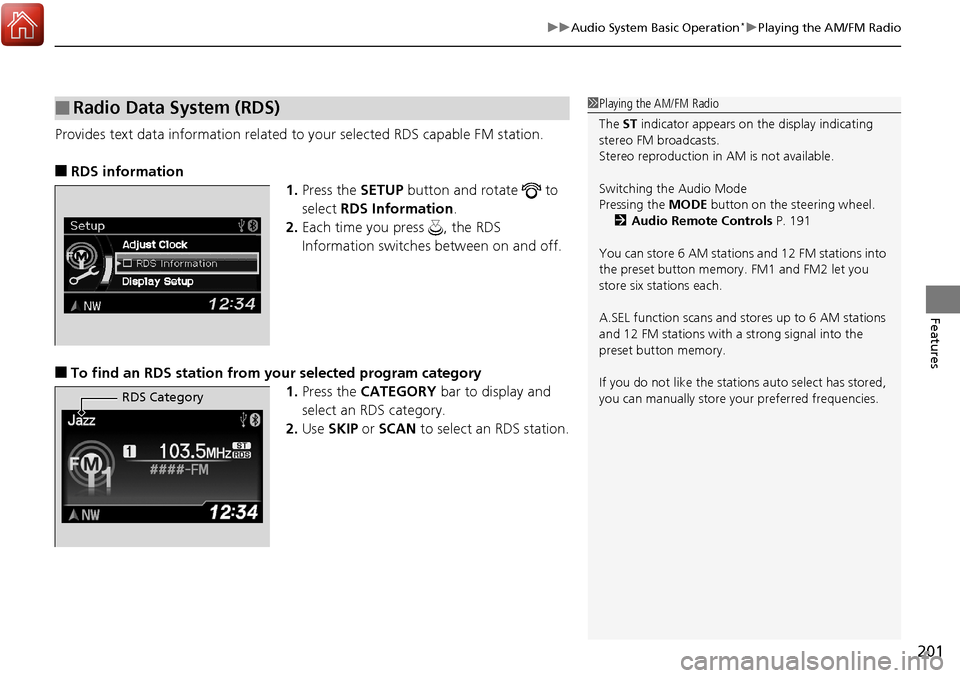
Provides text data information related to your selected RDS capable FM station.
■RDS information
1.Press the SETUP button and rotate to
select RDS Information .
2. Each time you press , the RDS
Information switches between on and off.
■To find an RDS station from your selected program category
1.Press the CATEGORY bar to display and
select an RDS category.
2. Use SKIP or SCAN to select an RDS station.
■Radio Data System (RDS)1Playing the AM/FM Radio
The ST indicator appears on the display indicating
stereo FM broadcasts.
Stereo reproduction in AM is not available.
Switching the Audio Mode
Pressing the MODE button on the steering wheel.
2 Audio Remote Controls P. 191
You can store 6 AM stations and 12 FM stations into
the preset button memory. FM1 and FM2 let you
store six stations each.
A.SEL function scans and stores up to 6 AM stations
and 12 FM stations with a strong signal into the
preset button memory.
If you do not like the stati ons auto select has stored,
you can manually store your preferred frequencies.
RDS Category
Page 225 of 453
224
Features
HomeLink® Universal Transceiver
The HomeLink ® Universal Transceiver can be pr ogrammed to operate up to three
remote controlled devices around your home, such as garage doors, lighting, or
home security systems.
Refer to the safety information that came wi th your garage door opener to test that
the safety features are functioning properly. If you do not have the safety
information, contact the manufacturer.
Before programming HomeLink, make sure that people and objects are out of the
way of the garage or gate to prevent potential injury or damage.
When programming a garage door opener, park just outside the garage door’s
path.
Training HomeLink
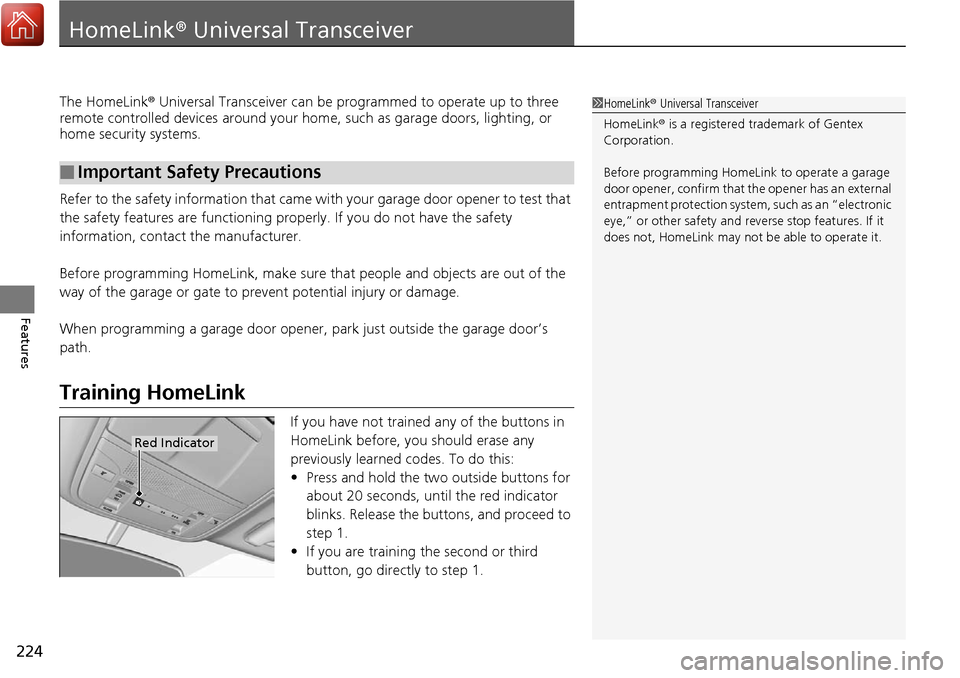
If you have not trained any of the buttons in
HomeLink before, you should erase any
previously learned codes. To do this:
• Press and hold the two outside buttons for
about 20 seconds, until the red indicator
blinks. Release the bu ttons, and proceed to
step 1.
• If you are training the second or third
button, go directly to step 1.
■Important Safety Precautions
1HomeLink ® Universal Transceiver
HomeLink® is a registered tra demark of Gentex
Corporation.
Before programming HomeLi nk to operate a garage
door opener, confirm that the opener has an external
entrapment protection system, such as an “electronic
eye,” or other safety and reverse stop features. If it
does not, HomeLink may not be able to operate it.
Red Indicator
Page 226 of 453
225
uuHomeLink ® Universal Transceiver uTraining HomeLink
Features
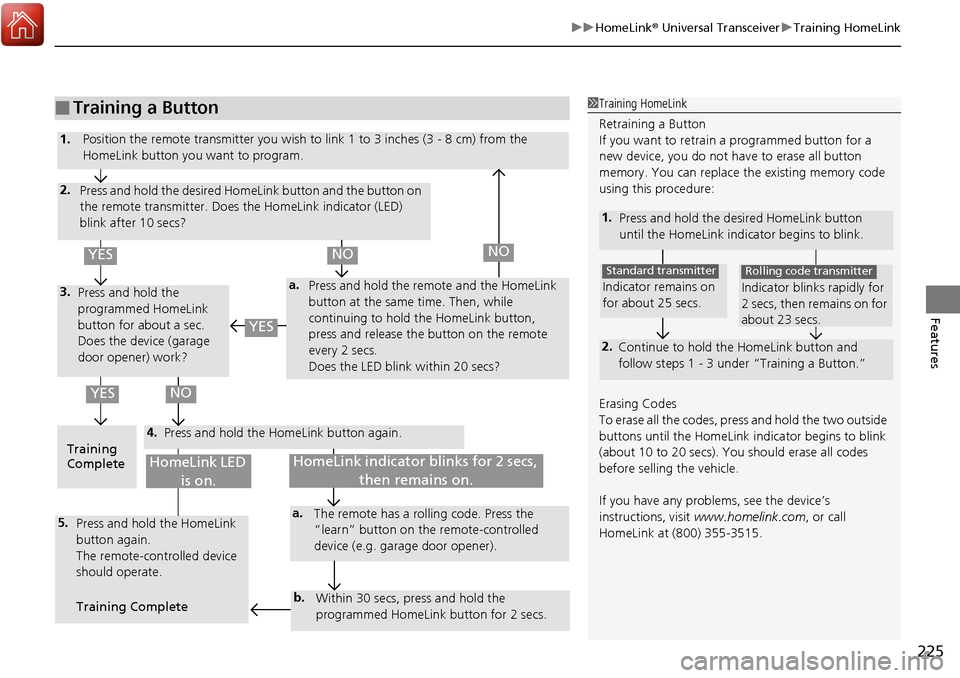
■Training a Button1Training HomeLink
Retraining a Button
If you want to retrain a programmed button for a
new device, you do not ha ve to erase all button
memory. You can replace the existing memory code
using this procedure:
1. Press and hold the desired HomeLink button
until the HomeLink indi cator begins to blink.
2.
Continue to hold the HomeLink button and
follow steps 1 - 3 unde r “Training a Button.”
Indicator remains on
for about 25 secs.
Standard transmitter
Indicator blinks rapidly for
2 secs, then remains on for
about 23 secs.
Rolling code transmitter
Erasing Codes
To erase all the codes, press and hold the two outside
buttons until the HomeLink i ndicator begins to blink
(about 10 to 20 secs). You should erase all codes
before selling the vehicle.
If you have any problems, see the device’s
instructions, visit www.homelink.com , or call
HomeLink at (800) 355-3515.
4.
a.3.
2.
5.a.
b.
1. Position the remote transmitter you wish to link 1 to 3 inches (3 - 8 cm) from the
HomeLink button you want to program.
Press and hold the desired HomeLink button and the button on
the remote transmitter. Does the HomeLink indicator (LED)
blink after 10 secs?
Press and hold the
programmed HomeLink
button for about a sec.
Does the device (garage
door opener) work? Press and hold the remote and the HomeLink
button at the same time. Then, while
continuing to hold the HomeLink button,
press and release the button on the remote
every 2 secs.
Does the LED blink within 20 secs?
Training
Complete Press and hold the HomeLink button again.
Press and hold the HomeLink
button again.
The remote-controlled device
should operate.
Training Complete The remote has a ro
lling code. Press the
“learn” button on the remote-controlled
device (e.g. garage door opener).
Within 30 secs, press and hold the
programmed HomeLink button for 2 secs.
HomeLink indicator blinks for 2 secs, then remains on.HomeLink LED is on.
YESNO
YES
YESNONO