sensor Acura RDX 2020 Repair Manual
[x] Cancel search | Manufacturer: ACURA, Model Year: 2020, Model line: RDX, Model: Acura RDX 2020Pages: 657, PDF Size: 33.2 MB
Page 507 of 657

uuParking Your Vehicle uParking Sensor System*
506
Driving
1. Make sure that the parking sensor system is not activated. Set the power mode to
VEHICLE OFF (LOCK).
2. Press and hold the parking sensor system button, and set the power mode to ON.
3. Keep pressing the button for 10 seconds. Release the button when the indicator
in the button flashes.
4. Press the button again. The indi cator in the button goes off.
u The beeper sounds twice. The re ar sensors are now turned off.
To turn the rear sensors on again, follow the above procedure. The beeper sounds
three times when the rear sensors come back on.
Ō¢ĀTurning off All Rear Sensors1 Turning off All Rear Sensors
When you shift to
(R, the indicator in the parking
sensor system button blinks as a reminder that the
rear sensors have been turned off.
20 ACURA RDX-31TJB6111.book 506 ŃāÜŃā╝ŃéĖ ’╝Æ’╝É’╝Æ’╝ÉÕ╣┤’╝Ƶ£ł’╝æ’╝æµŚźŃĆĆńü½µø£µŚźŃĆĆÕŹłÕŠī’╝ƵÖé’╝¢Õłå
Page 508 of 657

507
uuParking Your Vehicle uCross Traffic Monitor*
Continued
Driving
Cross Traffic Monitor*
Monitors the rear corner areas using the radar sensors when reversing, and alerts
you if a vehicle approaching from a rear corner is detected.
The system is convenient when you are backing out of a parking space.1Cross Traffic Monitor*
The parking sensor systemŌĆÖs alerting buzzer overrides
the Cross Traffic Monitor buzzer when the sensors
are detecting obstacles at the closest range.
3CAUTION
Cross Traffic Monitor cannot detect all
approaching vehicles and may not detect
an approaching vehicle at all.
Failure to visually confirm that it is safe to
back up the vehicle before doing so may
result in a collision.
Do not solely rely on the system when
reversing; always also use your mirrors, and
look behind and to the sides of your vehicle
before reversing.
Models with Parking Sensor System
* Not available on all models
20 ACURA RDX-31TJB6111.book 507 ŃāÜŃā╝ŃéĖ ’╝Æ’╝É’╝Æ’╝ÉÕ╣┤’╝Ƶ£ł’╝æ’╝æµŚźŃĆĆńü½µø£µŚźŃĆĆÕŹłÕŠī’╝ƵÖé’╝¢Õłå
Page 509 of 657

uuParking Your Vehicle uCross Traffic Monitor*
508
Driving
The system activates when:
ŌĆó The power mode is in ON.
ŌĆó The Cross Traffic Monitor is turned on.
2 Cross Traffic Monitor On and Off P. 510
ŌĆóThe transmission is in (R.
ŌĆó Your vehicle is moving at 3 mph (5 km/h) or
lower.
When a vehicle is detected approaching from a rear corner, Cross Traffic Monitor
alerts you with a buzzer and a displayed warning.
The system will not detect a vehicle that approaches from directly behind your
vehicle, nor will it provide alerts about a detected vehicle when it moves directly
behind your vehicle.
The system does not provide alerts for a vehicle that is moving away from your
vehicle, and it may alert for pedestri ans, bicycles, or stationary objects.
Ō¢ĀHow the System Works1Cross Traffic Monitor*
Cross traffic monitor may not detect or may delay
alerting an approach ing vehicle, or may alert without
an approaching vehicle under the following
conditions:
ŌĆóAn obstacle, such as a nother vehicle and a wall,
near your vehicleŌĆÖs rear bumper, is blocking the
radar sensorŌĆÖs scope.
ŌĆóYour vehicle is moving at the speed of about 3 mph
(5 km/h) or higher.
ŌĆóA vehicle is approaching at the speed other than
between about 6 mph (10 km/h) and 16 mph (25
km/h).
ŌĆóThe system picks up external interference such as
other radar sensors from an other vehicle or strong
radio wave transmitted fr om a facility nearby.
ŌĆóEither corner of the rear bumper is covered with
snow, ice, mud or dirt.
ŌĆóWhen there is bad weather.
ŌĆóYour vehicle is on an incline.
ŌĆóYour vehicle is tilted due to a heavy load in the rear.ŌĆóYour vehicle is reversing towards a wall, a pole, a
vehicle, and so on.
The rear bumper or the se nsors have been improperly
repaired or the rear bum per has been deformed.
Have your vehicle checked by a dealer.
For proper operation, always keep the rear bumper
corner area clean.
Do not cover the rear bumper corner area with labels
or stickers of any kind.
Radar sensors:
Underneath the rear bumper
corners
* Not available on all models
20 ACURA RDX-31TJB6111.book 508 ŃāÜŃā╝ŃéĖ ’╝Æ’╝É’╝Æ’╝ÉÕ╣┤’╝Ƶ£ł’╝æ’╝æµŚźŃĆĆńü½µø£µŚźŃĆĆÕŹłÕŠī’╝ƵÖé’╝¢Õłå
Page 510 of 657

Continued509
uuParking Your Vehicle uCross Traffic Monitor*
Driving
An arrow icon appears on the side a vehicle is approaching on the audio/information
screen.
Ō¢ĀWhen the System Detects a Vehicle1When the System Detects a Vehicle
If the on the lower right changes to in amber
when the gear position is in
( R, obstructions (mud,
snow, ice, etc.) may have ac cumulated in the vicinity
of the sensor. The system is temporarily canceled.
Check the bumper corners for any obstructions, and
thoroughly clean the area if necessary.
If the comes on in ambe r when the gear position
is in
( R, there may be a problem with the Cross
Traffic Monitor system. Do not use the system and
have your vehicle ch ecked by a dealer.
If the display remains the same with the transmission
in
( R, there may be a problem with the rear camera
system and the Cross Traffic Monitor system.
Do not use the system and have your vehicle checked
by a dealer.
Wide View Normal View
Arrow IconTop Down View
Models with multi-view rear camera system
Models with surround view camera system
Arrow Icon
Rear Wide View Rear Ground View
20 ACURA RDX-31TJB6111.book 509 ŃāÜŃā╝ŃéĖ ’╝Æ’╝É’╝Æ’╝ÉÕ╣┤’╝Ƶ£ł’╝æ’╝æµŚźŃĆĆńü½µø£µŚźŃĆĆÕŹłÕŠī’╝ƵÖé’╝¢Õłå
Page 570 of 657
569
Maintenance
Battery
Checking the Battery
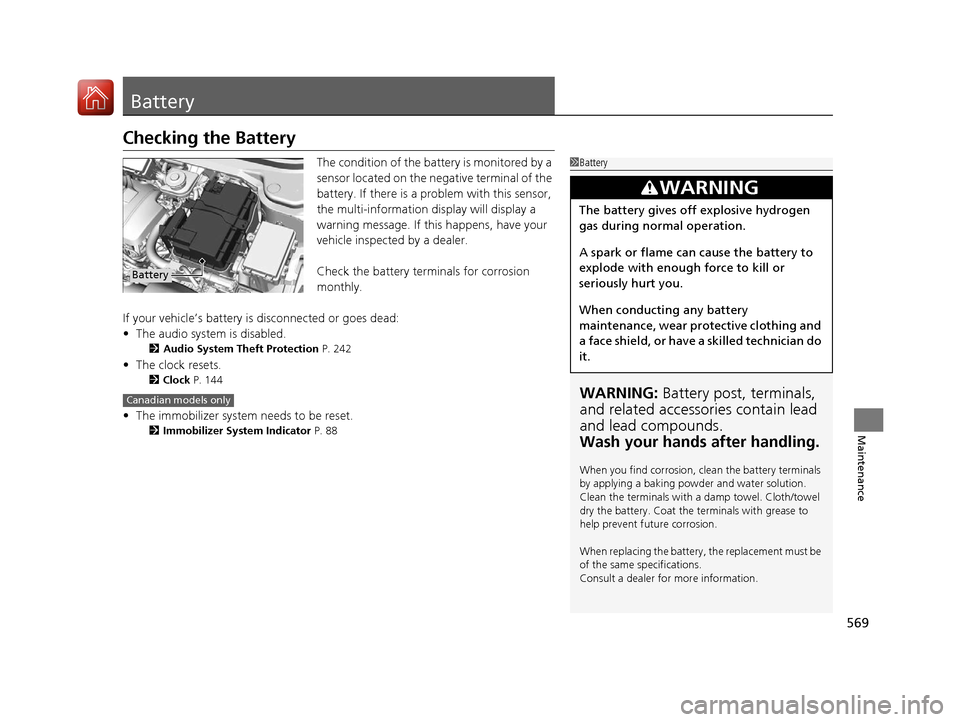
The condition of the battery is monitored by a
sensor located on the negative terminal of the
battery. If there is a problem with this sensor,
the multi-information display will display a
warning message. If this happens, have your
vehicle inspected by a dealer.
Check the battery termi nals for corrosion
monthly.
If your vehicleŌĆÖs battery is disconnected or goes dead:
ŌĆó The audio system is disabled.
2 Audio System Theft Protection P. 242
ŌĆóThe clock resets.
2 Clock P. 144
ŌĆóThe immobilizer system needs to be reset.
2 Immobilizer System Indicator P. 88
1Battery
WARNING: Battery post, terminals,
and related accessories contain lead
and lead compounds.
Wash your hands after handling.
When you find corrosion, cl ean the battery terminals
by applying a baking powder and water solution.
Clean the terminals with a damp towel. Cloth/towel
dry the battery. Coat the terminals with grease to
help prevent future corrosion.
When replacing the battery, the replacement must be
of the same specifications.
Consult a dealer for more information.
3WARNING
The battery gives off explosive hydrogen
gas during normal operation.
A spark or flame can cause the battery to
explode with enough force to kill or
seriously hurt you.
When conducting any battery
maintenance, wear prot ective clothing and
a face shield, or have a skilled technician do
it.
Battery
Canadian models only
20 ACURA RDX-31TJB6111.book 569 ŃāÜŃā╝ŃéĖ ’╝Æ’╝É’╝Æ’╝ÉÕ╣┤’╝Ƶ£ł’╝æ’╝æµŚźŃĆĆńü½µø£µŚźŃĆĆÕŹłÕŠī’╝ƵÖé’╝¢Õłå
Page 577 of 657

uuCleaning uInterior Care
576
Maintenance
Wipe using a glass cleaner.
The front floor mats hook over floor anchors,
which keep them from sliding forward. To
remove a mat for cleaning, turn the anchor
knobs to the unlock position. When
reinstalling the mat after cleaning, turn the
knobs to the lock position.
Do not put additional floor mats on top of
the anchored mats.
To properly clean leather:
1. Use a vacuum or soft dry cloth first to remove any dirt or dust.
2. Clean the leather with a soft cloth dampen ed with a solution comprised of 90%
water and 10% neutral soap.
3. Wipe away any soap residu e with a clean damp cloth.
4. Wipe away residual water and allow leather to air dry in the shade.
Ō¢ĀCleaning the Window
Ō¢ĀFloor Mats
1Cleaning the Window
Wires are mounted to the in side of the rear window.
Wipe along the same direct ion as the wires with a
soft cloth so as not to damage them.
Be careful not to spill fluids, such as water or glass
cleaner, on or around the co ver of both the front
sensor camera and the rainfall/light sensor
*.
2 Automatic Operation (automatic lighting
control) P. 187
2 Automatic Intermittent Wipers
* P. 195
2 Front Sensor Camera P. 489
1Floor Mats
If you use any floor mats that were not originally
provided with your vehicle, make sure they are
designed for your specific ve hicle, fit correctly, and
are securely anchored by the floor anchors.
Position the rear seat floor mat properly. If they are
not properly positioned, th e floor mat can interfere
with the front seat functions.
Lock
Unlock
Ō¢ĀMaintaining Genuine Leather1
Maintaining Genuine Leather
It is important to clean or wipe away dirt or dust as
soon as possible. Spills can soak into leather resulting
in stains. Dirt or dust ca n cause abrasions in the
leather. In addition, pl ease note that some dark
colored clothing can rub onto the leather seats
resulting in discol oration or stains.
* Not available on all models
20 ACURA RDX-31TJB6111.book 576 ŃāÜŃā╝ŃéĖ ’╝Æ’╝É’╝Æ’╝ÉÕ╣┤’╝Ƶ£ł’╝æ’╝æµŚźŃĆĆńü½µø£µŚźŃĆĆÕŹłÕŠī’╝ƵÖé’╝¢Õłå
Page 586 of 657
585Continued
Handling the Unexpected
If a Tire Goes Flat
Changing a Flat Tire
If a tire goes flat while driving, grasp the steering wheel firmly, and brake gradually
to reduce speed. Then, stop in a safe plac e. Replace the flat tire with a compact
spare tire. Go to a dealer as soon as possib le to have the full-size tire repaired or
replaced.
1. Park the vehicle on firm, level, non-slip pery surface and apply the parking brake.
2. Change the gear position to
(P.
3. Turn on the hazard warning lights an d set the power mode to VEHICLE OFF
(LOCK).
Vehicles with a compact spare tire
1 Changing a Flat Tire
Follow compact spare precautions:
Periodically check the tire pressure of the compact
spare. It should be set to the specified pressure.
Specified Pressure: 60 psi (420 kPa, 4.2 kgf/cm
2)
When driving with the compact spare tire, keep the
vehicle speed under 50 mph (80 km/h). Replace with
a full-size tire as soon as possible.
The compact spare tire and wheel in your vehicle are
specifically for this model. Do not use them with
another vehicle. Do not us e another type of compact
spare tire or wheel with your vehicle.
Do not mount tire chains on a compact spare tire.
If a chain-mounted front tire goes flat, remove one of
the full-size rear tires and replace it with the compact
spare tire. Remove the flat front tire and replace it
with the full-size tire that was removed from the rear.
Mount the tire chains on the front tire.
Do not use a puncture-repairi ng agent on a flat tire,
as it can damage the tire pressure sensor.
20 ACURA RDX-31TJB6111.book 585 ŃāÜŃā╝ŃéĖ ’╝Æ’╝É’╝Æ’╝ÉÕ╣┤’╝Ƶ£ł’╝æ’╝æµŚźŃĆĆńü½µø£µŚźŃĆĆÕŹłÕŠī’╝ƵÖé’╝¢Õłå
Page 593 of 657
uuIf a Tire Goes Flat uChanging a Flat Tire
592
Handling the Unexpected
If you replace a flat tire with the spare tire, the low tire pressure/TPMS indicator
comes on while you are driving. Afte r driving for a few miles (kilometers), Tire
Pressure Monitor System Problem. Check Tire Pressure. See Your Dealer will
appear on the multi-information display an d the indicator will start blinking for a
short time and then stay on; however, this is normal and is no cause for concern.
If you replace the tire with a full-size tire, the warning message on the multi-
information display and the low tire pressu re/TPMS indicator will go off after a few
miles (kilometers).
Ō¢ĀTPMS and the Compact Spare Tire1 TPMS and the Compact Spare Tire
The system cannot monitor th e pressure of the spare
tire. Manually check the spare tire pressure to be sure
that it is correct.
Use the TPMS specific wheels. Each is equipped with
a tire pressure sensor mount ed inside the tire behind
the valve stem.
20 ACURA RDX-31TJB6111.book 592 ŃāÜŃā╝ŃéĖ ’╝Æ’╝É’╝Æ’╝ÉÕ╣┤’╝Ƶ£ł’╝æ’╝æµŚźŃĆĆńü½µø£µŚźŃĆĆÕŹłÕŠī’╝ƵÖé’╝¢Õłå
Page 594 of 657
593
uuIf a Tire Goes Flat uTemporarily Repairing a Flat Tire
Continued
Handling the Unexpected
Temporarily Repairing a Flat Tire
If the tire has a large cut or is otherwise severely damaged, you will need to have the
vehicle towed. If the tire only has a small puncture, from a nail for instance, you can
use the temporary tire repair kit so that you can drive to the nearest service station
for a more permanent repair.
If a tire goes flat while driving, grasp the steering wheel firmly, and brake gradually
to reduce speed. Then stop in a safe place.
1. Park the vehicle on a firm, level, and n on-slippery surface and apply the parking
brake.
2. Change the gear position to
(P.
3. Turn on the hazard warning lights an d set the power mode to VEHICLE OFF
(LOCK).
Vehicles with temporary tire repair kit
1 Temporarily Repairing a Flat Tire
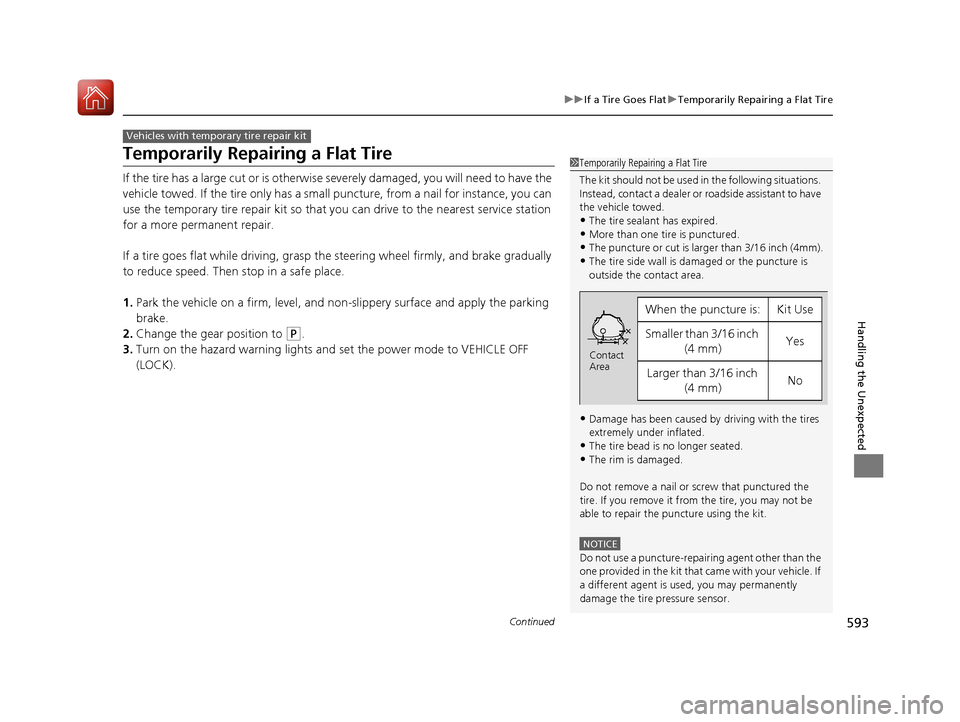
The kit should not be used in the following situations.
Instead, contact a dealer or roadside assistant to have
the vehicle towed.
ŌĆóThe tire sealant has expired.
ŌĆóMore than one tire is punctured.ŌĆóThe puncture or cut is larger than 3/16 inch (4mm).
ŌĆóThe tire side wall is da maged or the puncture is
outside the contact area.
ŌĆóDamage has been caused by driving with the tires
extremely under inflated.
ŌĆóThe tire bead is no longer seated.
ŌĆóThe rim is damaged.
Do not remove a nail or screw that punctured the
tire. If you remove it from the tire, you may not be
able to repair the puncture using the kit.
NOTICE
Do not use a puncture-repairing agent other than the
one provided in the kit that came with your vehicle. If
a different agent is used, you may permanently
damage the tire pressure sensor.
When the puncture is:Kit Use
Smaller than 3/16 inch (4 mm)Yes
Larger than 3/16 inch (4 mm)No
Contact
Area
20 ACURA RDX-31TJB6111.book 593 ŃāÜŃā╝ŃéĖ ’╝Æ’╝É’╝Æ’╝ÉÕ╣┤’╝Ƶ£ł’╝æ’╝æµŚźŃĆĆńü½µø£µŚźŃĆĆÕŹłÕŠī’╝ƵÖé’╝¢Õłå
Page 646 of 657
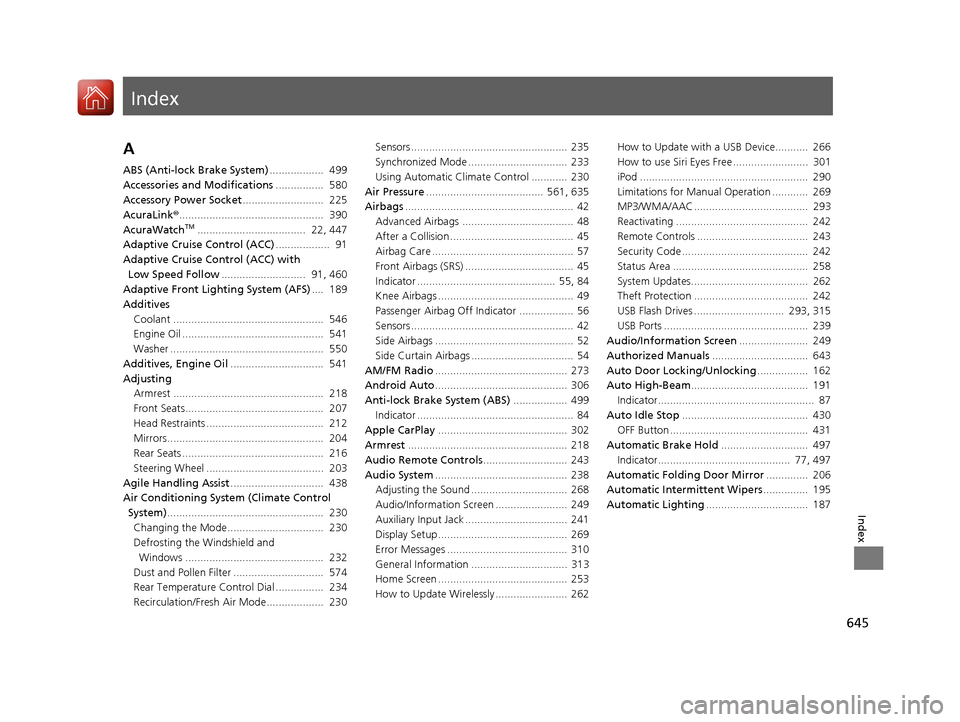
Index
645
Index
Index
A
ABS (Anti-lock Brake System).................. 499
Accessories and Modifications ................ 580
Accessory Power Socket ........................... 225
AcuraLink® ................................................ 390
AcuraWatch
TM.................................... 22, 447
Adaptive Cruise Control (ACC) .................. 91
Adaptive Cruise Control (ACC) with
Low Speed Follow ............................ 91, 460
Adaptive Front Lighting System (AFS) .... 189
Additives
Coolant .................................................. 546
Engine Oil ............................................... 541
Washer ................................................... 550
Additives, Engine Oil ............................... 541
Adjusting Armrest .................................................. 218
Front Seats.............................................. 207
Head Restraints ....................................... 212
Mirrors.................................................... 204
Rear Seats ............................................... 216
Steering Wheel ....................................... 203
Agile Handling Assist ............................... 438
Air Conditioning System (Climate Control System) .................................................... 230
Changing the Mode................................ 230
Defrosting the Windshield and Windows .............................................. 232
Dust and Pollen Filter .............................. 574
Rear Temperature Control Dial ................ 234
Recirculation/Fresh Air Mode................... 230 Sensors .................................................... 235
Synchronized Mode ................................. 233
Using Automatic Climate Control ............ 230
Air Pressure ....................................... 561, 635
Airbags ........................................................ 42
Advanced Airbags ..................................... 48
After a Collision ......................................... 45
Airbag Care ............................................... 57
Front Airbags (SRS) .................................... 45
Indicator .............................................. 55, 84
Knee Airbags ............................................. 49
Passenger Airbag Off Indicator .................. 56
Sensors ...................................................... 42
Side Airbags .............................................. 52
Side Curtain Airbags .................................. 54
AM/FM Radio ............................................ 273
Android Auto ............................................ 306
Anti-lock Brake System (ABS) .................. 499
Indicator .................................................... 84
Apple CarPlay ........................................... 302
Armrest ..................................................... 218
Audio Remote Controls ............................ 243
Audio System ............................................ 238
Adjusting the Sound ................................ 268
Audio/Information Screen ........................ 249
Auxiliary Input Jack .................................. 241
Display Setup ........................................... 269
Error Messages ........................................ 310
General Information ................................ 313
Home Screen ........................................... 253
How to Update Wirelessly ........................ 262 How to Update with a USB Device........... 266
How to use Siri Eyes Free ......................... 301
iPod ........................................................ 290
Limitations for Manual Operation ............ 269
MP3/WMA/AAC ...................................... 293
Reactivating ............................................ 242
Remote Controls ..................................... 243
Security Code .......................................... 242
Status Area ............................................. 258
System Updates....................................... 262
Theft Protection ...................................... 242
USB Flash Drives .............................. 293, 315
USB Ports ................................................ 239
Audio/Information Screen ....................... 249
Authorized Manuals ................................ 643
Auto Door Locking/Unlocking ................. 162
Auto High-Beam ....................................... 191
Indicator.................................................... 87
Auto Idle Stop .......................................... 430
OFF Button .............................................. 431
Automatic Brake Hold ............................. 497
Indicator............................................ 77, 497
Automatic Folding Door Mirror .............. 206
Automatic Intermittent Wipers ............... 195
Automatic Lighting .................................. 187
20 ACURA RDX-31TJB6111.book 645 ŃāÜŃā╝ŃéĖ ’╝Æ’╝É’╝Æ’╝ÉÕ╣┤’╝Ƶ£ł’╝æ’╝æµŚźŃĆĆńü½µø£µŚźŃĆĆÕŹłÕŠī’╝ƵÖé’╝¢Õłå