ECO mode Acura RL 2000 3.5 Owner's Manual
[x] Cancel search | Manufacturer: ACURA, Model Year: 2000, Model line: RL, Model: Acura RL 2000Pages: 330, PDF Size: 4.53 MB
Page 9 of 330
Importan
t Safet y Precaution s
You'll find many safety recommendations throughout thissection, and throughout this manual.
The recommendations on this page are the ones we consider to be the
most important.
Alway s Wea r You r Sea t Bel t
A seat belt is your best protection in all types of collisions. Airbagssupplement seat belts, but airbags
are designed to inflate only in a
moderate to severe frontal collision. So even though your car is equipped
with airbags, make sure you and
your passengers always wear your seat belts, and wear them properly. (See page 15.)
Restrai n Al l Childre n
Children are safest when they are
properly restrained in the back seat,
not the front seat. A child who is too small for a seat belt must be properly
restrained in a child safety seat. (See
page 20.) B
e Awar e o f Airba g Hazard s
While airbags can save lives, they can cause serious or fatal injuries to
occupants who sit too close to them,or are not properly restrained.
Infants, young children, and short
adults are at the greatest risk. Be sure to follow all instructions and
warnings in this manual. (See page 9.)
Don' t Drin k an d Driv e
Alcohol and driving don't mix. Even one drink can reduce your ability to
respond to changing conditions, and
your reaction time gets worse with every additional drink. So don't drink
and drive, and don't let your friends
drink and drive, either. Contro
l You r Spee d
Excessive speed is a major factor in
crash injuries and deaths. Generally,
the higher the speed the greater the risk, but serious accidents can also
occur at lower speeds. Never drive
faster than is safe for current conditions, regardless of the
maximum speed posted.
Kee p You r Ca r i n Saf e Conditio n
Having a tire blowout or a
mechanical failure can be extremely
hazardous. To reduce the possibility of such problems, check your tire
pressures and condition frequently, and perform all regularly scheduled
maintenance. (See page 204.)
Drive r an d Passenge r Safet y
Page 24 of 330
Protectin
g Childre n
Childre n Shoul d Si t i n th e Bac k
Sea t
According to accident statistics, children of all ages and sizes aresafer when they are restrained in the
back seat, not the front seat. The
National Highway Traffic Safety
Administration and Transport Canada recommend that all children
ages 12 and under be properly
restrained in the back seat.
In the back seat, children are less
likely to be injured by striking hard interior parts during a collision or
hard braking. Also, children cannot
be injured by an inflating airbag
when they ride in the back. Th
e Passenger' s Fron t Airba g
Pose s Seriou s Risk s t o Childre n
Front airbags have been designed to
help protect adults in a moderate to severe frontal collision. To do this,
the passenger's front airbag is quite
large, and it inflates with tremendous
speed.
Infants
Never put a rear-facing child seat in the front seat of a vehicle equipped
with a passenger's front airbag. If
the airbag inflates, it can hit the back of the child seat with enough force
to kill or very seriously injure an
infant.
Small Children
Placing a forward-facing child seat in the front seat of a vehicle equipped
with a passenger's front airbag can
be hazardous. If the vehicle seat is
too far forward, or the child's head is thrown forward during a collision, an
inflating front airbag can strike thechild with enough force to kill or
very seriously injure a small child.
Larger Children
Children who have outgrown child
seats are also at risk of being injured or killed by an inflating passenger's
front airbag. Whenever possible,
larger children should sit in the back seat, properly restrained with a seat
belt. (See page 35 for important information about protecting larger
children.)
CONTINUED
Drive r an d Passenge r Safet y
Page 28 of 330

Protectin
g Childre n
Small Children: A child who is too
large for a rear-facing child seat, and
who can sit up without support, should be restrained in a forward-
facing child seat. See page 32 for additional information on protecting
small children. 3. The child seat should fit the
vehicle seating position (or
positions) where it will be used.
Due to variations in the design of
child seats, vehicle seats, and seat
belts, all child seats will not fit all
vehicle seating positions.
However, Acura is confident that one
or more child seat models can fit and
be properly installed in all recommended seating positions in
your car. Before purchasing a child seat, we
recommend that parents test the
child seat in the specific vehicle
seating position (or positions) where
they intend to use the seat. If a
previously purchased child seat does not fit, you may need to buy adifferent one that will fit.
CONTINUED
Drive r an d Passenge r Safet y
Page 31 of 330
Protectin
g Childre n
Protectin g Infant s
Child Seat Type
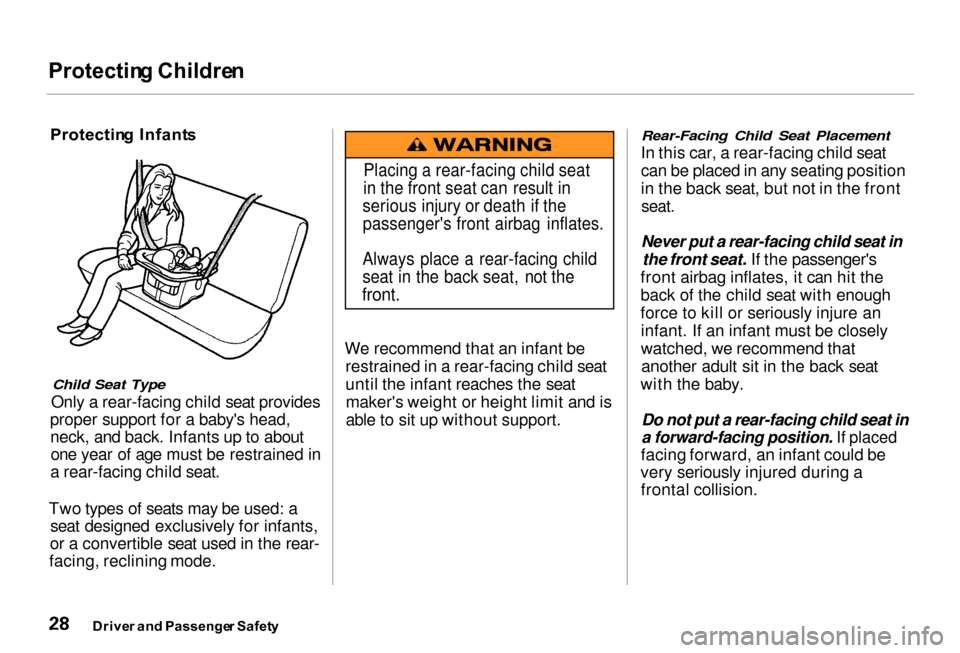
Only a rear-facing child seat provides
proper support for a baby's head, neck, and back. Infants up to aboutone year of age must be restrained in
a rear-facing child seat.
Two types of seats may be used: a seat designed exclusively for infants,
or a convertible seat used in the rear-
facing, reclining mode. We recommend that an infant be
restrained in a rear-facing child seat
until the infant reaches the seatmaker's weight or height limit and is
able to sit up without support.
Rear-Facing Child Seat Placement
In this car, a rear-facing child seat
can be placed in any seating position
in the back seat, but not in the front
seat.
Never put a rear-facing child seat in
the front seat. If the passenger's
front airbag inflates, it can hit the
back of the child seat with enough
force to kill or seriously injure an infant. If an infant must be closely
watched, we recommend thatanother adult sit in the back seat
with the baby.
Do not put a rear-facing child seat in
a forward-facing position. If placed
facing forward, an infant could be
very seriously injured during a frontal collision.
Drive r an d Passenge r Safet y
Placing a rear-facing child seat
in the front seat can result in
serious injury or death if the passenger's front airbag inflates.
Always place a rear-facing child
seat in the back seat, not the
front.
Page 46 of 330
Additiona
l Informatio n Abou t You r Fron t Airbag s
SR S Component s
Your Supplemental Restraint System (SRS) includes: Two front airbags. The driver's
airbag is stored in the center of
the steering wheel; the front
passenger's airbag is stored in the dashboard. Both are marked "SRS
AIRBAG." Automatic seat belt tensioners
(see page 41). Sensors that can detect a
moderate to severe frontal
collision.
A sophisticated electronic system
that continually monitors and
records information about thesensors, the control unit, the
airbag activators, driver and
passenger seat belt use, and all
related wiring when the ignition is ON (II). An indicator light on the
instrument panel that alerts you to
a possible problem with thesystem (see page 45). Emergency backup power in case
your car's electrical system is disconnected in a crash. Ho
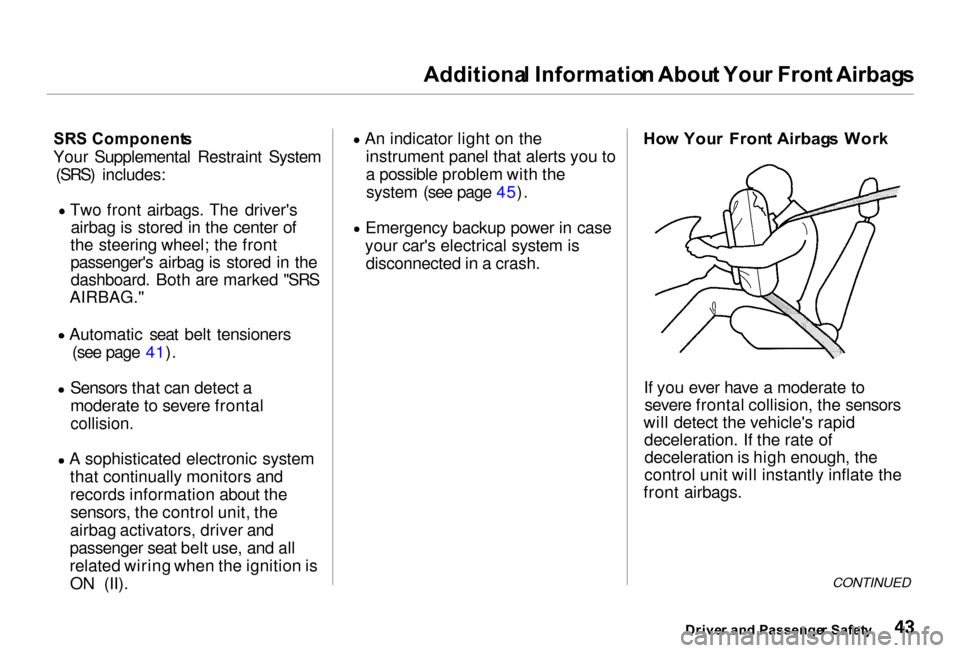
w You r Fron t Airbag s Wor k
If you ever have a moderate to severe frontal collision, the sensors
will detect the vehicle's rapid deceleration. If the rate ofdeceleration is high enough, the
control unit will instantly inflate the
front airbags.
CONTINUED
Drive r an d Passenge r Safet y
Page 53 of 330

Safet
y Label s
These labels are in the locations shown. They warn you of potential
hazards that could cause serious
injury. Read these labels carefully.
If a label comes off or becomes hard
to read, contact your Acura dealer
for a replacement.
Driver an d Passenge r Safet y
DASHBOAR
D
U.S. models only
HOO D RADIATO
R CA P
SU
N VISO R
U.S. models
Canadian models
Page 60 of 330
Indicato
r Light s
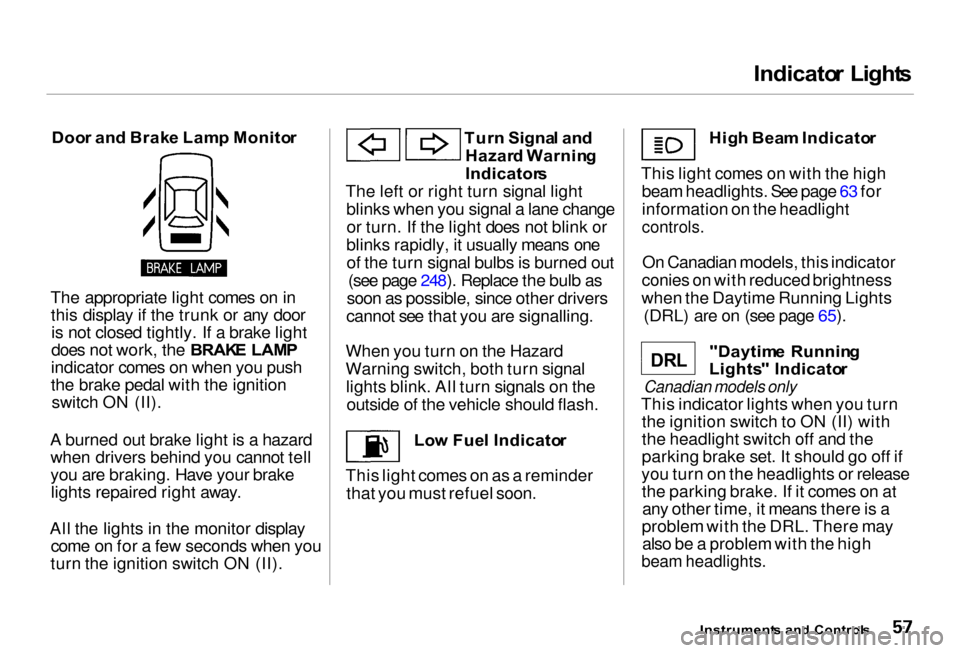
Doo r an d Brak e Lam p Monito r
The appropriate light comes on in this display if the trunk or any dooris not closed tightly. If a brake light
does not work, the BRAK E LAM P
indicator comes on when you push
the brake pedal with the ignition switch ON (II).
A burned out brake light is a hazard when drivers behind you cannot tell
you are braking. Have your brakelights repaired right away.
All the lights in the monitor display come on for a few seconds when you
turn the ignition switch ON (II). Tur
n Signa l an d
Hazar d Warnin g
Indicator s
The left or right turn signal light blinks when you signal a lane changeor turn. If the light does not blink or
blinks rapidly, it usually means one of the turn signal bulbs is burned out (see page 248). Replace the bulb as
soon as possible, since other drivers
cannot see that you are signalling.
When you turn on the Hazard
Warning switch, both turn signal lights blink. All turn signals on the outside of the vehicle should flash.
Low Fue l Indicato r
This light comes on as a reminder that you must refuel soon. Hig
h Bea m Indicato r
This light comes on with the high beam headlights. See page 63 for
information on the headlight
controls.
On Canadian models, this indicator
conies on with reduced brightness
when the Daytime Running Lights (DRL) are on (see page 65).
"Daytim e Runnin g
Lights " Indicato r
Canadian models only
This indicator lights when you turn the ignition switch to ON (II) with
the headlight switch off and the
parking brake set. It should go off if
you turn on the headlights or release the parking brake. If it comes on atany other time, it means there is a
problem with the DRL. There may also be a problem with the high
beam headlights.
Instrument s an d Control s
D R L
Page 67 of 330
Control
s Nea r th e Steerin g Whee l
To flash the high beams, pull the turn signal lever back lightly, then
release it. The high beams will comeon and go off.
The high beams will stay on for as long as you hold the lever back, nomatter what position the headlightswitch is in. Automati
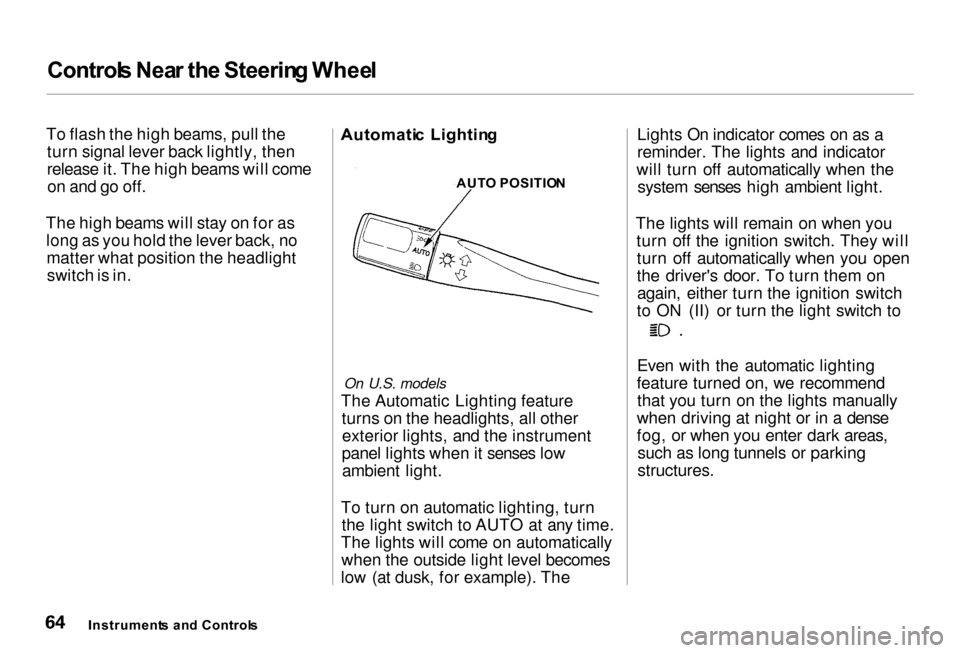
c Lightin g
On U.S. models
The Automatic Lighting feature turns on the headlights, all otherexterior lights, and the instrument
panel lights when it senses low ambient light.
To turn on automatic lighting, turn the light switch to AUTO at any time.
The lights will come on automatically when the outside light level becomes
low (at dusk, for example). The Lights On indicator comes on as a
reminder. The lights and indicator
will turn off automatically when the system senses high ambient light.
The lights will remain on when you turn off the ignition switch. They willturn off automatically when you open
the driver's door. To turn them onagain, either turn the ignition switch
to ON (II) or turn the light switch to Even with the automatic lighting
feature turned on, we recommend that you turn on the lights manually
when driving at night or in a dense
fog, or when you enter dark areas, such as long tunnels or parking
structures.
Instrument s an d Control s AUT
O POSITIO N
Page 86 of 330
Key
s an d Lock s
If you unlock the doors with the
remote transmitter, but do not open
any of the doors within 30 seconds,
the doors automatically relock and
the security system sets.
You cannot lock any of the doors with the remote transmitter if any door is not fully closed or the key is
in the ignition switch. You cannot
unlock any of the doors with the key
in the ignition switch.
To open the trunk, push the Trunk Release button for approximately
one second.
You can open the trunk with the remote transmitter regardless of the
position of the main switch in the
glove box. The trunk will not open if
the key is in the ignition switch.
Turning the Beep Off and On
You can program the keyless entry system so it does not beep when you
lock and unlock the doors. This
procedure only turns off the beep;
the exterior lights will still flash.
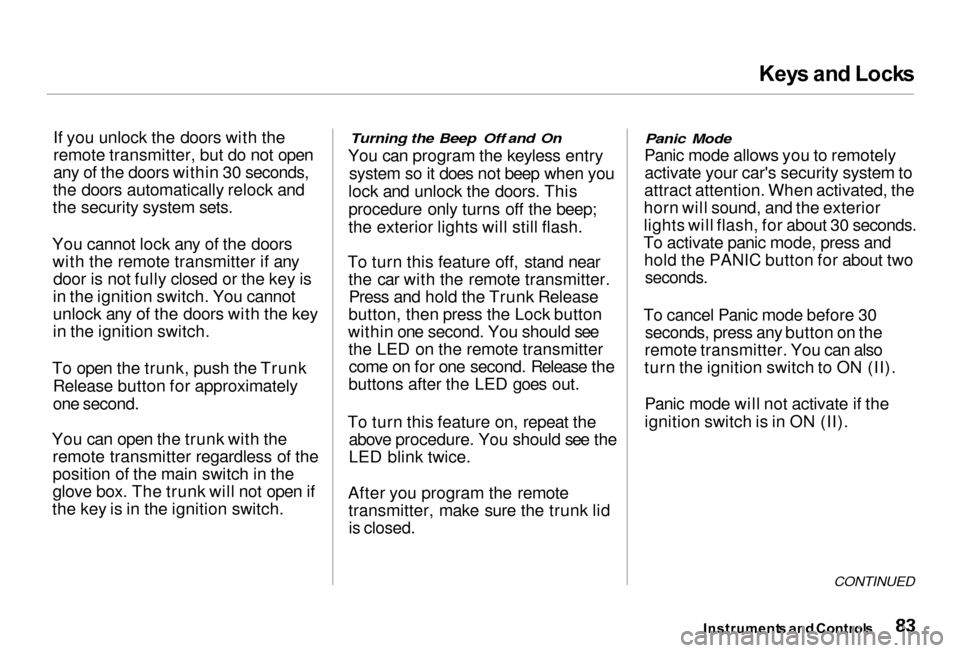
To turn this feature off, stand near the car with the remote transmitter.Press and hold the Trunk Release
button, then press the Lock button
within one second. You should see the LED on the remote transmittercome on for one second. Release the
buttons after the LED goes out.
To turn this feature on, repeat the above procedure. You should see the
LED blink twice.
After you program the remote transmitter, make sure the trunk lidis closed.
Panic Mode
Panic mode allows you to remotely activate your car's security system to
attract attention. When activated, the
horn will sound, and the exterior
lights will flash, for about 30 seconds.
To activate panic mode, press and hold the PANIC button for about two
seconds.
To cancel Panic mode before 30 seconds, press any button on the
remote transmitter. You can also
turn the ignition switch to ON (II).
Panic mode will not activate if the
ignition switch is in ON (II).
CONTINUED
Instrument s an d Control s
Page 126 of 330
Climat
e Control System
Semi-automati c Operatio n
You can manually select various functions of the Climate Control system when it is in FULL AUTO.
All other features remain auto- matically controlled. Making any
manual selection causes the word
FULL to go out.
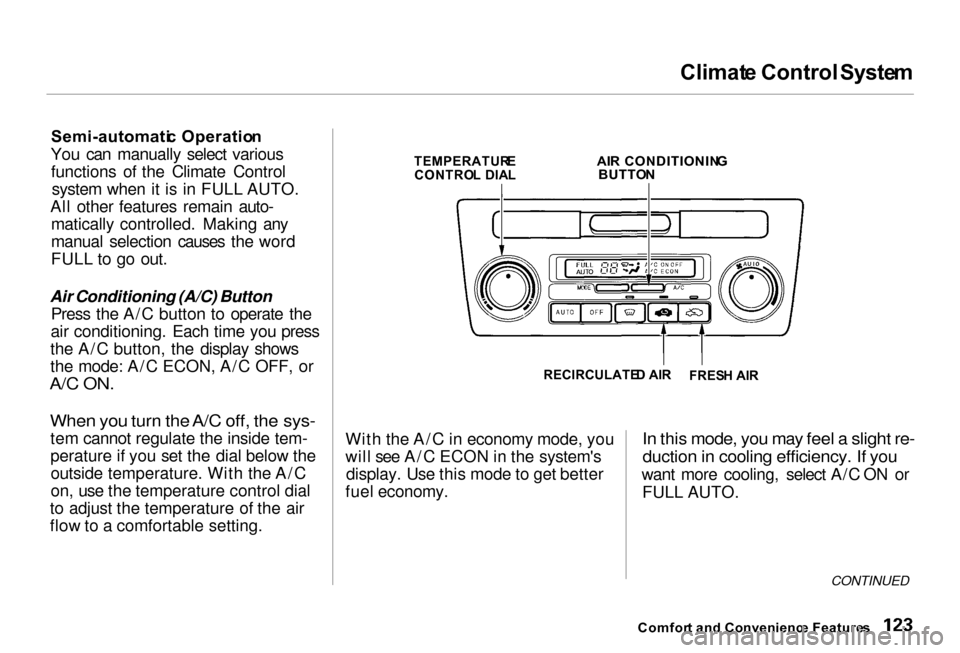
Air Conditioning (A/C) Button Press the A/C button to operate the
air conditioning. Each time you press
the A/C button, the display shows
the mode: A/C ECON, A/C OFF, or
A/C ON.
When you turn the A/C off, the sys-
tem cannot regulate the inside tem-
perature if you set the dial below theoutside temperature. With the A/C
on, use the temperature control dial
to adjust the temperature of the air
flow to a comfortable setting.
TEMPERATUR
E
CONTRO L DIA L
AI
R CONDITIONIN G
BUTTO N
RECIRCULATE D AI R
With the A/C in economy mode, you
will see A/C ECON in the system's display. Use this mode to get better
fuel economy.
In this mode, you may feel a slight re-
duction in cooling efficiency. If you
want more cooling, select A/C ON or FULL AUTO.
CONTINUED
Comfor t an d Convenienc e Feature s
FRES
H AI R