fog light Acura RL 2000 3.5 Owner's Manual
[x] Cancel search | Manufacturer: ACURA, Model Year: 2000, Model line: RL, Model: Acura RL 2000Pages: 330, PDF Size: 4.53 MB
Page 6 of 330
You
r Ca r a t a Glanc e
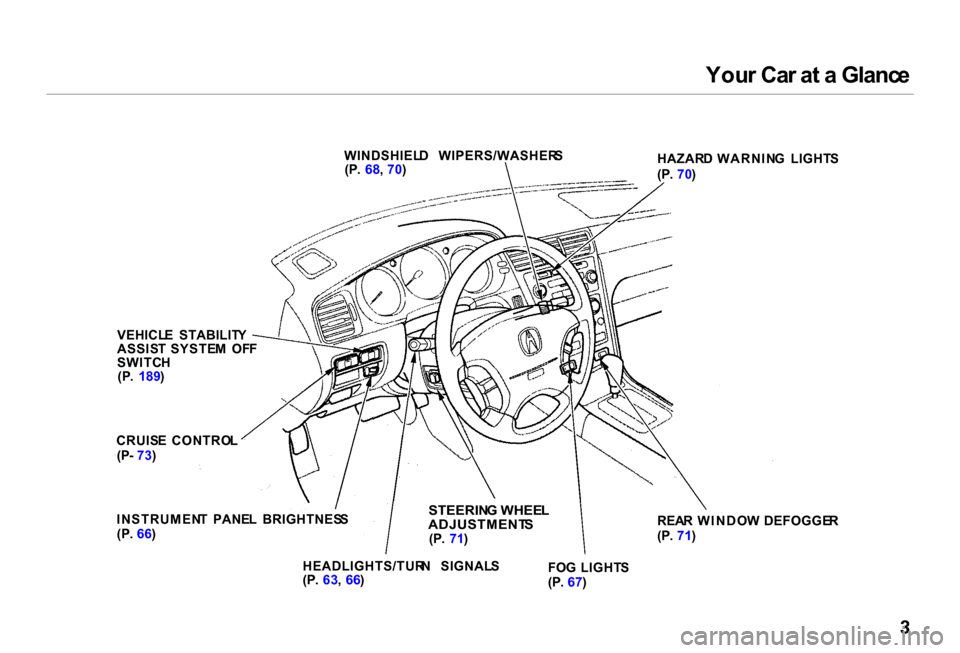
WINDSHIEL D WIPERS/WASHER S
(P . 68 , 70 ) HAZAR
D WARNIN G LIGHT S
(P . 70 )
REA R WINDO W DEFOGGE R
(P . 71 )
FO G LIGHT S
(P . 67 )
STEERIN
G WHEE L
ADJUSTMENT S
(P . 71 )
HEADLIGHTS/TUR N SIGNAL S
(P . 63 , 66 )
INSTRUMEN
T PANE L BRIGHTNES S
(P . 66 )
CRUIS
E CONTRO L
(P - 73 )
VEHICL
E STABILIT Y
ASSIS T SYSTE M OF F
SWITC H
(P . 189 )
Page 54 of 330
Instrument
s an d Control s
This section gives information about the controls and displays thatcontribute to the daily operation of
your Acura. All the essential controls are within easy reach.
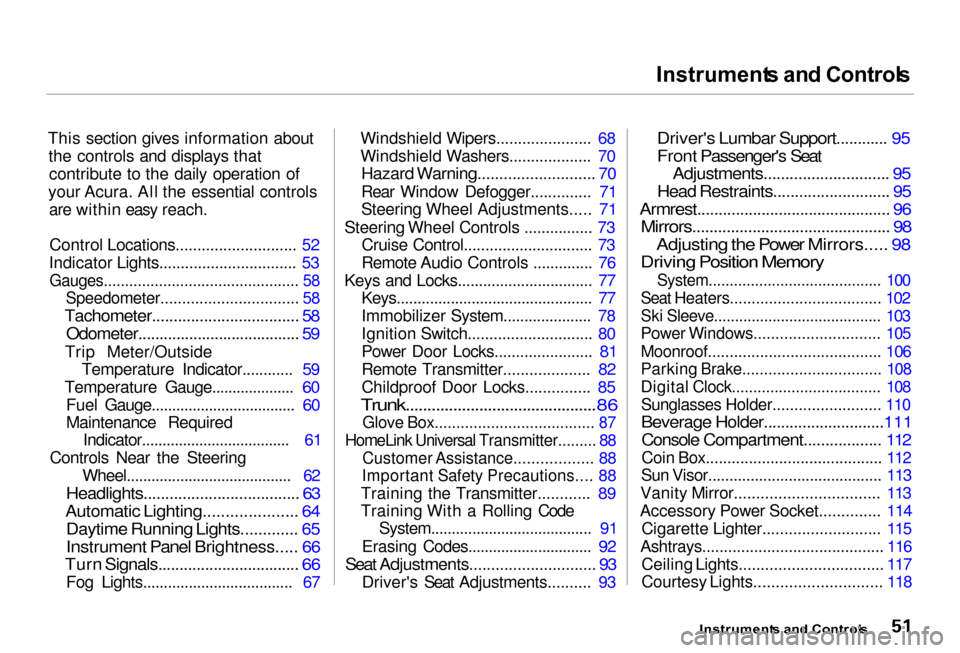
Control Locations............................ 52
Indicator Lights................................ 53
Gauges.............................................. 58
Speedometer................................ 58
Tachometer.................................. 58
Odometer...................................... 59
Trip Meter/Outside Temperature Indicator............ 59
Temperature Gauge.................... 60 Fuel Gauge................................... 60
Maintenance Required Indicator.................................... 61
Controls Near the Steering Wheel........................................ 62
Headlights.................................... 63
Automatic Lighting..................... 64
Daytime Running Lights............. 65
Instrument Panel Brightness..... 66
Turn Signals................................. 66
Fog Lights.................................... 67 Windshield Wipers...................... 68
Windshield Washers................... 70
Hazard Warning........................... 70
Rear Window Defogger.............. 71
Steering Wheel Adjustments..... 71
Steering Wheel Controls ................ 73 Cruise Control.............................. 73
Remote Audio Controls .............. 76
Keys and Locks................................ 77 Keys............................................... 77
Immobilizer System..................... 78
Ignition Switch............................. 80
Power Door Locks....................... 81
Remote Transmitter.................... 82
Childproof Door Locks............... 85
Trunk............................................86
Glove Box..................................... 87
HomeLink Universal Transmitter......... 88
Customer Assistance.................. 88
Important Safety Precautions.... 88
Training the Transmitter............ 89
Training With a Rolling Code System....................................... 91
Erasing Codes.............................. 92
Seat Adjustments............................. 93
Driver's Seat Adjustments.......... 93
Driver's Lumbar Support............ 95
Front Passenger's Seat
Adjustments............................. 95
Head Restraints........................... 95
Armrest............................................. 96
Mirrors.............................................. 98
Adjusting the Power Mirrors..... 98
Driving Position Memory
System......................................... 100
Seat Heaters................................... 102
Ski Sleeve........................................ 103
Power Windows............................. 105
Moonroof........................................ 106
Parking Brake................................ 108
Digital Clock................................... 108
Sunglasses Holder......................... 110
Beverage Holder............................111
Console Compartment.................. 112
Coin Box......................................... 112
Sun Visor......................................... 113
Vanity Mirror................................. 113
Accessory Power Socket.............. 114 Cigarette Lighter........................... 115
Ashtrays.......................................... 116
Ceiling Lights................................. 117
Courtesy Lights............................. 118
Instrument s an d Control s
Page 65 of 330
Control
s Nea r th e Steerin g Whee l
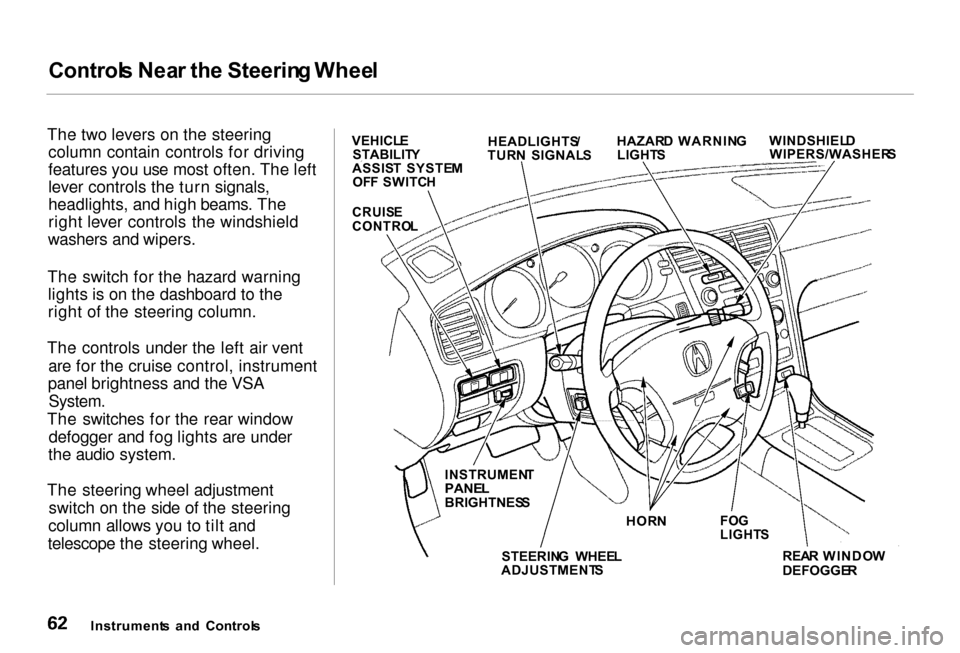
The two levers on the steering column contain controls for driving
features you use most often. The left
lever controls the turn signals,
headlights, and high beams. The
right lever controls the windshield
washers and wipers.
The switch for the hazard warning lights is on the dashboard to the
right of the steering column.
The controls under the left air vent are for the cruise control, instrument
panel brightness and the VSA
System.
The switches for the rear window defogger and fog lights are under
the audio system.
The steering wheel adjustment switch on the side of the steering
column allows you to tilt and
telescope the steering wheel.
Instrument s an d Control s WINDSHIEL
D
WIPERS/WASHER S
HAZAR
D WARNIN G
LIGHT S
HEADLIGHTS
/
TUR N SIGNAL S
VEHICL
E
STABILIT Y
ASSIS T SYSTE M
OF F SWITC H
CRUIS E
CONTRO L
REAR WINDO W
DEFOGGE R
FO
G
LIGHT S
HOR
N
INSTRUMEN
T
PANE L
BRIGHTNES S
STEERIN G WHEE L
ADJUSTMENT S
Page 67 of 330
Control
s Nea r th e Steerin g Whee l
To flash the high beams, pull the turn signal lever back lightly, then
release it. The high beams will comeon and go off.
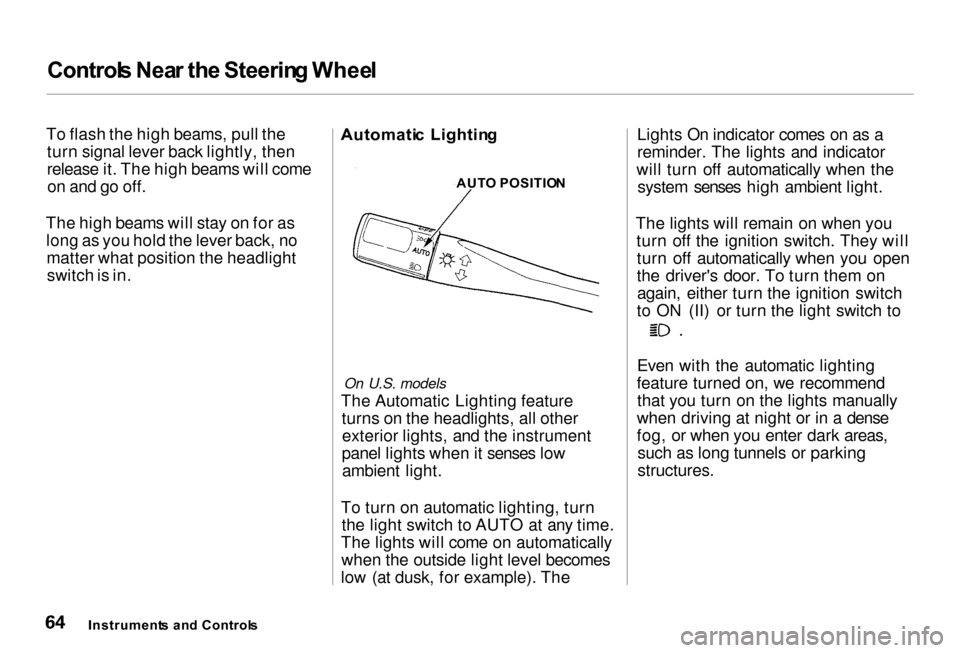
The high beams will stay on for as long as you hold the lever back, nomatter what position the headlightswitch is in. Automati
c Lightin g
On U.S. models
The Automatic Lighting feature turns on the headlights, all otherexterior lights, and the instrument
panel lights when it senses low ambient light.
To turn on automatic lighting, turn the light switch to AUTO at any time.
The lights will come on automatically when the outside light level becomes
low (at dusk, for example). The Lights On indicator comes on as a
reminder. The lights and indicator
will turn off automatically when the system senses high ambient light.
The lights will remain on when you turn off the ignition switch. They willturn off automatically when you open
the driver's door. To turn them onagain, either turn the ignition switch
to ON (II) or turn the light switch to Even with the automatic lighting
feature turned on, we recommend that you turn on the lights manually
when driving at night or in a dense
fog, or when you enter dark areas, such as long tunnels or parking
structures.
Instrument s an d Control s AUT
O POSITIO N
Page 70 of 330
Control
s Nea r th e Steerin g Whee l
To signal a lane change, push lightly on the turn signal lever in the proper
direction and hold it. The lever will
return to the center position as soon
as you release it.
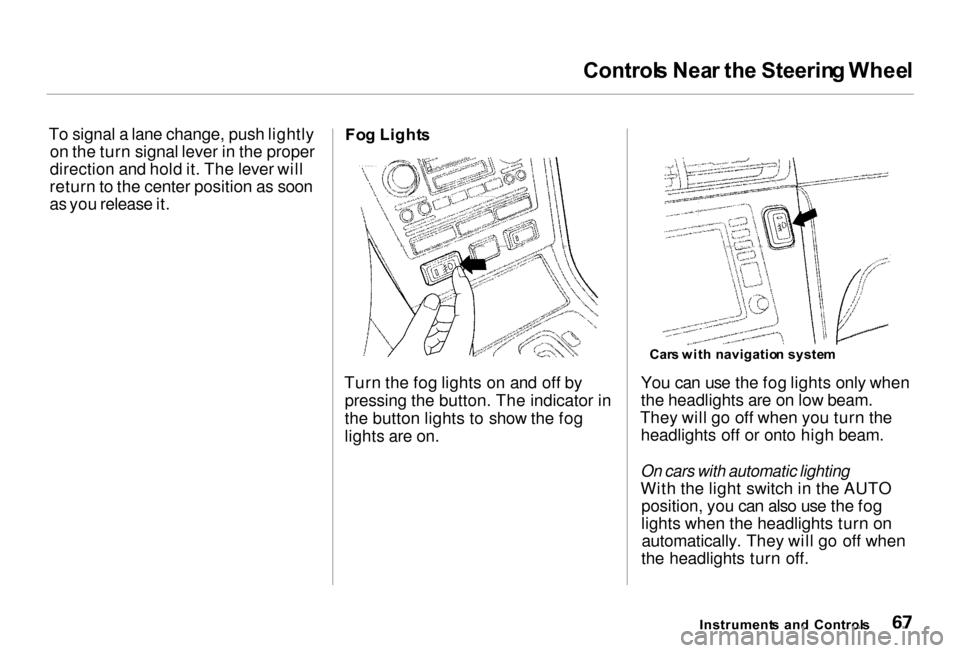
Fo
g Light s
Turn the fog lights on and off by pressing the button. The indicator in
the button lights to show the fog
lights are on. You can use the fog lights only when
the headlights are on low beam.
They will go off when you turn the headlights off or onto high beam.
On cars with automatic lighting
With the light switch in the AUTO position, you can also use the fog
lights when the headlights turn onautomatically. They will go off when
the headlights turn off.
Instrument s an d Control s
Car
s wit h navigatio n syste m
Page 74 of 330
Control
s Nea r th e Steerin g Whee l
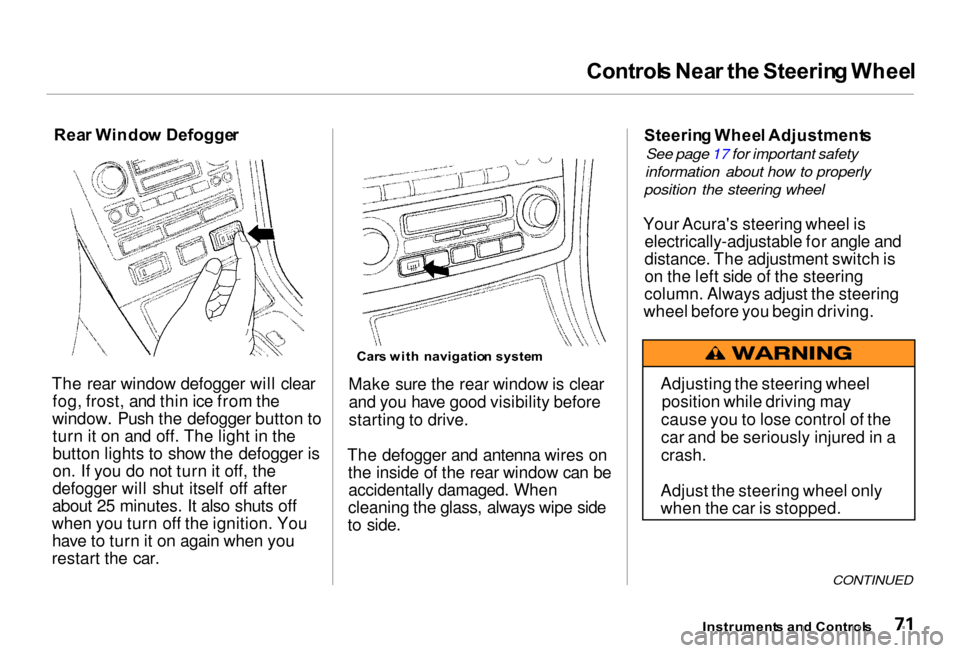
Rea r Windo w Defogge r
The rear window defogger will clear fog, frost, and thin ice from the
window. Push the defogger button to turn it on and off. The light in the
button lights to show the defogger is
on. If you do not turn it off, the
defogger will shut itself off after
about 25 minutes. It also shuts off
when you turn off the ignition. You have to turn it on again when you
restart the car.
Car
s wit h navigatio n syste m
Make sure the rear window is clear and you have good visibility before
starting to drive.
The defogger and antenna wires on the inside of the rear window can beaccidentally damaged. When
cleaning the glass, always wipe side
to side. Steerin
g Whee l Adjustment s
See page 17 for important safety
information about how to properly
position the steering wheel
Your Acura's steering wheel is electrically-adjustable for angle and
distance. The adjustment switch is
on the left side of the steering
column. Always adjust the steering
wheel before you begin driving.
CONTINUED
Instrument s an d Control s
Adjusting the steering wheel
position while driving may
cause you to lose control of the
car and be seriously injured in a
crash.
Adjust the steering wheel only
when the car is stopped.
Page 102 of 330

Mirror
s
ADJUSTMEN T BUTTO N
3. Move the mirror right, left, up or
down by pushing the adjustment
button in that direction. 4. When you finish, move the
selector switch to the center (off)
position. This turns off the adjustment button so you can't
move a mirror out of position by accidentally bumping the button.
Outside mirror positions can be
stored in the driving position
memory system (see page 100). HEATE
D MIRRO R BUTTO N
The outside mirrors are heated to re- move fog and frost. With the ignitionswitch ON (II), turn on the heaters
by pressing the button. The light in the button comes on as a reminder.
Press the button again to turn the
heaters off.
Instrument s an d Control s
Page 196 of 330
Drivin
g in Ba d Weathe r
Visibilit y — Being able to see
clearly in all directions and being
visible to other drivers are important in all weather conditions. This is
more difficult in bad weather. To be seen more clearly during daylight
hours, turn on your headlights.
Inspect your windshield wipers and
washers frequently. Keep the wind- shield washer reservoir full of the
proper fluid. Have the windshield
wiper blades replaced if they start to streak the windshield or leave parts
unwiped. Use the defroster and air conditioning to keep the windows
from fogging up on the inside (see
pages 126 and 131). Tractio
n — Check your tires
frequently for wear and proper pressure. Both are important in
preventing "hydroplaning" (loss of
traction on a wet surface). In the
winter, mount snow tires on all four
wheels for the best handling.
Watch road conditions carefully, they can change from moment to
moment. Wet leaves can be as slip-
pery as ice. "Clear" roads can have
patches of ice. Driving conditions can be very hazardous when the
outside temperature is near freezing.
The road surface can become covered with areas of water puddles
mixed with areas of ice, so your
traction can change without warning.
Be careful when downshifting. If
traction is low, you can lock up the drive wheels for a moment and cause
a skid. Be very cautious when passing, or
being passed by other vehicles. The spray from large vehicles reduces
your visibility, and the wind buffeting can cause you to lose control.
Driving
Page 252 of 330
Light
s
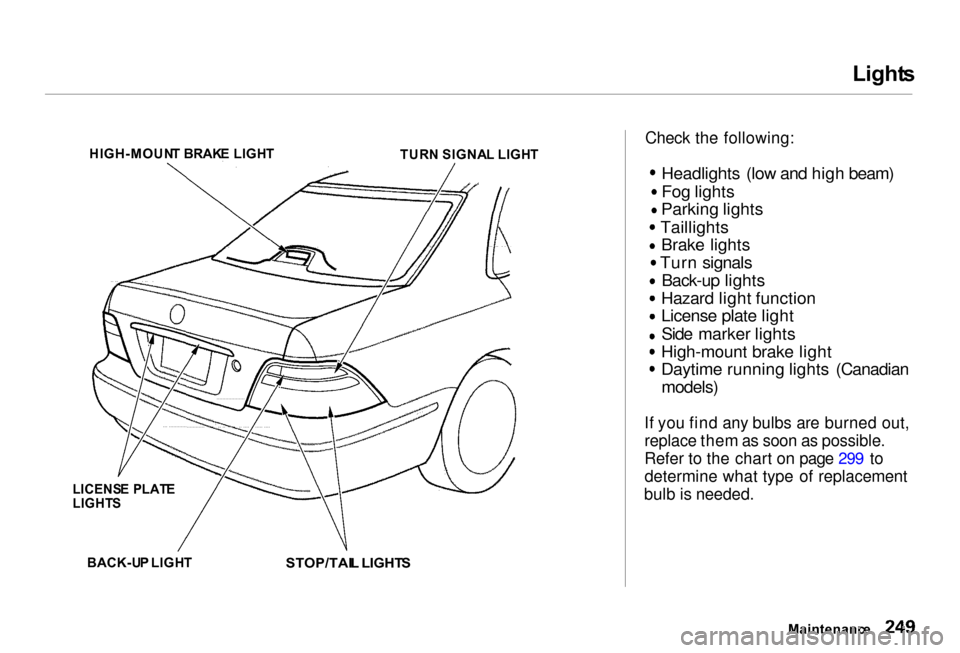
Check the following:
Headlights (low and high beam)
Fog lights
Parking lights Taillights
Brake lights Turn signals
Back-up lights
Hazard light function
License plate light
Side marker lights
High-mount brake light
Daytime running lights (Canadian
models)
If you find any bulbs are burned out,
replace them as soon as possible.
Refer to the chart on page 299 to
determine what type of replacement
bulb is needed.
Maintenance
HIGH-MOUN
T BRAK E LIGH T
TURN SIGNA L LIGH T
LICENS E PLAT E
LIGHT S
BACK-U P LIGH T
STOP/TAIL LIGHT S
Page 254 of 330

Light
s
4. Unclip the end of the hold-down wire from its slot. Pivot it out of
the way and remove the bulb.
5. Insert the new bulb into the hole, making sure the bulb is right side
up and the nubs on the bulb base
fit in the indentations in the
headlight assembly. Pivot the hold- down wire back in place and clip
the end into the slot. 6. Install the rubber seal over the
back of the headlight assembly.Make sure it is right side up; it is marked
7. Push the electrical connector onto the new bulb.
Turn on the headlights to test the
new bulb. Replacin
g a Fo g Ligh t Bul b
Your car uses halogen fog light bulbs. See page 250 for informationon replacing a halogen bulb.
CONTINUED
Maintenanc e
WEATHE
R SEA L
BULB
CONNECTO R
HOLD-DOW
N WIR E