torque Acura RL 2004 3.5 Owner's Manual
[x] Cancel search | Manufacturer: ACURA, Model Year: 2004, Model line: RL, Model: Acura RL 2004Pages: 370, PDF Size: 4.33 MB
Page 221 of 370

Your Acura’s transmission has f our
f orward speeds, and is electronically
controlled f or smoother shif ting. It
also has a ‘‘lock-up’’ torque converter
forbetterfueleconomy.Youmay
f eel what seems like another shif t
when the converter locks.
This indicator between the f uel
gauge and temperature gauge shows
which position the shif t lever is in.The shift lever has seven positions.
It must be in Park or Neutral to start
the engine. When you are stopped in
D,D,2,1,NorR,pressfirmlyon
the brake pedal, and keep your f oot
of f the accelerator pedal.
The ‘‘D ’’ indicator comes on f or a
f ew seconds when you turn the
ignition switch ON (II). If it f lashes
while driving (in any shif t position),
it indicates a possible problem in the
transmission. Avoid rapid acceler-
ation and have the transmission
checkedbyanauthorizedAcura
dealer as soon as possible.
43
4
Automatic Transmission
Driving
Shif t L ever Position Indicator Shif t L ever Positions
218
SHIFT LEVER
Page 264 of 370

Install the engine cover. First
tighten the two bolts on the front
of the engine cover, then tighten
the three nuts on the engine cover.
Tightening torque:
Install the radiator cap, and
tighten it to the first stop.
Start the engine and let it run until
the radiator cooling f an comes on
at least twice. Then stop the
engine.
Fill the reserve tank to the MAX
mark. Install the reserve tank cap.
Check the level in the radiator,
add coolant if needed. Remove the radiator cap. Pour
coolant into the radiator up to the
base of the f iller neck and into the
reserve tank up to the MAX mark.
Start the engine and hold it at
1,500 rpm until the cooling f an
comes on. Turn of f the engine.
Check the coolant level in the
radiator and add coolant if needed.
12. 11. 13.
14.
15. 16.
17.
CONT INUED
Cooling Syst em
Maint enance261
Fill up to here FILLER NECK
7 lbf·ft (9.8 N·m , 1.0 kgf·m)
Page 274 of 370

Install the ignition coil. Reinstall
the two hold-down bolts.
Repeat this procedure f or the
other f ive spark plugs.
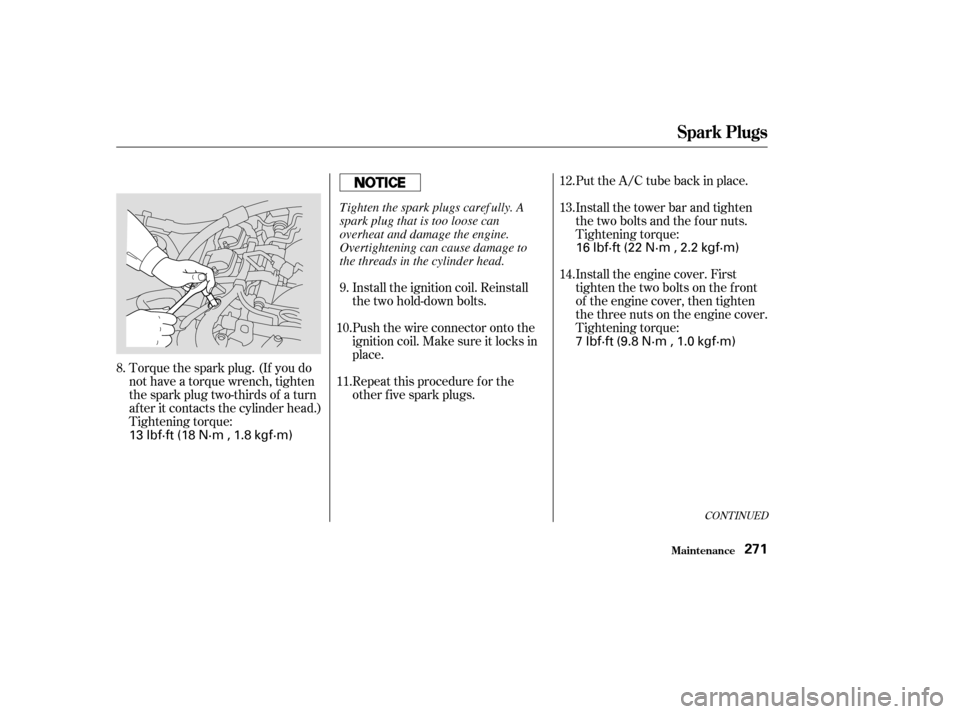
Torque the spark plug. (If you do
not have a torque wrench, tighten
the spark plug two-thirds of a turn
af ter it contacts the cylinder head.)
Tightening torque: Put the A/C tube back in place.
Install the tower bar and tighten
the two bolts and the f our nuts.
Tightening torque:
Push the wire connector onto the
ignition coil. Make sure it locks in
place. Install the engine cover. First
tighten the two bolts on the front
of the engine cover, then tighten
the three nuts on the engine cover.
Tightening torque:
8. 9.
10.
11. 12.
13.
14.
CONT INUED
Spark Plugs
Maint enance271
13 lbf·ft (18 N·m , 1.8 kgf·m) 16 lbf·ft (22 N·m , 2.2 kgf·m)
7 lbf·ft (9.8 N·m , 1.0 kgf·m)
Tighten the spark plugs caref ully. A
spark plug that is too loose can
overheat and damage the engine.
Overtightening can cause damage to
the threads in the cylinder head.
Page 315 of 370

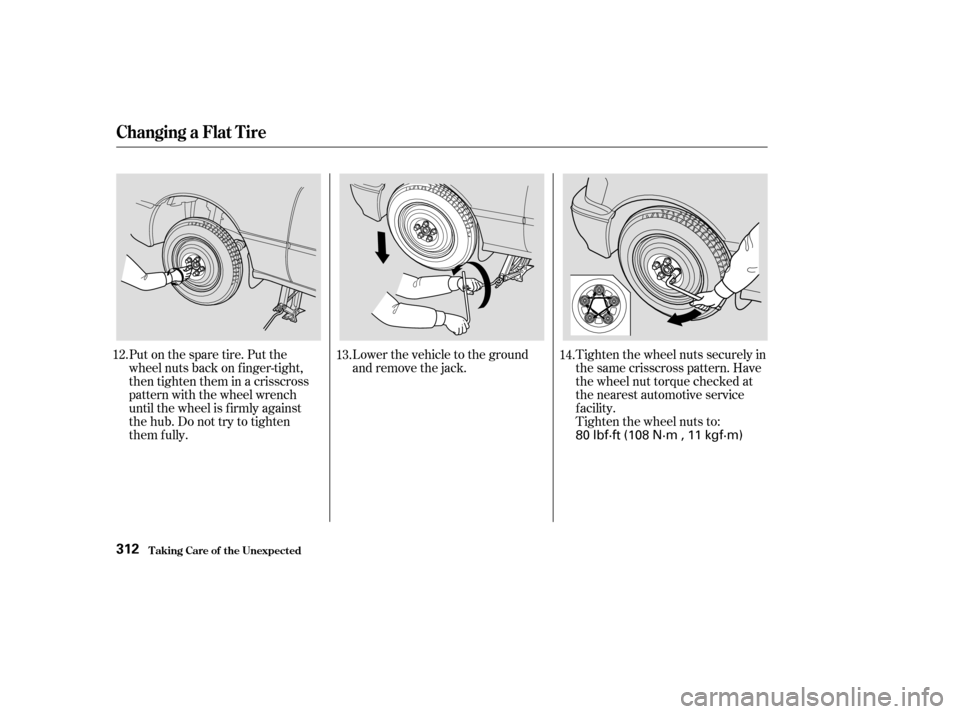
Put on the spare tire. Put the
wheel nuts back on f inger-tight,
then tighten them in a crisscross
pattern with the wheel wrench
until the wheel is f irmly against
the hub. Do not try to tighten
them f ully.Tighten the wheel nuts securely in
the same crisscross pattern. Have
the wheel nut torque checked at
the nearest automotive service
f acility.
Tighten the wheel nuts to:
Lower the vehicle to the ground
and remove the jack.
12.
13.14.
T aking Care of t he Unexpect ed
Changing a Flat T ire
312
80 lbf·ft (108 N·m , 11 kgf·m)